- Company Articles
- Products and Technology
- Installation And Maintenance
- A Guide to Installing Aluminum Pipe Clamps on Lean Workbenches

A Guide to Installing Aluminum Pipe Clamps on Lean Workbenches
Related Product
Aluminum Pipe Clamp
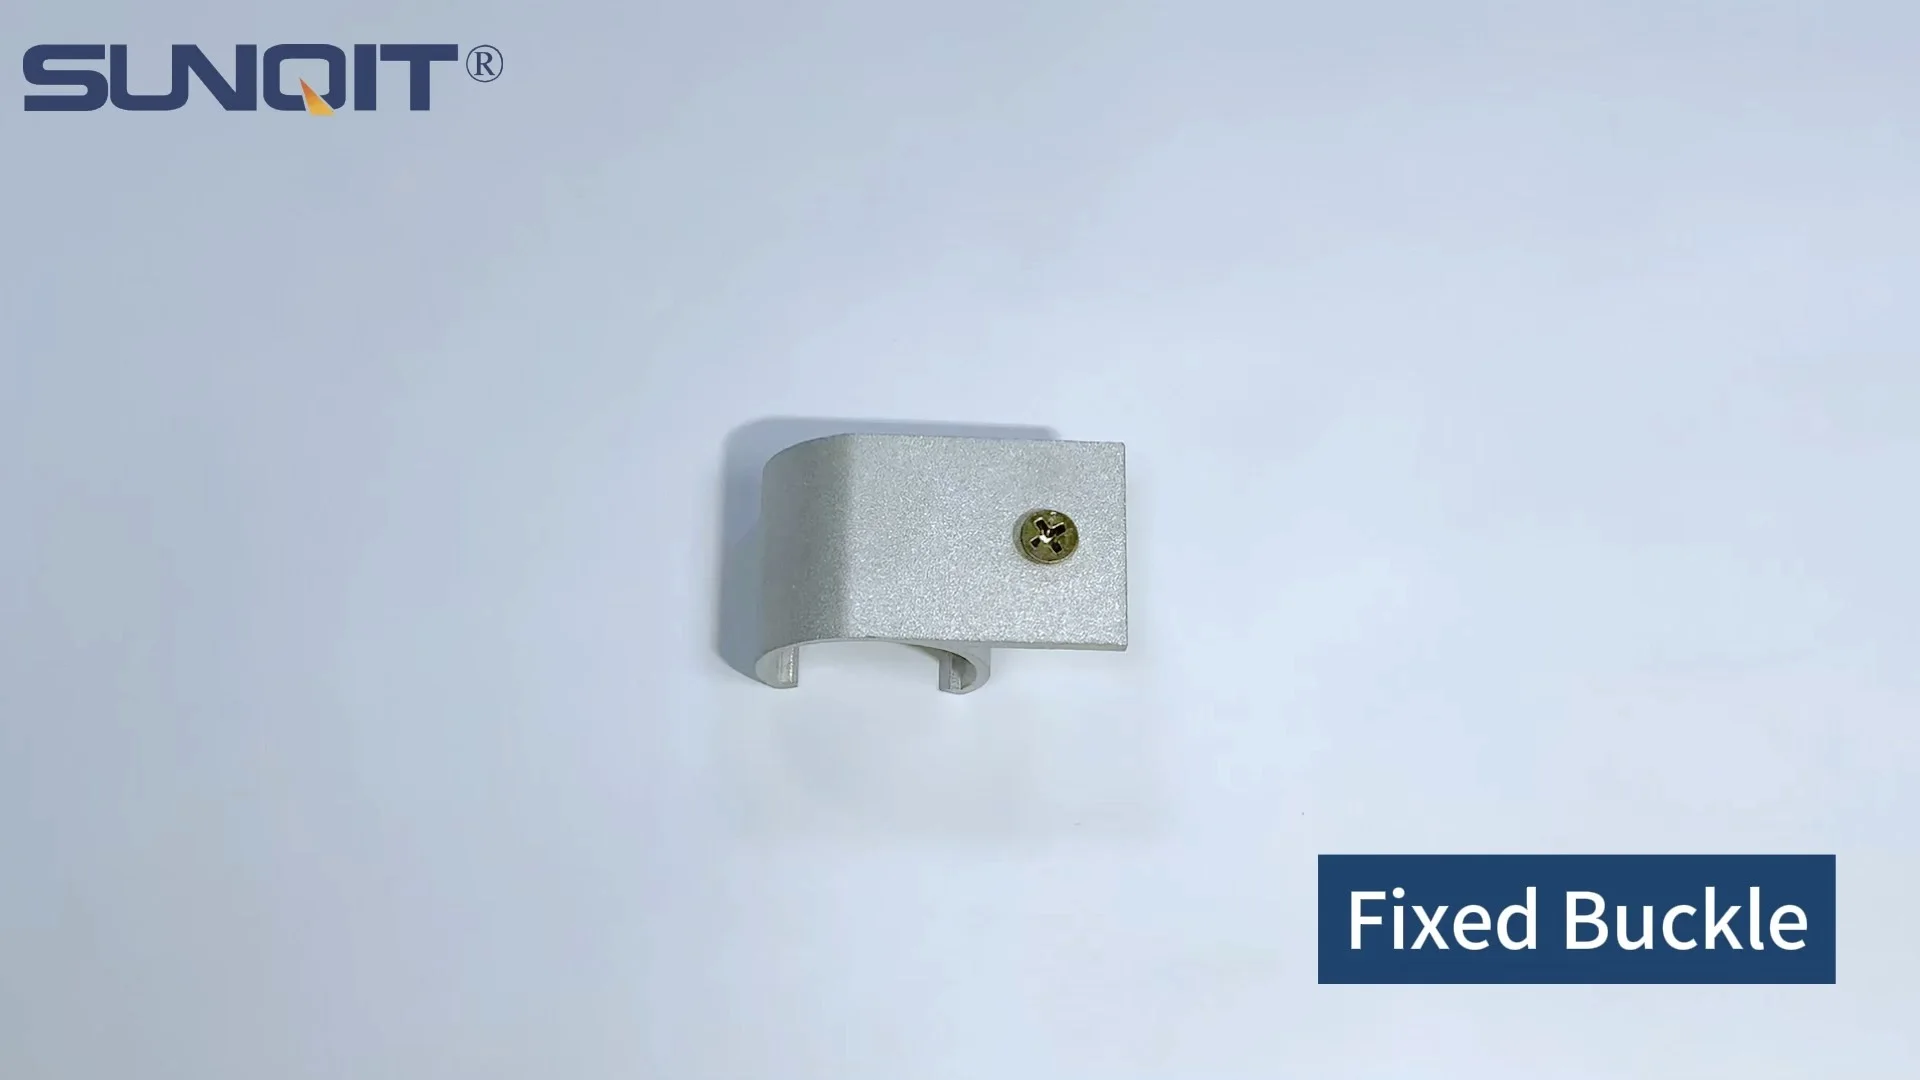
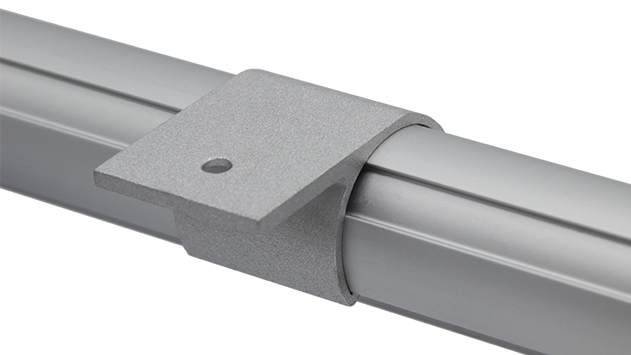
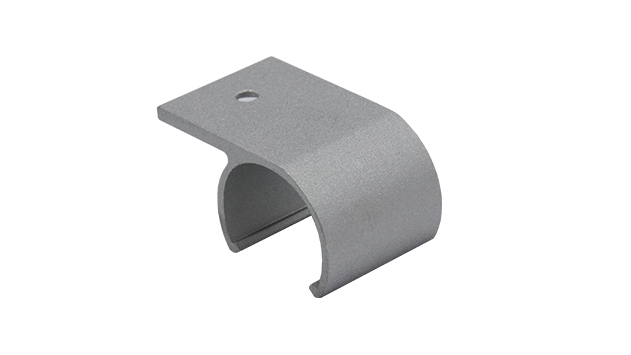
Aluminum pipe side clamp used for 28mm aluminum pipe connect with table top, or other accessories.
Walk into any modern workshop, factory floor, or small-scale production space, and you'll likely spot a common hero: the lean workbench. These sturdy, versatile stations are the backbone of efficient workflows, whether you're assembling electronics, packing orders, or testing prototypes. But what makes a lean workbench truly "lean"? It's not just about the flat surface—it's about how every part, from the frame to the smallest connector, works together to reduce waste, save time, and boost productivity. And today, we're diving into one of those unsung heroes: the aluminum pipe clamp.
You might be thinking, "Pipe clamps? Really? They just hold pipes together, right?" Well, yes—and no. Aluminum pipe clamps do more than just fasten; they're the glue that turns a pile of aluminum lean pipes and joints into a stable, customizable workbench. Install them right, and your bench will stand up to years of heavy use, shifting loads, and even the occasional bump from a turnover trolley. Install them wrong, and you'll be dealing with wobbly surfaces, misaligned shelves, and maybe even a safety hazard.
In this guide, we're going to walk through everything you need to know to install aluminum pipe clamps on a lean workbench like a pro. We'll start with why these clamps matter, gather the tools you'll need, break down the step-by-step process, troubleshoot common mistakes, and even share tips for keeping your setup in top shape. Whether you're a seasoned facility manager or a small business owner setting up your first workshop, this is your go-to resource for building a workbench that works as hard as you do.
Why Aluminum Pipe Clamps Deserve Your Attention
Before we grab our tools, let's talk about why aluminum pipe clamps are the go-to choice for lean workbenches. You've probably seen other clamp materials—plastic, steel, maybe even wood—but aluminum stands out for a few key reasons.
First, aluminum is lightweight but surprisingly tough. A lean workbench built with aluminum lean pipes and clamps is easy to move (especially if you add casters later) but won't flex or bend under the weight of tools, materials, or finished products. I once visited a manufacturing plant where they used steel clamps, and while they were strong, reconfiguring the workbench required two people and a lot of grunting. Aluminum? One person can adjust a section in minutes.
Second, aluminum resists rust and corrosion. If your workspace deals with moisture, oils, or chemicals (looking at you, automotive and food packaging industries), steel clamps would start showing red spots within months. Aluminum? It forms a natural oxide layer that keeps rust at bay, even in humid environments. That means your workbench will look newer longer, and you won't have to replace corroded clamps every year.
Third, aluminum pipe clamps play nice with aluminum profile accessories. Most lean workbenches today use aluminum extrusion profiles for the frame—those sleek, T-slot rails that let you attach shelves, tool hooks, and bins with ease. Aluminum clamps are designed to fit these profiles perfectly, creating a tight, wobble-free connection that plastic clamps (which can crack) or steel clamps (which might scratch the aluminum) just can't match.
Finally, they're cost-effective. Aluminum isn't the cheapest material upfront, but factor in how long they last, how little maintenance they need, and how easy they are to reuse when you reconfigure your bench, and they quickly become the most budget-friendly option. I worked with a startup once that tried to save money with plastic clamps; six months later, they were replacing half of them because they'd warped under heat. Don't make that mistake.
Gathering Your Tools: What You'll Need (and What to Avoid)
Installing aluminum pipe clamps isn't rocket science, but having the right tools will make the job faster, safer, and more precise. Let's break down the essentials. I've included a table below to keep you organized—print it out, check off items as you gather them, and you'll avoid that frustrating "Wait, where's the hex key?" moment halfway through.
| Tool | Why You Need It | Pro Tip |
|---|---|---|
| Hex Key Set (Metric) | Most aluminum pipe clamps use hex screws (allen bolts) to tighten. Get a set with long arms for better leverage. | A folding hex key set saves space in your toolbox and ensures you won't lose small keys. |
| Tape Measure (10ft/3m minimum) | To measure pipe lengths, mark clamp positions, and ensure everything lines up. | Look for one with a locking mechanism—you don't want the tape sliding while you're marking. |
| Pencil or Marker | To mark where clamps will go on the aluminum profile. | Use a fine-tip marker for precision; pencil can smudge if the profile is dusty. |
| Level (2ft/60cm) | To check if the workbench frame is straight before clamping. | A magnetic level sticks to metal profiles, leaving your hands free to adjust. |
| Rubber Mallet | To gently tap clamps into place without scratching the aluminum. | Never use a steel hammer—you'll dent the clamps or profile. |
| Wire Brush or Microfiber Cloth | To clean dirt, oil, or debris from the aluminum profile before clamping. | A quick wipe removes grime that could prevent the clamp from gripping tightly. |
| Aluminum Pipe Joints | To connect aluminum lean pipes at corners or intersections (works with clamps). | Match joint sizes to your pipes—most common are 28mm or 30mm diameter. |
Pro Tool Hack:
If you're installing a lot of clamps (say, for a multi-station workbench), invest in a cordless electric screwdriver with a hex bit attachment. It'll save your wrists from hours of twisting hex keys. Just don't over-tighten—aluminum threads can strip if you go too hard!
Now, what should you avoid? Skip "universal" clamps that claim to fit any pipe size. They're rarely a perfect match for aluminum lean pipes and often loosen over time. Also, steer clear of cheap, thin-walled aluminum clamps—you can spot them by their flimsy feel or uneven edges. Spend a little extra on clamps from a reputable lean pipe supplier; it's worth it for the durability.
Step-by-Step: Installing Aluminum Pipe Clamps on Your Lean Workbench
Okay, tools in hand, workspace cleared—let's get to the good stuff. Installing aluminum pipe clamps involves six main steps: prepping the workbench frame, measuring and marking, attaching the clamps, securing the pipes, testing stability, and making final adjustments. We'll take it slow, so don't worry if you're new to this.
Step 1: Prep the Frame—Clean and Inspect
Your lean workbench frame is probably made of aluminum extrusion profiles—those long, rectangular rails with T-slots running along the sides. Before attaching anything, give these profiles a quick once-over. Wipe them down with a microfiber cloth or wire brush to remove dust, oil, or leftover factory residue. Even a little dirt can create gaps between the clamp and the profile, weakening the connection.
Next, check for dents, bends, or rough edges. If a section of the profile is bent, the clamp won't sit flush, and your pipe will be misaligned. I once had a frame with a small dent from shipping, and no matter how I adjusted the clamp, the pipe sat at a slight angle. A quick fix? Use a rubber mallet to gently tap the dent out from the inside (if it's a hollow profile) or replace the section if it's too severe.
Finally, confirm that your frame is level. Lay a level across the top rails—if it wobbles, adjust the feet (most lean workbenches have adjustable leveling feet) until the bubble is centered. A level frame ensures your clamps and pipes will line up evenly, preventing stress on the joints later.
Step 2: Measure Twice, Mark Once
You've heard the carpenter's mantra, and it applies here too: measure twice, mark once. Nothing ruins a clamp installation faster than misaligned marks. Let's say you're attaching a vertical support pipe to the back of your workbench. You need to mark where the top and bottom clamps will go so the pipe stands straight.
Start by deciding where the pipe will go. For a standard workbench, vertical supports are usually 16-24 inches apart to support shelves or tool panels. Use your tape measure to mark these positions on the frame. For example, if your bench is 6 feet long, you might place supports at the 2-foot and 4-foot marks.
Once you've marked the vertical positions, measure the height of the pipe you'll be using. Let's say it's a 3-foot pipe—mark the top clamp 3 feet above the bottom clamp. Use a straightedge (or the pipe itself, if it's straight) to draw a vertical line between these marks. This line will guide you when placing the clamps, ensuring they're aligned and the pipe sits straight.
Pro tip: If you're installing multiple pipes (like for a multi-shelf rack), use a template. Cut a piece of cardboard or plywood to the distance between clamps, then trace around it to mark each set of positions. This ensures all clamps are spaced evenly, making your bench look neat and professional.
Step 3: Attach the Clamps to the Profile
Now it's time to mount the aluminum pipe clamps to the frame. Most clamps come in two parts: a base that attaches to the profile and a top that holds the pipe. The base usually slides into the T-slot of the aluminum profile and is secured with a hex screw.
Start by loosening the hex screw on the clamp base—don't remove it entirely, just enough so the base slides into the T-slot. Slide the base into the slot at your marked position, then hand-tighten the screw until the base is snug but still moves slightly. This "snug but adjustable" fit lets you fine-tune the position before locking it down.
Once the base is in place, align it with your vertical or horizontal mark. Use your level to check that the clamp is straight—if it's tilted, tap it gently with a rubber mallet to adjust. When it's aligned, grab your hex key and tighten the screw. How tight? You want it snug enough that the base doesn't move when you tug on it, but not so tight that you strip the threads. A good rule: tighten until you feel resistance, then give it a quarter-turn more.
Repeat this for all clamps. If you're installing a horizontal pipe (like a crossbar between vertical supports), make sure the clamps on both ends are at the same height. A quick way to check: hold a level across the clamps—if the bubble is centered, you're good to go.
Step 4: insert the Pipe and Secure the Top Clamp
With the clamp bases mounted, it's time to add the pipe. Slide the aluminum lean pipe into the open top clamps. If the pipe is long, ask a helper to hold one end while you guide the other—this prevents bending or scratching the pipe.
Once the pipe is in place, close the top of the clamp. Most aluminum pipe clamps have a hinged top or a separate bracket that bolts down. For hinged clamps, flip the top over the pipe and insert the locking screw. For two-piece clamps, place the top bracket over the pipe and align the holes with the base.
Now, tighten the top clamp screw. Again, don't overdo it—aluminum pipes can dent if the clamp is too tight. You want the pipe to be secure but still able to expand slightly with temperature changes (yes, metal expands and contracts!). A good test: grab the pipe and try to twist it—if it moves, tighten the screw a little more. If it doesn't budge, you're done.
For extra stability, use two clamps per pipe—one near the top and one near the bottom (for vertical pipes) or one at each end (for horizontal pipes). This prevents the pipe from wobbling, especially if you'll be placing heavy items on shelves attached to it.
Step 5: Test the Stability
You're almost done, but don't skip this step: test the stability. A wobbly pipe now will only get worse over time. Grab the pipe and give it a gentle shake—side to side, front to back. It should feel solid, with no movement in the clamps or frame.
Next, place a heavy object (like a toolbox or a stack of books) on any shelves attached to the pipe. Let it sit for 10-15 minutes, then check the clamps—they shouldn't have shifted, and the pipe shouldn't have bent. If you notice movement, tighten the clamp screws a little more (but again, don't strip them).
Finally, walk around the workbench and inspect all clamps from different angles. Are they aligned with the marks? Is the pipe straight? Does everything look even? If something seems off, now's the time to adjust—before you start using the bench and the clamps settle into a misaligned position.
Step 6: Final Adjustments and Cleanup
You've installed the clamps, secured the pipes, and tested the stability—now it's time for final tweaks. Wipe down the clamps and pipes with a clean cloth to remove any fingerprints or tool marks. If you used a marker to make your marks, a little rubbing alcohol will remove any leftover ink without damaging the aluminum.
If you're planning to add accessories like caster and accessories later (to make the bench mobile), now's a good time to mark where those will go, but wait to install them until after the clamps are fully set. Adding casters first can make the bench wobbly during clamp installation.
Finally, step back and admire your work! You've just installed aluminum pipe clamps like a pro, and your lean workbench is ready to handle whatever you throw at it.
Troubleshooting: Fixing Common Clamp Headaches
Even with careful measuring and installation, things can go wrong. Let's troubleshoot the most common issues and how to fix them.
Problem: Clamps Keep Loosening
You tighten the clamp screws, but a week later, they're loose again. Why? Two likely culprits: vibration or overtightening. If your workbench is near a machine that vibrates (like a drill press or conveyor), the constant shaking can loosen screws over time. Overtightening can strip the threads in the aluminum profile, making it impossible to get a tight hold.
Fix: For vibration, use thread-locking fluid (the removable kind, not the permanent stuff) on the clamp screws. A drop or two will keep them from loosening without damaging the threads. For stripped threads, move the clamp to a new position on the profile (T-slots have plenty of space) and be gentler when tightening.
Problem: Pipe Is Misaligned
The pipe sits at an angle, even though you measured carefully. This is usually caused by bent clamps or a warped pipe. If the clamp itself is bent (maybe from dropping it), it won't hold the pipe straight. If the pipe is warped, no amount of clamping will make it sit right.
Fix: Inspect the clamp—if it's bent, replace it (they're cheap, and it's not worth trying to bend it back). For a warped pipe, roll it on a flat surface—if it rocks, it's warped. replace the pipe or, for minor warps, use a rubber mallet to gently straighten it before clamping.
Problem: Clamp Slips in the T-Slot
The clamp base slides in the T-slot, even when the screw is tight. This happens when the clamp base is the wrong size for the T-slot or the slot is dirty. Aluminum profiles come in different T-slot sizes (like 8mm, 10mm, or 12mm), and clamps are designed to fit specific sizes.
Fix: Check the clamp packaging to ensure it matches your profile's T-slot size. If it's the right size, clean the slot with a wire brush to remove dirt or debris that's preventing the clamp from gripping. If the slot is worn (unlikely on new profiles), use a larger clamp or add a shim (a small piece of metal or plastic) to take up the slack.

Keeping Your Clamps (and Workbench) in Top Shape
Installing aluminum pipe clamps is just the first step—maintaining them will ensure your workbench stays sturdy for years. Here's how to keep things in tip-top shape:
Clean Regularly: Wipe down clamps and pipes with a damp cloth every month to remove dust, grease, and grime. For stubborn stains (like oil), use a mild detergent—avoid harsh chemicals that can damage the aluminum finish.
Check Tightness Quarterly: Every 3-4 months, grab your hex key and give each clamp screw a gentle tighten. Over time, vibration and temperature changes can loosen them, so a quick check prevents bigger issues.
replace Worn Parts: If a clamp starts to show signs of wear (like a cracked base or stripped threads), replace it immediately. Waiting can lead to bigger problems—like a pipe falling and damaging tools or injuring someone. Most lean pipe suppliers sell replacement clamps individually, so you don't have to buy a whole set.
Lubricate Moving Parts: If your clamps have moving parts (like adjustable or swivel clamps), apply a small amount of silicone lubricant once a year. This keeps them easy to adjust and prevents rust on any steel components (like screws).
Avoid Overloading: Even the strongest clamps have limits. Check the manufacturer's weight rating for your clamps and pipes, and don't exceed it. If you need to support heavier loads, use thicker pipes or add extra clamps for reinforcement.
Customizing Your Workbench with Aluminum Profile Accessories
Now that your aluminum pipe clamps are installed, why stop there? One of the best things about lean workbenches is how customizable they are, thanks to aluminum profile accessories. Here are a few ideas to take your bench to the next level:
Shelves: Add aluminum shelves using pipe clamps and short pipes. Mount them at different heights to store tools, materials, or finished products. Use wire shelves for better airflow or solid panels for small parts.
Tool Panels: Attach a pegboard or slatwall panel to vertical pipes (secured with clamps) to hang tools, tape measures, or scissors. This keeps everything within arm's reach and off the work surface.
Casters: Want a mobile workbench? Install caster and accessories to the bottom of the frame. Look for locking casters to keep the bench stationary when in use—just make sure the clamps and frame can support the added weight of the casters and any movement.
Lighting: Mount LED light strips to overhead pipes (using small clamps) to brighten your work surface. This is a game-changer for detailed tasks like electronics assembly.
The key here is to use accessories designed for aluminum profiles—they'll work seamlessly with your clamps and pipes, ensuring a secure, professional setup.
Wrapping Up: Your Workbench, Built to Last
Installing aluminum pipe clamps on a lean workbench might seem like a small task, but it's one that has a big impact on your workspace's efficiency, safety, and longevity. By taking the time to measure carefully, use the right tools, and follow these steps, you've built a foundation that will support your workflow for years to come.
Remember, the goal of a lean workbench is to reduce waste—and that includes wasted time fixing wobbly clamps or replacing damaged parts. With your new aluminum pipe clamps, you'll spend less time maintaining and more time creating, assembling, or producing. And isn't that the whole point of "lean" in the first place?
So go ahead—fire up that assembly line, unpack your tools, and start using your workbench. And if you ever need to reconfigure, expand, or repair, you now have the skills to do it with confidence. Here's to a workspace that's as sturdy, efficient, and adaptable as your business.