- Company Articles
- Products and Technology
- Installation And Maintenance
- Aluminum Foot Base for Conveyor Systems: Alignment Techniques for Smooth Operation

Aluminum Foot Base for Conveyor Systems: Alignment Techniques for Smooth Operation
Related Product
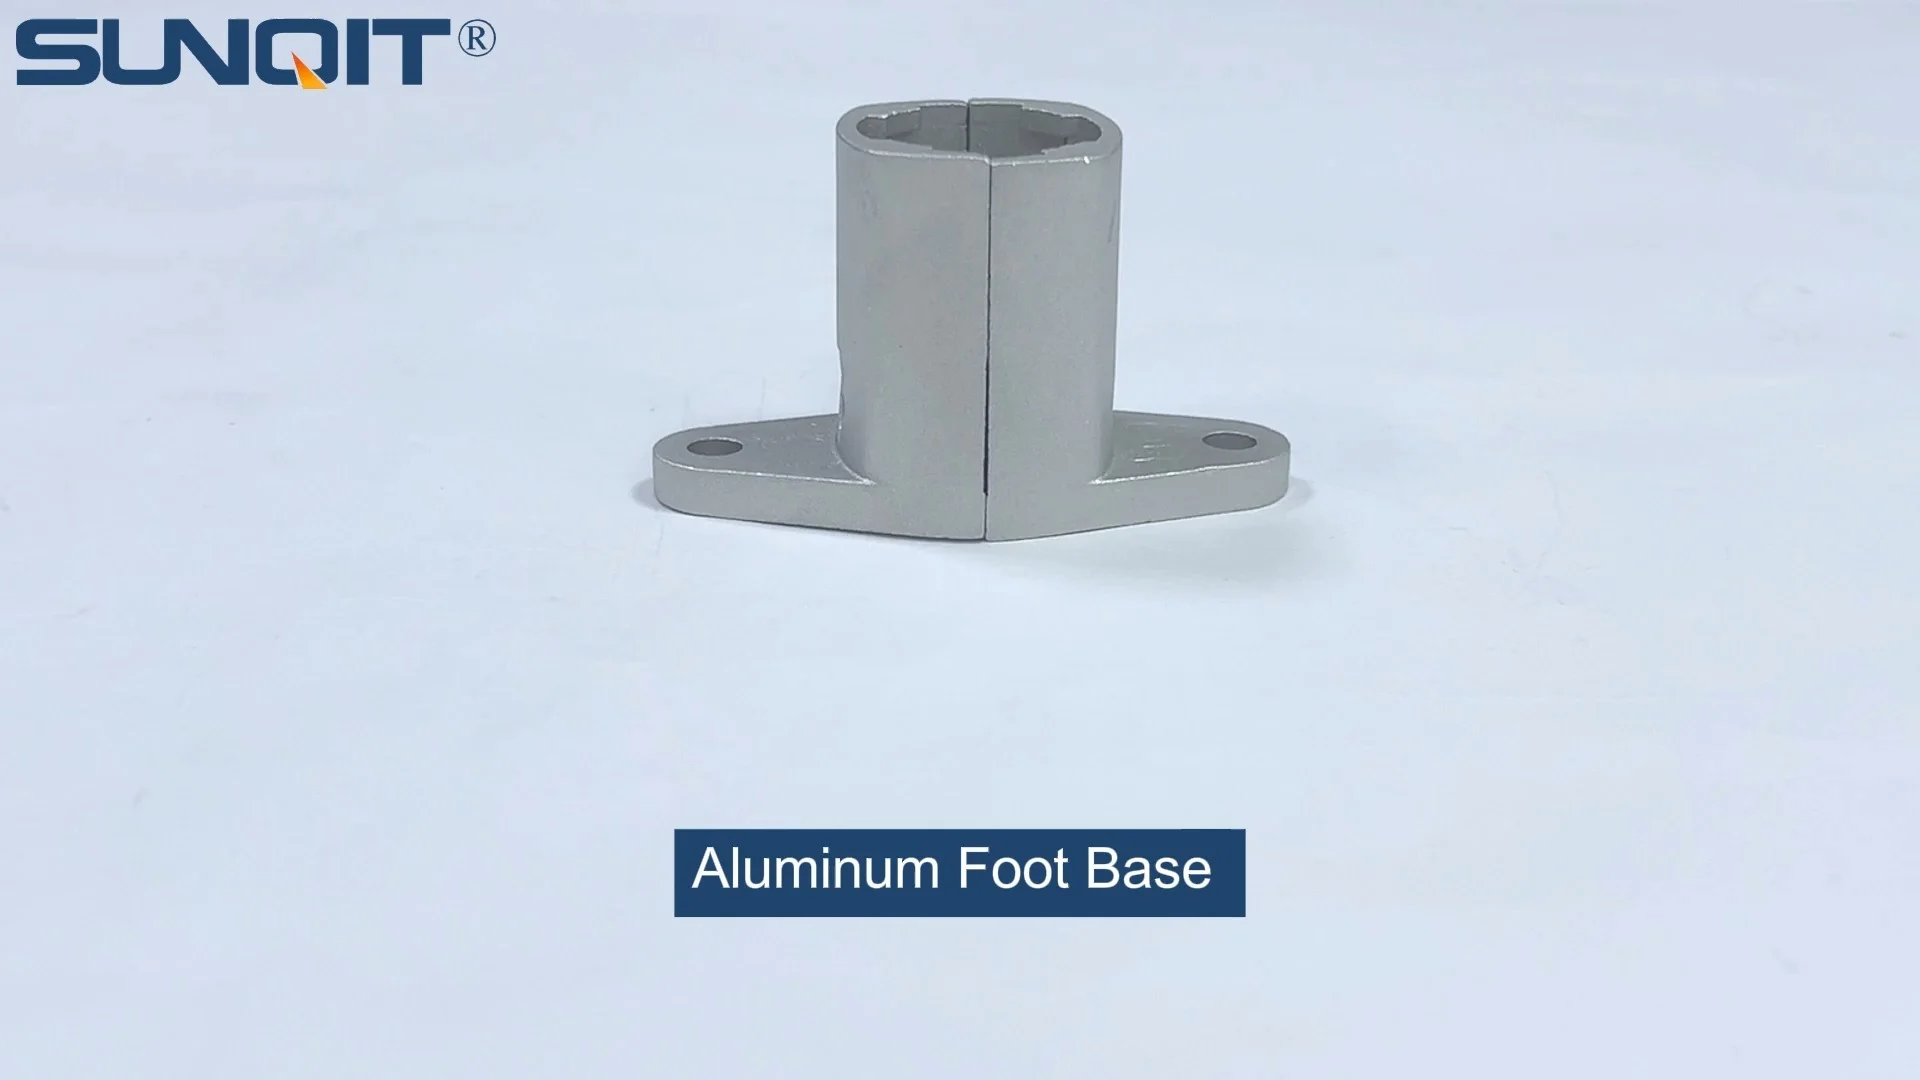
Aluminum Foot Base
Aluminum foot base to connect 28mm aluminum pipe and fixed it on the ground and prevent pipe fall and move.
In the fast-paced world of manufacturing, warehousing, and logistics, conveyor systems are the unsung heroes that keep operations moving. They transport everything from small electronic components to heavy pallets, ensuring products flow seamlessly from one workstation to the next. Yet, for all their importance, these systems rely on a network of small, often overlooked components to function at their best. One such component is the aluminum foot base—a sturdy, unassuming part that forms the foundation of any conveyor setup. While it may not grab headlines, the alignment of these foot bases directly impacts conveyor performance, efficiency, and longevity. In this article, we'll dive into the critical role of aluminum foot bases, explore why proper alignment matters, and walk through practical techniques to ensure your conveyor system runs smoother than ever.
Understanding Aluminum Foot Bases: The Backbone of Conveyor Stability
Before we jump into alignment, let's take a moment to understand what aluminum foot bases are and why they're so vital. Simply put, a foot base is the component that connects the conveyor frame to the floor, providing stability and support. Made from high-grade aluminum, these bases offer a unique blend of strength and lightweight versatility that makes them ideal for industrial environments. Unlike steel, aluminum resists corrosion—critical in settings where moisture, chemicals, or frequent cleaning are part of the daily routine. It's also easy to maneuver, which simplifies installation and adjustments, especially when setting up or reconfiguring conveyor lines.
Most aluminum foot bases are designed to work with the conveyor's structural frame, which is often built from aluminum profile. These profiles are extruded into precise shapes, allowing them to interlock with foot bases and other components like roller track systems. The foot base itself typically features a flat, weighted bottom to prevent tipping, along with holes or slots for bolts that secure it to the floor. Some models even include adjustable pads or caster wheels, which add flexibility for repositioning or fine-tuning height. This adjustability is key because no factory floor is perfectly level—and that's where alignment comes into play.
Why Alignment Matters: The Hidden Costs of Misalignment
Imagine a conveyor system where products glide effortlessly, downtime is minimal, and maintenance costs stay low. Now, contrast that with one where items jam, belts wear unevenly, and workers spend hours troubleshooting. The difference often boils down to alignment—specifically, how well the aluminum foot bases are positioned. Misaligned foot bases might seem like a minor issue, but their impact ripples through the entire operation. Let's break down the consequences of ignoring this critical step:
1. Increased Wear and Tear: When foot bases are out of alignment, the conveyor frame sags or twists. This puts uneven pressure on components like roller track wheels, bearings, and drive belts. Over time, parts wear out faster, leading to frequent replacements and unplanned downtime. For example, a misaligned roller track might cause wheels to grind against their axles, turning a $20 bearing into a $500 repair when it seizes.
2. Product Damage: Crooked conveyors are a recipe for damaged goods. Items might shift, tip, or get caught between rollers, especially fragile products like electronics or glassware. In a worst-case scenario, a jam could cause a domino effect, damaging dozens of items in one go. For manufacturers, this translates to wasted materials, lost revenue, and unhappy customers.
3. Safety Risks: Misalignment doesn't just harm equipment—it endangers workers. A conveyor that lurches or vibrates due to unstable foot bases can cause tools or products to fall, leading to trips, slips, or even crush injuries. Loose components, like a caster wheel that's come loose from a foot base, can also become projectiles if not addressed promptly.
4. Energy Inefficiency: A misaligned conveyor has to work harder to move products. The extra friction from uneven loading forces motors to draw more power, hiking up energy bills. Over a year, this inefficiency can add thousands of dollars to operational costs—money that could be invested in other areas of the business.

Common Alignment Issues: What to Watch For
Alignment problems rarely happen overnight. They often start small, worsen over time, and stem from a handful of common causes. By learning to spot these issues early, you can address them before they escalate. Here are the most frequent culprits:
Horizontal Misalignment: This occurs when the conveyor frame veers left or right, creating a "snake-like" path. You might notice products drifting toward one side of the roller track or rubbing against guide rails. Causes include uneven floor surfaces, loose anchor bolts, or foot bases that have shifted due to vibration.
Vertical Misalignment: Also called "height variation," this happens when foot bases are set at different heights. The conveyor frame then slopes up or down, leading to jams as products struggle to move uphill or gain too much speed downhill. Common triggers include worn shims, settled floor slabs, or adjustable pads that have slipped.
Loose or Damaged Components: Even well-aligned foot bases can fail if their parts are compromised. For example, a caster wheel with a flat spot (caused by sitting in one position for too long) can cause the conveyor to wobble. Similarly, corroded bolts or cracked aluminum pipe sections in the frame can weaken support, leading to gradual misalignment.
Poor Installation: Rushing through setup is a surefire way to create alignment issues. Skipping steps like checking floor levelness, over-tightening bolts (which warps aluminum profile), or using mismatched shims can all lead to problems down the line. In many cases, misalignment traces back to the initial installation, not wear and tear.

Step-by-Step Alignment Techniques: Getting It Right the First Time
Aligning aluminum foot bases doesn't have to be a daunting task. With the right tools, a systematic approach, and a little patience, you can achieve precision alignment that keeps your conveyor running smoothly for years. Below is a step-by-step guide to help you get started:
Step 1: Prepare for Alignment
Before you touch a single bolt, prioritize safety and preparation. Start by shutting off power to the conveyor and locking out the electrical system—you don't want the conveyor unexpectedly starting mid-alignment. Next, clear the area around the foot bases of debris, tools, or products to give yourself room to work. Finally, gather your tools: a spirit level (2-4 feet long for accuracy), a tape measure, a set of shims (plastic or metal, in various thicknesses), a torque wrench, and a rubber mallet for gentle adjustments. If you're working with a long conveyor, enlist a helper to assist with measurements—two sets of eyes make spotting misalignment easier.
Step 2: Inspect the Floor and Foot Bases
The first rule of alignment: start from the ground up. Even the best foot bases can't compensate for a severely uneven floor. Use your spirit level to check the floor around each foot base. Look for dips, bumps, or slopes—note these on a sketch of the conveyor layout. Next, inspect each foot base individually. Check for cracks in the aluminum, rust (yes, even aluminum can corrode in harsh environments), or loose bolts. If you find damaged parts, replace them before proceeding—aligning a cracked foot base is a waste of time, as it will only fail again.
Pay special attention to caster wheels if your foot bases have them. Spin each wheel to ensure it rotates freely, and check for flat spots or debris stuck in the tread. Tighten any loose axle bolts, and lubricate the bearings with a light machine oil if they're stiff. Remember: caster wheels are meant to aid movement, not support constant weight—if your conveyor is stationary, lock the casters or replace them with fixed pads for stability.
Step 3: Align Horizontally (Left-to-Right)
Horizontal alignment ensures the conveyor frame runs straight, preventing products from drifting. Begin at one end of the conveyor and work toward the other. Place the spirit level across the top of the aluminum profile frame, perpendicular to the direction of travel. The bubble in the level should sit exactly between the two lines. If it drifts left or right, adjust the foot bases accordingly:
- If the bubble drifts left: Loosen the bolts securing the left foot base to the floor. Gently tap the base to the right with the rubber mallet until the level bubble centers. Retighten the bolts, but don't overtighten—aluminum can strip if you apply too much force.
- If the bubble drifts right: Repeat the process with the right foot base, tapping it left until the level is centered.
For longer conveyors, check alignment every 3-4 feet. It's normal for small adjustments to affect previously aligned sections, so you may need to go back and fine-tune as you go. Once horizontal alignment is set, mark the position of each foot base on the floor with a pencil—this helps if you need to recheck later.
Step 4: Align Vertically (Height Adjustment)
Vertical alignment ensures the conveyor frame sits level from front to back and side to side. Using your tape measure, measure the distance from the floor to the top of the aluminum profile at each foot base. All measurements should be within 1/16 of an inch of each other—any more than that, and you'll have a slope.
To adjust height, use shims. If a foot base is too low, place shims under it until the height matches the others. If it's too high, remove existing shims or loosen the floor bolts and gently lower the base (you may need to tap it with the rubber mallet). Always use multiple small shims instead of one thick one—this distributes weight more evenly and prevents shifting. After adjusting, retighten the bolts and recheck the height with your tape measure.
Step 5: Test the Alignment
With horizontal and vertical alignment done, it's time to test the system. Start by manually rotating the roller track to ensure it moves freely—no jams, squeaks, or resistance. Next, power up the conveyor (with caution!) and run it empty for 10-15 minutes. Watch for signs of misalignment: products (or even a test weight, like a cardboard box) should travel straight, and the conveyor should run quietly. If you notice drifting or vibration, shut down the system and revisit the foot bases—you may need to tweak a shim or tighten a bolt.

Tools of the Trade: Must-Haves for Precision Alignment
You wouldn't build a house without a hammer, and you shouldn't align foot bases without the right tools. While basic tools work for small conveyors, larger or more complex systems may require advanced equipment. Here's a breakdown of the essentials:
| Tool | Use Case | Why It Matters |
|---|---|---|
| Spirit Level | Checking horizontal/vertical levelness | A 4-foot level provides more accurate readings than a shorter one, reducing the risk of "spot checking" errors. |
| Laser Alignment Tool | Long conveyors (20+ feet) | Laser tools project a straight line across the conveyor, making it easy to spot misalignment in hard-to-reach areas. |
| Feeler Gauges | Measuring small gaps between components | Useful for checking if roller track is parallel to the frame—gaps larger than 0.005 inches indicate misalignment. |
| Torque Wrench | Tightening bolts | Aluminum foot bases require precise torque (typically 25-35 ft-lbs) to avoid stripping threads or warping the base. |
| Shim Kit | Adjusting height | Kits with shims from 0.01 to 0.25 inches let you fine-tune height without guesswork. |
Maintenance: Keeping Alignment Intact for the Long Haul
Alignment isn't a one-and-done task. Over time, factors like floor settling, temperature changes, and regular use can throw foot bases out of whack. The good news is that a little proactive maintenance can prevent major issues. Here's a schedule to keep in mind:
Daily Checks: Have operators visually inspect the conveyor for signs of misalignment, like product drift or unusual noises. A quick glance can catch problems early.
Weekly Inspections: Tighten foot base bolts and caster wheel axles. Check shims for cracks or compression—replace any that show wear.
Monthly Alignment Tests: Use a spirit level to recheck horizontal and vertical alignment. Even small adjustments (1/16 inch) can prevent bigger issues later.
Quarterly Deep Dive: Clean foot bases to remove dirt and debris that can cause slipping. Lubricate caster wheels and roller track bearings. Inspect aluminum profile for bends or corrosion—early replacement saves money.
Real-World Success: How Proper Alignment Transformed One Factory's Operations
To put these techniques into context, let's look at a real example. A mid-sized electronics manufacturer in Ohio was struggling with a roller track conveyor that kept jamming. Their production line, which assembled circuit boards, relied on the conveyor to move components between workstations. Over six months, they'd replaced 12 roller bearings, wasted hundreds of dollars in damaged parts, and lost 20+ hours of downtime. Frustrated, they called in a maintenance consultant who immediately suspected misaligned foot bases.
The consultant inspected the system and found two issues: first, the factory floor had settled slightly after a recent renovation, leaving three foot bases 0.25 inches lower than the rest. Second, the caster wheels on two foot bases were loose, causing the frame to shift during operation. Using the step-by-step alignment process, the team adjusted the foot bases with shims, tightened the caster wheels, and rechecked alignment. The result? Over the next six months, the conveyor experienced zero jams, bearing replacements dropped to two, and downtime was cut by 90%. The plant manager later reported, "We never thought a few shims and a level would make such a difference. It's like having a brand-new conveyor."
Conclusion: Invest in Alignment, Reap the Rewards
Aluminum foot bases may be small, but their role in conveyor performance is enormous. Proper alignment isn't just about avoiding jams or reducing wear—it's about creating a more efficient, safer, and profitable operation. By taking the time to align your foot bases correctly, investing in the right tools, and sticking to a maintenance schedule, you'll transform your conveyor from a source of frustration into a reliable workhorse.
Remember, alignment is an ongoing process, not a one-time fix. By making it part of your regular maintenance routine, you'll ensure your conveyor system runs smoothly for years to come. And when it does, you'll wonder how you ever managed without it.