- Company Articles
- Products and Technology
- Installation And Maintenance
- Aluminum Foot Base for Workbench E: Installation Steps & Stability Tips

Aluminum Foot Base for Workbench E: Installation Steps & Stability Tips
Related Product
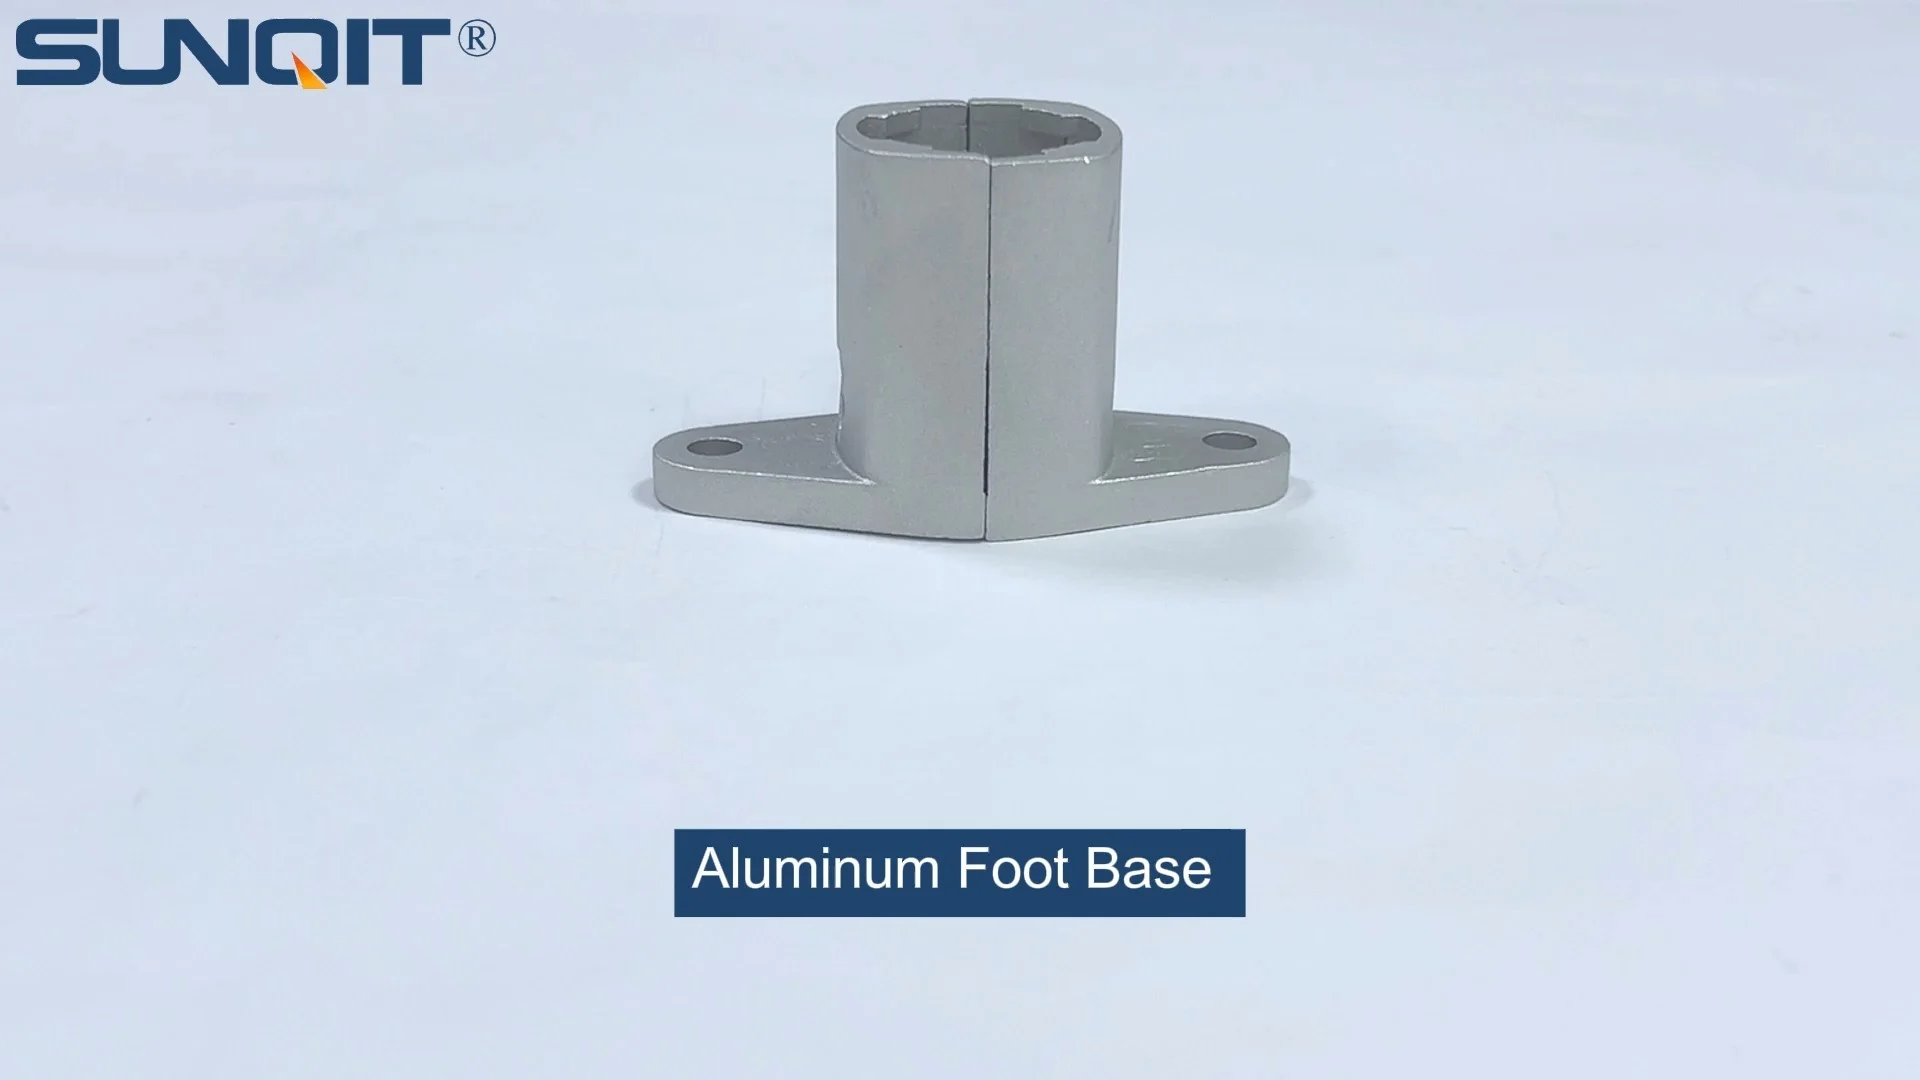
Aluminum Foot Base
Aluminum foot base to connect 28mm aluminum pipe and fixed it on the ground and prevent pipe fall and move.
Walk into any workshop, factory floor, or garage, and you'll notice something crucial: the workbench isn't just a table—it's the heartbeat of productivity. It's where ideas take shape, where parts are assembled, where precision meets purpose. But here's the thing: even the sturdiest workbench can feel like a let down if it wobbles, creaks, or shifts under pressure. That's where the unsung hero of workbench stability comes in: the foot base. And when it comes to balancing durability, adaptability, and sheer reliability, few options compare to the aluminum foot base—especially for models like the workbench e (single deck-without caster) .
If you've ever spent hours hunched over a project, only to pause and realize your workbench is tilting slightly to one side, you know the frustration. A wobbly surface doesn't just throw off measurements; it saps focus, slows progress, and even risks damaging materials or tools. But what if your workbench could feel like an extension of your own steady hands? That's the promise of a well-installed aluminum foot base. Lightweight yet surprisingly strong, designed to adapt to uneven floors, and built to last—this isn't just a "part" of your workbench. It's the foundation that turns a simple table into a workspace you can trust.
In this guide, we're diving deep into everything you need to know about the aluminum foot base for Workbench E. We'll cover why aluminum stands out as the material of choice, walk through step-by-step installation (no confusing jargon, we promise), share pro tips to keep your setup rock-solid for years, and even troubleshoot common issues. Whether you're setting up a new Workbench E or upgrading an old one, by the end, you'll have the confidence to build a workspace that works with you—not against you. Let's get started.
Meet Your Workbench E's Silent Hero: The Aluminum Foot Base
Before we jump into tools and installation, let's take a moment to appreciate what makes the aluminum foot base so special. First, let's clarify: the "foot base" is the component that connects your Workbench E to the floor. It's the buffer between the workbench frame and the ground, responsible for distributing weight evenly and keeping the surface level. For the workbench e (single deck-without caster) —a model designed for stationary, high-precision tasks—this role is even more critical. Without casters to adjust or shift, the foot base is your only line of defense against instability.
Why Aluminum? The Case for This Lightweight Powerhouse
You might be wondering: Why aluminum? Why not steel, plastic, or wood? Let's break it down. Steel is strong, sure, but it's heavy—too heavy for a Workbench E, which is meant to be maneuverable during setup (even without casters). Plastic is lightweight but can warp over time, especially in humid or high-temperature environments. Wood, while classic, absorbs moisture and can rot or splinter. Aluminum, though? It hits the sweet spot.
Aluminum is naturally resistant to corrosion, so even if your workshop gets a little damp (think spilled coolant or rainy garage floors), you won't have to worry about rust eating away at the foot base. It's also surprisingly rigid for its weight—meaning it won't bend under heavy loads, even when you're working with dense materials like metal or hardwood. And here's a bonus: aluminum is easy to machine and mold, which means manufacturers can design foot bases with precise adjustments (like built-in slots for adjustable leveling feet ) that make your life easier.
| Material | Weight (per sq ft) | Corrosion Resistance | Adjustability | Best For |
|---|---|---|---|---|
| Aluminum | 1.5 lbs | Excellent (resists rust, moisture) | High (compatible with adjustable leveling feet) | Stationary workbenches (e.g., Workbench E) |
| Steel | 4.5 lbs | Poor (prone to rust without coating) | Medium (heavy, harder to adjust) | Heavy-duty industrial tables |
| Plastic | 0.8 lbs | Good (but warps in heat) | Low (limited to fixed heights) | Temporary or lightweight setups |
| Wood | 2.2 lbs | Poor (absorbs moisture, rots) | Medium (can be sanded/trimmed) | DIY or low-use hobby benches |
As the table shows, aluminum is the clear winner for Workbench E. Its light weight makes installation a one-person job (no need to call in a coworker for help), its corrosion resistance ensures longevity, and its adjustability pairs perfectly with adjustable leveling feet —a must-have for anyone dealing with less-than-perfect workshop floors.
Aluminum Foot Base + Workbench E: A Match Made in Workshop Heaven
The workbench e (single deck-without caster) is designed for precision. Whether you're assembling electronics, sorting small parts, or drafting technical drawings, you need a surface that stays put. The aluminum foot base is engineered to complement this design. Its low profile keeps the workbench close to the ground (reducing sway), while its modular design allows for easy customization. Most importantly, it's compatible with Workbench E's frame holes and brackets, so you won't need to drill extra holes or jury-rig solutions.
Think of it this way: Workbench E is like a high-performance car, and the aluminum foot base is its tires. You can have the fanciest engine (or, in this case, the sturdiest tabletop), but without reliable tires (foot base), you're not going anywhere safely. The two work in tandem to deliver the stability you need.
Gearing Up: Tools & Accessories You'll Need
Installing an aluminum foot base isn't rocket science, but having the right tools on hand will make the process smoother than a well-oiled machine. Let's start with the basics. You'll need:
- Phillips-head screwdriver (or cordless drill with Phillips bit): For tightening screws and brackets.
- Spirit level (12-inch or longer): To check if the workbench is level during and after installation.
- Tape measure : To ensure the foot base is centered and aligned with the workbench legs.
- Rubber mallet : For gently tapping brackets into place (no brute force needed—aluminum is strong but can dent if hit too hard).
- Adjustable wrench : To tighten nuts on adjustable leveling feet (more on those later).
- Clean cloth : To wipe away dust or debris from the workbench legs and foot base before installation (a clean surface means a tighter fit).
Now, let's talk about the star accessories that will take your installation from "good" to "great." These aren't just add-ons—they're essential for maximizing stability:
- Adjustable leveling feet : These are game-changers for uneven floors. Most aluminum foot bases come with pre-drilled holes to attach these, but if not, look for models with M10 threads (a common size for workbench hardware).
- Aluminum profile accessories : Think brackets, end caps, or gaskets. These help secure the foot base to the workbench legs and prevent metal-on-metal squeaking. For example, a simple rubber gasket between the foot base and workbench leg can absorb vibrations and reduce noise.
- Thread-locking fluid (optional but recommended): A drop on each screw will prevent them from loosening over time, especially if your workbench sees heavy use.
Pro Tip:
Before you start, lay out all parts on a clean surface and double-check the instructions (if included). Most aluminum foot bases come with a small bag of screws and washers—count them to make sure nothing's missing. There's nothing worse than getting halfway through installation and realizing you're short a screw!

Step-by-Step Installation: Putting It All Together
Now, let's get to the hands-on part: installing the aluminum foot base on your Workbench E. We'll break this into 5 simple steps. Take your time—rushing leads to mistakes, and a little patience now will save you headaches later.
Step 1: Prep the Workbench E
First, clear off your Workbench E. Remove any tools, materials, or clutter from the tabletop—you'll need to flip the workbench over later, and the last thing you want is a screwdriver rolling off and getting lost. If your workbench is already assembled, gently tip it onto its side (or ask a helper to hold it steady) so the legs are facing up. If it's new and unassembled, lay the frame on a flat surface with the leg brackets exposed.
Next, use your clean cloth to wipe down the bottom of the workbench legs. Dust, oil, or sawdust can create a barrier between the leg and foot base, weakening the connection. A quick wipe will ensure the foot base adheres (or screws) tightly.
Step 2: Attach the Aluminum Foot Base Brackets
Most aluminum foot bases come in two parts: the base plate (which sits on the floor) and the bracket (which attaches to the workbench leg). Start by aligning the bracket with the pre-drilled holes on the bottom of the Workbench E's leg. The holes should line up perfectly—if they don't, double-check that you have the right foot base model (some brands make bases for specific workbench series).
Once aligned, insert the screws (usually 16mm self-tapping screws) through the bracket and into the leg. Use your screwdriver or drill to tighten them until they're snug—don't over-tighten, as this can strip the holes in the aluminum bracket. Repeat this for all four legs (Workbench E typically has four legs, but double-check your model).
Pro tip: If your foot base doesn't come with brackets (some are one-piece designs), skip this step and move straight to attaching the base plate directly to the leg.
Step 3: Install Adjustable Leveling Feet (Optional but Highly Recommended)
Here's where the magic happens: adjustable leveling feet . These small, threaded devices screw into the bottom of the aluminum foot base and let you raise or lower each corner of the workbench to compensate for uneven floors. Even if your workshop floor feels "flat," trust us—there's almost always a slight slope or bump. Leveling feet will make sure your workbench doesn't notice.
To install them: Screw the leveling feet into the pre-drilled holes on the bottom of the foot base. Turn them clockwise to lower the foot base or counterclockwise to raise it—you'll adjust the height more precisely later. Leave them slightly loose for now (you'll tighten the lock nuts after leveling).
Step 4: Flip the Workbench and Check Level
With the foot base and leveling feet attached, it's time to stand the Workbench E upright. If you're working alone, tilt the workbench back slowly, keeping one hand on the frame for balance. If you have help, have a coworker hold the opposite side to prevent tipping.
Once the workbench is upright, place your spirit level on the tabletop. Start by checking the length (front to back) and then the width (side to side). If the bubble in the level is off-center, you'll need to adjust the adjustable leveling feet . Here's how:
- If the bubble leans toward the front left corner, that corner is too low. Locate the leveling foot under the front left leg and turn it counterclockwise to raise it. Check the level again—repeat until the bubble is centered.
- If the bubble leans toward the back right corner, that corner is too high. Turn its leveling foot clockwise to lower it.
- Go slow! Small adjustments make a big difference. Turn the leveling foot 1/4 turn at a time, then check the level.
Once the tabletop is level in both directions, grab your adjustable wrench and tighten the lock nuts on the leveling feet (these are the small nuts just above the foot base). Tightening them will prevent the feet from rotating on their own over time.
Pro Tip:
For extra precision, place the spirit level in the center of the tabletop, then at each corner. A truly level workbench will read level no matter where you place the tool. If you're still having trouble, try placing a thin piece of cardboard under the lowest leveling foot (this works wonders on extremely uneven floors).
Step 5: Secure Everything and Test for Stability
You're almost done! Take a moment to go back and check all the screws on the foot base brackets and leveling feet—tighten any that feel loose. Then, give the workbench a gentle shake. Push on each corner with moderate force—if it wobbles, double-check the level and tighten the leveling feet. A stable workbench should feel like it's bolted to the floor (even though it's not).
Finally, load the tabletop with some weight (a toolbox, a stack of materials, etc.)—about as much as you'd normally have on it during a workday. Let it sit for 10-15 minutes, then check the level again. Sometimes the weight of tools can compress the leveling feet slightly, so a final adjustment might be needed.
And that's it! You've successfully installed an aluminum foot base on your Workbench E. Pat yourself on the back—you've just upgraded your workspace from "functional" to "unshakable."

Stability Tips: Keeping Your Workbench E Rock-Solid for Years
Installing the foot base is just the first step. To keep your Workbench E stable for the long haul, a little maintenance goes a long way. Here are our top tips:
1. Check the Level Monthly (Yes, Monthly!)
Floors shift, leveling feet loosen, and temperature changes can cause materials to expand or contract—all of which can throw off your workbench's level. Make it a habit to check the level once a month. It takes 2 minutes and can save you from hours of frustration later. Keep a spirit level near your workbench as a reminder.
2. Clean Under the Foot Base Regularly
Dust, dirt, and small debris love to collect under foot bases. Over time, this buildup can act like a shim, lifting one corner of the workbench. Every few months, slide a thin broom or vacuum attachment under the workbench to clear away crumbs, sawdust, or metal shavings. Your future self (and your level) will thank you.
3. Don't Overload One Side
We get it—when you're in the zone, it's easy to pile tools, materials, and finished projects on one side of the workbench. But uneven weight distribution is a stability killer. Try to keep heavy items (like power tools or metal stock) centered or spread evenly across the tabletop. If you need to store frequently used tools, consider adding a shelf under the workbench (using aluminum lean pipe and brackets) to keep weight low and balanced.
4. Upgrade with Aluminum Lean Pipe for Extra Support
For workshops that handle extra-heavy loads (think engine parts or large machinery components), consider reinforcing your Workbench E with aluminum lean pipe . These lightweight, modular pipes can be attached to the workbench legs to create a "cage" around the base, adding lateral stability. Pair them with aluminum profile accessories like corner brackets or T-joints, and you'll have a setup that can handle almost anything.
Here's how to do it: Measure the distance between the front legs and cut two pieces of aluminum lean pipe to that length. Attach one pipe between the front legs and one between the back legs using pipe clamps (available at most hardware stores). For extra stability, add diagonal braces from the top of one leg to the bottom of the opposite leg. It's a simple upgrade that adds years of durability.
5. replace Worn Leveling Feet Promptly
Even the best adjustable leveling feet wear out over time. The rubber or plastic pads on the bottom can crack, and the threads can strip. If you notice the workbench starting to wobble despite regular leveling, inspect the feet. Look for cracks, flattened pads, or threads that feel loose. Replacing them is cheap (most cost less than $10 each) and takes 5 minutes—well worth the investment to avoid bigger issues.

Troubleshooting Common Issues
Even with careful installation, you might run into a few hiccups. Let's troubleshoot the most common problems:
- Problem: The workbench still wobbles after leveling. Solution: Check if the foot base brackets are loose. Tighten the screws connecting the bracket to the workbench leg. If that doesn't work, the floor might have a larger dip than the leveling feet can handle. Try adding a metal shim (available at hardware stores) under the lowest foot—just make sure it's flat and not thicker than 1/8 inch.
- Problem: The aluminum foot base is bent or dented. Solution: Aluminum is strong, but it can bend if hit with heavy tools. Use a rubber mallet to gently tap the dented area back into shape. If the bend is severe, you may need to replace the foot base (most suppliers sell them individually).
- Problem: Leveling feet keep loosening. Solution: Apply a drop of thread-locking fluid to the threads before tightening the lock nut. This will create a secure bond without damaging the threads. Avoid using super glue—you'll never be able to adjust the feet again!
- Problem: The workbench legs are bent (uncommon, but possible). Solution: If the legs themselves are bent, the foot base can't fix that. Use a vice to gently straighten the leg (if it's metal) or replace the leg if it's beyond repair. Workbench E legs are usually sold separately by the manufacturer.
Beyond the Basics: Customizing with Aluminum Profile Accessories
Now that your Workbench E is stable, why stop there? Aluminum profile accessories are a great way to turn your basic workbench into a fully customized workspace. Here are a few ideas:
- Tool rails: Attach aluminum profile rails to the back of the workbench using brackets. Add hooks for hanging tools like screwdrivers, pliers, or tape measures—keep everything within arm's reach.
- Shelving units: Use aluminum lean pipe and T-joints to build a shelf above or below the workbench. Perfect for storing bins, manuals, or extra materials.
- LED light bar: Mount an LED light bar under the top shelf (if you added one) to brighten the work surface. Most light bars come with clips that attach to aluminum profiles—no drilling needed.
- Bin holders: Use aluminum brackets to attach plastic bins to the side of the workbench for sorting small parts. Customize the size and layout to fit your needs.
The best part? Aluminum profile accessories are modular, so you can add or remove components as your workflow changes. It's like having a workbench that grows with your projects.
Conclusion: Invest in Stability, Invest in Your Work
At the end of the day, a stable workbench isn't a luxury—it's a necessity. It's the difference between a project that flows smoothly and one that's constantly interrupted by frustration. The aluminum foot base for workbench e (single deck-without caster) isn't just a part; it's an investment in your productivity, your focus, and the quality of your work.
By choosing aluminum, you're choosing a material that's built to last—resistant to rust, easy to adjust, and lightweight enough to install without stress. Pairing it with adjustable leveling feet and aluminum profile accessories ensures your workspace can adapt to any challenge, from uneven floors to evolving projects.
So go ahead—grab your tools, follow the steps, and give your Workbench E the foundation it deserves. We promise: once you feel that rock-solid surface under your hands, you'll wonder how you ever worked without it. Here's to stable workbenches, smoother projects, and a workshop that works as hard as you do.