- Company Articles
- Products and Technology
- Installation And Maintenance
- Aluminum Foot Base Installation Tools: Must-Have Equipment for Lean Teams

Aluminum Foot Base Installation Tools: Must-Have Equipment for Lean Teams
Related Product
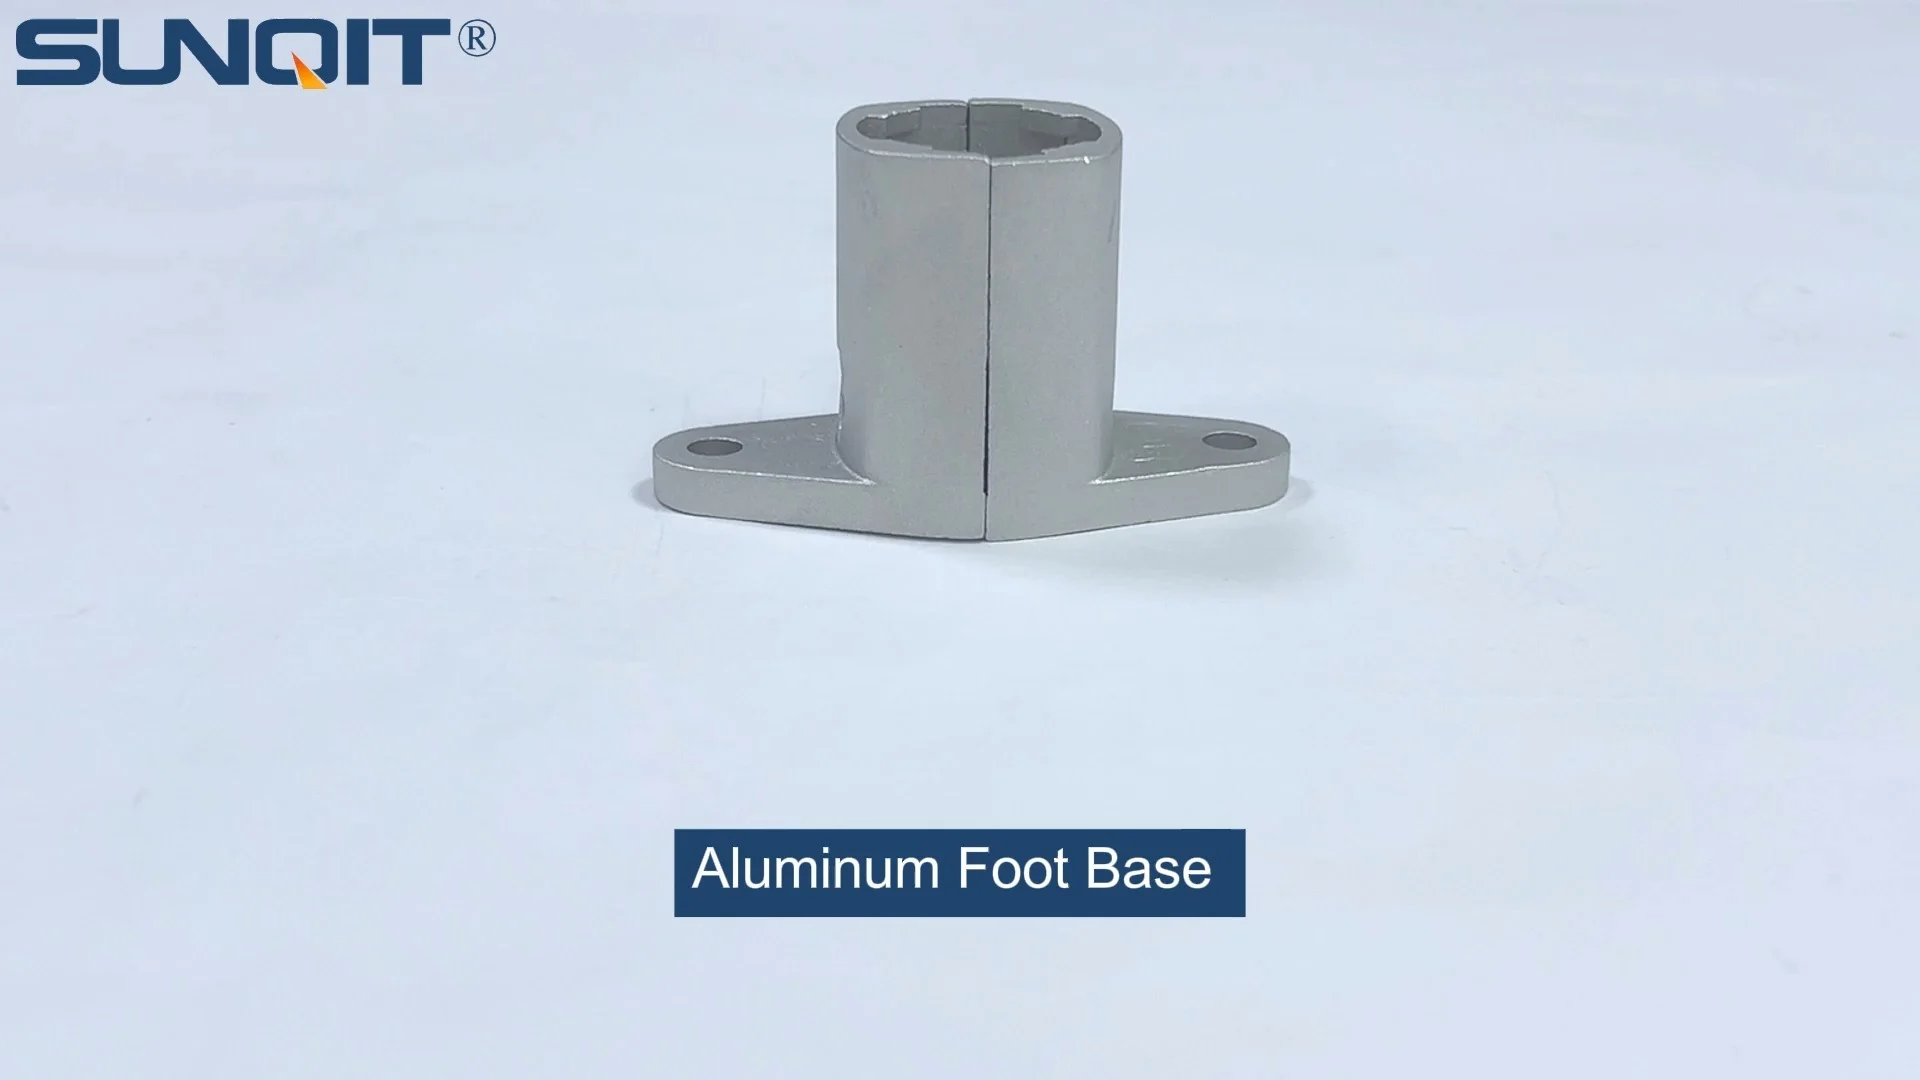
Aluminum Foot Base
Aluminum foot base to connect 28mm aluminum pipe and fixed it on the ground and prevent pipe fall and move.
It's a Tuesday morning on the factory floor. Maria, a line supervisor, glances at the production clock—already 15 minutes behind schedule. Again. The culprit? A wobbly workbench at Station 3 that's been causing parts to slide off, forcing her team to stop, readjust, and restart. "If we could just get this thing stable," she mutters, "we'd hit our target today." Sound familiar? For lean teams, every second counts. Instability in workstations isn't just a nuisance; it's a waste of time, energy, and resources—the very opposite of what lean manufacturing stands for. Enter the aluminum foot base: a humble component that stabilizes workbenches, conveyor systems, and material racks. But here's the catch: even the best foot base is only as good as the tools used to install it. Today, we're diving into the unsung heroes of lean efficiency—aluminum foot base installation tools—and why they're non-negotiable for teams serious about eliminating waste and boosting productivity.
What Is an Aluminum Foot Base, Anyway?
Before we talk tools, let's get clear on the star of the show: the aluminum foot base. Found at the bottom of workbenches, material racks, and assembly stations, this unassuming component does three critical jobs: it stabilizes the structure, distributes weight evenly to prevent floor damage, and adjusts height to keep work surfaces level—even on uneven factory floors. Made from lightweight yet durable aluminum, it's resistant to corrosion (a must in busy shops) and designed to integrate seamlessly with aluminum profiles, the backbone of modern lean workstations. Think of it as the foundation of your workstation's "posture"—if the foundation is weak, everything built on top will suffer.
For lean teams, the aluminum foot base isn't just about stability. It's about ergonomics (adjusting height to reduce worker strain), flexibility (easily reconfiguring stations during line changes), and sustainability (aluminum's recyclability aligns with green lean goals). But here's the truth: none of these benefits matter if the foot base is installed poorly. A slightly off-kilter installation can turn a "lean asset" into a "lean liability"—and that's where the right tools come in.
Why Lean Teams Can't Afford to Skimp on Installation Tools
Lean manufacturing is built on the principle of "doing things right the first time." It's about eliminating rework, reducing variability, and creating predictable, repeatable processes. When it comes to installing aluminum foot bases, "close enough" isn't close enough. Using generic tools or skipping steps leads to:
- Wasted Time: A wobbly workstation might take 5 minutes to readjust today, 10 minutes tomorrow, and eventually require a full reinstall. Multiply that by 10 workstations, and you're looking at hours of lost productivity monthly.
- Safety Risks: An unstable rack or workbench isn't just inefficient—it's dangerous. Tools, parts, or even the structure itself could topple, risking injury and costly downtime.
- Poor Quality: In precision assembly, a shaky workstation leads to misaligned parts, increased defects, and unhappy customers. Lean's focus on quality starts with stable processes.
The solution? Investing in tools designed specifically for installing aluminum foot bases and aluminum profile systems. These tools ensure precision, speed, and consistency—turning installation from a chore into a competitive advantage.

Essential Aluminum Foot Base Installation Tools for Lean Teams
Not all tools are created equal. For lean teams, the goal is to choose tools that are durable, easy to use, and optimized for aluminum (which is softer than steel and prone to scratching if mishandled). Below is a breakdown of the must-have tools, their roles, and why they matter for lean success:
| Tool Name | Primary Function | Why It Matters for Lean Teams |
|---|---|---|
| Adjustable Wrench with Non-Marring Jaws | Tightening and loosening hex bolts on foot base brackets without scratching aluminum surfaces. | Prevents damage to aluminum profiles, reducing waste from replacement parts. Non-slip jaws ensure a secure grip, cutting down on rework. |
| Digital Spirit Level (IP65 Rated) | Checking horizontal and vertical alignment of the workbench or rack during installation. | Ensures precise leveling in seconds (vs. minutes with a bubble level). IP65 rating means it withstands shop floor dust and spills, reducing tool downtime. |
| Torque Screwdriver (Adjustable 2-10 Nm) | Delivering consistent torque when securing foot base bolts to aluminum profiles. | Over-tightening strips threads; under-tightening causes loosening. A torque screwdriver ensures bolts are tensioned to manufacturer specs, eliminating guesswork. |
| Rubber Mallet with Nylon Head | Gently tapping foot bases into alignment without deforming aluminum or damaging threads. | Aluminum bends easily—this tool lets you adjust positioning without creating scrap. Safer than steel hammers, reducing injury risk. |
| Magnetic Parts Tray | Organizing small hardware (washers, bolts, nuts) during installation. | Prevents lost parts (a common source of waste in lean environments) and keeps the workspace clutter-free, aligning with 5S principles. |
Pro tip: Look for tool kits that include these essentials—many suppliers bundle them with aluminum foot bases and aluminum profile accessories, ensuring compatibility. For example, a kit might include the wrench, level, and torque screwdriver, plus a few extra hex bolts and washers (because even lean teams know backups save time).

Step-by-Step: Installing Aluminum Foot Bases the Lean Way
Now that you have the right tools, let's walk through a lean installation process. This 5-step method is designed to minimize waste, maximize precision, and get your workstation up and running in under 30 minutes (vs. the 1+ hour teams often spend with generic tools).
Step 1: Prep the Workspace (5S First!)
Lean starts with organization. Clear the area around the workbench or rack, removing debris and unnecessary tools. Lay out your aluminum foot bases, bolts, washers, and installation tools on a clean mat (use the magnetic tray for small parts). Check the aluminum profile for dents or bent threads—addressing these now prevents headaches later. This step aligns with the "Sort" and "Set in Order" phases of 5S, ensuring you have everything you need at your fingertips.
Step 2: Position the Foot Bases
Place the aluminum foot bases at the corners of the workstation, aligning their mounting holes with the pre-drilled holes in the aluminum profile. For larger racks, add a foot base midway along longer sides to prevent sagging. Use your measuring tape to ensure equal spacing—this ensures even weight distribution. Pro lean move: Mark hole positions with a pencil first to avoid misalignment (a 30-second step that saves 5 minutes of readjustment).
Step 3: Secure with Bolts (Torque Matters!)
insert the bolts through the foot base brackets and into the aluminum profile. Hand-tighten them first to hold the foot base in place. Then, switch to your torque screwdriver, set to the manufacturer's recommended torque (usually 4-6 Nm for aluminum profiles). Tighten in a "star pattern" (like tightening car lug nuts) to distribute pressure evenly—this prevents warping the profile. Why torque? Aluminum threads can strip if over-tightened, and loose bolts will vibrate free over time. Consistency here is key to long-term stability.
Step 4: Level the Workstation
Place your digital spirit level on the workbench surface (or the top shelf of the rack). Check both horizontal (left-right) and vertical (front-back) alignment. If the level shows a tilt, adjust the foot base's height using its built-in threaded rod (turn clockwise to raise, counterclockwise to lower). Retighten the lock nut on the foot base with your adjustable wrench once level. Repeat until the level reads "0" in both directions. This step eliminates the "rocking" that plagues poorly installed workstations—and cuts down on the need for constant readjustments.
Step 5: Test and Validate
Give the workstation a gentle shake (or apply downward pressure on each corner). It should feel solid—no wobbling or creaking. If it moves, double-check the bolts with your torque screwdriver and re-level if needed. Finally, walk away and come back 10 minutes later (letting the bolts "settle")—then test again. This final check ensures the installation holds under real-world conditions. For lean teams, this is "Poka-Yoke" in action—preventing defects (unstable workstations) before they reach the production line.

From Frustration to Flow: A Lean Team's Success Story
Let's put this into context with a real example. A mid-sized electronics manufacturer in Ohio was struggling with their assembly line workstations. Their lean team had invested in aluminum profile workbenches and foot bases but was using generic wrenches and bubble levels for installation. The result? Workstations needed readjustment every 2-3 weeks, costing 2-3 hours of downtime monthly. Employees complained about neck strain from hunching over uneven surfaces, and parts occasionally slid off, causing scrap.
After switching to the tools listed above—including a digital spirit level and torque screwdriver—the team noticed immediate changes. Installation time per workstation dropped from 45 minutes to 20 minutes. Readjustments? Almost zero. Six months later, the plant manager reported a 12% reduction in scrap from assembly errors and a 15% boost in employee satisfaction (no more "fighting the workbench"). "We thought the foot bases were the solution," he said, "but the tools made them work . It's like buying a sports car and finally using premium fuel—you get the performance you paid for."
This story highlights a key lean truth: Lean isn't just about what you buy—it's about how you use it. Tools transform good components into great systems.
Long-Term Maintenance: Keeping Your Foot Bases (and Lean System) Strong
Lean is a journey, not a destination—and that includes maintaining your installations. Even the best-installed foot bases need occasional check-ins, especially in high-vibration environments (like near conveyor systems). Here's how to keep them in top shape:
- Monthly Inspections: Use your torque screwdriver to spot-check bolts (they loosen over time due to vibration). A 5-minute check per workstation prevents costly failures.
- Clean and Lubricate: Wipe down foot bases with a damp cloth to remove dust and debris. Apply a drop of silicone lubricant to the threaded height adjuster if it becomes stiff—this ensures easy adjustments later.
- replace Worn Parts: If a foot base's rubber pad (which prevents slipping) is cracked, replace it immediately. Most suppliers sell replacement pads for a fraction of the cost of a new foot base—another lean win for waste reduction.
Final Thoughts: Tools as the Foundation of Lean Excellence
Aluminum foot bases are quiet contributors to lean success, but they can't do it alone. For lean teams, the right installation tools aren't an expense—they're an investment in precision, safety, and efficiency. By choosing tools that align with aluminum's unique properties and lean's focus on waste elimination, you turn "good enough" installations into "excellent, repeatable" ones.
So, the next time you're setting up a new workstation or upgrading an old one, remember: the difference between frustration and flow might just be a torque screwdriver or a digital level. Lean teams don't cut corners—they equip themselves to win. And with these tools, you will too.