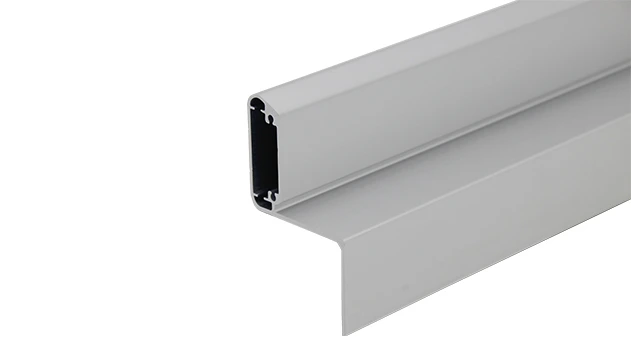
Creating an Aluminum Guide Rail A is like crafting a precision instrument. It takes 7 key steps, each requiring careful control and expertise. Let's walk through the process, from raw material to ready-to-install rail:
Step 1: Design & Engineering – The Blueprint for Perfection
Before any metal is melted, engineers use CAD software to design the rail's cross-section. Every groove, hole, and edge is calculated to work with specific components:
lean pipe joint
s for mounting, roller tracks for sliding, and brackets for securing to frames. For example, a rail destined for an ESD workstation will have extra-wide channels to accommodate anti-static roller balls, while one for a heavy-duty conveyor might feature reinforced flanges. This design phase ensures the rail isn't just a piece of metal, but a system component that plays nice with others.
Step 2: Raw Material Prep – The "Aluminum Butter" Stage
The process starts with 6063 aluminum billets—cylindrical rods about 6 meters long and 120mm in diameter. These billets are inspected for impurities (like oxide inclusions) because even a tiny flaw can weaken the final rail. They're then preheated to 450-500°C, a temperature where aluminum becomes pliable but not molten—think of it as warming chocolate just enough to shape, but not so much it melts.
Step 3: Extrusion – Shaping the Rail's "Personality"
Here's where the magic happens:
extrusion
. The heated billet is loaded into a hydraulic press and forced through a die—a steel mold with the exact cross-section of Aluminum Guide Rail A. The pressure? Up to 10,000 tons—enough to crush a car. As the metal flows through the die, it takes on the rail's shape: the main channel, side lips, mounting holes, and any special features like ESD grounding strips.
This process is surprisingly dynamic. Extrusion speeds hit 5-10 meters per minute, so operators monitor the flow closely to ensure uniformity. If the temperature drops too low, the metal might crack; too high, and the shape distorts. It's a bit like baking: get the timing and heat right, and you get a perfect result every time. The extruded rail emerges from the die like a continuous ribbon, which is then cooled with water sprays to lock in the shape.
Step 4: Heat Treatment – The "Workout" for Strength
Freshly extruded aluminum is soft—too soft for industrial use. To harden it into 6063-T5, we subject it to
solution annealing
and
artificial aging
. First, the rail is heated to 530°C for 2 hours to dissolve magnesium-silicon particles into the aluminum matrix (solution annealing). Then it's quenched in water to trap those particles in a supersaturated state. Finally, it's baked at 175°C for 8 hours (artificial aging), allowing the particles to precipitate out as tiny, evenly distributed crystals. These crystals act like microscopic anchors, preventing the metal's atoms from sliding past each other under stress—making the rail 300% stronger than before treatment.
Step 5: Surface Treatment – Beauty with a Purpose
Aluminum naturally forms a thin oxide layer that resists corrosion, but we take it further. Most Aluminum Guide Rail A undergoes
anodizing
—an electrolytic process that thickens this oxide layer to 5-10 microns. The result? A surface that's scratch-resistant, easy to clean, and available in colors like silver, black, or blue (for color-coding production lines). For ESD-sensitive environments (hello, esd workstation!), we add a conductive coating that dissipates static electricity, protecting sensitive electronics from damage.
Step 6: Precision Cutting & Machining – Tailoring to Length
Extruded rails come in 6-meter lengths, but factories need custom sizes. Using CNC saws with diamond blades, we cut the rail to exact lengths—down to ±0.1mm tolerance. For rails needing holes or notches (to attach to lean pipe joint s or conveyor frames), CNC mills drill and shape these features with pinpoint accuracy. A rail for a 3C assembly line might get 12mm mounting holes every 50mm, while one for a flow rack could have angled notches to cradle roller balls.
Step 7: Quality Inspection – The Final Check
No rail leaves the factory without passing a battery of tests. We check straightness with laser alignment tools (max deviation: 0.5mm per meter), surface finish with gloss meters, and hardness with a Rockwell tester (target: 80 HRB). For critical applications like aerospace parts manufacturing, we even do ultrasonic testing to detect hidden defects. Only 100% perfect rails get the stamp of approval.
"We once had a customer in the automotive industry who needed rails that could handle 100,000 cycles without wear. After testing, our
Aluminum Guide Rail A lasted 150,000 cycles—and still looked new. That's the difference between good and great manufacturing." — Senior Quality Inspector,
Lean System Supplier