- Company Articles
- Products and Technology
- Installation And Maintenance
- Aluminum Pipe with Board Holder for Workbench E: Setup Guide

Aluminum Pipe with Board Holder for Workbench E: Setup Guide
Related Product
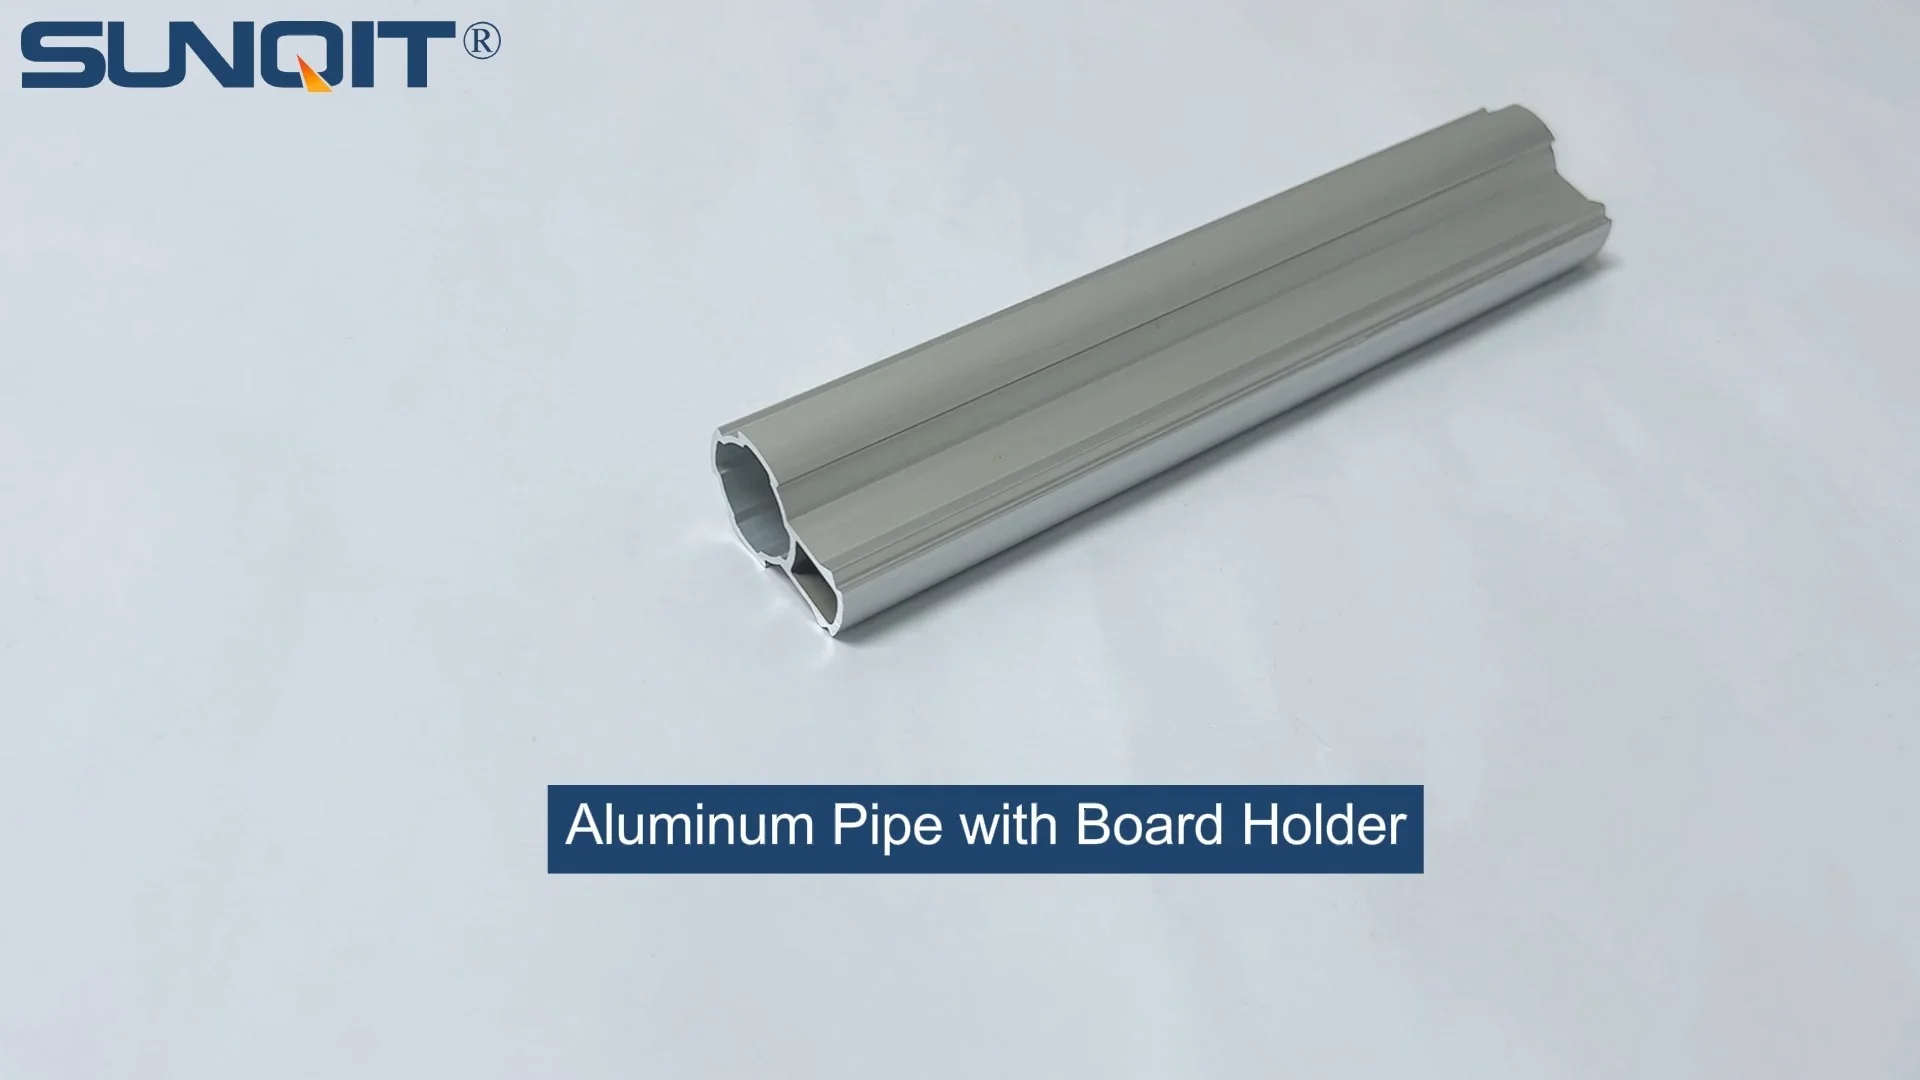
Aluminum Pipe with Board Holder
The linear rolling assembly can be arbitrarily connected in the protruding part of the card slot to increase the rigidity of the track.
Let's be honest—we've all been there. You walk up to your workbench, ready to dive into a project, and instead of a clean, organized space, you're greeted by a chaotic jumble of tools, parts, and half-finished tasks. Screwdrivers roll off the edge, drill bits get lost in the shuffle, and that stack of plywood you need is teetering dangerously close to collapse. Sound familiar? The truth is, a cluttered workspace doesn't just look messy—it kills productivity. When your tools aren't where you need them, every minute spent hunting for that missing wrench is a minute taken away from actually building, creating, or repairing. That's where the right setup comes in. Today, we're zeroing in on a game-changer for anyone who values order: the aluminum pipe with board holder for Workbench E (single deck-without caster) . This isn't just another piece of hardware—it's a simple, customizable solution designed to turn your workbench from a source of frustration into a productivity powerhouse. Whether you're a hobbyist in a garage, a small business owner in a workshop, or a manufacturer streamlining assembly lines, this guide will walk you through every step of setting up your aluminum pipe with board holder, so you can take back control of your workspace.
Understanding Your Workbench E and the Aluminum Pipe with Board Holder
Before we dive into the setup, let's get to know the stars of the show: Workbench E and the aluminum pipe with board holder. First, Workbench E (single deck-without caster) is exactly what it sounds like: a sturdy, single-level work surface designed for stability. Unlike mobile workbenches with casters, this one stays put, making it ideal for tasks that require precision or heavy lifting—think assembling machinery parts, woodworking, or electronics repair. Its solid deck (typically made of particleboard or plywood, depending on your order) provides a flat, even surface, but on its own, it's just that: a surface. That's where the aluminum pipe with board holder steps in.
The aluminum pipe with board holder is a modular add-on that mounts directly to Workbench E, creating vertical storage space above the deck. Picture this: a lightweight but durable aluminum pipe runs along the back or side of the workbench, with a sliding or fixed board holder attached. This holder can support a wooden or plastic board, which you can then use to hang tools, store small parts bins, or even prop up instruction manuals. It's like adding a second "layer" of workspace—without sacrificing the main deck area.
Why aluminum? Great question. Aluminum is the unsung hero of workshop materials: it's lightweight enough to avoid weighing down your workbench, but strong enough to hold tools, boards, and supplies without bending or warping. It's also resistant to rust and corrosion, which means it'll stand up to the inevitable spills, sawdust, and humidity of a busy workspace. And unlike steel, it won't leave unsightly scratches on your tools or hands. Plus, aluminum pipes are easy to cut and drill, so if you ever need to adjust the length or add extra mounting points, you won't need industrial tools to do it.
Pro Insight: Aluminum's versatility is a huge plus here. If you later decide to expand your setup—say, adding a second pipe for more storage or repositioning the board holder—you can do it without replacing the entire system. This adaptability is why aluminum is a favorite among lean manufacturing setups and DIY enthusiasts alike.
What's in the Box? The Basics of Aluminum Pipe Accessories
To set up your aluminum pipe with board holder, you'll need more than just the pipe and holder themselves. That's where aluminum pipe accessories come into play. These small but crucial parts ensure your setup is secure, stable, and tailored to your needs. Let's break down the key components you'll likely find in your kit (or need to source separately):
| Part Name | Description | Why You Need It |
|---|---|---|
| Aluminum Pipe (1.2mm thickness) | Main structural component; typically 1-2 meters long (varies by order). | Forms the vertical/horizontal support for the board holder; 1.2mm thickness strikes a balance between strength and flexibility. |
| Board Holder | Aluminum or plastic bracket designed to grip a board (plywood, MDF, etc.). | Holds the storage board in place; may feature adjustable clamps for different board thicknesses. |
| L-Shaped Aluminum Brackets | Right-angle brackets with pre-drilled holes for mounting the pipe to the workbench. | Securely attaches the aluminum pipe to Workbench E's deck or frame; prevents wobbling. |
| Hex Screws & Washers | M6 or M8 hex-head screws (length varies) and metal washers. | Fastens brackets, pipe, and holder together; washers distribute pressure to avoid damaging the aluminum. |
| End Caps | Plastic or rubber caps that fit over the ends of the aluminum pipe. | Prevents snags on clothing or tools; stops dust and debris from collecting inside the pipe. |
Depending on your specific kit, you might also get extras like adjustable T-joints (for adding cross-pipes) or rubber gaskets (to reduce noise when sliding the board holder). Always check the packaging—missing parts are rare, but it's better to catch them before you start drilling!
Tools and Prep: Getting Ready to Install
You've unboxed your aluminum pipe with board holder, laid out the parts, and admired the potential of your soon-to-be-organized workspace. Now, let's make sure you have everything you need to get the job done right. This isn't a project that requires a fully stocked toolbox, but a few key tools will save you time and frustration. Here's what to gather:
Essential Tools
- Hex Key Set: Most aluminum pipe accessories use hex screws, so a set with metric sizes (especially 4mm, 5mm, and 6mm) is a must. Look for one with ball-end tips—they make it easier to reach screws at awkward angles.
- Cordless Drill/Driver: Hand-tightening screws works, but a drill will speed things up. Use a low-torque setting to avoid stripping the aluminum threads.
- Measuring Tape & Pencil: Precision matters! You'll need to measure where to mount the brackets to ensure the pipe is straight and the board holder aligns with your needs.
- Level (2-foot or longer): A wobbly pipe is a useless pipe. A level will help you make sure the aluminum pipe is perfectly vertical (or horizontal, if you're mounting it that way).
- Screwdriver (Flathead/Phillips): Some accessories (like end caps) might use standard screws, so keep this handy.
- Rubber Mallet: If parts are tight (like sliding the board holder onto the pipe), a gentle tap with a rubber mallet will seat them without damaging the aluminum.
Prep Steps: Setting Yourself Up for Success
Before you start drilling or screwing, take 10 minutes to prep your workspace—it'll save you from costly mistakes later. First, clear off Workbench E completely. Remove any tools, debris, or existing accessories (like clamp-on lights) so you have a clean surface to work on. Next, decide where to mount the aluminum pipe. Most people choose the back edge of the workbench (to keep the front clear for tasks), but if you're left-handed, you might prefer the left side, or right-handed the right side. There's no "wrong" choice here—go with what feels most natural for your workflow.
Once you've picked a spot, use your measuring tape to mark the pipe's position. Let's say you're mounting it along the back edge: measure 2 inches in from the back corner on both ends of the workbench and mark those points with a pencil. This will be where your L-brackets go. Pro tip: If you're mounting the pipe vertically (to hold a tall board), measure the height of your board first—you don't want the pipe to be too short to support it!
Pro Insight: If you're unsure about placement, use painter's tape to mock up the pipe and board holder. Stick the tape to the workbench where the brackets will go, then place the board (or a piece of cardboard cut to size) against the tape. Stand back and imagine using the space—can you reach your tools easily? Is there enough room for the main deck tasks? Adjust the tape until it feels right.

Step-by-Step Setup: Installing Your Aluminum Pipe with Board Holder
Now, the moment you've been waiting for: putting it all together. Follow these steps, and you'll have your aluminum pipe with board holder up and running in under an hour (we timed it—even if you're new to DIY, it's that straightforward).
Step 1: Unpack and Inspect All Parts
1. Start by emptying all parts onto a clean, flat surface (like the Workbench E deck). Lay out the aluminum pipe, board holder, L-brackets, screws, washers, and end caps. Compare your parts to the table we provided earlier (or the parts list in your kit) to make sure nothing is missing or damaged. Look for dents in the pipe, bent brackets, or stripped screws—if you spot a defect, contact your supplier immediately (most offer quick replacements).
Step 2: Attach the L-Brackets to Workbench E
2. Grab your L-brackets, screws, washers, and a hex key. Position one bracket at each pencil mark you made earlier (the 2-inch-in marks from the back corners). Make sure the bracket's holes align with the edge of the workbench—you want the long arm of the L to run along the workbench's edge, and the short arm to point upward (this is where the aluminum pipe will mount). Place a washer over each screw hole in the bracket, then insert the hex screws and hand-tighten them until they're snug. Don't fully tighten yet—we'll adjust for level in the next step.
Step 3: Mount the Aluminum Pipe to the Brackets
3. Now, take the aluminum pipe and hold it against the short arms of the L-brackets. The pipe should sit flush against the brackets—if there's a gap, double-check that the brackets are aligned. Once the pipe is in place, mark the screw holes on the brackets (they should line up with pre-drilled holes in the pipe, if your kit includes them). If there are no pre-drilled holes, use a pencil to mark where you'll drill—just make sure the marks are level and spaced evenly (every 6-8 inches is a good rule of thumb for stability).
If drilling is needed, use a 3mm drill bit (for M6 screws) to create pilot holes in the pipe. Go slow—aluminum is soft, so it'll drill easily, but rushing can cause the bit to slip. Once the holes are drilled, align the pipe with the brackets again, insert screws through the brackets and into the pipe (don't forget the washers!), and hand-tighten.
Step 4: Level the Pipe and Tighten All Screws
4. This is where your level becomes critical. Place the level vertically against the aluminum pipe—if the bubble is centered, you're good to go. If not, gently push or pull the pipe until the bubble aligns. Once level, use your hex key to fully tighten the screws on the L-brackets (securing them to the workbench) and the screws holding the pipe to the brackets. Tighten until the screw heads are flush with the bracket—over-tightening can strip the aluminum threads or warp the bracket, so stop when you feel resistance.
Pro Tip: If your workbench isn't perfectly level (common in garages or basements with uneven floors), shim the brackets with small pieces of cardboard or plastic washers to adjust. A wobbly pipe will only get worse over time, so take the extra minute to get this right.
Step 5: Install the Board Holder
5. Now, slide the board holder onto the aluminum pipe. Most holders have a clamp-style design—simply open the clamp, position it on the pipe where you want it (typically 12-18 inches above the workbench deck, but adjust for your height), then tighten the clamp screw with a hex key. If your holder uses set screws instead of a clamp, align the screws with the pipe and tighten until they bite into the aluminum (but not so hard they leave permanent marks).
Once the holder is in place, test its movement. If it's supposed to slide (for adjustable positioning), it should move smoothly but not feel loose. If it sticks, check for burrs on the pipe or holder—sand them down gently with fine-grit sandpaper (220-grit works) to smooth the surface.
Step 6: Add the Board and Secure It
6. Grab the board you'll be using (plywood, MDF, or even a plastic cutting board work well—just make sure it's at least ½-inch thick for stability). Slide it into the board holder, making sure it's centered and extends evenly on both sides of the pipe. If your holder has locking screws, tighten them to secure the board in place. If not, a few small wood screws (drilled through the holder into the board) will keep it from sliding.
Step 7: Attach End Caps and Final Checks
7. Pop the plastic end caps onto the open ends of the aluminum pipe—they should snap into place with a gentle push. Now, give the entire setup a once-over: shake the pipe gently to check for wobbling (there should be none), tug on the board to ensure it's secure, and slide the holder back and forth (if applicable) to confirm smooth movement. If everything feels solid, you're done!

Troubleshooting: Fixing Common Issues
Even with careful setup, you might run into a hiccup or two. Don't panic—these issues are easy to fix, and we've got you covered with simple solutions.
Issue: The aluminum pipe wobbles when I touch it.
Solution: Wobbling usually means the L-brackets aren't tight enough or aren't level. Tighten the bracket screws first—if that doesn't work, check the pipe-to-bracket screws. If the wobble persists, add a third L-bracket in the middle of the pipe for extra support (you can buy additional brackets from aluminum pipe accessories kits).
Issue: The board holder won't slide smoothly on the pipe.
Solution: First, check for debris—dust or sawdust can get stuck between the holder and pipe. Wipe both down with a dry cloth. If that doesn't help, the holder might be bent. Use a pair of pliers (wrapped in a cloth to avoid scratches) to gently bend the clamp back into shape. For set-screw holders, loosen the screws slightly—over-tightening can cause binding.
Issue: Screws keep stripping when I try to tighten them.
Solution: Aluminum is soft, so stripping is often caused by using the wrong size hex key or over-tightening. Make sure you're using the correct hex key (match the screw size) and stop tightening when you feel resistance. If a screw is already stripped, remove it with a screw extractor (available at hardware stores) and replace it with a new one from your aluminum pipe accessories kit.
Maintenance: Keeping Your Setup in Top Shape
Your aluminum pipe with board holder is installed, and your workspace is finally organized—congratulations! Now, let's make sure it stays that way. With minimal maintenance, this setup will last for years, even in busy workshops.
- Clean Regularly: Wipe down the aluminum pipe and board holder with a damp cloth every week to remove dust, oil, or sawdust. Avoid harsh cleaners (like bleach or ammonia)—they can discolor the aluminum. For stubborn grime, use a mild soap and water solution, then dry thoroughly.
- Check Tightness Monthly: Over time, vibrations from using the workbench can loosen screws. Once a month, give all hex screws a gentle tighten with your hex key (but don't overdo it!).
- Lubricate Moving Parts: If your board holder slides, apply a drop of silicone lubricant (not oil—it attracts dust) to the pipe every 3 months. This keeps the movement smooth and prevents rust on any metal components.
- replace Worn Parts: If end caps crack or brackets bend, replace them ASAP. Most aluminum pipe accessories are affordable, and replacing a $5 bracket now beats replacing the entire pipe later.
Customization: Making It Your Own
One of the best things about the aluminum pipe with board holder is how easy it is to customize. Once you've mastered the basic setup, you can tweak it to fit your unique needs. Here are a few ideas to inspire you:
Add a Second Pipe for Extra Storage
If one pipe isn't enough, mount a second one on the opposite side of Workbench E. Use T-joints (from aluminum pipe accessories) to connect them with a cross-pipe, creating a "frame" above the deck. You can then hang tools from both pipes or add multiple board holders for separate storage zones (e.g., one for hand tools, one for power tools).
Install Hooks or Bins on the Board
The board in your holder isn't just for show—screw in pegboard hooks, magnetic strips, or small plastic bins to organize tiny parts like nails, screws, or drill bits. For a sleek look, paint the board to match your workshop decor!
Adjust the Height for Standing Work
If you prefer standing while working, mount the aluminum pipe higher up (30-36 inches above the deck) and use a taller board. This turns the holder into a "mug rack" for tools or a shelf for frequently used materials, keeping them at eye level.
Final Thoughts: Your Workspace, Reimagined
You did it. You've transformed your cluttered Workbench E into an organized, efficient workspace with the aluminum pipe with board holder. Take a step back and admire your handiwork: tools within reach, parts neatly stored, and a clear deck ready for whatever project comes next. This isn't just about tidying up—it's about reclaiming your time, reducing stress, and creating a space that works for you, not against you.
Remember, the beauty of this setup lies in its simplicity and adaptability. As your needs change, so can your aluminum pipe system. Add more pipes, swap out the board for a larger one, or experiment with new accessories—there's no limit to how you can customize it. And if you ever need help, whether it's troubleshooting a wobbly bracket or brainstorming a new setup, your aluminum pipe supplier is just a call or email away (though we bet you won't need them—you've got this).
Now, go grab that project you've been putting off. With your new aluminum pipe with board holder, there's no telling what you'll create next.