- Company Articles
- Products and Technology
- Installation And Maintenance
- Aluminum Pipe with Tray Holder Installation Tools: What You'll Need

Aluminum Pipe with Tray Holder Installation Tools: What You'll Need
Related Product
Aluminum Pipe with Tray Holder
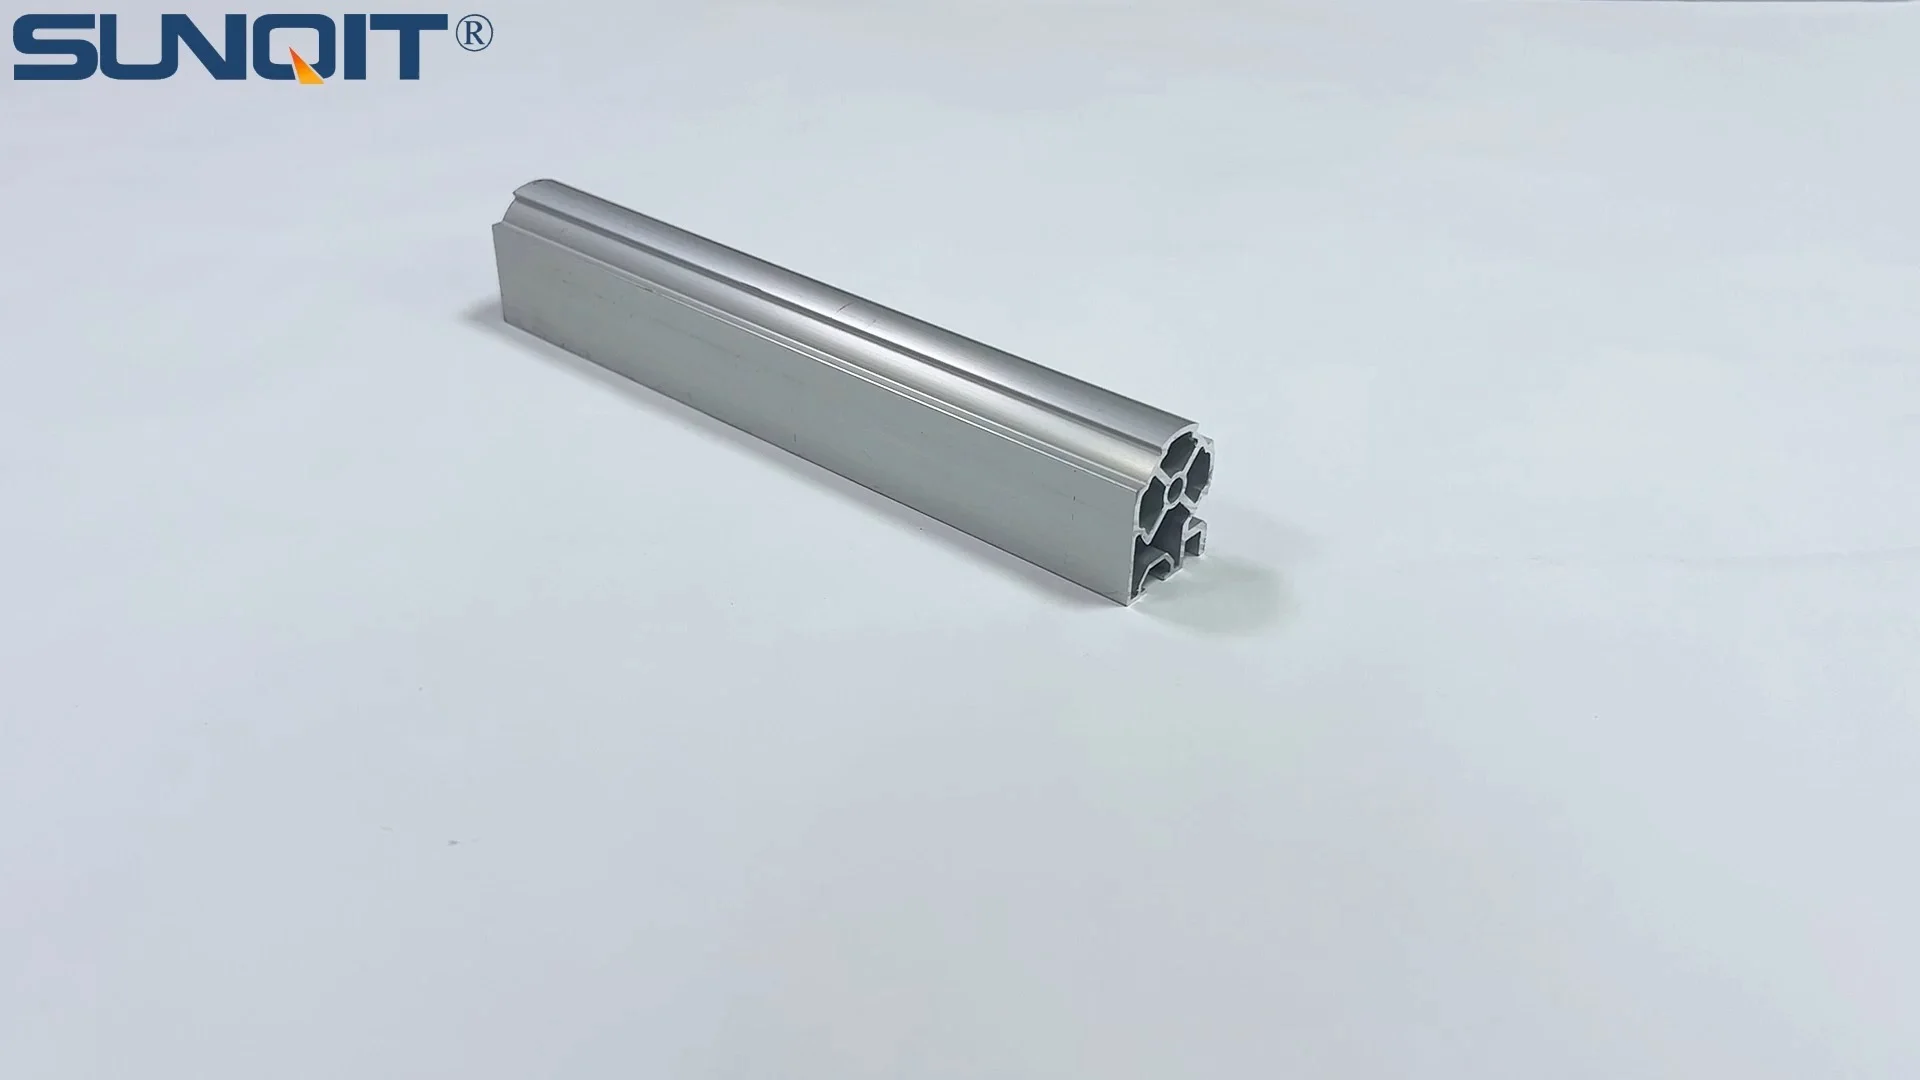
Aluminum pipe with tray holder,the pipe one side connected by a joint, the other side with a slot which can hold a tray or a aluminum pannel.
Introduction: The Backbone of Modern Workspaces
Walk into any well-organized workshop, manufacturing plant, or even a garage-based production line, and you'll likely spot a common hero: the aluminum pipe with tray holder. These unassuming yet versatile setups are the unsung champions of lean system principles, quietly streamlining workflows, reducing clutter, and keeping tools and materials exactly where they need to be. Whether you're building a custom workbench, setting up a material rack, or designing a flow-efficient production station, aluminum pipe with tray holders are the building blocks that turn chaos into order.
But here's the thing: even the highest-quality aluminum pipe and tray holder won't live up to their potential if installed haphazardly. The difference between a wobbly, inefficient setup and a sturdy, long-lasting one often comes down to one critical factor: having the right tools. In this guide, we're diving deep into the toolkit you'll need to install an aluminum pipe with tray holder like a pro. From basic hand tools to specialized gadgets for aluminum profiles, we'll cover everything you need to know to get the job done safely, accurately, and efficiently—no guesswork required.
We'll also touch on why this matters. In a lean system, every second counts. A poorly installed tray holder might mean materials slip off, tools get misplaced, or workers waste time adjusting unstable components. By the end of this article, you'll not only have a checklist of must-have tools but also understand how each one contributes to a smoother, more productive workspace. Let's get started.
Pre-Installation Prep: Laying the Groundwork
Before you even pick up a tool, there's work to do. Pre-installation prep isn't glamorous, but it's the secret to avoiding headaches later. Let's break it down step by step.
1. Know Your Components
First, familiarize yourself with the parts you're working with. At the core, you'll have the aluminum pipe—lightweight, corrosion-resistant, and strong enough to support the tray holder and whatever you'll place on it. Then there's the tray holder itself, which could be a simple flat surface or a more complex design with dividers. Finally, there are the aluminum profile accessories: connectors, brackets, screws, and joints that hold everything together. These accessories are like the glue of your setup; choosing the right ones (and knowing how they fit) is half the battle.
Take a few minutes to lay out all components on a clean, flat surface. Check the manufacturer's instructions (if included) to understand how the aluminum pipe connects to the tray holder and which aluminum profile accessories are needed for your specific design. Is there a 90° aluminum pipe joint that connects the vertical and horizontal pipes? A parallel fixation aluminum pipe joint to secure two pipes side by side? Knowing this upfront prevents scrambling for missing parts mid-installation.
2. Clear Your Workspace
You'll need room to maneuver, especially if you're cutting the aluminum pipe to length or assembling large sections. Clear a workspace that's at least twice the size of your planned setup—this gives you space to lay out tools, components, and the aluminum pipe without tripping over things. If you're working indoors, sweep the floor to remove debris that could scratch the aluminum pipe or interfere with measurements. If outdoors, set up on a level surface (a patio or garage floor works well) and avoid windy days—lightweight aluminum profile accessories like small brackets can easily blow away.
3. Gather Your Tools (Yes, We're Getting to That!)
This might seem obvious, but it's worth: gather all tools before starting. There's nothing more frustrating than tightening the last bolt only to realize you need a specific hex key you left in the garage. We'll dive into the full tool list next, but for now, start a pile with the basics: screwdrivers, wrenches, a tape measure. You'll thank yourself later.
Pro Tip: Take a photo of your component layout before you start. If you need to pause mid-installation, the photo will help you remember how parts fit together—no more staring at a pile of aluminum pipe and accessories wondering, "Which bracket goes where?"

Basic Hand Tools: Your First Line of Defense
Think of basic hand tools as the foundation of your installation toolkit. These are the workhorses you'll reach for again and again, from loosening screws to adjusting brackets. Let's break down the essentials.
1. Screwdrivers: The Right Fit for Every Screw
Aluminum profile accessories and tray holders typically use two types of screws: Phillips (cross-shaped) and flathead (slotted). That means you'll need at least two screwdrivers—or better yet, a multi-bit screwdriver with interchangeable tips. Look for a set with sizes ranging from #1 to #3 Phillips and 3mm to 8mm flathead; these cover most standard screws in aluminum pipe setups.
Why does size matter? Using a screwdriver that's too small will strip the screw head, making it nearly impossible to remove later. Too large, and you risk damaging the aluminum pipe or tray holder's surface. For tight spaces—like when securing a bracket to the back of the tray holder—opt for a stubby screwdriver (shorter handle, same tip size) to avoid bumping into surrounding components.
2. Wrenches: Tightening with Precision
When it comes to nuts and bolts on aluminum profile accessories, wrenches are your best friend. An adjustable wrench is a versatile choice—it can fit multiple nut sizes, from small M6 nuts to larger M10 ones. Look for one with a smooth jaw (no teeth) to avoid marring the finish of the aluminum pipe or accessories. For nuts that are in hard-to-reach places, a ratchet wrench with socket attachments (metric sizes, of course!) will save you from contorting your hand into awkward positions.
Pro tip: If you're working with a lot of the same-sized nuts (common in pre-packaged aluminum pipe kits), invest in a combination wrench (open-end on one side, box-end on the other). The box-end grips the nut more securely, reducing the chance of slipping and scratching the aluminum.
3. Hex Keys (Allen Keys): The Secret to Aluminum Profile Accessories
Here's where things get specific to aluminum setups: most aluminum profile accessories—like internal rotatary aluminum joints or parallel aluminum joint a—use hex bolts (Allen bolts). These bolts have a hexagonal socket in the head, and the only way to tighten them is with a hex key (or Allen key). You'll need a metric set (sizes 2mm to 10mm) since aluminum profiles and accessories are almost universally metric.
Spring for a set with ball-end tips. Unlike standard hex keys, which only work when straight, ball-end keys can angle up to 25 degrees, making it easier to reach bolts that are recessed or surrounded by other components. For example, if you're attaching a tray holder to a vertical aluminum pipe, the bolt might be hidden behind a bracket—ball-end hex keys let you tighten it without removing the bracket first.
4. Mallets: Gentle Persuasion for Aluminum
Aluminum is soft compared to steel, so forget about using a steel hammer—it will dent or scratch the pipe. Instead, grab a rubber mallet or a dead-blow mallet (filled with sand or lead shot to reduce rebound). These tools deliver force without damaging the aluminum surface. When would you use one? If a aluminum profile accessory is stuck (like a tight-fitting connector), a light tap with a rubber mallet can seat it properly. Or, when aligning two pieces of aluminum pipe, a gentle tap helps nudge them into place without bending.
Avoid using a wooden mallet—over time, wood can splinter, leaving debris on the aluminum pipe that's hard to clean off. Stick with rubber or dead-blow for best results.
5. Clamps: Holding It All Together
Ever tried to tighten a bolt with one hand while holding two pieces of aluminum pipe steady with the other? Spoiler: it doesn't work. Clamps solve this problem by holding components in place during assembly. A C-clamp is great for small jobs, like securing a bracket to a pipe. For larger sections—say, a 6-foot aluminum pipe attached to a tray holder—use a bar clamp (also called a F-clamp) for extra stability. Look for clamps with rubberized jaws to protect the aluminum pipe from scratches.
Pro tip: Use two clamps when assembling long sections. Place one near each end to prevent the pipe from twisting while you tighten the bolts. This ensures the final setup is straight and stable.
| Tool | Why You Need It | Pro Tips |
|---|---|---|
| Multi-bit screwdriver | Tightens Phillips and flathead screws on tray holders and brackets. | Choose magnetic tips to hold small screws in place. |
| Adjustable wrench | Fits multiple nut sizes on aluminum profile accessories. | Wrap jaws in tape if working with polished aluminum to avoid scratches. |
| Metric hex key set (ball-end) | Tightens hex bolts on aluminum joints and connectors. | Store in a labeled case to avoid losing small sizes (looking at you, 2mm key). |
| Rubber mallet | Seats tight-fitting accessories without damaging aluminum. | Test on a scrap piece of aluminum first to get a feel for needed force. |
| C-clamp or bar clamp | Holds components steady during assembly. | Pad jaws with cardboard to protect aluminum surfaces. |

Measuring and Marking Tools: Accuracy is Everything
In the world of aluminum pipe installation, "close enough" is never good enough. A tray holder that's off by even half an inch can cause materials to slide off, or worse, create a wobbly setup that's unsafe. That's where measuring and marking tools come in—they're your insurance policy for a straight, level, and functional final product.
1. Tape Measure: The Long and Short of It
You can't build something if you don't know how big it needs to be. A 25-foot tape measure is ideal for most aluminum pipe projects—long enough to measure full-length pipes (which often come in 6-foot or 8-foot lengths) but compact enough to carry in your tool belt. Look for one with a lockable blade and clear markings in both inches and centimeters (since aluminum profile accessories might use metric measurements). A tape with a magnetic end is a bonus—it can stick to metal surfaces, freeing up your hands to mark measurements.
How to use it properly: When measuring the aluminum pipe, extend the tape fully and hook the end over the pipe's edge (don't pull too tight—this can stretch the tape and throw off measurements). For tray holders, measure the distance between the mounting brackets to ensure the pipe will fit snugly. Always measure twice—once to get the number, once to confirm it's right. As the old saying goes, "Measure twice, cut once" (we'll get to cutting later!).
2. Level: Keep It Straight (and Level!)
Imagine loading a tray holder with heavy tools, only to watch them slide off because the whole setup is tilted. Not fun. A level ensures your aluminum pipe and tray holder are perfectly horizontal (left to right) and vertical (up and down). For most projects, a 2-foot spirit level (with a bubble vial for horizontal and vertical checks) is sufficient. If you're building a tall setup (like a material rack with multiple shelves), a 4-foot level will cover longer sections of aluminum pipe.
Using a level is simple: place it on top of the aluminum pipe and wait for the bubble to settle. If it's centered between the two lines, the pipe is level. If it's off, adjust the pipe or brackets until the bubble is centered. For vertical pipes, hold the level against the side of the pipe and check the vertical bubble. Pro tip: Check level at multiple points along the pipe—floors and walls aren't always level, so what's straight in one spot might be tilted in another.
3. Square: Right Angles, Right Results
When connecting two aluminum pipes at a corner (like a vertical pipe and a horizontal tray holder support), you need a perfect 90° angle. A speed square (a triangular metal tool) or a framing square (L-shaped) will help you check this. Place the square's corner at the joint where the two pipes meet, then align the square's edges with the pipes. If both pipes run flush against the square's edges, the angle is 90°. If not, adjust the aluminum pipe joint until they do.
Speed squares are great for small joints, like connecting a bracket to a pipe. Framing squares work better for larger sections, like the corner of a workbench made with aluminum pipe. Either way, a square prevents "crooked corners" that can weaken the setup and make the tray holder sit unevenly.
4. Pencil, Marker, or Scriber: Marking the Spot
Once you've measured, you need to mark where to cut the aluminum pipe or where to drill holes for brackets. A regular pencil works for most jobs, but if you're working on shiny aluminum (which can be hard to see pencil marks on), use a fine-tipped permanent marker. For precision marking (like drilling holes for aluminum profile accessories), a scriber (a sharp metal tool) is better—it etches a thin line into the aluminum that won't rub off. Just be careful not to press too hard; you don't want to scratch the pipe more than necessary.
Pro tip: When marking a cut line on aluminum pipe, wrap a piece of masking tape around the pipe first, then mark on the tape. The tape prevents the marker from smudging and gives you a clean edge to follow when cutting.
Pro Tip: For extra accuracy, use a string line. Tie a string between two points (like the ends of your planned setup) and use it as a guide to align the aluminum pipe. This is especially helpful for long sections, like a 10-foot aluminum pipe that needs to be perfectly straight.
Specialized Tools for Aluminum Profiles: Cutting, Drilling, and Deburring
Aluminum pipe isn't always the perfect length right out of the box. Sometimes you need to cut it to fit your workspace, drill holes for custom brackets, or smooth rough edges after cutting. For these tasks, basic hand tools won't cut it (pun intended)—you need specialized tools designed for aluminum.
1. Aluminum Pipe Cutters: Clean Cuts Without the Hassle
Cutting aluminum pipe is different from cutting wood or steel. Aluminum is soft, so using a hacksaw (while possible) can leave jagged edges and require a lot of effort. A better option is a pipe cutter specifically designed for aluminum. There are two main types: rotary pipe cutters (which work like a pizza cutter, scoring the pipe until it snaps) and miter saws with an aluminum-cutting blade (for larger jobs or multiple cuts).
Rotary pipe cutters are great for small-diameter aluminum pipes (up to 2 inches). They're portable, easy to use, and leave clean, burr-free cuts. To use one: clamp the pipe in a vice (with rubber jaws to protect the aluminum), position the cutter around the pipe at your marked line, and twist the cutter while applying gentle pressure. Rotate it around the pipe, tightening the cutter slightly with each rotation, until the pipe snaps cleanly. For larger pipes or if you're cutting multiple pipes to the same length, a miter saw with a 60-tooth carbide-tipped blade (labeled for aluminum) will make quick work of the job. Just wear hearing protection—the saw can be loud!
2. Deburring Tool: Smooth Edges, Safe Hands
No matter how clean the cut, aluminum pipe will have burrs (sharp, raised edges) after cutting. These burrs can slice hands, catch on gloves, or prevent aluminum profile accessories from fitting properly. A deburring tool solves this. It looks like a small handle with a rotating blade or a cone-shaped abrasive tip. Simply run the tool along the inside and outside edges of the cut pipe to smooth away burrs.
For extra-smooth edges (important if you're inserting the pipe into a tight-fitting joint), follow up with a piece of fine-grit sandpaper (220 grit or higher). Sand in a circular motion to avoid creating grooves in the aluminum. Your hands (and your aluminum profile accessories) will thank you.
3. Drill and Drill Bits: Making Holes for Accessories
Sometimes the pre-drilled holes in aluminum profile accessories don't line up with where you need them, or you need to add custom holes for brackets or hooks. That's where a drill and aluminum-specific drill bits come in. Aluminum is soft, so using a steel drill bit will work, but a cobalt or titanium-coated bit (labeled for metal) will last longer and cut more smoothly.
Start with a smaller pilot hole (1/8 inch) before drilling the final size—this prevents the bit from wandering and ensures the hole is in the right spot. Use cutting oil to lubricate the bit as you drill; this reduces friction, keeps the bit cool, and prevents it from getting stuck in the aluminum. Clamp the pipe securely before drilling to avoid it spinning. And go slow—high speeds can melt the aluminum around the hole, creating a messy, uneven finish.
4. Tapping Tool: Creating Threads for Bolts
If you need to screw a bolt directly into the aluminum pipe (instead of using a nut on the other side), you'll need to tap threads into the hole. A tap and die set (metric, of course) includes taps (for cutting internal threads) and dies (for external threads). For aluminum, use a tap with a fine pitch (more threads per inch) to prevent stripping—aluminum isn't as strong as steel, so coarse threads can pull out easily.
To tap a hole: drill a pilot hole slightly smaller than the tap size (check the tap's packaging for the recommended drill size), then insert the tap into a tap handle. Apply cutting oil to the tap, then turn it clockwise into the hole, reversing a quarter turn every few rotations to clear chips. Stop when the tap is seated to the desired depth. Wipe away excess oil and test the bolt—if it screws in smoothly, you're good to go. If it's tight, run the tap through again with more oil.
Safety First: When cutting or drilling aluminum, always wear safety glasses to protect your eyes from flying debris. A dust mask is also a good idea—aluminum dust is fine and can irritate your lungs if inhaled. And never cut aluminum pipe held in your hand—always use a vice or clamps to secure it.
Safety Equipment: Protect Yourself While You Work
Installing an aluminum pipe with tray holder might seem like a low-risk project, but accidents can happen. Sharp edges, flying debris, and power tools all pose hazards. Investing in basic safety equipment isn't just smart—it's essential. Here's what you need to stay safe.
1. Safety Glasses: Shield Your Eyes
Even a small piece of aluminum debris can cause serious eye damage. When cutting, drilling, or using a mallet, wear safety glasses with side shields to protect against flying particles. Look for ANSI Z87.1 certified glasses—these meet strict safety standards and are impact-resistant. If you wear prescription glasses, you can buy over-the-glass (OTG) safety glasses that fit over your regular lenses, or get prescription safety glasses if you do a lot of DIY work.
2. Work Gloves: Protect Your Hands
Aluminum pipe edges (even after deburring) can be sharp, and aluminum profile accessories like brackets often have small, pointy corners. Leather or nitrile gloves will protect your hands from cuts and scrapes. Leather gloves are durable and great for handling rough materials, while nitrile gloves are better for tasks that require dexterity (like tightening small hex bolts with a hex key). Avoid cloth gloves—they tear easily and don't protect against sharp edges.
3. Hearing Protection: Guard Against Noise
Power tools like miter saws or drills can reach noise levels of 90 decibels or more—loud enough to damage hearing over time. Wear earplugs or earmuffs when using these tools. Earplugs are small and portable (great for tight spaces), while earmuffs offer more protection (ideal for prolonged tool use). If you're not sure which to choose, check the noise rating of your tool (listed in the manual) and pick hearing protection with a noise reduction rating (NRR) that's high enough to bring the noise below 85 decibels.
4. Dust Mask or Respirator: Breathe Easy
Cutting or sanding aluminum creates fine dust particles that can irritate your lungs. A basic dust mask (like a disposable N95 respirator) will filter out most of these particles. If you're doing a lot of cutting or sanding (e.g., cutting multiple aluminum pipes), upgrade to a half-face respirator with replaceable filters for better protection. Always wear the mask when cutting, sanding, or drilling aluminum—even if you're working outdoors, the dust can linger in the air.
5. Steel-Toed Boots (Optional but Recommended)
Dropping a heavy aluminum pipe or a metal bracket on your foot hurts—trust us. Steel-toed boots aren't necessary for every project, but if you're working with large or heavy components (like 6-foot aluminum pipes or solid aluminum profile accessories), they're worth wearing. They also protect against sharp objects on the floor, like dropped drill bits or burrs from cut pipes.
Testing and Adjustment Tools: Perfecting the Setup
You've assembled the aluminum pipe and tray holder—now what? It's time to test the setup and make adjustments to ensure it's stable, level, and functional. These tools will help you fine-tune your work.
1. Torque Wrench: Tighten Without Overdoing It
Overtightening bolts is a common mistake. It can strip threads on aluminum profile accessories, warp the aluminum pipe, or even crack the tray holder. A torque wrench lets you tighten bolts to a specific torque (measured in foot-pounds or newton-meters), as recommended by the manufacturer. Most aluminum setups require low torque—around 10-15 ft-lbs for M8 bolts, for example. Check the accessory's instructions for the exact torque, then set the wrench and tighten until it clicks (indicating the desired torque is reached).
2. Rubber Mallet (Again!): Fine Adjustments
We already mentioned rubber mallets for seating accessories, but they're also great for fine adjustments. If the tray holder is slightly tilted after assembly, a light tap with a rubber mallet on the high side can nudge it into place. Just be gentle—aluminum is soft, and too much force can bend the pipe.
3. Level (Again!): Double-Checking Alignment
After assembly, use the level one last time to check horizontal and vertical alignment. Load the tray holder with a few pounds of weight (simulating the tools or materials it will hold) and recheck—sometimes the added weight can cause the setup to shift slightly. If it's off, adjust the brackets or feet until the level shows it's straight.
4. Tape Measure (Again!): Verifying Spacing
If your setup has multiple tray holders or shelves (like a material rack with 3 rows and 3 floors), use the tape measure to ensure the spacing between shelves is even. Uneven spacing can make it hard to store items and looks unprofessional. Adjust the brackets or aluminum pipe joints until each shelf is the same distance apart.
Common Mistakes to Avoid: Learn from Others' Errors
Even with the right tools, mistakes happen. Here are the most common ones to watch out for—and how to avoid them.
1. Using the Wrong Tools
Using a steel hammer instead of a rubber mallet, a flathead screwdriver on a Phillips screw, or a wrench that's too small—these mistakes can damage your aluminum pipe, strip screws, or leave you frustrated. Always use the tool designed for the job. When in doubt, refer to the tool list we've covered—better to take an extra minute to grab the right hex key than to spend an hour fixing a stripped bolt.
2. Skipping Measurements
"I'll just eye it" might work for hanging a picture, but not for aluminum pipe installation. Skipping measurements leads to uneven tray holders, tilted pipes, and wasted materials. Take the time to measure, mark, and check with a level and square—your back (and your tools) will thank you when the setup is stable and functional.
3. Overtightening Bolts
Aluminum isn't steel—overtightening bolts can strip threads, crack accessories, or bend the pipe. Use a torque wrench if you're unsure, and stop tightening when the bolt is snug (you shouldn't be able to wiggle the accessory with your hand). If you hear a "creaking" sound when tightening, stop—you're probably overdoing it.
4. Ignoring Safety
Safety glasses, gloves, and hearing protection might seem like overkill, but one flying burr or dropped pipe is all it takes to cause an injury. Always wear the right safety gear, and never take shortcuts (like holding a pipe in your hand while cutting it). Safety first, always.
5. Rushing the Assembly
Aluminum pipe installation is a project that rewards patience. Rushing leads to mistakes: forgetting to tighten a bolt, misaligning a joint, or skipping the final level check. Set aside enough time (at least a few hours for a simple setup) and take breaks if you're getting frustrated. A calm, focused approach will result in a better final product.
Conclusion: Tools for a Lean, Efficient Workspace
Installing an aluminum pipe with tray holder isn't just about putting parts together—it's about building a workspace that supports lean system principles: efficiency, organization, and waste reduction. With the right tools—basic hand tools, measuring tools, specialized aluminum tools, and safety gear—you can create a setup that's not only functional but also built to last.
Remember, the tools we've covered aren't just for this project—they'll serve you well for future DIY tasks, from building a workbench to assembling a roller track for material flow. Invest in quality tools (they don't have to be the most expensive, just reliable), take your time with measurements, and prioritize safety. The result? A workspace that's organized, efficient, and tailored to your needs—all thanks to a little aluminum pipe, some aluminum profile accessories, and the right tools to bring it all together.
So grab your hex keys, level, and rubber mallet, and get started. Your lean, clutter-free workspace awaits.