- Company Articles
- Products and Technology
- Product knowledge
- Anti-Slip Adjustable Leveling Feet and Lean Tube Systems: Integration Tips

Anti-Slip Adjustable Leveling Feet and Lean Tube Systems: Integration Tips
Related Product
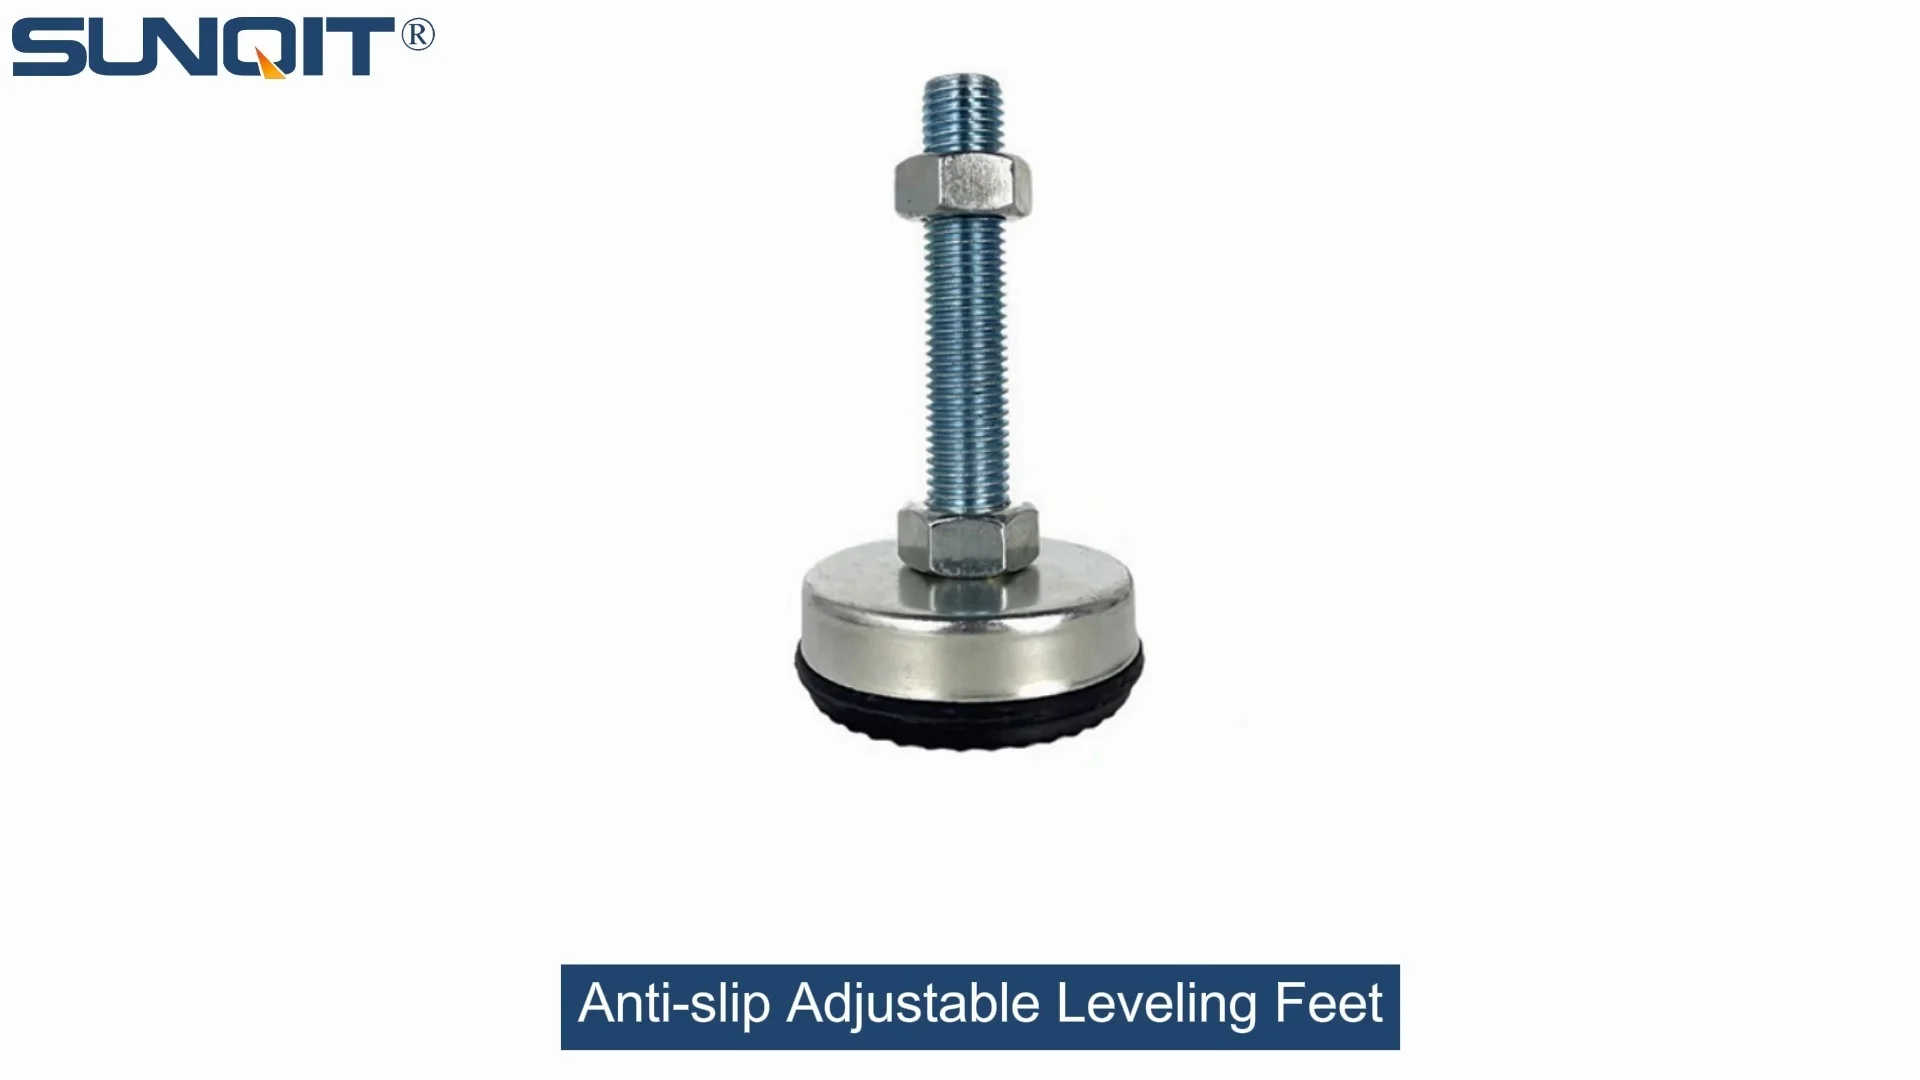
Anti-slip Adjustable Leveling Feet
Anti-slip Adjustable Leveling Feet are designed to keep machines level when placed on uneven or sloped ground, the rubber base will prevent product slip during work.
The Heart of Lean Manufacturing – Lean Tube Systems
Walk into any modern manufacturing facility, and you'll likely spot a network of modular workbenches, material racks, and assembly lines that seem to adapt and evolve with the rhythm of production. Chances are, many of these structures are built using lean tube systems – the unsung backbone of lean manufacturing. But what makes these systems so indispensable? It's their unique blend of flexibility, cost-effectiveness, and adaptability, all designed to minimize waste and maximize efficiency.
At its core, lean manufacturing is about stripping away inefficiencies: unnecessary movement, excess inventory, and time wasted on rigid, unchangeable processes. Lean tube systems embody this philosophy perfectly. Made from lightweight yet durable materials like aluminum or steel (often coated for extra protection), these tubes – often called "lean tubes" – connect using simple, reusable joints that allow teams to build, modify, and repurpose structures in hours, not weeks. Need a new workbench for a sudden production spike? Reconfigure an old material rack. Want to adjust the height of an assembly line to fit a new machine? Swap out a few tubes and joints. It's manufacturing agility in its purest form.
But here's the thing: even the most flexible system is only as good as its foundation. A wobbly workbench or a rack that shifts under load can turn a lean dream into a productivity nightmare. That's where stability comes in – and it's where anti-slip adjustable leveling feet enter the picture. These small but mighty components might not grab headlines, but they're critical for ensuring that your lean tube structures stay steady, safe, and efficient, no matter what the factory floor throws at them.
The Unsung Hero: Anti-Slip Adjustable Leveling Feet
Let's start with the basics: what exactly are anti-slip adjustable leveling feet? Imagine the feet of a workbench or a material trolley – but smarter. These aren't just static, fixed components. They're engineered to do two key jobs: level out uneven surfaces and prevent slipping, even under heavy loads. Here's how they work: most have a threaded stem that screws into the base of a structure (like a lean tube frame), allowing you to twist the foot up or down to adjust height. The bottom is usually capped with a rubber or non-slip pad that grips the floor, while the top might feature a plate or bracket to attach securely to the frame.
Why does this matter? Factory floors are rarely perfect. Over time, concrete can crack, tiles can shift, or machinery can create small indentations. Even a 1/4-inch difference in floor height can make a workbench wobble. For precision tasks – think electronics assembly or parts inspection – that wobble isn't just annoying; it can lead to errors, rework, or even safety hazards. Anti-slip adjustable leveling feet solve this by letting you "dial in" stability, ensuring the structure sits perfectly flat, no matter the floor's condition.
Then there's the "anti-slip" part. In busy facilities, floors can get oily, dusty, or wet – especially near machinery or cleaning zones. A metal foot might slide easily on a slick surface, but the rubber or textured pads on these leveling feet create friction, keeping the structure anchored. This is a big deal for safety: a material rack that slides during loading could tip, damaging parts or injuring workers. Even a small slip on a workbench can throw off a technician's focus, leading to mistakes.
Key features to look for? Adjustability range (how much height they can compensate for), load capacity (how much weight they can support without bending), and the quality of the anti-slip pad (look for materials like nitrile rubber, which resists oil and wear). Some even come with locking mechanisms to keep the adjusted height in place, preventing slow "creep" over time as the structure is used.

Lean Tube Systems 101: Components and Flexibility
To understand how anti-slip adjustable leveling feet integrate with lean tube systems, let's first break down the system itself. At its most basic, a lean tube system consists of three main components: the tubes, the joints, and the accessories. Let's start with the star of the show: the lean tube.
Lean tubes come in various materials, but the most common are aluminum and steel (often coated with plastic or epoxy for durability and corrosion resistance). Aluminum lean tubes are lightweight and rust-proof, making them ideal for clean environments like pharmaceutical labs or food processing plants. Steel tubes, on the other hand, are heavier and stronger, better suited for heavy-duty applications like automotive manufacturing. Both types are typically 28mm or 30mm in diameter, though sizes can vary based on load requirements.
Next up: lean pipe joints. These are the connectors that turn tubes into structures. Think of them as the "Lego blocks" of lean systems. Most joints are made of metal (like zinc-plated steel) and come in fixed or rotating designs. Fixed joints lock tubes at specific angles (90°, 45°, 180°), while rotating joints allow for flexibility – useful for structures that need to pivot or adjust. The magic of these joints is their simplicity: they clamp onto the tubes using set screws or bolts, requiring no welding or specialized tools. This means a team can assemble a basic workbench in under an hour, and take it apart just as quickly if needs change.
Accessories round out the system: casters for mobility, shelves for storage, tool hooks, and – you guessed it – leveling feet. These accessories turn a basic frame into a functional tool. For example, adding a flat wooden or metal top to a tube frame with leveling feet creates a workbench. Attach casters instead, and it becomes a mobile trolley for moving materials between stations. It's this modularity that makes lean tube systems so popular: they grow with your needs, rather than forcing you to buy new equipment every time processes change.
But here's the catch: all this flexibility can sometimes come at the cost of stability. Because the joints are clamped, not welded, and the tubes are lightweight, a poorly anchored structure can shift or wobble – especially under heavy loads or vibration. That's where anti-slip adjustable leveling feet become critical. They're the anchor that turns a "good enough" structure into a rock-solid foundation for productivity.

Integrating Anti-Slip Adjustable Leveling Feet: A Step-by-Step Guide
So, you've decided to upgrade your lean tube structure with anti-slip adjustable leveling feet. Great choice – but how do you actually integrate them? It's not as simple as screwing them on and calling it a day. Let's walk through the process step by step, from planning to testing, to ensure a seamless, stable result.
Step 1: Assess Your Needs and Environment
Before you buy a single leveling foot, take a close look at your structure and the space it's in. Ask yourself: What's the total weight the structure will support? (This includes the weight of the tubes, joints, any shelves or tops, and the materials/equipment on it.) How uneven is the floor? (Use a spirit level to check – even small slopes matter.) Are there any environmental factors? (Oily floors? High humidity? These affect anti-slip pad choice.)
For example, a workbench used for light electronics assembly might only need leveling feet with a 200kg load capacity. But a material rack holding heavy automotive parts could require 500kg+ per foot. Similarly, a factory with concrete floors might use standard rubber pads, while a facility with polished tile might need extra-grip pads to prevent slipping.
Step 2: Choose the Right Leveling Feet for Your Lean Tube System
Not all leveling feet are created equal, and not all will work with lean tube systems. The key here is compatibility with your lean pipe joints and tube diameter. Most lean tubes have a standard diameter (28mm, 30mm, etc.), so look for leveling feet with mounting brackets or plates that fit these sizes. Some feet come with threaded stems that can screw directly into a base joint, while others require a separate mounting plate that attaches to the tube frame.
Load capacity is non-negotiable. As a rule of thumb, calculate the total weight of your structure (tubes, joints, top, and maximum load) and divide by the number of feet (usually 4 for a workbench, 6-8 for a larger rack). Then, choose feet with a load capacity that's 20-30% higher than this number – it's better to over-engineer than risk failure. For example, a 4-legged workbench with a total weight of 400kg would need feet rated for at least 100kg each; aim for 120-130kg to be safe.
Step 3: Prepare the Lean Tube Structure
Once you have the right feet, it's time to prep the structure. If you're building a new structure, this is straightforward: just plan the base frame to include mounting points for the feet. If you're retrofitting an existing structure, you'll need to remove any existing feet or casters and ensure the base tubes are clean and undamaged. Check for bent tubes or loose joints – a wobbly frame will still be wobbly even with leveling feet, so tighten any loose set screws or replace damaged parts first.
For most lean tube systems, the feet attach to the bottom of the base tubes. This might mean adding short "stub" tubes to the corners of the frame to create mounting points, or using specialized lean pipe joints that have threaded holes for the leveling feet. Some manufacturers sell "leveling foot joints" – pre-made joints that combine a standard lean pipe connector with a threaded stem for the leveling foot. These can save time and ensure a secure fit.
Step 4: Install and Adjust the Feet
Now comes the hands-on part: installing the feet. Start by screwing the feet into their mounting points – hand-tighten first to avoid cross-threading. Once all feet are attached, place the structure in its final position. Then, grab a spirit level (a digital level with a backlight works best for precision) and place it on the top surface of the structure. Adjust one foot at a time, turning the threaded stem clockwise to lower it or counterclockwise to raise it, until the bubble is centered both front-to-back and side-to-side.
Pro tip: Work in a diagonal pattern. For a 4-legged structure, adjust the front-left foot, then the back-right, then front-right, then back-left. This ensures the structure doesn't "rock" as you adjust. Once level, lock the feet in place if they have locking nuts – this prevents them from unscrewing over time due to vibration.
Step 5: Test for Stability and Anti-Slip Performance
You're not done yet! After adjusting, test the structure to make sure it's stable. Push gently on each corner – it shouldn't rock or shift. Place a load on top (simulating the maximum weight it will hold during use) and check again. For anti-slip testing, wipe the floor with a damp cloth (to simulate oil or water) and try to push the structure sideways. It should resist sliding – if it moves easily, the anti-slip pads might be worn or the floor is too slick; consider upgrading to a higher-grip pad material.
Finally, mark the position of the feet on the floor with tape (if the structure won't be moved often). This makes it easy to reposition it exactly if you need to clean underneath or temporarily relocate it.

Best Practices for Long-Term Success
Installing anti-slip adjustable leveling feet is just the first step. To keep your lean tube system stable and efficient for years, follow these best practices:
1. Regular Inspections
Make it part of your team's routine to check the leveling feet during weekly equipment checks. Look for: loose locking nuts, worn or cracked anti-slip pads, bent stems, or debris (like dirt or metal shavings) stuck between the foot and the floor. Even small issues can grow – a loose nut might lead to the foot unscrewing, causing the structure to wobble.
2. Re-Level After Moves
Lean tube systems are designed to be mobile, but even rolling a structure a few feet can throw off the leveling. An uneven floor in the new location might mean the feet need readjustment. Always recheck the level with a spirit level after moving a structure, and adjust as needed.
3. Match Feet to the Environment
Different environments demand different feet. In a cold storage facility, rubber pads might harden and lose grip – opt for polyurethane pads, which stay flexible in low temps. In a chemical plant, look for feet with corrosion-resistant stems (like stainless steel) and chemical-resistant pads. If you're unsure, ask your lean tube supplier for recommendations – they'll know which materials work best in your specific conditions.
4. Don't Overload
Even the strongest leveling feet have limits. Overloading a structure can bend the stems, crack the pads, or damage the lean pipe joints. Post the maximum load capacity clearly on the structure (use a label or sign) and train teams to respect it. If you need to increase capacity, add more feet (e.g., going from 4 to 6 legs) or upgrade to heavy-duty feet with higher load ratings.
5. Plan for Growth
As your lean tube system grows (adding shelves, extending the frame), remember that the weight will increase too. A workbench that starts with a 200kg load might end up holding 400kg after adding a second shelf. When planning expansions, factor in the additional weight and upgrade the leveling feet if needed. It's cheaper to replace a few feet now than to repair a collapsed structure later.
Common Challenges and How to Solve Them
Even with careful planning, integrating leveling feet with lean tube systems can hit snags. Here are the most common challenges and how to overcome them:
Challenge 1: The Structure Still Rocks After Leveling
You've adjusted the feet, the level says it's flat, but the structure still rocks when you push it. What's going on? Chances are, the floor has a "dish" or unevenness that the level didn't catch. For example, the center of the floor might be slightly lower than the corners, making the structure rock like a seesaw.
Solution: Use a longer level (3-4 feet) to check the entire surface, not just the corners. If the floor is uneven in the middle, add additional leveling feet along the sides or center of the structure. For large racks, consider 6 or 8 feet instead of 4 – more points of contact mean better stability.
Challenge 2: Leveling Feet Won't Attach to Lean Pipe Joints
You bought leveling feet, but the threaded stem doesn't fit the holes in your lean pipe joints. This is common if you're mixing parts from different suppliers – thread sizes (like M10 vs. M12) or joint designs can vary.
Solution: Use adapter plates or universal mounting brackets. These metal plates attach to the lean tube frame using standard lean pipe joints, then have holes that fit a variety of leveling foot stems. Most lean tube suppliers sell these adapters, or you can have them custom-made for odd-sized joints.
Challenge 3: Anti-Slip Pads Wear Out Quickly
In high-traffic areas, the anti-slip pads on the feet might wear down in just a few months, losing their grip. This is especially true if the floor is rough (like unfinished concrete) or if the structure is moved frequently.
Solution: Upgrade to replaceable pads. Many leveling feet have detachable pads that can be unscrewed and replaced when worn, instead of buying new feet. Look for pads made of high-density rubber or polyurethane, which are more durable than standard rubber. For extremely rough floors, consider steel-reinforced pads with a textured surface.
Challenge 4: Vibration Causes Feet to Loosen
If the structure is near heavy machinery (like presses or conveyors), constant vibration can loosen the leveling feet over time, even with locking nuts. This leads to gradual wobbling and instability.
Solution: Use thread-locking compound (like Loctite) on the stem threads before installing the feet. This prevents the threads from vibrating loose. For extra security, choose feet with double-locking nuts – two nuts that tighten against each other, creating friction that resists movement.
Real-World Success Stories
Still not convinced that anti-slip adjustable leveling feet are worth the investment? Let's look at two real-world examples of how they transformed lean tube systems from "good" to "game-changing."
Case Study 1: Automotive Assembly Plant
A mid-sized automotive parts manufacturer was struggling with quality issues on their brake caliper assembly line. The workbenches, built with basic lean tube systems, wobbled slightly due to uneven concrete floors. This wobble caused workers to misalign small components, leading to a 5% error rate and hours of rework each week.
The solution? Upgrading to heavy-duty anti-slip adjustable leveling feet. The team installed feet with 500kg load capacity and nitrile rubber pads on each workbench. After leveling, the wobble disappeared. Within a month, error rates dropped to 0.5%, and rework time was cut by 75%. Workers reported less fatigue (no more compensating for wobble) and better focus. The plant manager later said, "We thought the wobble was just part of factory life – we never realized how much it was costing us until we fixed it."
Case Study 2: Electronics Manufacturing Facility
An electronics plant producing circuit boards had a different problem: static electricity and slippery floors. Their ESD (electrostatic discharge) workbenches were on casters, but the casters often slid on the factory's polished concrete floors, especially when workers moved quickly. Static from the sliding casters occasionally damaged sensitive components, costing thousands in scrap.
The fix? Replacing the casters with anti-slip adjustable leveling feet on half the workbenches (the ones used for static-sensitive tasks). The feet's rubber pads prevented sliding and also helped dissipate static (when paired with ESD-safe materials). The result: a 90% reduction in static-related damage and a safer, more stable workspace. The plant later standardized on leveling feet for all ESD workbenches.
Comparison Table: Anti-Slip Adjustable Leveling Feet for Lean Tube Systems
| Type | Material | Load Capacity (per foot) | Anti-Slip Feature | Best For | Compatibility with Lean Pipe Joints |
|---|---|---|---|---|---|
| Standard Adjustable | Zinc-plated steel stem, rubber pad | 200-300kg | Standard rubber pad (good for dry floors) | Light-duty workbenches, small material racks | Fits most standard lean pipe joints (M10 thread) |
| Heavy-Duty | Stainless steel stem, polyurethane pad | 500-1000kg | Polyurethane pad (resists oil, chemicals, wear) | Heavy material racks, assembly lines with large equipment | Requires heavy-duty lean pipe joints or adapter plates |
| Low-Profile | Aluminum stem, nitrile rubber pad | 150-250kg | Thin, high-grip nitrile pad (for tight spaces) | Low workbenches, under-shelf storage racks | Best with short lean tube stubs or specialized low-profile joints |
| ESD-Safe | Brass stem, conductive rubber pad | 200-400kg | Conductive rubber (dissipates static electricity) | Electronics assembly, static-sensitive component handling | Compatible with ESD-rated lean pipe joints |
Conclusion: Small Components, Big Impact
In the world of lean manufacturing, it's easy to focus on big-picture systems: kanban boards, automated conveyors, or 5S protocols. But as we've explored, the smallest components often have the biggest impact. Anti-slip adjustable leveling feet might not look like much – just metal stems and rubber pads – but they're the foundation that turns flexible lean tube systems into stable, efficient, and safe workspaces.
By integrating these feet thoughtfully – choosing the right type for your environment, installing them carefully, and maintaining them regularly – you can eliminate wobble, reduce errors, and create a workspace that adapts to your needs without sacrificing stability. Whether you're building a new lean tube system or upgrading an existing one, don't overlook these unsung heroes. Your team, your products, and your bottom line will thank you.
As lean manufacturing continues to evolve, we'll likely see even smarter leveling feet – maybe with built-in sensors that alert you when they're loose, or self-leveling mechanisms that adjust automatically. But for now, the basics still work: a well-chosen, properly installed anti-slip adjustable leveling foot is one of the best investments you can make in your lean tube system. After all, in lean manufacturing, efficiency starts from the ground up.