- Company Articles
- Products and Technology
- Installation And Maintenance
- Avoiding Mistakes When Integrating Aluminum Guide Rail A with Existing Equipment

Avoiding Mistakes When Integrating Aluminum Guide Rail A with Existing Equipment
Related Product
Aluminum Guide Rail A
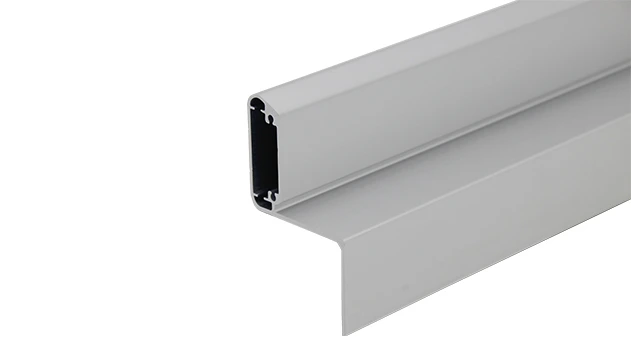
The aluminum guide rails hold the transport goods securely on the roller track. For installation, the guide rails are simply pushed over the roller tracks.To protect sensitive products.
In the fast-paced world of manufacturing, where every second counts and efficiency is the backbone of productivity, the ability to adapt and upgrade existing equipment can make or break your production line. Whether you're running a 3C assembly plant churning out smartphones or a medical device workshop crafting life-saving tools, the integration of new components into legacy systems is often a necessary step toward improvement. One such component that's been gaining traction for its flexibility and durability is the Aluminum Guide Rail A. But here's the thing: while this guide rail promises to streamline workflows and enhance adaptability, integrating it with your existing equipment isn't as simple as screwing a few parts together. Many teams dive in without proper planning, only to face downtime, compatibility headaches, and even safety risks later on. Today, let's walk through the common pitfalls and how to steer clear of them—because getting it right the first time isn't just about saving time; it's about building a production line that grows with your needs.
Why Aluminum Guide Rail A Stands Out in Lean System Integration
Before we jump into the mistakes, let's take a moment to understand why Aluminum Guide Rail A has become a go-to choice for manufacturers aiming to boost their lean system. Unlike rigid steel rails or flimsy plastic alternatives, this guide rail brings together the best of both worlds: the lightweight nature of aluminum (making installation and adjustments a breeze) and the structural integrity needed to handle the daily grind of production. Its modular design aligns perfectly with the "reusable, continuously improvable" lean philosophy—you can reconfigure it as your production needs change, without having to replace the entire system. Whether you're adding it to a workbench for smoother material handling, integrating it into a flow rack to speed up order picking, or using it to guide components on a conveyor, Aluminum Guide Rail A is built to adapt. But its versatility is also where the trouble can start. Without a clear plan, that adaptability can turn into chaos. Let's break down the missteps you'll want to avoid.
5 Critical Mistakes to Avoid (and How to Fix Them)
Mistake #1: Overlooking Existing Equipment's Size Tolerances—The "Close Enough" Trap
Here's a scenario many production managers know too well: You order Aluminum Guide Rail A, excited to upgrade your aging workbench, only to find that the pre-drilled holes on the workbench don't line up with the rail's mounting points. Or maybe the rail is slightly wider than the space between the workbench's side frames, forcing you to grind down metal or rig a shaky workaround. Sound familiar? This happens when teams assume "standard" measurements are universal. In reality, older equipment—especially workbenches or flow racks that have been in use for years—often have worn or slightly off-kilter dimensions due to repeated use, temperature changes, or even previous modifications.
The Fix: Start with a "measure twice, install once" mindset. Before ordering, grab a caliper, a level, and a tape measure, and document every relevant dimension of your existing equipment. Note the distance between mounting holes, the height of the surface where the rail will sit, and even the squareness of the frame (a workbench that's slightly warped can throw off rail alignment). Don't rely on the equipment's original specs—measure the actual, current state. Many suppliers, including those specializing in lean system components, offer adjustable mounting brackets or shims designed to bridge small gaps. For example, Aluminum Guide Rail A often comes with slotted mounting holes that allow for ±2mm of adjustment, which can save you from a headache when your workbench's holes are just a hair off.
Mistake #2: Underestimating Load Capacity—When "It Looks Strong Enough" Backfires
Imagine this: You've installed Aluminum Guide Rail A on your flow rack, eager to see how much faster your team can unload incoming parts. The first few days go great—small boxes glide smoothly down the rail. But then, a shipment of heavier components arrives, and suddenly, the rail starts to bow in the middle. The next thing you know, parts are getting stuck, and you're left with a bent rail and a bottleneck in your process. This is the result of underestimating load capacity—a mistake that's easy to make when you focus only on the rail's advertised weight limit without considering real-world conditions.
Aluminum Guide Rail A, like any component, has a maximum load rating, but that number is based on ideal conditions: evenly distributed weight, proper mounting spacing, and horizontal installation. In reality, your flow rack might have the rail mounted at a slight incline (increasing stress on the mounting points), or the parts sliding down might be unevenly packed (creating concentrated weight in one spot). Even the number of support brackets matters—skimping on brackets to save time during installation can turn a 200kg-rated rail into one that fails at 150kg.
| Scenario | Common Miscalculation | Corrected Approach |
|---|---|---|
| Flow rack with 3-row, 3-floor setup (Material Rack B) | Assuming 200kg total load = 67kg per floor | Account for uneven distribution: 80kg max per floor, plus 20% buffer = 96kg capacity per rail section |
| Workbench E with single deck (no casters) | Using rail rated for 100kg for tool storage | Factor in dynamic load (tools being placed/removed): 100kg static load + 30% dynamic buffer = 130kg-rated rail |
| Conveyor integration for 3C assembly parts | Relying on rail's "per meter" rating alone | Multiply per-meter rating by rail length, then divide by number of support brackets to ensure even weight distribution |
The Fix: Start by listing all the items that will move along the rail—their weights, sizes, and how often they'll be loaded/unloaded. Then, check the manufacturer's data sheet for Aluminum Guide Rail A, paying close attention to both static (stationary) and dynamic (moving) load limits. Add a 20-30% buffer to these numbers to account for unexpected stress (like a operator accidentally dropping a heavy part). If you're unsure, reach out to your supplier—reputable lean pipe suppliers have technical teams that can help calculate the right rail (specifications) for your specific use case. And don't forget the support brackets: spacing them too far apart is a recipe for sagging. As a rule of thumb, for loads over 50kg, mount brackets every 50cm instead of the standard 80cm.
Mistake #3: Ignoring ESD Compatibility in Sensitive Environments
In industries like 3C assembly or medical device manufacturing, electrostatic discharge (ESD) isn't just a buzzword—it's a critical safety concern. A single static spark can damage sensitive circuit boards or compromise sterile equipment, leading to costly rework or even product recalls. Here's where many teams slip up: They install Aluminum Guide Rail A without checking if it's ESD-safe, assuming that "aluminum is conductive, so it must be fine." But not all aluminum rails are created equal. Standard Aluminum Guide Rail A might conduct electricity, but if it's not properly grounded or if its surface finish creates resistance, it can actually trap static charges instead of dissipating them—turning your new rail into a hidden ESD hazard.
The Fix: If your workspace requires ESD protection (and if you're working with electronics or medical devices, it almost certainly does), opt for an ESD-rated Aluminum Guide Rail A. These rails are treated with a special coating that ensures consistent static dissipation (usually between 10^6 to 10^9 ohms, per industry standards). But don't stop there—verify the entire system's grounding. The rail should connect to your workstation's existing ESD grounding point via a low-resistance cable, and all mounting hardware (screws, brackets) should also be ESD-compliant to avoid creating "break points" in the grounding path. During installation, use a multimeter to test the resistance between the rail and the ground—anything above 10^9 ohms means you've got a problem. And remember: ESD protection isn't a one-and-done check. Over time, the coating can wear off, so include regular resistance testing in your maintenance schedule.
Mistake #4: Rushing Installation Without Precision—The "Good Enough" Alignment Myth
You've measured the dimensions, checked the load capacity, and confirmed ESD compatibility—now it's time to install. You line up the rail, drill a few holes, tighten the screws, and step back, thinking, "That looks straight." But a week later, you notice parts jamming on the rail, or the conveyor belt keeps veering off course. What went wrong? More often than not, it's a lack of precision during installation. Even a tiny misalignment—1-2 degrees off horizontal or a few millimeters of height difference between rail sections—can throw off material flow, leading to friction, jams, and premature wear on both the rail and the parts moving along it.
The Fix: Slow down and use the right tools. A laser level or a long spirit level (at least 1m long) is non-negotiable for ensuring the rail is perfectly horizontal. For longer rail sections (like those used in conveyors), check alignment in both directions: along the length (to prevent slopes that cause parts to speed up/slow down unexpectedly) and across the width (to avoid lateral drift). When connecting multiple rail sections, use alignment pins or the rail's built-in interlocking features—don't rely on eye-balling it. If you're integrating the rail into a flow rack with multiple levels, make sure each level's rail is parallel to the one above/below; even a small offset can cause parts to get stuck when transferring between levels. And don't overtighten the mounting screws—aluminum can warp under excessive force, so follow the manufacturer's torque specifications (usually 8-10 Nm for M6 screws).
Mistake #5: Forgetting About Future Adaptability—Building for Today, Not Tomorrow
Lean system thrive on continuous improvement, but too many teams install Aluminum Guide Rail A with a "set it and forget it" mindset. They bolt it down permanently, use non-removable adhesives, or cut the rail to exact lengths with no room for extension. Then, six months later, a new product line requires a wider workbench or a longer flow rack, and suddenly, that "perfect" rail installation becomes a roadblock. You're left with two options: tear out the entire rail system (wasting time and money) or cobble together a jury-rigged extension that compromises efficiency. Neither is ideal.
The Fix: Plan for change from the start. Choose modular mounting hardware—like T-slot aluminum profile accessories or clamp-on brackets—that allows you to loosen, reposition, or extend the rail without drilling new holes. Leave extra length on the rail when cutting (adding 10-15cm gives you wiggle room for future extensions). If you're installing multiple rail sections, use connectors that allow for easy disassembly, so you can rearrange them as your production line evolves. Remember the lean principle of "sustainable improvement"? Your guide rail setup should embody that. For example, if you're not sure whether you'll need to add a side guard later, pre-install the mounting points for it now. It might take a few extra minutes upfront, but it'll save you hours of frustration when your production needs shift.

Real-World Example: How One Medical Device Manufacturer Got It Right
Let's put this all into context with a story from the field. A mid-sized medical device company specializing in surgical tools recently decided to upgrade their assembly line with Aluminum Guide Rail A, aiming to reduce the time spent moving small components between workstations. Initially, their team skipped the pre-installation measurements, assuming their existing workbenches (which were 5 years old) were still "standard size." When the rails arrived, they found the workbench's side frames were 1.5cm narrower than expected, forcing them to delay installation while they waited for custom brackets. To make matters worse, they'd chosen a rail with a 150kg load rating, but the metal trays carrying the tools weighed 200kg when fully loaded—within a month, the rails began to sag.
After hitting pause, the team went back to the drawing board. They measured each workbench meticulously, contacted their lean pipe supplier for adjustable brackets, and upgraded to a heavier-duty rail with a 250kg rating. They also added ESD grounding kits, since the surgical tools included sensitive electronics. The result? A smooth-running line where components glide effortlessly from station to station, and the team estimates they've cut material handling time by 30%. Plus, because they used modular brackets, they've already reconfigured two workstations to accommodate a new tool design—no new rails needed. The lesson? Taking the time to plan isn't a delay; it's an investment in long-term efficiency.

Wrapping Up: Integration Done Right—A Foundation for Lean Success
Integrating Aluminum Guide Rail A into your existing equipment isn't just about adding a new component—it's about strengthening your entire lean system. By avoiding these common mistakes—ignoring size tolerances, underestimating load, skipping ESD checks, rushing installation, and forgetting adaptability—you're not just building a better production line; you're building one that can grow, change, and improve over time. Remember, the goal of lean manufacturing isn't perfection on day one; it's creating a system that can evolve with your challenges. Aluminum Guide Rail A is a powerful tool in that journey, but like any tool, its success depends on how you use it.
So, the next time you're gearing up for an integration project, take a deep breath, grab your measuring tape, and ask: "Is this setup built to last—and to change?" Your future self (and your production metrics) will thank you.