- Company Articles
- Products and Technology
- Installation And Maintenance
- Best Practices for Aligning Castor Install Bases on Conveyor Systems

Best Practices for Aligning Castor Install Bases on Conveyor Systems
Related Product
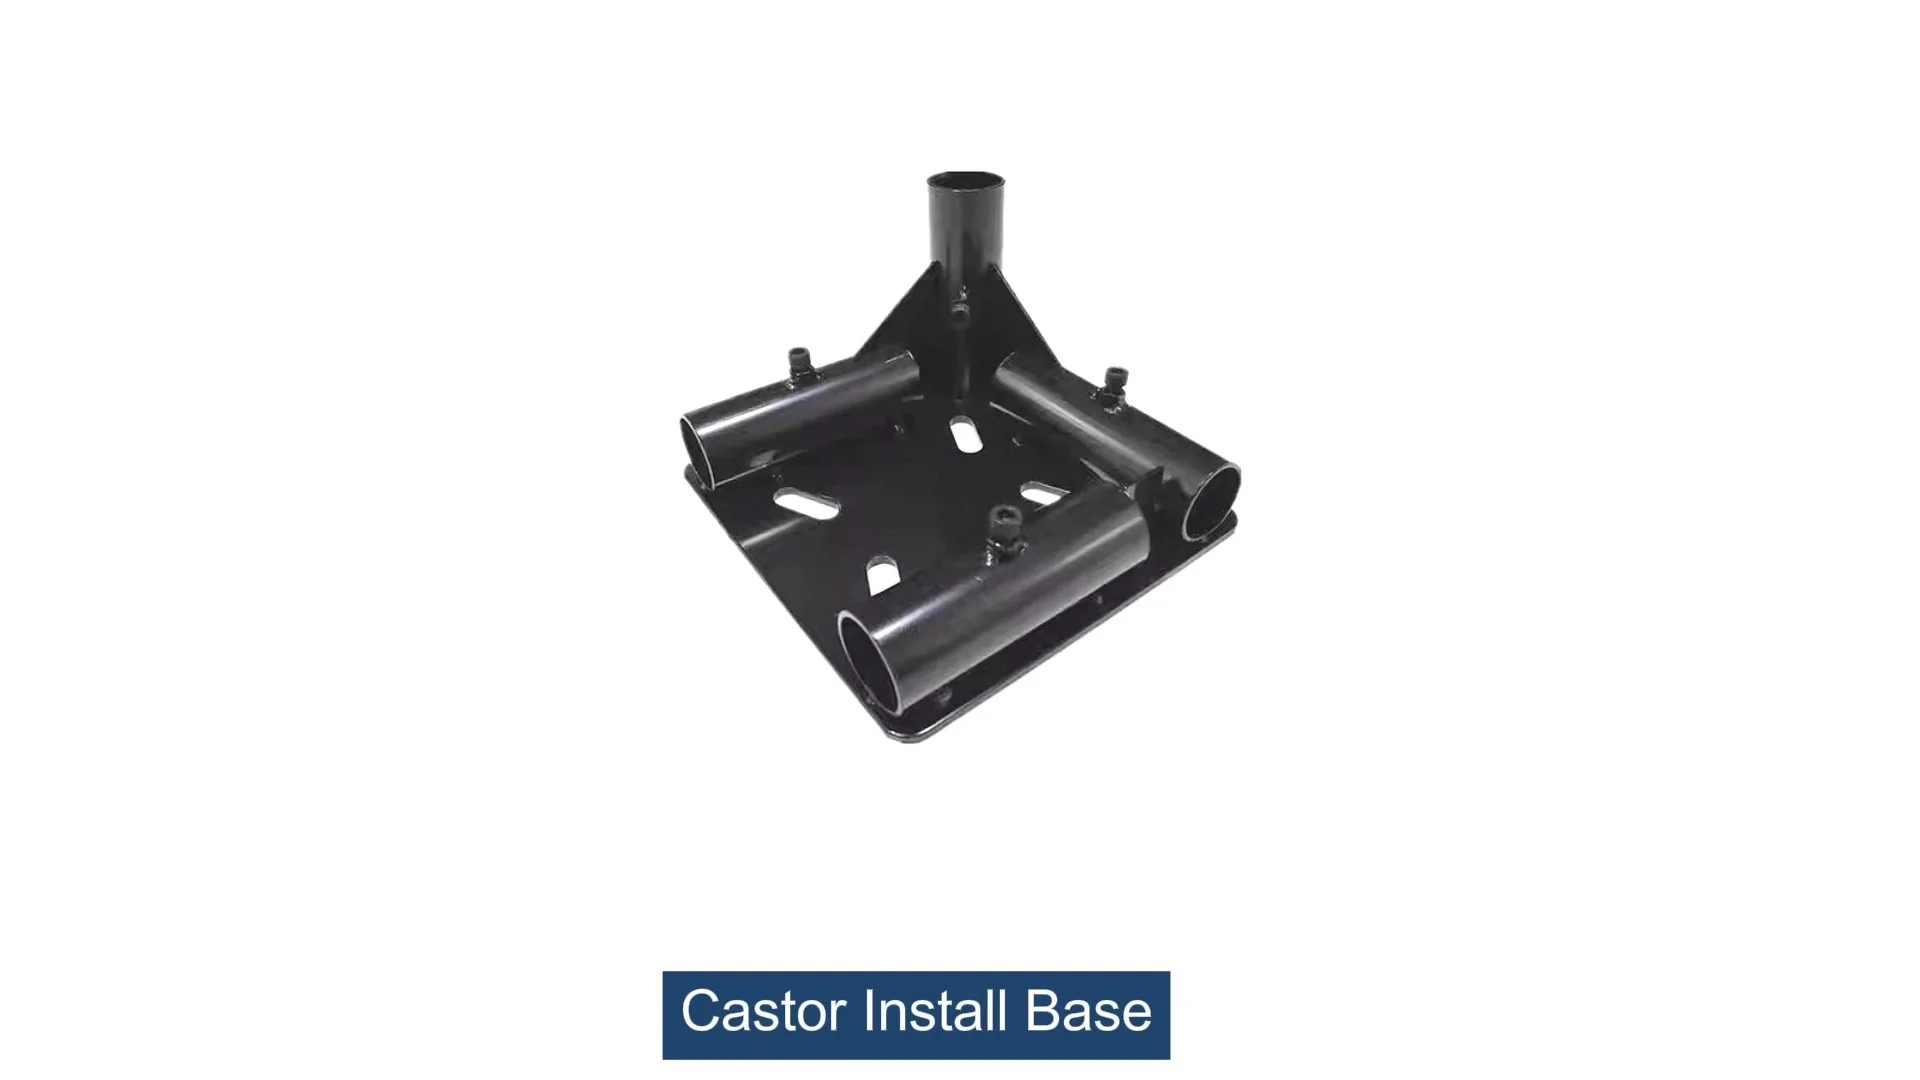
Castor Install Base
Castor install base, used for connection between pipe and castor, it can connect 4 pcs pipe by 1 pcs castor base, to make the structure strong and stable.
Picture this: It's a busy Tuesday morning on the factory floor. The assembly line hums with activity, boxes glide along conveyors, and workers move with purpose to meet the day's production targets. But suddenly, a sharp grind echoes through the space. A conveyor belt jams, halting the flow of materials. By the time the team identifies the issue—misaligned castor install bases causing the conveyor to tilt—30 minutes have passed, deadlines are tight, and frustration lingers in the air. Sound familiar? For many production managers, this scenario is all too common. What if that 30-minute delay could have been avoided with a little attention to detail during setup? That's where aligning castor install bases comes in—not as a "nice-to-have" step, but as a cornerstone of efficient, reliable conveyor systems.
In the world of lean manufacturing, where every second and every resource counts, even the smallest misalignment can ripple into bigger problems: wasted time, damaged products, and strained team morale. Castor install bases might seem like components, but they're the unsung heroes that keep conveyors stable, mobile, and aligned with the precision needed for smooth operations. Whether you're setting up a new system or maintaining an existing one, getting these bases right is non-negotiable. In this guide, we'll walk through the best practices for aligning castor install bases, drawing on real-world challenges, practical solutions, and insights from years of working with production teams to optimize their workflows. We'll also touch on how components like caster and accessories, roller track and accessories, and aluminum profile play into this critical process—because alignment isn't just about the bases themselves, but how they connect to the entire ecosystem of your conveyor system.
Understanding the Role of Castor Install Bases: More Than Just a "Base"
Before diving into alignment steps, let's clarify what castor install bases do—and why they matter so much. At their core, these bases are the foundation that connects caster wheels to the conveyor frame. They bear the weight of the conveyor and its load, absorb vibrations from movement, and ensure the entire system stays level as it transports materials. Think of them as the feet of your conveyor: if one foot is "crooked," the whole body (system) wobbles, strains, and eventually breaks down.
But their role goes beyond basic support. In dynamic production environments, conveyors often need to be repositioned—whether to adapt to new workflows, accommodate larger batches, or make space for maintenance. Castor install bases with high-quality caster and accessories (like swivel locks, brake mechanisms, and durable wheels) make this mobility possible without sacrificing stability. When aligned correctly, they allow for smooth, controlled movement, preventing sudden shifts that could misalign other components like roller tracks or workbench attachments.
Consider a scenario where a conveyor's castor bases are off by just 2 degrees. Over 50 feet of conveyor length, that tiny misalignment translates to a 2-inch height difference at the end—enough to cause boxes to slide off, jam in roller tracks, or even damage sensitive electronics on an ESD workstation. For teams working with tight tolerances (like in electronics manufacturing), this isn't just a nuisance; it's a threat to product quality and customer trust. That's why alignment isn't a one-time task—it's an ongoing commitment to precision.
Preparing for Alignment: Tools, Planning, and the "Measure Twice" Mindset
Aligning castor install bases isn't something you rush into with a wrench and a hope. It starts with preparation—gathering the right tools, assessing the workspace, and understanding the unique needs of your conveyor system. Let's break down the key steps to set yourself up for success.
1. Gather Your Tools: Quality Equipment for Precision Results
You wouldn't build a house with a dull hammer, and you shouldn't align castor bases with subpar tools. Here's what you'll need:
| Tool | Purpose | Why It Matters |
|---|---|---|
| Spirit Level (24-inch or longer) | Checking horizontal and vertical alignment | A longer level provides more accurate readings across the conveyor frame. |
| Tape Measure (50-foot, retractable) | Measuring distances between bases and from reference points | Ensures bases are evenly spaced to distribute weight. |
| Adjustable Wrenches (2 sizes) | Tightening/loosening bolts on bases and caster wheels | Prevents stripping bolts, which can ruin alignment later. |
| Shim Kit (various thicknesses: 1mm to 10mm) | Leveling bases on uneven floors | Even small gaps (1mm) can cause big alignment issues over time. |
| Laser Level (optional but recommended) | Projecting straight lines for long conveyor runs | Eliminates human error in visual alignment for systems over 20 feet. |
2. Assess the Workspace: Floors, Loads, and Environmental Factors
Even the best alignment work can fail if the floor beneath the conveyor is uneven or unstable. Start by inspecting the installation area: Are there cracks, bumps, or slopes? Use your spirit level to check the floor itself—place it in multiple spots along the conveyor's intended path. A floor that slopes more than 0.25 inches over 10 feet will need extra shimming to keep the bases level.
Next, calculate the total load the conveyor will bear. This includes the weight of the conveyor frame, motors, roller track and accessories, and the maximum product weight it will carry. Castor install bases are rated for specific weight capacities—exceeding this not only causes alignment issues but also poses safety risks. If you're unsure, consult the manufacturer's specs or reach out to your lean system supplier for guidance. Remember: It's better to overestimate than underestimate load needs.
Finally, consider environmental factors. Will the conveyor be in a dusty warehouse, a humid food processing plant, or a cleanroom? Dust and debris can get trapped under castor bases, shifting alignment over time. In humid environments, choose bases with corrosion-resistant materials (like stainless steel or aluminum profile) to prevent rust from warping the structure. These small adjustments upfront save hours of rework later.

Step-by-Step Alignment: From Marking to Testing
Now that you're prepared, let's walk through the alignment process itself. This step-by-step approach ensures you don't miss critical details—and leaves you with a conveyor system that runs smoothly for years.
1. Mark Reference Points: Your "North Star" for Alignment
Start by defining clear reference points. These are fixed, stable objects in your workspace that won't move—like a load-bearing wall, a permanent machine, or a laser level line projected along the floor. Measure the distance from these points to where each castor base will go, marking the floor with tape or chalk. For example, if your conveyor is 30 feet long, mark positions for each base every 5 feet (adjust based on your system's design) to ensure even spacing.
Pro tip: Use the "3-45-5" method to check for square corners if your conveyor has turns. Measure 3 feet along one reference line, 4 feet along the perpendicular line, then check that the diagonal between the two points is exactly 5 feet. If not, adjust your marks until the corner is square—this prevents the conveyor from "dog-legging" down the line.
2. Mount the Bases Temporarily: Snug but Not Tight
Attach each castor base to the conveyor frame using the manufacturer's bolts, but don't tighten them fully—leave them snug enough to hold the base in place but loose enough to adjust. This "floating" stage is crucial: it lets you shift the base slightly as you align it, without fighting against fully tightened bolts.
If your system uses aluminum profile for the frame (a popular choice for its lightweight strength), ensure the bases are mounted to the profile's T-slots using compatible brackets. Aluminum profile accessories like T-nuts and bolts are designed to grip the profile tightly without damaging it—using generic hardware here can lead to slippage and misalignment later.
3. Level Each Base Horizontally: The Spirit Level Test
Place your spirit level across the top of each castor base. The bubble should sit perfectly between the two lines. If it drifts left or right, add shims under the lower side of the base until the bubble centers. Start with the thinnest shim (1mm) and add more as needed—stacking shims is better than using one thick shim, as it distributes weight more evenly.
Check the base in both directions (front-to-back and side-to-side) to ensure it's level in all planes. A base that's level front-to-back but tilted side-to-side will still cause problems—imagine a table with one leg shorter than the others; it wobbles no matter how you sit. Take your time here: rushing through leveling is the single biggest cause of alignment failures.
4. Align Bases Vertically: Same Height, Same Direction
Once each base is level horizontally, check their heights relative to each other. Using your tape measure, measure from the floor to the top of each base—all should be within 1mm of the same height. If one is taller, remove shims; if shorter, add them. This vertical alignment ensures the conveyor frame sits flat, preventing stress on the structure and roller tracks.
Next, align the bases in the same direction. If your conveyor moves straight, all caster wheels should face forward; if it needs to swivel, ensure the bases are angled consistently (e.g., 15 degrees to the left) to avoid wheels fighting against each other. Use your reference marks to double-check that each base is in the correct position along the conveyor's path—even a ½-inch offset can lead to tracking issues with roller track and accessories.
5. Tighten Bolts in a Cross Pattern: Preventing Warping
With all bases level, aligned, and at the same height, it's time to tighten the bolts. But don't just go clockwise around the base—use a cross pattern (tighten the top-left bolt, then bottom-right, then top-right, then bottom-left) to distribute pressure evenly. This prevents the base from warping as bolts are tightened, which would throw off your hard-earned alignment.
Check the manufacturer's torque specs for the bolts—over-tightening can strip threads or crack the base, while under-tightening leaves room for movement. A torque wrench is worth the investment here; it ensures each bolt is tightened to exactly the right tension.
6. Test with Load: Real-World Conditions, Real-World Results
The final step is testing under load. Empty conveyors might seem aligned, but adding weight can reveal issues. Load the conveyor with products similar to what it will carry daily (or use weighted boxes if you're setting up a new system), then run it for 30 minutes. Watch for:
- Uneven movement: Does the conveyor drift left or right?
- Jamming: Do products get stuck on roller tracks or at transitions?
- Vibration: Excessive shaking can indicate misaligned bases or unbalanced wheels.
- Noise: Grinding or squeaking may mean caster wheels are rubbing against the frame due to poor alignment.
If you notice any of these issues, stop the conveyor, loosen the affected base's bolts, and make small adjustments. It's normal to need 2-3 rounds of testing and tweaking—precision takes patience. Once the conveyor runs smoothly under load, you're ready to lock everything in place.

Troubleshooting Common Alignment Headaches
Even with careful work, alignment issues can pop up. Here's how to diagnose and fix the most common problems:
Problem: Conveyor Drifts to One Side
**Possible Cause:** Bases on one side are slightly taller than the other, or caster wheels are angled inconsistently. **Fix:** Measure base heights again, adding/removing shims to balance. Check wheel direction—ensure all face the same way and their swivel locks (if used) are engaged.
Problem: Roller Tracks Jam Products
**Possible Cause:** Castor bases are aligned, but roller tracks themselves are misaligned with the conveyor frame. **Fix:** Use roller track and accessories like connectors and placon mounts to adjust track height and angle. Ensure tracks are parallel to the conveyor's direction and level with the bases.
Problem: Bases Loosen Over Time
**Possible Cause:** Vibrations from the conveyor or heavy loads loosen bolts. **Fix:** Use thread-locking fluid on bolts (avoid on aluminum profile, as some fluids can corrode it). Schedule weekly checks to retighten bolts—this quick habit prevents big issues.

Long-Term Maintenance: Keeping Alignment Sharp
Alignment isn't a "set it and forget it" task. To keep your conveyor running smoothly, adopt these maintenance habits:
- Daily Visual Checks: Have operators glance at castor bases and wheels during pre-shift inspections. Look for cracks, loose bolts, or debris buildup.
- Weekly Measurements: Use your spirit level and tape measure to check base height and alignment. Catching a 1mm shift early is easier to fix than a 5mm shift later.
- Monthly Cleaning: Sweep or vacuum under bases to remove dirt that can shift alignment. Clean caster wheels with a brush to prevent debris from getting stuck in bearings.
- Quarterly Lubrication: Apply lubricant to caster wheel bearings and swivel joints (use food-grade lubricant in sensitive environments). This reduces friction and vibration that can loosen bases.
- Annual Overhaul: Once a year, fully inspect all bases, replacing worn caster and accessories (wheels, brakes, shims) as needed. This proactive step extends your system's lifespan.
Why Aluminum Profile Matters for Lasting Alignment
Throughout this guide, we've mentioned aluminum profile as a top choice for conveyor frames and castor bases—and for good reason. Aluminum's unique properties make it ideal for maintaining alignment over time:
- Lightweight yet Strong: Aluminum profile is lighter than steel, reducing stress on castor bases and wheels. Its strength-to-weight ratio means it won't bend under heavy loads, keeping alignment stable.
- Corrosion-Resistant: Unlike steel, aluminum doesn't rust—critical in damp or dusty environments where rust can warp bases and throw off alignment.
- Precision Machining: Aluminum extrusion processes create profiles with tight tolerances (often within 0.1mm), ensuring consistent dimensions that make alignment easier.
- Modular Design: Aluminum profile accessories like brackets, connectors, and T-slots let you adjust bases and frames quickly, adapting to new workflows without rebuilding from scratch.
For lean system managers, aluminum profile also aligns with sustainability goals—recyclable, energy-efficient to produce, and durable enough to last decades. It's an investment that pays off in both performance and peace of mind.
Conclusion: Alignment as a Foundation for Excellence
Aligning castor install bases might not be the most glamorous part of setting up a conveyor system, but it's one of the most impactful. It's the difference between a production line that hums with efficiency and one that sputters with delays. It's the reason your team can focus on building quality products instead of fixing preventable problems. And it's a tangible expression of the lean system principle: respect for people and processes through attention to detail.
As you implement these best practices—preparing thoroughly, aligning carefully, maintaining consistently—remember that every small adjustment adds up. A level base here, a tightened bolt there, a cleaned wheel over there—these steps build a conveyor system that doesn't just move products, but moves your business forward. And when you pair that with quality components like caster and accessories, roller track and accessories, and aluminum profile, you're not just aligning a machine—you're aligning your team for success.
So the next time you walk past your conveyor, take a moment to appreciate those castor install bases. They're quiet, unassuming, and absolutely essential. And with the right care, they'll keep your operations running smoothly for years to come—one perfectly aligned step at a time.