- Company Articles
- Products and Technology
- Installation And Maintenance
- Best Practices for Storing One Way Rotatory Straight Lean Pipe Joint Chrome When Not in Use

Best Practices for Storing One Way Rotatory Straight Lean Pipe Joint Chrome When Not in Use
Related Product
One Way Rotatory Straight Lean Pipe Joint Chrome
Two way lean pipe joint for 2 pcs 28MM lean pipe connection in straight angle with rotatory fucntion, which used widely in workbench, flow rack, hand trolley frame connection.
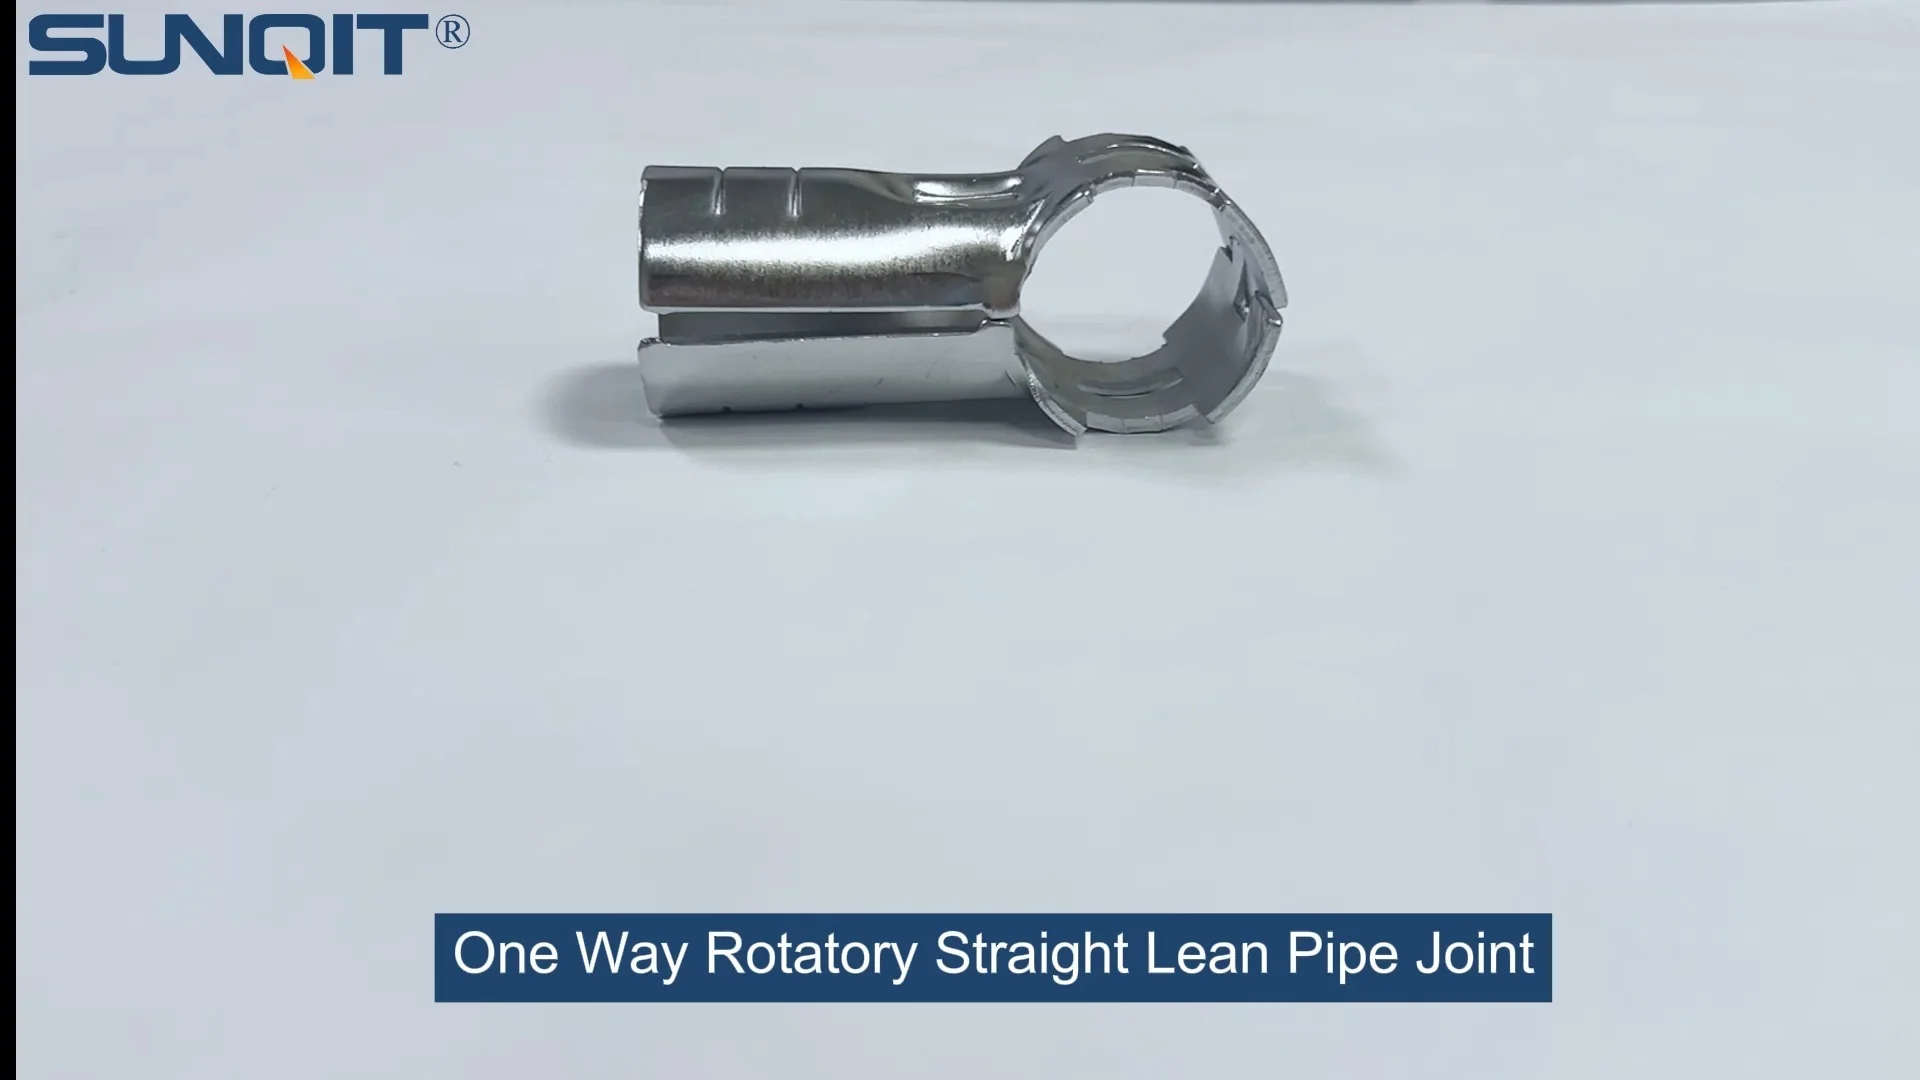
In the world of lean manufacturing, every component counts—even the smallest ones. While production teams often focus on optimizing workbenches, flow racks, or conveyor systems, it's the tiny, unsung heroes like the one way rotatory straight lean pipe joint chrome that keep these systems running smoothly. These unassuming joints, with their precision-engineered rotation and durable chrome finish, are the backbone of modular assemblies, enabling the flexibility and adaptability that define lean systems. But here's the thing: their reliability depends as much on how you store them as how you use them.
Walk into any workshop, and you might find bins overflowing with loose joints, rust spots creeping across chrome surfaces, or workers rummaging through piles to find the right part. It's a common scene, but it's also a silent productivity killer. Misplaced, damaged, or corroded joints lead to assembly delays, compromised structural integrity in workbenches or turnover trolleys, and unnecessary replacement costs. The good news? With intentional storage practices, you can protect these critical components, extend their lifespan, and keep your lean operations running like clockwork. Let's dive into how to do it right.
Understanding Your One Way Rotatory Straight Lean Pipe Joint Chrome
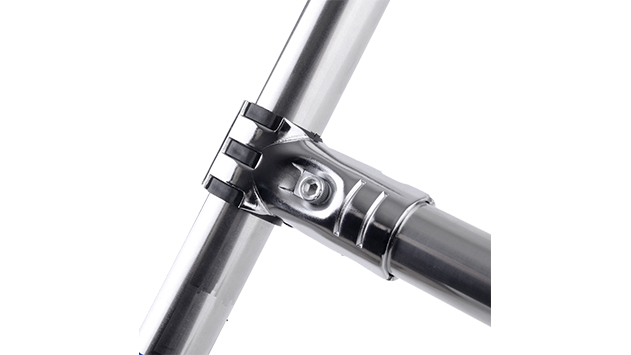
Before we talk storage, let's make sure we're all on the same page about what we're protecting. The one way rotatory straight lean pipe joint chrome is a specialized connector designed for use with lean pipes—those versatile tubes that form the framework of everything from workbenches to material racks. What sets this joint apart is its unique one-way rotation mechanism, which allows for controlled, directional movement in assemblies. This makes it ideal for applications like roller tracks, where parts need to glide smoothly in a specific direction, or adjustable workbenches that require precise positioning.
Most of these joints start as steel components, then undergo a chrome-plating process to boost durability and resistance to corrosion. That chrome layer isn't just for shine; it's a protective barrier that stands up to the wear and tear of daily use. But here's the catch: chrome is tough, but it's not invincible. Scratches, moisture, or prolonged exposure to harsh environments can chip away at that barrier, leaving the underlying steel vulnerable to rust. And when the joint's moving parts—like the internal mechanisms that enable one-way rotation—get gunked up with dust or grime, their precision suffers. Suddenly, that smooth rotation becomes stiff or inconsistent, throwing off the entire flow of your production line.
These joints are workhorses, too. You'll find them holding together the frames of workbench E (single deck—without caster), reinforcing the shelves of material rack B (3 row and 3 floor), or connecting the rails of turnover trolleys. Their small size belies their importance: a single damaged joint can compromise the stability of a workbench, or cause a flow rack to misalign, leading to jams in your production process. So, storing them properly isn't just about organization—it's about protecting the integrity of your entire lean system.
Why Skimping on Storage Hurts More Than You Think
Let's get real: no one gets excited about organizing small parts. It's easy to toss a handful of joints into a spare bin at the end of the day and call it a day. But that "good enough" approach costs you in the long run. Here's how poor storage comes back to bite:
- Corrosion: The Silent Saboteur – Chrome plating resists rust, but it's not waterproof. If joints are stored in a damp corner or left on a sweaty workshop floor, moisture can seep into tiny scratches or gaps in the plating. Over time, this leads to pitting—small, ugly holes in the chrome that grow larger as rust spreads. Once rust takes hold, the joint's movement becomes gritty, and its structural strength weakens. Suddenly, that joint you thought would last years is ready for the trash.
- Physical Damage: Bends, Breaks, and Bumps – Tossing joints into a bin without dividers is like playing a game of bumper cars with your components. Metal-on-metal collisions can bend the joint's arms, crack the chrome plating, or warp the internal mechanisms. Even a small bend in the rotatory part can throw off the one-way rotation, making the joint useless for precision applications. And if you stack heavy tools on top of that bin? You're practically guaranteeing dents or fractures.
- Misplacement: Time Wasted, Money Lost – Ever spent 20 minutes hunting for a single joint because it rolled under a shelf or got mixed in with a bin of caster accessories? Multiply that by how many times a week your team faces this problem, and you're looking at hours of lost productivity. Plus, when you can't find the joints you need, you're forced to order replacements—adding unnecessary costs to your operations. It's a classic case of "penny wise, pound foolish."
- Contamination: Gunked-Up Mechanisms – Workshops are dusty, oily places, and those particles love to cling to metal surfaces. When joints sit unprotected, dust settles into their moving parts, and oil residues from nearby machinery can coat their surfaces. The next time you go to use that joint, that dust acts like sandpaper, wearing down the internal components, while oil attracts even more grime. Suddenly, that "new" joint feels old and sluggish.
Pro Tip: Think of your one way rotatory straight lean pipe joint chrome as a precision tool, not just a hardware part. Would you leave a high-quality drill bit lying on the floor? Treat your joints with the same care, and they'll repay you with reliable performance.
The Golden Rules of Joint Storage
Storing these joints doesn't have to be complicated, but it does need to be intentional. Follow these five principles, and you'll keep your joints in top shape for years:
- Keep It Clean – Before storing any joint, make sure it's free of dust, oil, or debris. Even a small amount of grime can trap moisture or scratch the chrome during storage. A quick wipe with a lint-free cloth (dry or slightly damp with water, if needed) goes a long way.
- Dry, Dry, Dry – Moisture is chrome's worst enemy. Store joints in a room with low humidity (aim for below 60%) and away from water sources like sinks, pressure washers, or leaky windows. If your workshop tends to get humid, consider using a dehumidifier near your storage area.
- Protect from Impacts – No more tossing joints into open bins. Use dividers, foam inserts, or individual compartments to keep them from knocking into each other. The goal is to treat each joint like a fragile component—because, in terms of precision, it is.
- Organize for Accessibility – Storage should make your life easier, not harder. Arrange joints so they're easy to see, grab, and count. Label bins clearly with part numbers (like "One Way Rotatory Straight Lean Pipe Joint Chrome") and quantities. This cuts down on hunting time and helps you track inventory.
- Avoid Extreme Conditions – Chrome and steel don't love temperature swings. Keep joints away from radiators, air conditioners, or direct sunlight, which can cause condensation (from rapid temperature changes) or fade the chrome over time. A stable, room-temperature environment is best.

Step-by-Step: How to Store Your Joints Like a Pro
Ready to turn those principles into action? Here's a step-by-step guide to storing your one way rotatory straight lean pipe joint chrome:
1. Prep the Joints for Storage
Before they even touch a storage bin, your joints need a little TLC. Start by inspecting each one for existing damage—scratches, dents, or signs of rust. Separate any damaged joints for repair or disposal; there's no point in storing parts that won't work when you need them. Next, clean them. Use a dry microfiber cloth to wipe away dust and loose debris. If there's oil or grease (from previous use), dampen the cloth with a small amount of mild dish soap and water, then wipe again with a dry cloth. Avoid harsh chemicals like bleach or abrasive cleaners—they can strip the chrome plating. Finally, dry each joint thoroughly. Even a drop of water left on the surface can lead to spotting, so take the time to air-dry them or pat them with a dry cloth.
2. Choose the Right Container
Not all storage bins are created equal. The container you pick should protect the joints from impacts, keep out moisture, and make organization easy. Here's a breakdown of your options:
| Storage Method | Best For | Pros | Cons |
|---|---|---|---|
| Plastic Bins with Dividers | Small to medium quantities; short-term storage (1-3 months) | Affordable, lightweight, stackable, easy to clean; dividers prevent jostling | Not airtight (moisture can seep in); may crack if dropped |
| Metal Drawers with Foam Inserts | High-value joints; long-term storage (6+ months) | Durable, pest-resistant, foam cushions prevent scratches; often lockable for security | Heavier, more expensive; requires a cabinet or rack for mounting |
| Clear Plastic Organizers with Compartments | Small quantities; frequent access | Transparent (easy to see contents), stackable, affordable | Compartments may be too small for larger joints; lids can warp over time |
| Vacuum-Sealed Bags (with Desiccant Packs) | Long-term storage (1+ years); humid environments | Airtight, moisture-proof, space-saving | Time-consuming to pack/unpack; not ideal for frequent access |
For most workshops, plastic bins with adjustable dividers are a solid middle ground. They're budget-friendly, easy to find at hardware stores, and let you customize the compartment size to fit your joints. If you're storing joints for more than six months, or if your workshop is prone to humidity, consider adding a silica gel desiccant pack to each bin—these absorb moisture and help keep the air inside dry.
3. Organize and Label
Once you've got your containers, it's time to arrange the joints. Lay them in a single layer if possible; stacking them can lead to pressure marks or scratches. If you must stack, place a piece of foam or cardboard between layers to cushion them. Use dividers to separate different joint types (for example, keep one way rotatory joints separate from 90° fixed lean pipe joints) to avoid mix-ups. Then, label everything clearly. Write the part name, quantity, and date of storage on a waterproof label (sticky labels or tape work, but a permanent marker on the bin itself is even better). If you're using multiple bins, number them (e.g., "Bin 1: One Way Rotatory Joints, 50 units") and keep a master list near the storage area. This makes inventory checks a breeze.
4. Find the Perfect Storage Spot
Now, where to put those bins? Aim for a cool, dry corner of your workshop—ideally a shelf or cabinet away from windows, doors, or areas with high foot traffic (to avoid accidental bumps). If you're using a shelf, make sure it's sturdy enough to hold the weight of the bins; a collapsing shelf could damage both the joints and whatever's below. Avoid storing joints on the floor, where they're vulnerable to water, dust, and being stepped on. If space is tight, wall-mounted shelves or cabinets are a great option—they keep joints off the ground and free up floor space for other tools.
5. Maintain the Storage Area
Storage isn't a "set it and forget it" task. Check on your joints monthly (or more often if your workshop is humid). Wipe down the bins to remove dust, check for signs of moisture inside (like condensation or mold), and rearrange if needed. If you notice any joints starting to show rust, pull them out immediately, clean them with a rust remover (follow the product instructions carefully to avoid damaging the chrome), and re-store them in a drier spot. Also, keep the area around the storage clean—spills or debris can attract pests or create a humid microclimate. A quick sweep or wipe-down every week goes a long way.
Storing Joints with Your Lean Pipe and Accessories
Chances are, your one way rotatory straight lean pipe joint chrome isn't the only lean system component you need to store. You've probably got lean pipe and accessories, plastic roller track guide rails (yellow or grey), caster wheels, and maybe even aluminum profile accessories lying around. Why not create a unified storage system that keeps all these parts organized and easy to find? Start by grouping related components together: store joints near the lean pipes they connect, keep caster accessories with caster wheels, and pair roller track connectors with roller tracks. This way, when you're building a workbench or assembling a flow rack, you can grab all the parts you need from one area, saving time and reducing frustration.
For example, if you use these joints to build turnover trolleys, store them in the same cabinet as the trolley's caster wheels, plastic pipe end caps, and aluminum guide rails. Use clear bins with color-coded labels (e.g., blue for workbench parts, red for trolley parts) to make sorting even easier. You can even take it a step further by creating "kits"—pre-packaged sets of joints, pipes, and accessories for common assemblies. Imagine grabbing a "Workbench E Starter Kit" that includes everything you need: joints, lean pipes, and a workbench top. No more hunting for individual parts—just grab the kit and go. This not only streamlines storage but also speeds up assembly times, aligning perfectly with lean manufacturing principles of eliminating waste.
Wrapping Up: Small Parts, Big Impact
At the end of the day, storing your one way rotatory straight lean pipe joint chrome is about respect—respect for the tools that keep your production line moving, respect for the time your team spends searching for parts, and respect for the lean principles that drive your operations. These small, unassuming joints play a big role in keeping your workbenches stable, your flow racks flowing, and your turnover trolleys rolling. By taking the time to clean, protect, and organize them, you're not just extending their lifespan—you're investing in the efficiency and reliability of your entire production process.
So, the next time you finish a project and have a handful of joints left over, resist the urge to toss them into a random bin. Instead, treat them like the critical components they are. Your future self (and your production team) will thank you when those joints are clean, rust-free, and ready to go the next time you need them. After all, in lean manufacturing, success is in the details—and that includes how you store your smallest parts.