- Company Articles
- Products and Technology
- Product knowledge
- Best Practices for Using Four Way Straight Lean Pipe Joint Chrome in Flexible Workstations

Best Practices for Using Four Way Straight Lean Pipe Joint Chrome in Flexible Workstations
Related Product
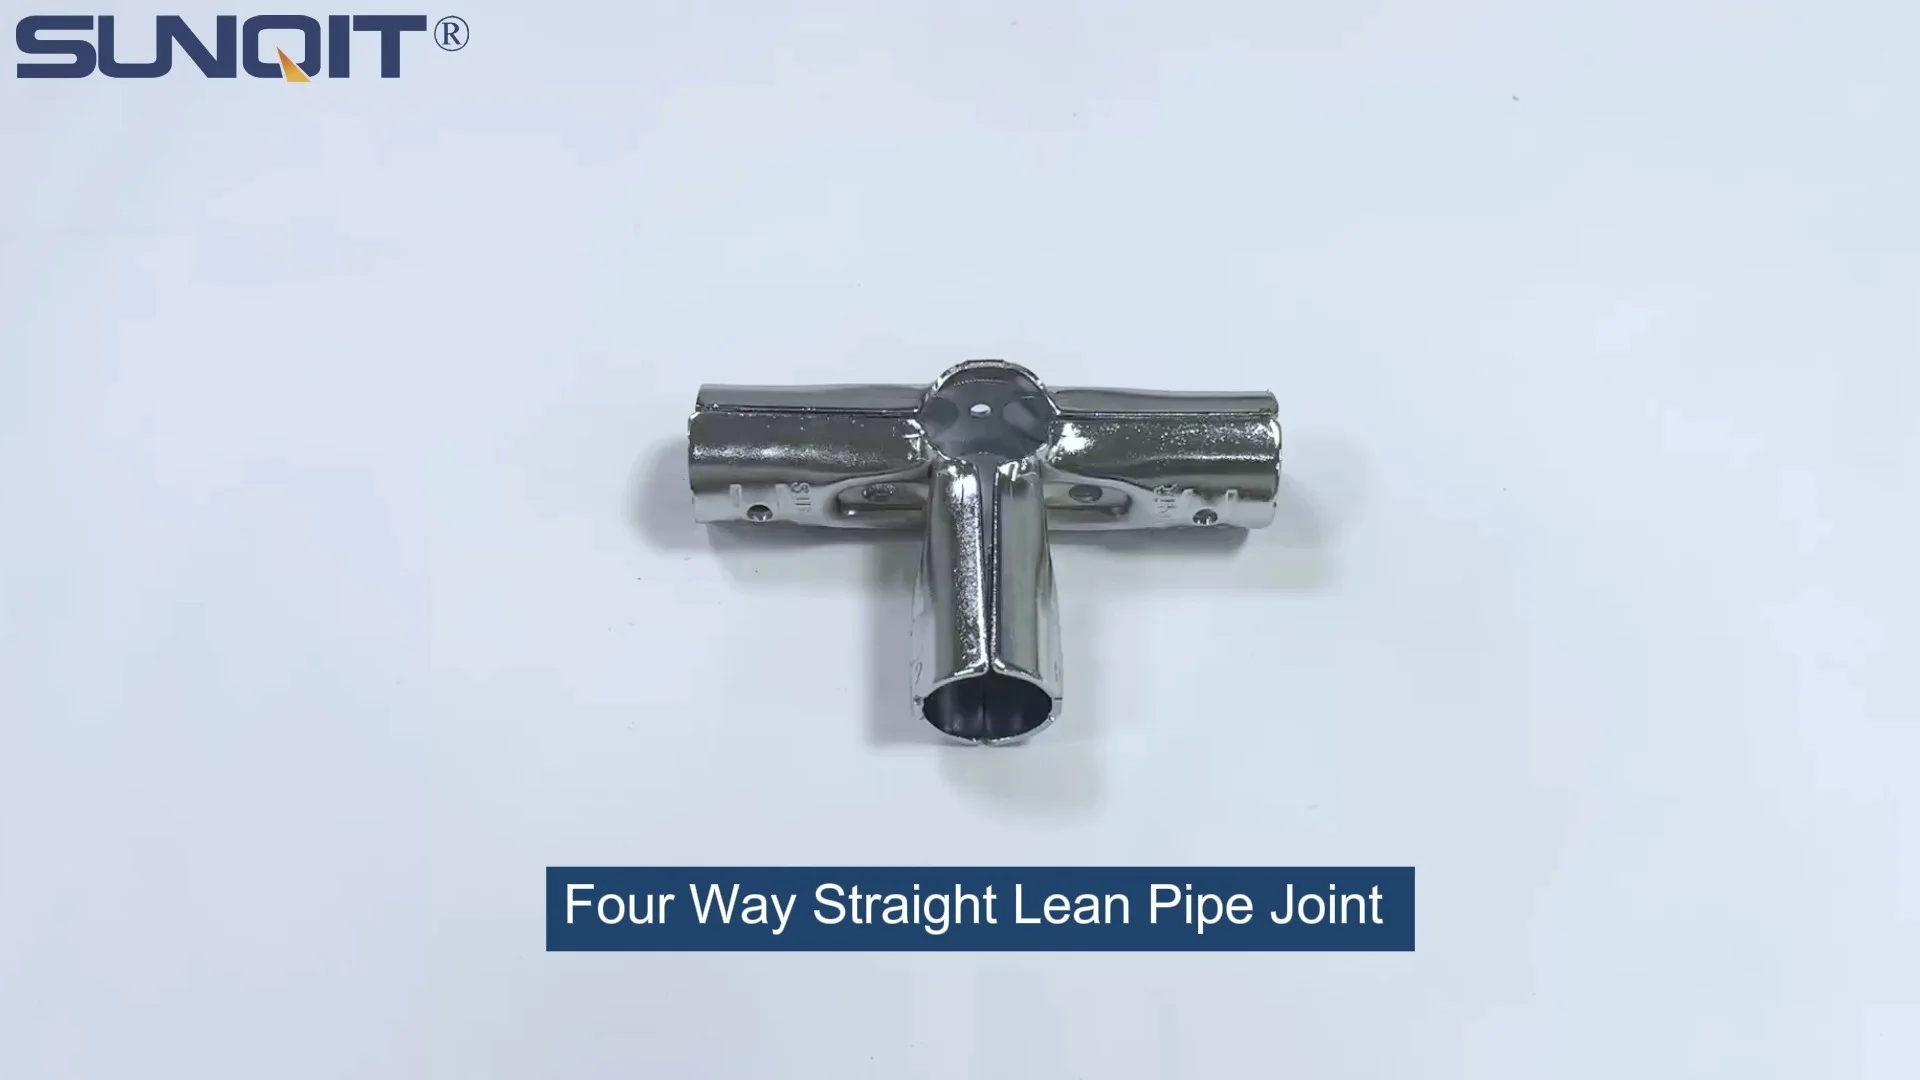
Four Way Straight Lean Pipe Joint Chrome
Four way lean pipe joint for 4 pcs 28MM lean pipe connection in straight angle, which used widely in workbench, flow rack, hand trolley frame connection.
Walk into any well-run manufacturing floor, warehouse, or assembly line, and you'll notice something common: workstations that feel intentional. They're not just tables with tools—they're ecosystems designed to make work flow. The secret? Often, it's in the details: the connectors, the pipes, the small parts that turn a static setup into something that bends, adapts, and grows with your team. Among these unsung heroes is the four way straight lean pipe joint chrome. It's a small component, but its impact on building flexible, efficient workstations is huge. Let's break down how to use this joint to its full potential, turning your workspace from "good enough" to "game-changing."
First: What Even Is a Four Way Straight Lean Pipe Joint Chrome?
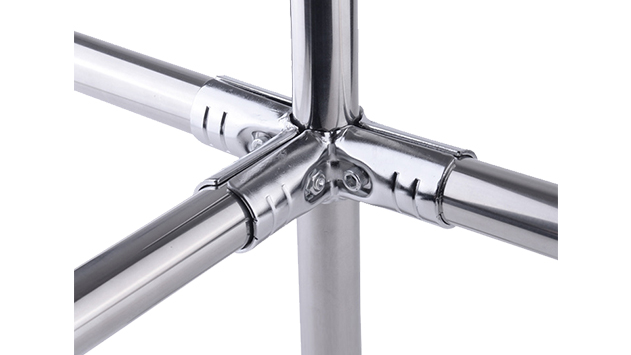
Before we dive into best practices, let's make sure we're all on the same page. A four way straight lean pipe joint chrome is exactly what it sounds like: a chrome-plated connector designed to join lean pipes (those lightweight, durable tubes used in lean manufacturing setups) at straight angles—specifically, four directions. Picture a small, sturdy cube with threaded holes or slots on four sides, letting you attach lean pipes in front, back, left, and right. The chrome finish isn't just for looks; it adds corrosion resistance, making the joint tough enough for dusty, humid, or high-use environments.
Why does this matter? In lean systems, flexibility is king. Traditional workstations are often fixed—built once, and if your needs change (new product, higher volume, different team workflow), you're stuck. Lean pipe systems, held together by joints like this four way chrome one, let you reconfigure on the fly. Add a shelf here, extend a workbench there, or rearrange a material rack—all without welding, drilling, or calling in a contractor. The four way joint is especially powerful because it lets you branch out in multiple directions, creating structures that are both strong and adaptable.
Best Practice 1: Start with Workflow, Not Parts
Here's a mistake we see all the time: teams buy a pile of lean pipes, joints, and accessories, then start building "just because." They end up with a workstation that looks cool but doesn't actually solve their workflow pain points. The four way straight lean pipe joint chrome is a tool, not a toy—so start by asking: What does our team need this workstation to DO?
Let's say you're setting up a workbench for electronics assembly. Your team might need space for tools, a place to hold components, and a way to move finished parts to the next station. A four way joint could connect the main workbench frame to a side shelf for tools and a roller track (another keyword from your list!) for moving parts. But if you skip mapping the workflow first, you might end up with extra pipes cluttering the space or a shelf that's too low, forcing workers to hunch over.
Pro tip: Grab a whiteboard and sketch the workflow step-by-step. Where do materials enter? Where do finished products exit? What tools are used most often, and how much space do they need? Once you have that map, you'll know exactly where to place four way joints to support the flow—not fight against it.
Best Practice 2: Don't Overlook Load Capacity
Chrome-plated lean pipe joints are strong, but they're not indestructible. Every joint has a load rating—the maximum weight it can safely support without bending or breaking. Ignore this, and you risk wobbly workstations, damaged tools, or worse, injuries.
The four way straight lean pipe joint chrome is typically rated for loads between 50-150 kg, depending on the manufacturer and pipe diameter (common sizes are 28mm or 30mm for lean pipes). But here's the catch: the load isn't just about the weight on top of the structure. If you're using the joint to connect a cantilevered shelf (a shelf that sticks out from the main frame), the weight on that shelf puts extra stress on the joint. For example, a 30kg toolbox on a 2-foot cantilevered shelf exerts more force than the same toolbox sitting directly on top of the joint.
How to avoid this? Check the manufacturer's specs for both the joint and the lean pipes. If you're unsure, err on the side of caution: use additional four way joints or reinforce with parallel lean pipe joints (another keyword!) to distribute weight. And remember: dynamic loads (like parts moving along a roller track) add stress too. A box sliding down a roller track might jostle the joint, so make sure the structure is anchored well.

Best Practice 3: Tighten, but Don't Over-Tighten
Assembling a lean pipe workstation with four way joints is satisfying—like building with adult Legos. But here's where many teams go wrong: cranking the bolts as tight as possible, thinking "tighter = stronger." Spoiler: it doesn't work that way.
Lean pipe joints rely on friction and the integrity of the pipe's surface to hold together. Over-tightening can strip the threads, warp the joint, or even dent the lean pipe, weakening the connection. On the flip side, under-tightening leaves the structure wobbly, which can lead to parts shifting or pipes coming loose over time.
So what's the sweet spot? Use a torque wrench (or a standard wrench with a feel for it) to tighten the bolts until they're snug—about 15-20 Nm (newton-meters) for most 28mm lean pipe joints. You should feel resistance, but the joint shouldn't bend or creak. If you're using a joint with set screws (instead of bolts), tighten until the screw bites into the pipe, then give it a quarter-turn more. And always hand-tighten first; power tools are great for speed, but they make it easy to overdo it.
Best Practice 4: Plan for Future Reconfigurations
The whole point of lean systems is adaptability. Today, you might need a workbench with two shelves; six months from now, you might need to add a third or extend the length. The four way straight lean pipe joint chrome is perfect for this—if you plan ahead.
Here's how: Leave "extra" connection points. For example, when building the main frame of a workbench, use four way joints at the corners, even if you don't need all four directions right now. Later, you can add a side rack or a material shelf by simply screwing in a new lean pipe. Similarly, avoid cutting pipes to exact lengths unless you have to; longer pipes can be trimmed later, but short pipes limit your options.
Another trick: Label your joints and pipes. Use a permanent marker to note which joint connects to which part of the structure (e.g., "Workbench leg A, top joint"). When you need to reconfigure, you won't waste time figuring out which pipe goes where. And keep a small stock of extra four way joints and lean pipe accessories (like caster wheels or roller track connectors) on hand—you'll thank yourself when inspiration strikes for a new layout.
Best Practice 5: Maintenance Matters (Yes, Even for Chrome Joints)
Chrome-plated joints resist rust, but they're not maintenance-free. Over time, dust, grease, and moisture can build up, making the joints harder to adjust or weakening the connection. A little TLC goes a long way in keeping your workstation flexible and safe.
Start with regular cleaning. Wipe down the joints with a damp cloth (or a mild degreaser if they're greasy) every month or two. Pay special attention to the threads and connection points—debris here can make it hard to tighten or loosen bolts later. If you notice any rust spots (unlikely with chrome, but possible in very humid environments), gently sand them with fine-grit sandpaper and apply a thin coat of anti-rust spray.
Also, inspect the joints for wear. Are the bolts loose? Is the chrome peeling? If a joint is bent or cracked, replace it immediately—don't try to "make do" with a damaged component. Remember: a workstation is only as strong as its weakest joint.
| Practice | Key Action | Why It Works |
|---|---|---|
| Start with Workflow | Map workflow steps before building; sketch layout. | Ensures the workstation supports how your team actually works, reducing waste. |
| Check Load Capacity | Verify joint/pipe load ratings; distribute weight evenly. | Prevents structural failure and keeps workstations stable. |
| Tighten Properly | Use torque wrench (15-20 Nm); avoid over-tightening. | Maintains joint integrity and makes future reconfigurations easier. |
| Plan for Reconfigurations | Leave extra connection points; avoid over-cutting pipes. | Let's you adapt the workstation as needs change, extending its lifespan. |
| Regular Maintenance | Clean joints monthly; inspect for wear/tightness. | Keeps joints functioning smoothly and prevents unexpected breakdowns. |
Putting It All Together: A Real-World Example
Let's wrap up with a story. A small automotive parts manufacturer we worked with recently wanted to upgrade their assembly workbenches. Their old setup was a jumble of fixed wooden tables and metal shelves—reconfiguring took hours, and tools were always scattered. They chose lean pipe systems with four way straight lean pipe joint chrome, and here's how they applied the best practices:
Step 1: Workflow Mapping They watched their team assemble brake components for a week, noting that workers spent 15% of their time walking to grab tools from a distant cart. Solution: Use four way joints to add side shelves (connected to the main workbench frame) for frequently used tools.
Step 2: Load Planning The tools on the side shelves weighed about 40kg total. They checked the joint specs (rated for 80kg) and added a parallel lean pipe joint below each four way joint to reinforce the shelf, ensuring stability.
Step 3: Smart Assembly They used torque wrenches to tighten bolts to 18 Nm, then labeled each joint with its position ("Left Shelf, Joint 1"). They left extra connection points on the back of the workbench for future additions, like a roller track to move finished parts to quality control.
Result? Tool retrieval time dropped by 75%, and when they introduced a new brake component six months later, they reconfigured the shelves in 20 minutes using the extra connection points. The chrome joints still look brand-new after a year of use, thanks to monthly wipe-downs.
Final Thoughts: It's About the Team, Not the Parts
At the end of the day, the four way straight lean pipe joint chrome is just a piece of metal. Its real power comes from how you use it to make your team's work easier, faster, and less frustrating. By starting with workflow, respecting load limits, tightening carefully, planning for change, and keeping up with maintenance, you'll build workstations that don't just hold tools—they empower people.
And isn't that the point of lean systems? To create spaces where people can do their best work, without the hassle of rigid, outdated setups. So grab your lean pipes, your four way joints, and start building something that works with your team—not against them. Your future self (and your team) will thank you.