- Company Articles
- Products and Technology
- Product knowledge
- Best Practices for Using Lean Pipe Clamps in Automotive Workshops

Best Practices for Using Lean Pipe Clamps in Automotive Workshops
Related Product
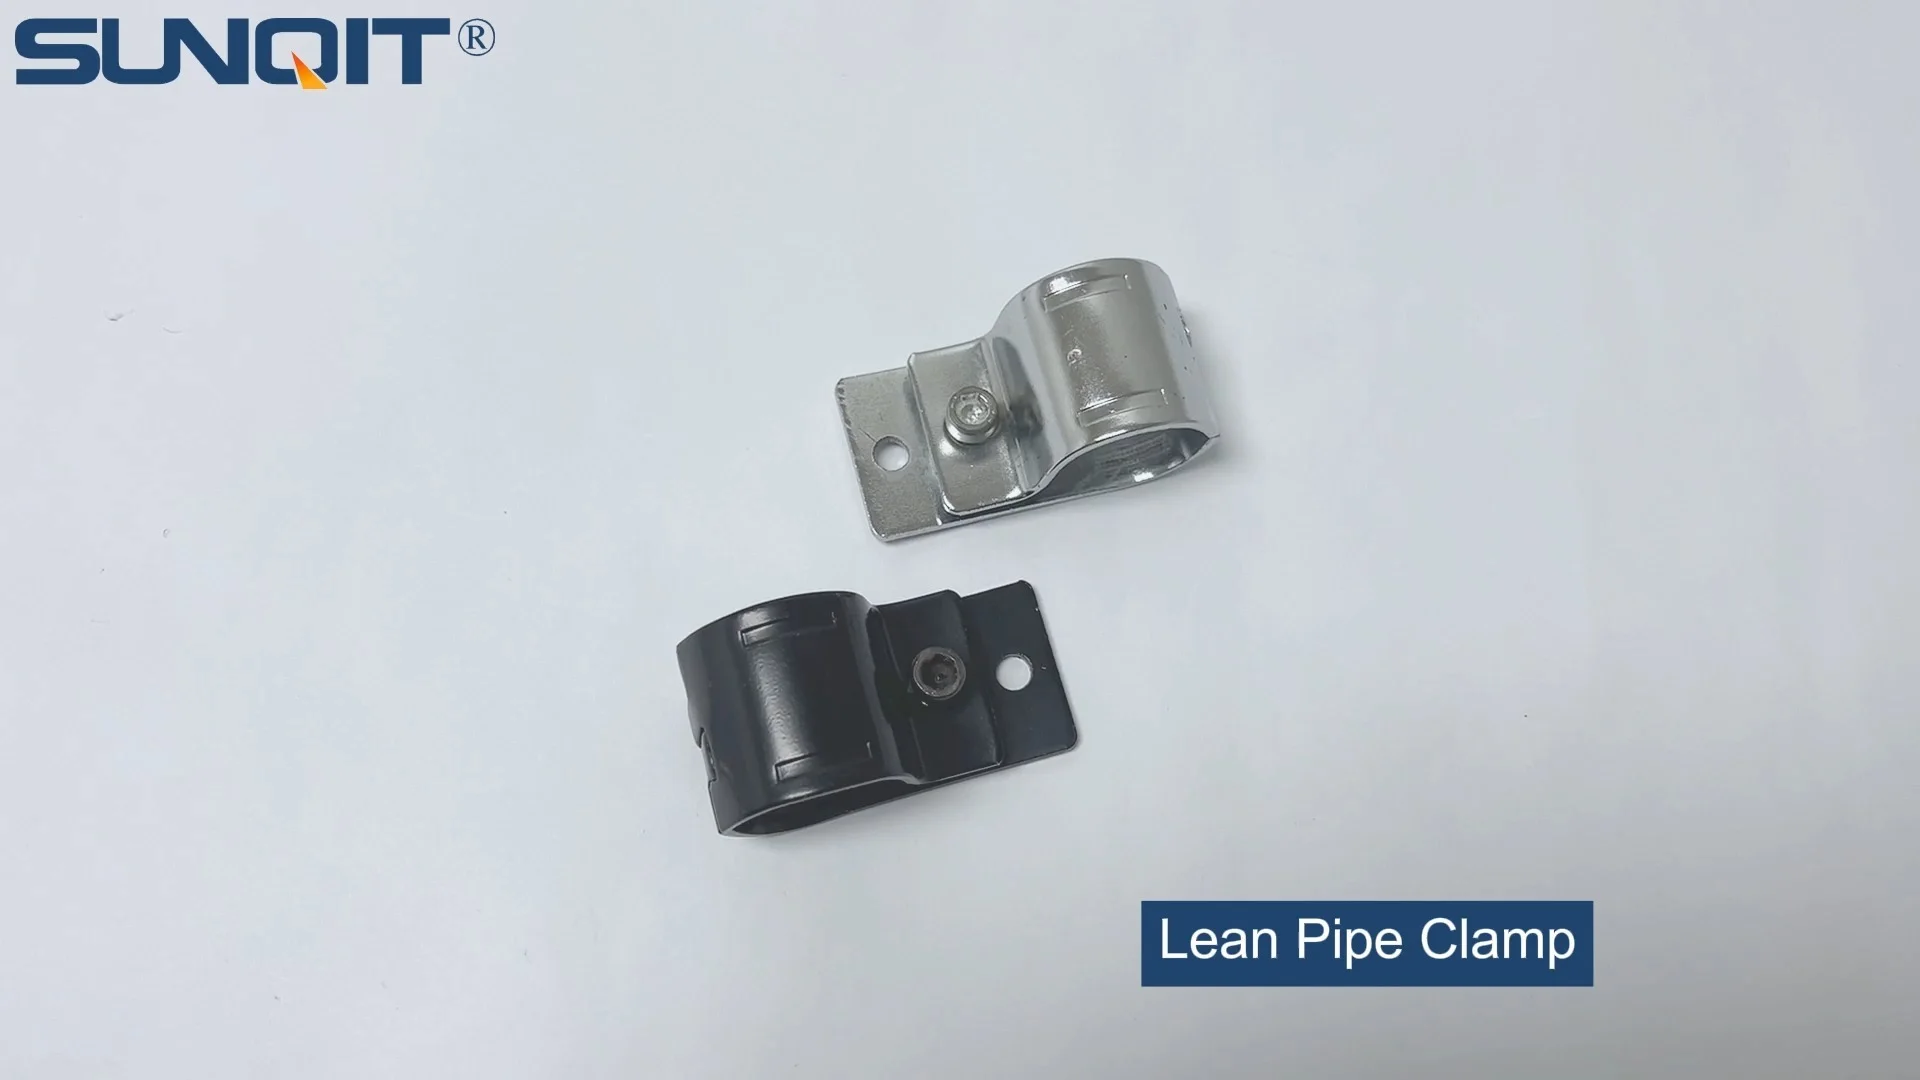
Lean Pipe Clamp
Lean pipe clamp is used for rack system hang monitor or other panel for workbenck, flowrack in production daily use.
Walk into any busy automotive workshop, and you'll likely be met with a symphony of clanking tools, the hum of power drills, and the focused urgency of technicians racing to meet repair deadlines. In the midst of this controlled chaos, organization often takes a backseat—tools get misplaced, parts pile up on workbenches, and custom workstations that once made sense now feel rigid and inefficient. It's a scenario that drains productivity, increases frustration, and even risks safety. But what if there was a simple, adaptable solution to transform this chaos into calm? Enter lean pipe clamps: the unsung heroes of lean manufacturing that are quietly revolutionizing how automotive workshops design, build, and reimagine their workspaces.
What Are Lean Pipe Clamps, and Why Do They Matter?
At their core, lean pipe clamps are the connective tissue of lean systems—versatile, durable fasteners designed to join lean pipes (also known as "lean tubes") into custom structures like workbenches, flow racks, tool carts, and material handling stations. Unlike rigid, one-size-fits-all equipment, these clamps and their lean pipe joints allow workshops to build exactly what they need, when they need it—and reconfigure it just as easily when needs change. Think of them as the automotive workshop's equivalent of modular building blocks, but built to withstand the grit, grease, and heavy loads of daily shop life.
Most lean pipe clamps are made from robust materials like steel or aluminum, with coatings that resist corrosion and wear—critical in environments where oil, coolant, and metal shavings are part of the daily grind. They come in various designs: fixed clamps for stable, permanent connections; swivel clamps for adjustable angles; and parallel clamps for linking pipes side-by-side. Paired with lean pipe joints—another key component—they transform simple pipes into everything from a height-adjustable workbench for engine repairs to a mobile flow rack on caster wheels that glides parts directly to the assembly line.
The Hidden Benefits of Lean Pipe Clamps in Automotive Settings
Why bother with lean pipe clamps when traditional workbenches or prefab racks are readily available? Ask any technician who's spent hours rearranging a clunky, bolted-down workstation, and they'll tell you: flexibility is everything. Automotive repair is rarely one-size-fits-all. One day, you're servicing a compact car; the next, a heavy-duty truck. A workbench that works for a transmission rebuild might be useless for detailing a dashboard. Lean pipe clamps solve this by letting you disassemble, reconfigure, and rebuild structures in minutes—no welding, no specialized tools, just a wrench and a vision.
Durability is another non-negotiable. Automotive workshops are tough on equipment. A flimsy clamp that loosens under vibration or snaps under the weight of a 50-pound toolbox isn't just a nuisance—it's a safety hazard. High-quality lean pipe clamps, however, are engineered to handle the stress: they grip pipes tightly to prevent wobbling, resist bending under load, and stand up to repeated adjustments. When paired with corrosion-resistant lean pipes (like stainless steel or aluminum lean pipe), they become nearly indestructible workhorses that outlast many prefab alternatives.
Cost-effectiveness might surprise you, too. While the upfront investment in lean pipe clamps and joints is modest, their reusability pays dividends over time. Instead of buying a new workbench every time your workflow changes, you can repurpose existing pipes and clamps to build something new. A flow rack that once held brake parts can be disassembled and rebuilt as a tool cart with caster wheels for a new project. This "build once, reuse often" model slashes long-term equipment costs and reduces waste—aligning perfectly with the lean manufacturing principles that drive efficiency.

Best Practices for Maximizing Lean Pipe Clamp Performance
Like any tool, lean pipe clamps work best when used correctly. Below are actionable best practices to ensure your clamps deliver peak performance, safety, and longevity in the automotive workshop.
1. Start with the Right Design: Measure Twice, Clamp Once
Before you even pick up a clamp, take the time to design your structure. Sketch out the dimensions of your workbench, flow rack, or cart, and calculate the weight it will need to support. A common mistake is overestimating a clamp's load capacity or underestimating the stress of daily use—for example, a workbench holding a 300-pound engine block needs sturdier clamps and thicker pipes than one holding small hand tools. Refer to the manufacturer's specs for load limits, and when in doubt, over-engineer slightly: it's better to have a clamp that's stronger than needed than one that fails mid-job.
Also, consider the workshop environment. Will the structure be stationary (like a fixed workbench) or mobile (like a tool cart on caster wheels)? Mobile setups require extra stability—opt for wider bases and locking caster wheels—and clamps that can withstand vibration from rolling over concrete floors. For workbenches near welding stations, choose heat-resistant clamps to avoid warping. Taking these details into account upfront saves time (and frustration) later.
2. Master the Art of Installation: Tighten, but Don't Over-Tighten
Installing lean pipe clamps might seem straightforward, but there's a science to getting it right. The goal is a connection that's tight enough to hold firm but not so tight that it damages the pipe or the clamp itself. Over-tightening is a common pitfall: it can strip threads, crack the clamp's plastic or metal housing, or even deform the pipe, weakening the entire structure. Under-tightening, on the other hand, leads to wobbling, which can loosen other joints over time and create safety risks.
A good rule of thumb: use a torque wrench set to the manufacturer's recommended level (usually between 15-25 Nm for steel clamps). If you don't have a torque wrench, aim for "firm but not forceful"—you should feel resistance, but the clamp shouldn't bend or distort. When attaching clamps to lean pipe joints, align the pipes carefully to avoid cross-threading, and always use the correct size clamp for your pipe diameter (most automotive workshops use 28mm or 30mm pipes, but double-check!).
3. Pair Clamps with the Right Lean Pipe Joints
Lean pipe clamps rarely work alone—they rely on lean pipe joints to create angles, T-junctions, or cross-connections. Using mismatched clamps and joints is like trying to fit a square peg in a round hole: it won't hold, and it could compromise the entire structure. For example, a 90-degree fixed joint needs a clamp designed to handle right-angle stress, while a swivel joint pairs best with a clamp that allows for rotational movement. Always buy clamps and joints from the same supplier when possible, as they're engineered to work together seamlessly.
Pro tip: Keep a small inventory of "universal" joints and clamps on hand for emergency repairs or last-minute adjustments. A 45-degree reinforce aluminum pipe joint, for instance, can save the day when you need to angle a flow rack to fit around a workbench, and a parallel fixation aluminum pipe joint is perfect for adding side rails to a tool cart.
4. Maintain Like You Mean It: Inspect, Clean, and Lubricate
Even the toughest lean pipe clamps need a little TLC to stay in top shape. In automotive workshops, grease, oil, and metal debris can build up in clamp threads and joints, causing them to stick or loosen over time. Make it a habit to inspect clamps weekly: check for signs of wear (cracks, bent handles, stripped threads), tighten any loose connections, and clean off grime with a wire brush and degreaser. For moving parts, like swivel clamps or caster wheel connectors, a drop of machine oil every month will keep them turning smoothly.
Don't forget to inspect the pipes themselves, too. A rusted or dented pipe can weaken the clamp's grip, even if the clamp itself is in good condition. replace any pipes that show signs of structural damage, and consider adding protective end caps to prevent sharp edges (a small detail that goes a long way in preventing cuts and scrapes).
5. Design for Safety: Load Limits and Accessibility
In a busy workshop, it's easy to overlook safety in the name of speed—but when it comes to lean pipe structures, cutting corners can have serious consequences. Always respect the load limits specified by the clamp manufacturer. A clamp rated for 100 pounds shouldn't be asked to hold 200, even if it "feels" sturdy. Overloading can cause clamps to shear, pipes to bend, or entire structures to collapse—putting technicians and expensive equipment at risk.
Accessibility is another safety consideration. If you're building a flow rack with roller tracks, for example, ensure the clamps holding the tracks in place are positioned so they don't create sharp edges or protrusions that could catch on clothing or tools. Similarly, when adding caster wheels to a mobile cart, use locking clamps to secure the wheels in place when the cart is stationary—this prevents unintended movement during repairs.

Real-World Examples: How Workshops Are Winning with Lean Pipe Clamps
Still skeptical? Let's look at two automotive workshops that turned to lean pipe clamps to solve common pain points—and saw tangible results.
Case Study 1: The "Reconfigurable Workbench" Revolution
A mid-sized auto repair shop in Michigan was struggling with workspace bottlenecks. Their technicians worked on everything from oil changes to engine rebuilds, but their fixed workbenches were too low for tall engines and too narrow for spreading out tools. After consulting a lean system supplier, they invested in aluminum lean pipes, swivel clamps, and height-adjustable lean pipe joints. Today, each technician can adjust their workbench height in minutes using a simple clamp adjustment, and the benches are wide enough to hold a full toolset and a parts bin. The result? Setup time for jobs dropped by 30%, and technicians reported less back strain from hunching over low surfaces.
Case Study 2: Mobile Flow Racks on Caster Wheels
A truck dealership in Texas needed a way to move heavy parts (like brake calipers and suspension components) from the parts room to the service bay without using a forklift. Their solution: a custom flow rack built with steel lean pipes, fixed clamps, and heavy-duty caster wheels. The rack features three levels of roller tracks (held in place with roller track placon mount brackets) that let parts slide smoothly to the front, and the caster wheels lock securely when in use. Now, a single technician can move 500 pounds of parts in seconds, and the rack can be reconfigured with new clamps and joints to hold different parts when the dealership adds a new truck model. "It's like having a moving parts shelf that adapts to us," said the service manager.

Common Mistakes to Avoid
Even with the best intentions, workshops sometimes stumble when using lean pipe clamps. Here are the top mistakes to steer clear of:
- Over-tightening clamps: This can strip threads, crack pipes, or warp clamps—making them weaker, not stronger.
- Mixing materials: Steel clamps and aluminum pipes can cause galvanic corrosion if they're in constant contact with moisture. Stick to matching materials when possible.
- Ignoring weight distribution: A structure is only as strong as its weakest clamp. Distribute heavy loads evenly, and reinforce corners with extra clamps or gusset plates.
- Skipping the "test load": Before putting a new structure into use, load it with weights heavier than you expect to use (safely!) and let it sit overnight. If clamps loosen or pipes bend, you'll catch it before it fails during a job.
The Bottom Line: Lean Pipe Clamps = Leaner, Smarter Workshops
In the fast-paced world of automotive repair, efficiency isn't just a buzzword—it's the difference between meeting deadlines, keeping customers happy, and staying profitable. Lean pipe clamps might seem like small components, but their impact is huge: they turn static workspaces into dynamic, adaptable environments that grow with your shop. Whether you're building a custom workbench, a mobile flow rack, or a tool cart on caster wheels, these clamps and their lean pipe joints give you the power to design your workshop around your needs—not the other way around.
So, the next time you walk into your workshop and feel that familiar twinge of frustration at the chaos, remember: the solution might be as simple as grabbing a lean pipe clamp, a length of pipe, and a wrench. With a little creativity and these best practices, you'll be building a workspace that works for you—one clamp at a time.
| Best Practice | Why It Matters | Quick Tip |
|---|---|---|
| Measure load capacity before building | Prevents overloading and structural failure | Add 20% to your estimated load for safety |
| Use torque wrenches for installation | Ensures clamps are tight but not over-tightened | Set to 15-25 Nm for most steel clamps |
| Inspect weekly for wear | Catches issues before they cause accidents | Check for cracks in clamp handles and stripped threads |
| Pair clamps with matching joints | Guarantees a secure, seamless connection | Buy from the same supplier when possible |
| Lubricate moving parts monthly | Keeps swivel clamps and caster wheels turning smoothly | Use machine oil or silicone spray for best results |