- Company Articles
- Products and Technology
- Installation And Maintenance
- Castor Fixed Plate Breakage: Warning Signs & Replacement Guide

Castor Fixed Plate Breakage: Warning Signs & Replacement Guide
Related Product
Castor Fixed Plate
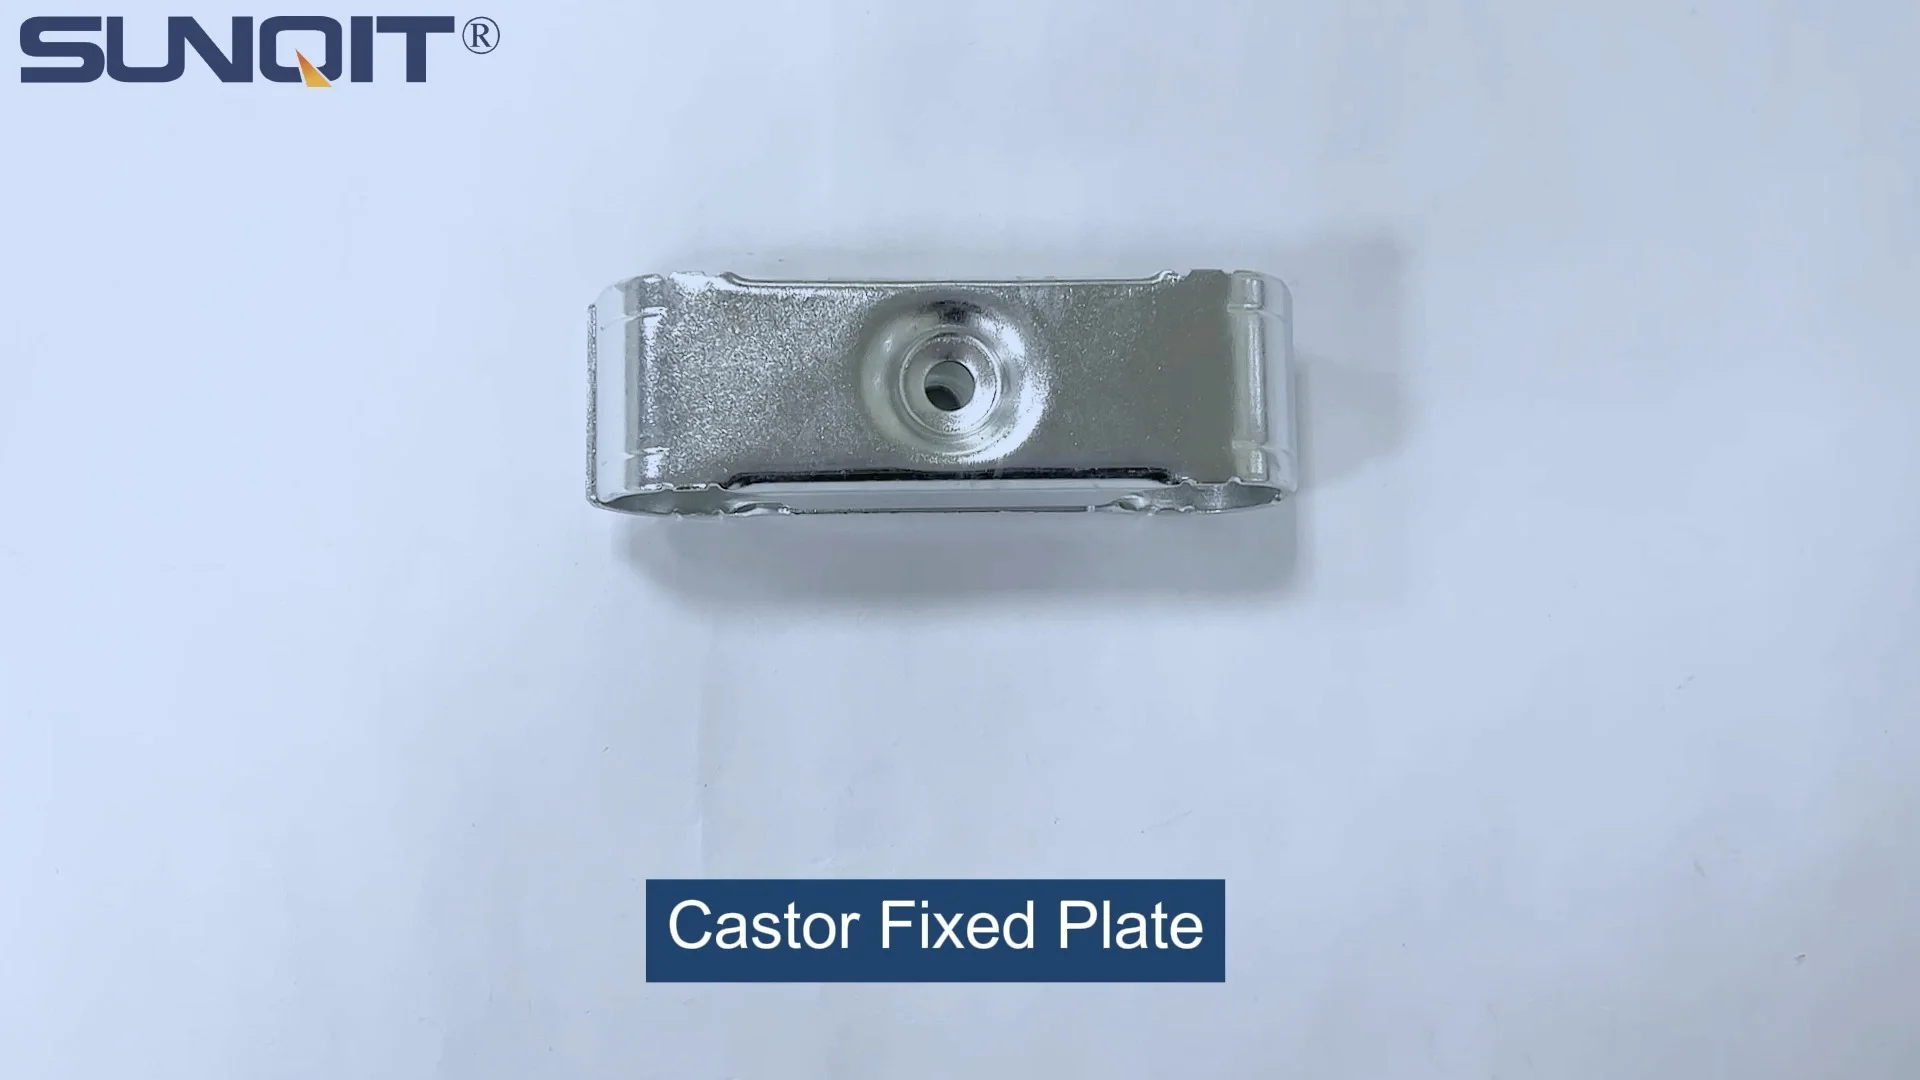
Castor fixed plate, used for castor installation, one castor need two pcs castor plate to fix under the workbench, flow rack, and hand trolley.
If you've ever pushed a heavy trolley across a warehouse floor or adjusted a workbench to reach a hard-to-reach tool, you've probably never given much thought to the small but mighty component holding it all together: the castor fixed plate. This unassuming piece of hardware is the unsung hero that keeps your caster wheels attached to your equipment, ensuring smooth movement and stable operation. But when it breaks, it doesn't just cause a minor inconvenience—it can bring your workflow to a grinding halt, put your team's safety at risk, and even lead to costly equipment damage. In this guide, we'll walk you through everything you need to know about recognizing the warning signs of castor fixed plate breakage, understanding why it happens, and replacing it like a pro. Let's dive in.
What Even Is a Castor Fixed Plate, Anyway?
Before we get into the nitty-gritty of breakage and replacement, let's make sure we're all on the same page. A castor fixed plate—sometimes called a caster mounting plate—is a flat, often metal component that serves as the bridge between a caster wheel and the piece of equipment it's attached to. Think of it as the middleman: one side bolts or welds to the bottom of your workbench, turnover trolley, or material rack, and the other side connects to the caster wheel's housing. Without it, your caster wheel would be little more than a loose wheel rolling aimlessly across the floor.
These plates come in all shapes and sizes, depending on the equipment they're meant to support. A lightweight workbench might use a small, thin steel plate, while a heavy-duty conveyor system could require a thick, reinforced aluminum or stainless steel version. Some are designed with pre-drilled holes for easy installation, others with slots to accommodate different caster wheel models. No matter the design, their job is simple: keep the caster wheel securely in place, even when the going gets tough.
Why Do Castor Fixed Plates Break? Common Culprits
Castor fixed plates are built to withstand a lot—daily use, heavy loads, and even the occasional bump against a wall. But like any piece of hardware, they have their limits. Here are the most common reasons they fail:
- Overloading: This is the number one offender. If you regularly push a trolley loaded with more weight than the fixed plate is rated for, you're essentially asking it to do the impossible. Over time, the metal fatigues, bends, and eventually cracks.
- Poor Maintenance: Neglecting to clean, lubricate, or tighten the bolts on your caster fixed plate can lead to trouble. Dirt and debris can cause corrosion, while loose bolts create extra stress every time the wheel turns.
- Impact Damage: Slamming a trolley into a loading dock, hitting a curb at full speed, or dropping heavy items onto the equipment can jolt the fixed plate, causing immediate cracks or weakening the metal for future failure.
- Low-Quality Materials: Not all castor fixed plates are created equal. If you skimp on quality—opting for thin, cheap steel instead of reinforced alloys—you're setting yourself up for premature breakage, especially in high-use environments.
- Misalignment: If the fixed plate isn't installed straight or the caster wheel is at an angle, the weight isn't distributed evenly. This uneven pressure can wear down specific areas of the plate until it gives way.

The Telltale Signs: How to Spot a Failing Castor Fixed Plate
The worst part about castor fixed plate breakage is that it rarely happens without warning. Your equipment will usually send out "red flags" weeks or even months before the plate fully fails—if you know what to look for. Here's how to spot trouble early:
| Warning Sign | What It Could Mean | Immediate Action |
|---|---|---|
| Wobbling or Shaking | The fixed plate is bent or cracked, causing the caster wheel to sit unevenly. | Stop using the equipment and inspect the plate for visible damage. |
| Grinding or Squeaking Noises | Loose bolts or misalignment are causing metal-on-metal friction. | Tighten bolts and lubricate moving parts; if noise persists, check for cracks. |
| Visible Cracks or Rust | Corrosion or metal fatigue has weakened the plate. | replace the fixed plate immediately—even small cracks can worsen quickly. |
| Stiff or Stuck Wheels | The fixed plate may be bent, preventing the wheel from rotating freely. | Check for bends; if the plate is warped, replacement is necessary. |
| Bolts Backing Out | Constant vibration or impact has loosened the hardware, putting stress on the plate. | Tighten bolts with a torque wrench; apply thread locker to prevent future loosening. |
Let's say you're a warehouse supervisor, and one of your team members mentions that the material rack B (3 row and 3 floor) has been "acting funny" lately. They complain that it's harder to push, and it makes a weird creaking sound when they turn. Instead of brushing it off as "just old age," take a minute to look under the rack. Chances are, you'll find a castor fixed plate that's starting to bend or a bolt that's hanging on by a thread. Catching these signs early can save you from a bigger headache down the line.

DIY Replacement: How to Swap Out a Broken Castor Fixed Plate
So, you've spotted the signs, and it's time to replace your castor fixed plate. Don't worry—you don't need to be a professional mechanic to get the job done. With the right tools, a little patience, and this step-by-step guide, you'll have your equipment rolling smoothly again in no time.
Step 1: Gather Your Tools and Supplies
Before you start, make sure you have everything you need. You'll want:
- A new castor fixed plate (match the size, material, and weight rating of the old one—when in doubt, check with your caster and accessories supplier).
- A socket wrench or screwdriver (depending on the type of bolts holding the plate in place).
- A rubber mallet (for gently tapping the old plate loose).
- Sandpaper or a wire brush (to clean rust or debris from the mounting area).
- Thread locker (like Loctite) to keep the new bolts from loosening.
- Gloves and safety glasses (to protect your hands and eyes from sharp edges).
Step 2: Remove the Old Fixed Plate
First, lift the equipment off the ground to take the weight off the caster wheel. You can use a jack, blocks of wood, or even have a colleague help you hold it steady. Once the wheel is off the floor, use your socket wrench or screwdriver to remove the bolts holding the fixed plate to the equipment. If the bolts are rusted or stuck, spray them with a penetrating oil (like WD-40) and let it sit for 10–15 minutes. If they still won't budge, gently tap the wrench with a hammer to loosen them—just be careful not to strip the bolt heads.
Once the bolts are out, the old fixed plate should come free. If it's bent or stuck, use the rubber mallet to tap it loose. Take a moment to inspect the mounting area: Are there any cracks in the equipment itself? Is the surface rusted or damaged? Clean it up with sandpaper or a wire brush to ensure the new plate sits flat.
Step 3: Install the New Fixed Plate
Now, line up the new fixed plate with the mounting holes on the equipment. Make sure it's straight—you don't want to repeat the misalignment mistake! insert the new bolts (if your replacement plate didn't come with bolts, use the old ones only if they're in good condition; otherwise, buy new ones of the same size and strength). Tighten the bolts by hand first to avoid cross-threading, then use the socket wrench to snug them up. Don't overtighten—you could strip the threads or warp the plate. A good rule of thumb: tighten until you feel resistance, then give it a quarter-turn more.
If the plate has slots instead of fixed holes, adjust it so the caster wheel sits perfectly straight, then tighten the bolts. Apply a drop of thread locker to each bolt to prevent them from loosening over time.
Step 4: Test It Out
Lower the equipment back to the ground and give the caster wheel a spin. Does it turn smoothly? Is there any wobbling or squeaking? Push the equipment back and forth a few times to make sure the new plate can handle the movement. If everything feels solid, you're good to go! If not, double-check the alignment and bolt tightness—you might need to readjust.

Preventive Maintenance: Keep Your Castor Fixed Plates in Top Shape
Now that you've replaced the fixed plate, you want to make sure it lasts as long as possible. A little preventive maintenance goes a long way in extending the life of your caster and accessories. Here's how to keep things running smoothly:
Pro Maintenance Checklist
- Weekly Inspections: Take 5 minutes every week to check for loose bolts, cracks, or rust on all castor fixed plates. Pay extra attention to equipment that gets heavy use, like workbenches or turnover trolleys.
- Monthly Cleaning: Wipe down the fixed plates and caster wheels with a damp cloth to remove dirt and debris. For stubborn grime, use a mild detergent—avoid harsh chemicals that can corrode the metal.
- Quarterly Lubrication: Apply a few drops of lubricating oil to the bolts and moving parts of the caster wheel. This reduces friction and prevents rust, especially in humid or dusty environments.
- Weight Checks: Make sure your team knows the weight limits of each piece of equipment. Post a sticker with the maximum load if needed—this simple reminder can prevent overloading.
- Invest in Quality: When it's time to replace caster and accessories, don't cut corners. A high-quality castor fixed plate might cost a little more upfront, but it will save you money (and frustration) in the long run. Look for plates made from reinforced steel or aluminum, and check the weight rating to ensure it matches your needs.
Real-World Example: How One Warehouse Avoided Disaster
Let's wrap up with a quick story to drive the point home. A few years back, a manufacturing plant in Ohio was dealing with frequent delays on their assembly line. The issue? Their workbench E (single deck-without caster) kept breaking down, and the root cause was a failing castor fixed plate. At first, they replaced the plate with a cheap, generic version from a local hardware store—but it broke again two weeks later. Frustrated, they reached out to their lean pipe supplier, who explained that the workbench was being used to hold heavy machinery parts far beyond the fixed plate's weight limit. The supplier recommended upgrading to a reinforced stainless steel fixed plate with a higher weight rating, along with a regular maintenance schedule.
The plant followed the advice, and guess what? Six months later, they hadn't had a single breakdown. The team saved hours of downtime, reduced the risk of workplace injuries, and even noticed that the workbench moved more smoothly than ever. The lesson? Taking castor fixed plate breakage seriously—spotting the signs, investing in quality parts, and keeping up with maintenance—isn't just about fixing a small piece of hardware. It's about keeping your entire operation running like a well-oiled machine.
Final Thoughts: Don't Overlook the Little Things
At the end of the day, castor fixed plates might not be the most glamorous part of your equipment, but they're essential. Ignoring the warning signs of breakage can lead to safety hazards, costly repairs, and workflow disruptions that no business can afford. By learning to spot the red flags, replacing failed plates promptly, and keeping up with maintenance, you'll ensure that your workbenches, trolleys, and racks keep rolling—so you can focus on what really matters: growing your business.
Remember, when it comes to caster and accessories, quality and care go hand in hand. Whether you're a small workshop owner or a warehouse manager, taking the time to understand and maintain these little components will pay off in the long run. So the next time you push a trolley or adjust a workbench, give a quick nod to the castor fixed plate holding it all together—it deserves the recognition.