- Company Articles
- Products and Technology
- Installation And Maintenance
- Castor Fixed Plate Installation Tools: What You Need for Workbench E

Castor Fixed Plate Installation Tools: What You Need for Workbench E
Related Product
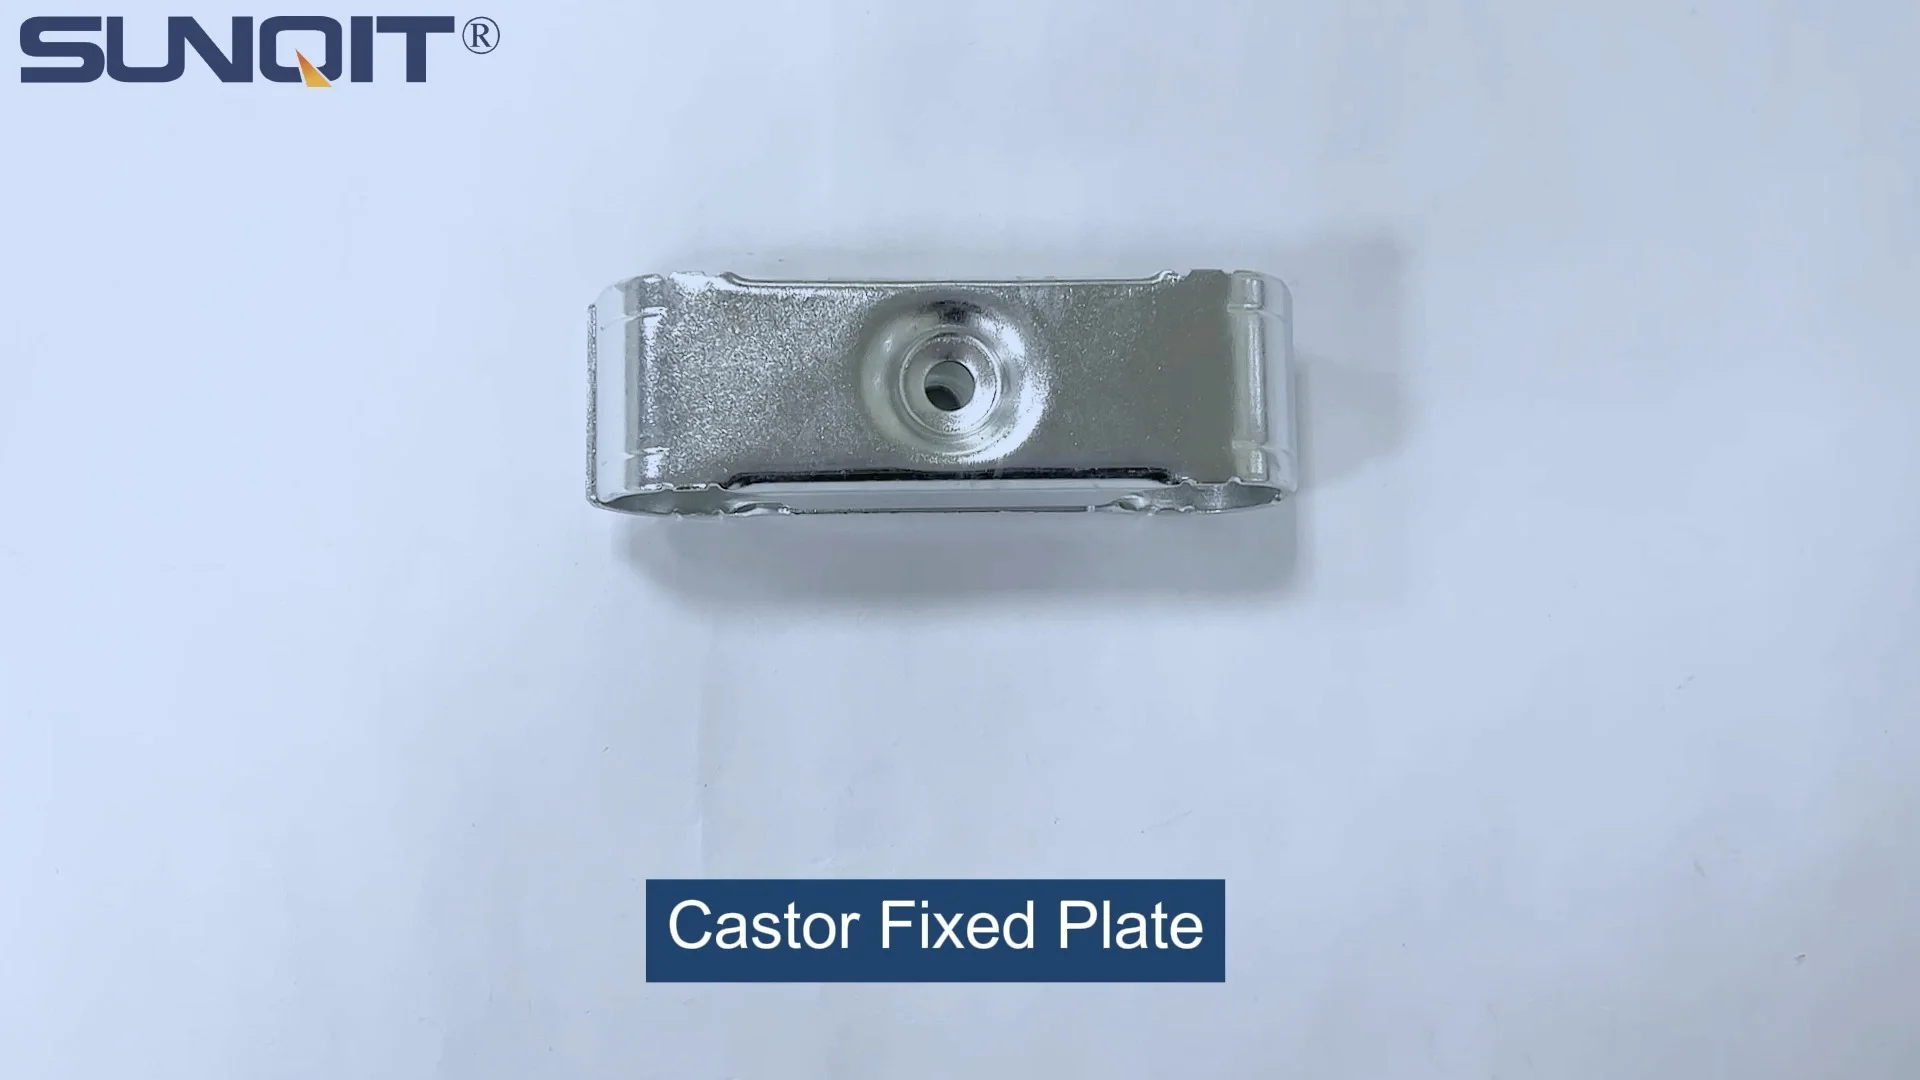
Castor Fixed Plate
Castor fixed plate, used for castor installation, one castor need two pcs castor plate to fix under the workbench, flow rack, and hand trolley.
If you've recently invested in a Workbench E (single deck-without caster), you already know it's a workhorse—sturdy, reliable, and designed to streamline your workspace. But here's the thing: even the best workbench can feel limiting if it's stuck in one spot. Whether you're rearranging your workshop for a new project, need to sweep the floor underneath, or want to move materials from one station to another without heavy lifting, adding mobility to your Workbench E is a game-changer. That's where castor fixed plates come in. These unassuming but essential components bridge the gap between your stationary workbench and the freedom of movement. In this guide, we'll walk you through everything you need to know about installing castor fixed plates on Workbench E, from the tools required to step-by-step instructions, troubleshooting tips, and why choosing the right caster accessories matters. Let's turn that static workbench into a mobile productivity hub.
Understanding Workbench E: Why It Deserves Mobility
First, let's take a moment to appreciate what makes Workbench E (single deck-without caster) such a popular choice. Designed with simplicity and durability in mind, this workbench features a single, solid deck—perfect for assembling small parts, organizing tools, or serving as a dedicated workspace for tasks that demand precision. Its frame, often constructed with aluminum pipe and accessories, strikes a balance between strength and lightweight maneuverability (once casters are added, of course). The absence of casters in its base design is intentional: it keeps the workbench stable during heavy use, preventing unwanted movement when you're drilling, sawing, or tightening bolts. But in dynamic work environments—think manufacturing floors, garages, or DIY workshops—stability alone isn't enough. You need flexibility.
Imagine spending 10 minutes clearing off your workbench, recruiting a coworker to help lift it, and then struggling to align it back perfectly after moving. Now multiply that by how many times you need to shift it in a week. Suddenly, those "minor" inconveniences add up to lost time and frustration. By installing castors via fixed plates, you retain the workbench's original stability (thanks to secure mounting) while gaining the ability to roll it smoothly across the floor with minimal effort. It's a small upgrade that transforms how you interact with your workspace.
Castor Fixed Plates: The Unsung Heroes of Mobility
Before diving into tools, let's clarify what castor fixed plates are and why they're non-negotiable for this project. A castor fixed plate is a flat, metal (or heavy-duty plastic) bracket that attaches to the bottom of your workbench's legs, providing a stable platform to mount casters. Think of it as a bridge between the workbench's frame and the caster wheel: it distributes the workbench's weight evenly across the caster, preventing stress on the legs and ensuring the entire setup remains sturdy when in use.
Not all fixed plates are created equal, though. For Workbench E, which may have aluminum pipe legs or a frame built with aluminum pipe accessories, you'll want plates that are compatible with the material and weight capacity of the workbench. Most quality fixed plates feature pre-drilled holes for easy installation, and some even come with rubber padding to reduce vibration or protect floors from scratches. When paired with the right casters—locking ones, ideally, to keep the workbench stationary when needed—fixed plates turn a static piece of equipment into a mobile workstation that adapts to your needs.

Essential Tools for the Job: A Detailed Breakdown
Installing castor fixed plates isn't overly complicated, but having the right tools on hand will make the process smoother, faster, and less prone to mistakes. Below is a comprehensive list of tools you'll need, along with why each one matters and tips for choosing the best options.
| Tool Name | Purpose | Pro Tips |
|---|---|---|
| Power Drill with Bits | To drill pilot holes (if needed) and drive screws into the workbench legs and fixed plates. | Use a cordless drill for mobility; opt for bits that match your screws (Phillips or flat-head). A 1/8-inch drill bit is ideal for pilot holes in aluminum or wood legs. |
| Adjustable Wrench | To tighten nuts onto bolts, especially if your fixed plates use bolt-and-nut combinations instead of screws. | Choose a wrench with a wide jaw opening to fit different bolt sizes. A ratcheting wrench will save time when tightening multiple bolts. |
| Measuring Tape & Carpenter's Square | To ensure fixed plates are positioned evenly and aligned at 90-degree angles to the legs. | A 25-foot measuring tape gives flexibility; a metal carpenter's square ensures plates aren't crooked, which can cause wobbling. |
| Level (2-foot or longer) | To check that the workbench sits evenly after installation, preventing rocking or uneven weight distribution. | A bubble level is affordable and easy to use; place it on the workbench top both horizontally and vertically to confirm alignment. |
| Rubber Mallet | To gently tap fixed plates into place if they're misaligned, or to seat casters fully onto the plate's mounting studs. | A rubber mallet won't damage the fixed plate's finish or the workbench legs—avoid metal hammers, which can dent or scratch. |
| Screwdrivers (Phillips and Flat-Head) | Backup for manual screw driving, especially if your drill's battery dies or you need precise control for small screws. | Magnetic tips help hold screws in place, which is a lifesaver when working under the workbench. |
| Marker or Pencil | To mark where to drill holes or position the fixed plates on the workbench legs. | A fine-tipped marker works best on metal legs; for wood, a pencil is easier to erase if you need to adjust. |
Pro Tip: Don't skimp on tool quality. A cheap drill bit might dull halfway through drilling, or a flimsy wrench could slip and strip a bolt. Investing in mid-range tools will save you frustration and ensure the installation is secure. If you're borrowing tools, test them beforehand to make sure they're in good working order.

Step-by-Step Installation Guide: From Prep to Rolling
Now that you have your tools ready, let's walk through the installation process step by step. Take your time—rushing can lead to misalignment or loose connections, which will cause problems down the line. Plan for 30–45 minutes, depending on your experience level.
Step 1: Prepare the Workbench and Workspace
Start by clearing everything off the Workbench E. Tools, parts, or materials left on top will add unnecessary weight and could shift during installation. Next, tip the workbench onto its side or back (whichever is easier) so you can access the bottom of the legs. If the workbench is heavy, ask someone to help—safety first! Place a soft cloth or cardboard under the workbench to protect the top from scratches while it's flipped.
Inspect the legs for any existing damage, rust, or debris. Wipe them clean with a damp cloth to remove dust or grease, which could prevent the fixed plate from adhering properly. If the legs are made of aluminum (common in Workbench E setups with aluminum pipe accessories), check for any burrs or sharp edges—these can be smoothed with a file to ensure the fixed plate sits flush.
Step 2: Position the Castor Fixed Plates
Lay out your castor fixed plates and casters to confirm you have everything: one plate per leg, plus the necessary screws, bolts, or caster accessories (like washers or locknuts). Hold a fixed plate against the bottom of one leg, centering it as much as possible. Use your measuring tape to ensure the plate is positioned the same distance from the edge of each leg—this ensures even weight distribution. For example, if the leg is 4 inches wide, the plate should extend 2 inches from each side.
Once positioned, use a marker to trace the outline of the plate and mark the locations of the pre-drilled holes. Repeat this process for all legs, double-checking measurements to ensure consistency. A carpenter's square can help here: align the plate with the square's edge to confirm it's at a 90-degree angle to the leg. Crooked plates will lead to casters that don't roll straight, so take the time to get this right.
Step 3: Drill Pilot Holes (If Needed)
If your Workbench E's legs are made of metal (aluminum) or hardwood, drilling pilot holes before inserting screws is critical. Pilot holes prevent the material from splitting and make it easier to drive screws straight. Use a drill bit slightly smaller than the diameter of your screws—for example, a #6 screw (common in fixed plate kits) works with a 1/8-inch drill bit.
Drill slowly and steadily, applying gentle pressure. If the drill bit starts to wander, stop and reposition it. For metal legs, you may need a metal-specific drill bit to avoid dulling. Once all pilot holes are drilled, wipe away any metal shavings or wood dust with a cloth.
Step 4: Attach the Fixed Plates to the Legs
Align the fixed plate's holes with the pilot holes you just drilled. insert a screw into each hole and tighten it with your power drill (set to low speed) or screwdriver. Be careful not to overtighten—stripping the screw or damaging the leg material is a common mistake. The goal is to snug the plate against the leg so there's no wobble, but not so tight that the screw head digs into the plate.
If your fixed plates use bolts instead of screws, insert the bolt through the plate and leg, then thread a locknut onto the end. Tighten the nut with an adjustable wrench until it's secure, then give it a final quarter-turn to ensure it won't loosen. Locknuts (which have a nylon insert) are preferable to regular nuts here—they resist vibration better, keeping the plate tight over time.
Step 5: Mount the Casters to the Fixed Plates
With the fixed plates attached, it's time to add the casters. Most casters come with their own mounting hardware, but if not, use the screws or bolts provided with your fixed plate kit. Position a caster onto a fixed plate, aligning its holes with the plate's mounting points. Tighten the screws or bolts securely, again being careful not to overtighten. If your casters have brakes, make sure they're in the "unlocked" position during installation—this makes testing easier later.
Pro tip: If you're using locking casters (highly recommended for Workbench E), install them on opposite corners (e.g., front-left and back-right). This setup makes it easier to lock the workbench in place without having to reach all four corners.
Step 6: Test Stability and Mobility
Carefully flip the workbench back onto its casters. Stand back and check if it sits evenly—no rocking, no legs lifting off the ground. Place a level on the workbench top: the bubble should be centered both side-to-side and front-to-back. If it's uneven, check which caster is sitting higher. This could mean a fixed plate is bent, a screw is loose, or the floor itself is uneven. Adjust as needed—shimming a caster with a small washer (a handy caster accessory) can often fix minor height differences.
Next, test the mobility. Push the workbench gently across the floor—casters should roll smoothly without catching or squeaking. Lock the brakes to ensure they hold the workbench in place, then unlock them and try again. If a caster doesn't roll freely, check for debris in the wheel or a misaligned axle—these are easy fixes with a little troubleshooting.

Troubleshooting Common Issues
Even with careful installation, you might run into a few hiccups. Here's how to solve the most common problems:
Wobbling Workbench
If the workbench rocks from side to side, the issue is likely uneven fixed plates. Check if all plates are mounted flush against the legs—gaps can cause instability. Tighten any loose screws or bolts, and ensure the plates are aligned at 90-degree angles. If the floor is uneven, use adjustable casters (a great caster accessory) to tweak the height of individual wheels until the workbench sits level.
Sticky or Squeaky Casters
Casters that don't roll smoothly might have dirt or hair wrapped around the axle. Flip the workbench again, remove the caster, and clean the wheel with a toothbrush or compressed air. If they squeak, a drop of lubricating oil (like WD-40) on the axle should quiet them down. Avoid over-oiling, though—excess oil can attract dust and make the problem worse later.
Loose Fixed Plates
Over time, vibration can loosen screws or bolts. Periodically check the fixed plates and tighten any hardware that's come loose. If screws keep loosening, switch to self-locking screws or add a drop of thread-locking adhesive (like Loctite) to the threads—just be careful not to use too much, as it can make future removal difficult.
Why Quality Caster Accessories Matter
You might be tempted to cut costs with generic or off-brand caster accessories, but trust us—this is one area where quality pays off. Cheap screws can strip, flimsy washers can compress, and low-grade casters can crack under the workbench's weight. For Workbench E, which may hold hundreds of pounds of tools or materials, investing in durable caster accessories ensures safety and longevity.
Look for casters with ball bearings (they roll smoother), steel or heavy-duty plastic wheels (resistant to wear), and locking mechanisms that engage firmly. When it comes to fixed plates, opt for ones made of galvanized steel or aluminum—these resist rust and corrosion, even in humid workshops. Remember, the goal is to make your Workbench E mobile for years, not just weeks.
Maintaining Your Mobile Workbench
Once your Workbench E is rolling smoothly, a little maintenance will keep it that way. Every month, take 5 minutes to:
- Tighten any loose screws or bolts on fixed plates and casters.
- Clean caster wheels with a damp cloth to remove dust and debris.
- Lubricate caster axles if they start to squeak.
- Check brake mechanisms to ensure they lock and release easily.
If you notice a caster wheel is cracked, worn, or no longer rolls smoothly, replace it immediately. Most casters can be swapped out with basic tools, and keeping a spare set of wheels (another useful caster accessory) on hand means you won't have to halt projects while waiting for replacements.
Final Thoughts: Mobility = Productivity
Installing castor fixed plates on your Workbench E (single deck-without caster) is more than just a DIY project—it's an investment in how you work. By adding mobility, you're not just making the workbench easier to move; you're creating a workspace that adapts to you, not the other way around. Whether you're a professional mechanic, a hobbyist woodworker, or someone who values efficiency in their garage, this upgrade will save you time, reduce physical strain, and make your daily tasks feel less like a chore.
Remember, the key to success is preparation: gather the right tools, take your time with measurements and alignment, and don't overlook the importance of quality caster accessories. With a little patience, you'll have a mobile Workbench E that's ready to tackle whatever project comes next. Now go roll with it.