- Company Articles
- Products and Technology
- Installation And Maintenance
- Castor Fixed Plate Installation Video Guide: For Beginners

Castor Fixed Plate Installation Video Guide: For Beginners
Related Product
Castor Fixed Plate
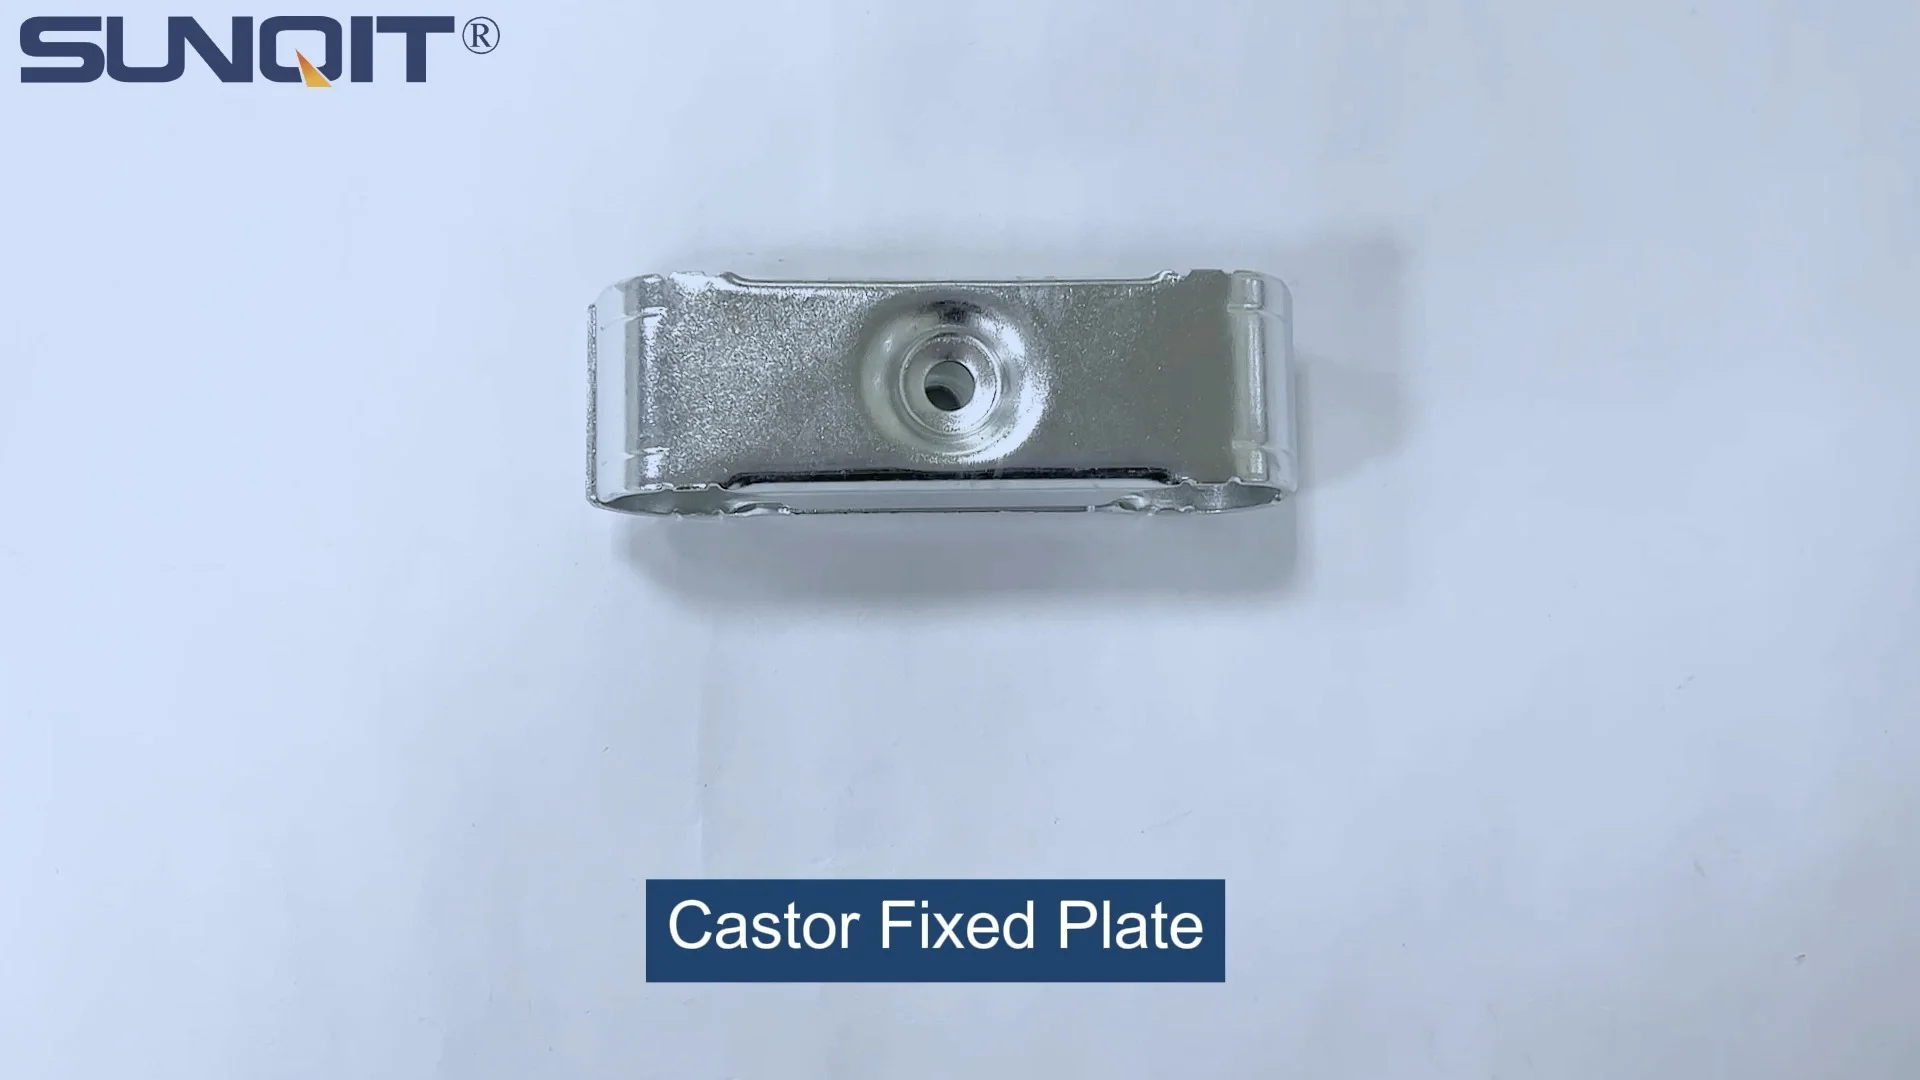
Castor fixed plate, used for castor installation, one castor need two pcs castor plate to fix under the workbench, flow rack, and hand trolley.
Hey there, beginner DIYers and workshop enthusiasts! If you've ever stared at a pile of caster wheels, a metal plate, and a workbench frame wondering, "How on earth do I put these together without breaking something?"—you're in the right place. Today, we're diving into the world of castor fixed plates: those small but mighty components that keep your casters (and everything they carry) stable, secure, and rolling smoothly. Whether you're building a mobile workbench, a turnover trolley, or just upgrading an old rack, getting the castor fixed plate installation right is key. And don't worry—I'm breaking it down step by step, with zero jargon and plenty of tips I wish someone had told me when I first tackled this. Let's get rolling!
Why Castor Fixed Plates Matter (Spoiler: They're Not Just "Extra Metal")
First off, let's talk about why we even need a castor fixed plate. You might be thinking, "Can't I just screw the caster directly into the frame?" Sure, you could—but let me save you the headache. Castor fixed plates act like a bridge between your caster wheel and the structure it's attached to (think: a workbench leg, an aluminum pipe frame, or a trolley base). They distribute weight evenly, prevent the frame from cracking under pressure, and ensure the caster stays aligned. Without a solid fixed plate, you're looking at wobbly wheels, stripped screws, and maybe even a collapsed cart mid-use. Trust me, I've seen it happen—and it's not pretty.
These plates also play nice with caster and accessories. Most casters (especially the heavy-duty ones) come with pre-drilled holes that line up perfectly with standard fixed plates, making installation a breeze. And if you ever need to replace a caster? A fixed plate makes swapping it out as easy as unscrewing a few bolts. No more drilling new holes or patching up old ones—hallelujah!
Tools You'll Need (Pro Tip: Gather These Before You Start)
Before we jump into the step-by-step, let's make sure you have all the tools handy. There's nothing worse than getting halfway through installation and realizing you're missing a wrench. Here's your checklist:
| Tool | Purpose |
|---|---|
| Phillips-head screwdriver (or power drill with Phillips bit) | To drive screws into the fixed plate and frame |
| Adjustable wrench | To tighten nuts on caster stems (if your caster uses a stem instead of bolts) |
| Tape measure | To mark where the plate will go (precision = stability!) |
| Pencil or marker | To mark drill points on the frame |
| Level (small 2-foot one works best) | To ensure the plate (and later, the caster) is straight |
| Drill and drill bits (matching the size of your screws) | To pre-drill holes in the frame (critical for avoiding splits, especially in wood or aluminum) |
| Screws (the right length! Too short = loose; too long = they'll poke through the frame) | To secure the fixed plate to the frame |
| Rubber mallet (optional but helpful) | To gently tap the plate into place if it's misaligned |
Pro move: If you're working with an aluminum pipe frame (super common for lean systems and workbenches), grab a set of aluminum profile accessories like drill guides—they'll prevent the drill bit from slipping on the smooth metal surface. Trust me, your hands (and sanity) will thank you.

Pre-Installation Prep: The "Measure Twice, Drill Once" Rule
Okay, tools are ready—now let's prep. Rushing this step is the #1 mistake beginners make, so slow down and follow along:
Step 1: Inspect Your Castor Fixed Plate and Caster
First, take a good look at your castor fixed plate. Are there any dents, bent edges, or rust spots? If yes, swap it out—damaged plates won't hold properly. Next, check the caster itself. Make sure the wheel spins freely, the brake (if it has one) works, and the mounting holes line up with the plate. Most casters and fixed plates are sold as sets, but if you're mixing and matching, double-check the hole pattern! I once bought a caster that had 4 holes instead of 5, and let's just say I spent an extra hour drilling a new hole. Oops.
Step 2: Prep the Surface (No Grease, No Gunk, No Problems)
Now, clean the area where you'll attach the plate. If it's a metal frame (like aluminum pipe or stainless steel), wipe off any dust, oil, or rust with a rag and some rubbing alcohol. For wooden frames, sand down any rough spots—you want the plate to sit flat, not lopsided. A flat surface = a stable caster, and stable casters = happy rolling.
Step 3: Mark Your Spot (Measure, Then Measure Again)
Time to mark where the plate will go. Let's say you're attaching it to a workbench leg—measure the distance from the bottom of the leg to the top of the plate. You want the caster wheel to touch the ground, but not so low that the plate scrapes. A good rule of thumb: leave 1/4 inch between the bottom of the frame and the plate. Use your tape measure to mark this spot on all four legs (if it's a workbench) to keep things even. Then, place the plate on the mark and trace around the edges with a pencil. This helps you realign it if it slips during drilling.

Step-by-Step Installation: Let's Get That Plate On!
Now for the fun part—actually installing the castor fixed plate. Follow these steps, and you'll be done in no time:
Step 1: Pre-Drill Holes (Your Frame Will Thank You)
Take your drill and a bit slightly smaller than your screws (this is called a "pilot hole"). Line up the drill bit with one of the holes in the fixed plate (use your traced outline as a guide) and drill straight down into the frame. Repeat this for all holes. Pre-drilling prevents the frame from splitting (especially important for wood or thin aluminum) and makes driving the screws much easier. Pro tip: If you're drilling into aluminum profile, go slow—aluminum is soft, and a fast drill can strip the hole.
Step 2: Attach the Castor Fixed Plate to the Frame
Now, place the fixed plate back over the pilot holes. Take a screw and start threading it into one hole by hand—this ensures it goes in straight. Once it's started, use your screwdriver or drill to tighten it until it's snug (but not so tight that the plate bends). Repeat with the remaining screws, working in a "star" pattern (tighten one screw, then the one diagonally opposite) to keep the plate from warping. If the plate shifts, gently tap it with a rubber mallet to realign—don't force it!
Step 3: Mount the Caster to the Fixed Plate
With the plate secured, it's time to add the caster. Flip the caster so the mounting plate (the part with holes) faces up, and line it up with the holes on the fixed plate. insert screws through the caster's holes and into the fixed plate, then tighten them with your screwdriver. If your caster has a stem (a metal rod instead of a mounting plate), slide the stem into the hole in the fixed plate and tighten the nut with your adjustable wrench. Make sure it's tight enough that the caster doesn't wobble, but not so tight that you strip the threads.
Step 4: Test It Out (The "Rock and Roll" Check)
Stand back and give your newly installed caster a test. Push it gently—does it roll smoothly? Rock the frame side to side—any wobbling? If it's wobbly, check if the screws are loose or if the plate is bent. If the wheel doesn't roll, make sure the brake is off (I've definitely forgotten that before!) or that the wheel isn't rubbing against the frame. Adjust as needed, and repeat the test until it feels solid.
Step 5: Repeat for All Casters (Consistency Is Key)
Now, do the same for the remaining casters. Remember to measure and mark each one to keep them all at the same height—if one caster is higher than the others, your cart or workbench will lean, and that's a recipe for spills (or worse). Once all four are installed, push the whole structure around—if it glides smoothly and doesn't tip, you're golden!

Common Mistakes Beginners Make (And How to Avoid Them)
Even with a guide, it's easy to slip up. Here are the top mistakes I've seen (and made!) and how to steer clear:
Mistake #1: Using the Wrong Screws
Not all screws are created equal! Using short screws means they won't grip the frame; using long screws might poke through the other side. Check the thickness of your frame and plate, then choose screws that are 1/4 inch longer than the combined thickness. For example, if your frame is 1 inch thick and the plate is 1/4 inch thick, use 1 1/4 inch screws.
Mistake #2: Over-Tightening Screws
It's tempting to crank that screwdriver until the screw won't turn—but stop! Over-tightening can strip the holes, bend the plate, or even crack the frame (aluminum is especially prone to this). Tighten until the plate is snug against the frame, then give it a tiny extra twist—done.
Mistake #3: Skipping the Pilot Holes
"Drilling takes too long!" I get it, but trust me—pilot holes are non-negotiable. Without them, you risk splitting the frame, bending the screw, or misaligning the plate. Spend the extra 2 minutes drilling, and you'll save hours of frustration later.
Mistake #4: Ignoring Alignment
If your fixed plate is even slightly off-center, the caster will pull to one side when you roll it. Always trace the plate and double-check the marks before drilling. A level can help here too—place it on the plate to make sure it's straight.
Troubleshooting: "Help! My Caster Isn't Working Right!"
Even with perfect installation, things can go wrong. Here's how to fix common issues:
Problem: Wobbly Caster
Solution: Check if the screws are loose—tighten them. If that doesn't work, the fixed plate might be bent. Remove it, tap it flat with a rubber mallet, and reattach. If it's still wobbly, the caster itself might be damaged—swap it out.
Problem: Caster Won't Roll Straight
Solution: The plate is probably misaligned. Loosen the screws, adjust the plate so it's centered, and retighten. If the wheel is rubbing against the frame, file down any sharp edges on the frame or add a washer between the plate and frame to create space.
Problem: Plate Pulls Away from the Frame
Solution: You might have used screws that are too short or the pilot holes are too big. Try longer screws or add a washer under the screw head to distribute pressure. If the frame is stripped, fill the holes with wood glue and toothpicks (for wood) or epoxy (for metal), let it dry, then redrill.
Maintenance Tips: Keep Your Casters Rolling for Years
Installing the castor fixed plate is just the first step—now you need to keep it in shape. Here's how:
- Clean regularly: Wipe down the fixed plate and caster with a damp cloth to remove dust and debris. If you're using the cart in a messy area (like a workshop), spray the wheel with a little WD-40 to keep it rolling smoothly.
- Tighten screws monthly: Vibrations from rolling can loosen screws over time. Give them a quick check and tighten if needed.
- replace worn parts: If the caster wheel starts to crack or the brake stops working, swap in a new caster. Most caster and accessories are affordable, and it's better to replace a $10 wheel than risk a $100 cart breaking.
- Don't overload it: Check the weight limit on your caster and fixed plate! Overloading can bend the plate or snap the screws. If you need to carry heavy stuff, invest in heavy-duty casters and thicker fixed plates.
Wrapping Up: You've Got This!
Installing a castor fixed plate might seem intimidating at first, but with the right tools, a little patience, and these tips, you'll be a pro in no time. Remember: measure twice, drill once, and don't skip the prep work. Whether you're building a mobile workbench, a turnover trolley, or just upgrading your existing setup, a solid castor fixed plate installation is the foundation of a reliable, rolling system. And hey—once you're done, stand back and admire your handiwork. There's nothing like the satisfaction of knowing you built something that works (and works well).
Got questions? drop them in the comments below—I'm happy to help. Now go forth and roll smoothly, my friend!