- Company Articles
- Products and Technology
- Installation And Maintenance
- Castor Fixed Plate Loosening Prevention: Thread Locking Tips

Castor Fixed Plate Loosening Prevention: Thread Locking Tips
Related Product
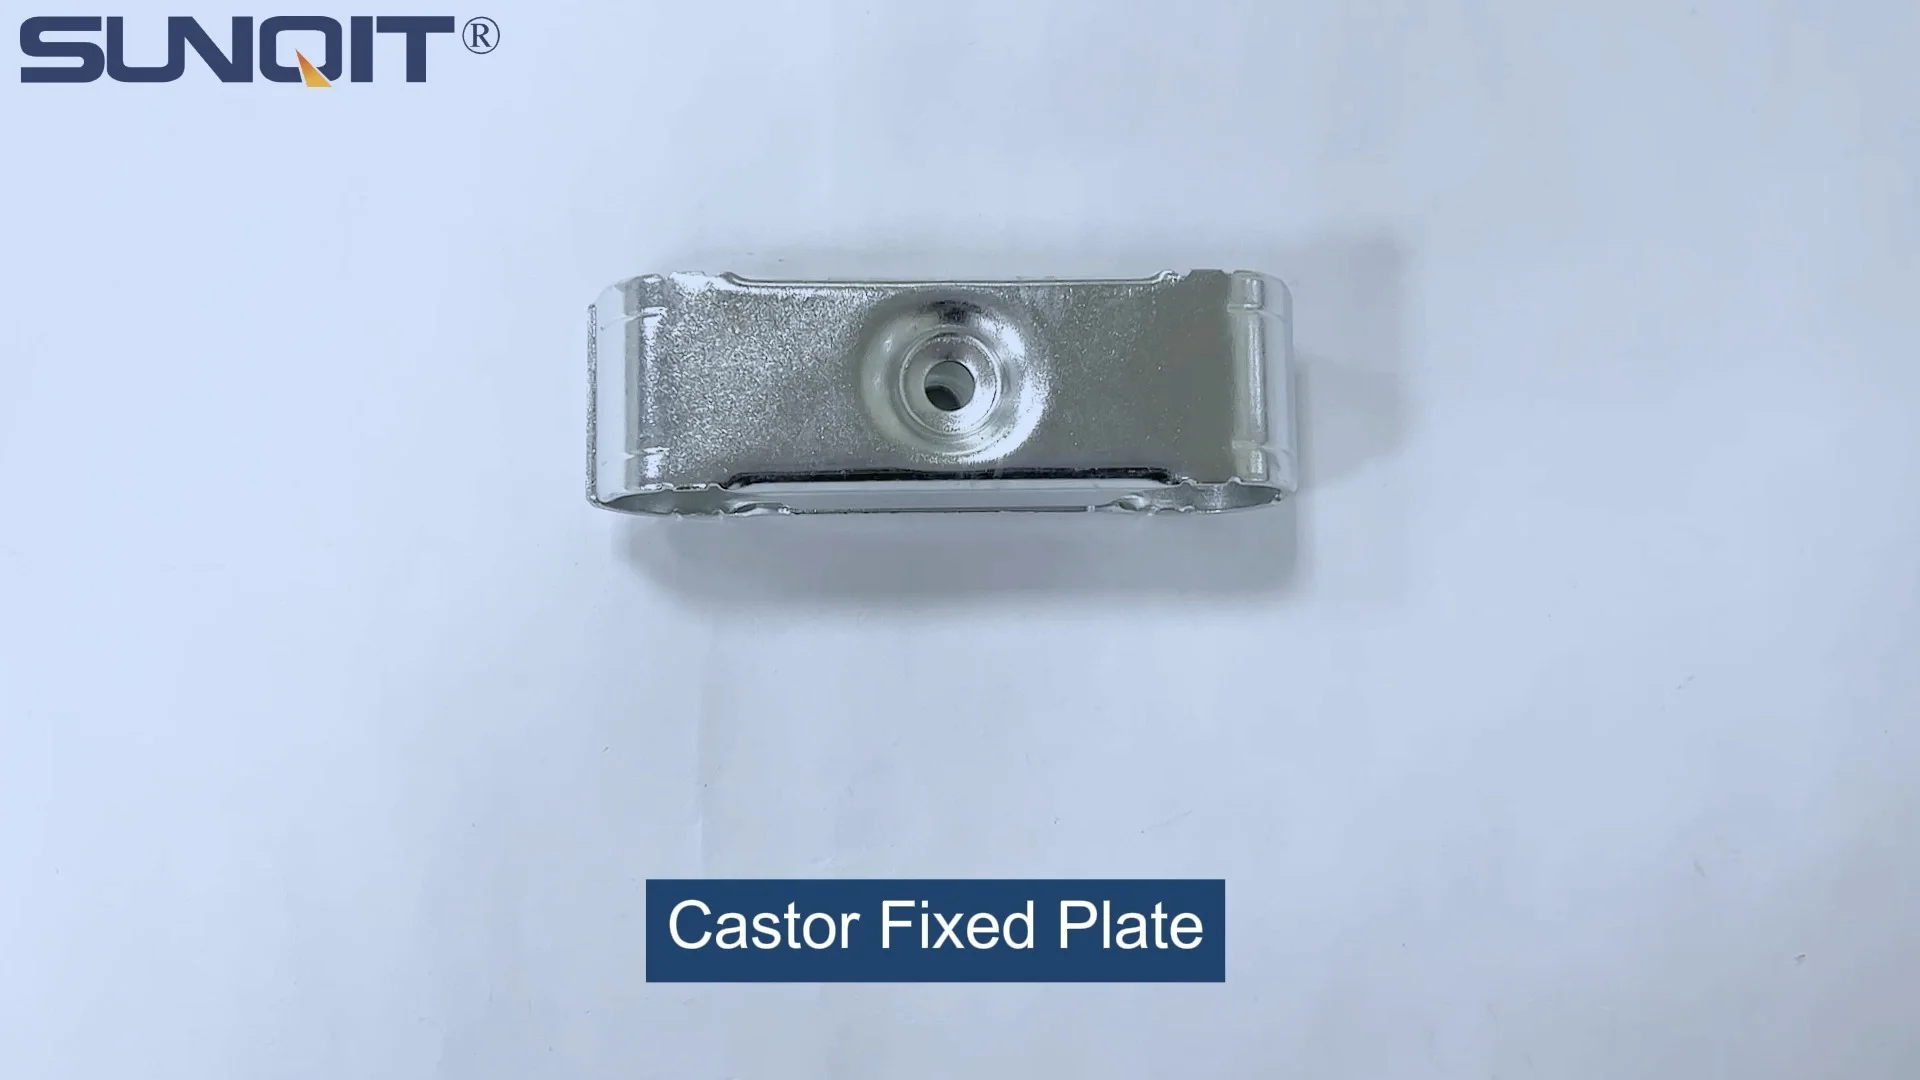
Castor Fixed Plate
Castor fixed plate, used for castor installation, one castor need two pcs castor plate to fix under the workbench, flow rack, and hand trolley.
Walk through any factory, warehouse, or workshop, and you'll notice a silent workhorse keeping operations moving: caster wheels. These unassuming components glide beneath workbenches, material racks, turnover trolleys, and conveyor systems, making it easy to shift heavy loads, organize materials, and keep production lines flowing. But what happens when the castor fixed plate—the critical piece that secures the caster wheel to its base—starts to loosen? Suddenly, that smooth-rolling trolley becomes a wobbly hazard, a workbench vibrates itself apart, or a material rack threatens to tip. Loose castor fixed plates don't just disrupt efficiency; they risk worker safety, damage equipment, and create costly downtime. The good news? With the right thread locking techniques, you can keep those plates tight, extend the life of your caster and accessories, and maintain a seamless workflow.
Why Do Castor Fixed Plates Loosen in the First Place?
Before diving into solutions, let's unpack why castor fixed plates come loose. It's rarely a single issue—instead, a mix of operational stressors and overlooked details. Here are the most common culprits:
- Vibration and Movement: Every time a trolley rolls over uneven floors or a workbench is bumped, vibrations travel through the caster wheel and into the fixed plate's bolts. Over time, this "micro-shaking" can slowly back bolts out of their threads—a phenomenon engineers call "vibration-induced loosening."
- Improper Installation Torque: Tightening bolts by hand (without a torque wrench) often leads to under-tightening, leaving room for movement. Conversely, over-tightening can stretch bolts, weakening their grip over time.
- Contaminated Threads: Dirt, oil, or rust on bolt threads acts as a barrier, preventing proper seating. Even a thin layer of grease can let bolts slip as vibrations set in.
- Low-Quality Accessories: Using generic or worn caster accessories—like stripped bolts, flimsy washers, or a damaged castor installation base—undermines the entire setup. A weak link here means the fixed plate can't hold securely, no matter how tight the bolts.
- Environmental Factors: Temperature swings (common in warehouses with unregulated climates) cause metal to expand and contract, loosening bolt tension. Humidity and chemicals can also corrode threads, weakening their hold.
The bottom line? Ignoring these issues turns a minor annoyance into a major problem. A loose castor fixed plate on a heavy-duty material rack, for example, could lead to a collapse, damaging inventory or injuring a worker. On a production line trolley, it might cause parts to shift, leading to assembly errors. The solution? Thread locking—a simple, affordable technique that transforms "temporary tightness" into "long-term security."
Thread Locking 101: What It Is and How It Works
Thread locking isn't magic, but it might feel like it. At its core, it's a specialized adhesive designed to fill the tiny gaps between bolt threads and the castor installation base, creating a friction bond that resists vibration, shock, and movement. Unlike traditional lock washers (which can wear out or compress over time), thread lockers form a semi-permanent seal that keeps bolts tight until you intentionally break the bond—usually with heat or extra torque.
There are three main types of thread lockers, each tailored to different needs:
| Locker Type | Color | Strength | Curing Time (25°C) | Best For | Removal Method |
|---|---|---|---|---|---|
| Low-Strength (Purple) | Purple | Removable, low shear strength | 5-10 minutes (fixture); 24 hours (full cure) | Small bolts (≤6mm), delicate parts, or components that need frequent disassembly (e.g., caster wheels on light-duty workbenches) | Hand tools (no heat needed) |
| Medium-Strength (Blue) | Blue | Semi-permanent, balances hold and removability | 10-20 minutes (fixture); 24 hours (full cure) | Most caster fixed plates, standard bolts (6-12mm), and equipment that needs occasional maintenance (e.g., turnover trolleys, material racks) | Hand tools or wrench (may need moderate torque) |
| High-Strength (Red) | Red | Permanent, high shear strength | 20-30 minutes (fixture); 24 hours (full cure) | Heavy-duty applications: large bolts (>12mm), high-vibration equipment (e.g., motorized conveyors, industrial workbenches with constant movement) | Heat (250-300°C) + high-torque tools |
For most caster fixed plates, medium-strength (blue) thread locker is the sweet spot. It's strong enough to resist daily vibrations but can still be removed with basic tools if you need to replace the caster wheel or castor installation base later. Low-strength (purple) works for lightweight setups, while high-strength (red) is overkill unless you're dealing with extreme conditions.

Tools You'll Need: Assembling Your Thread Locking Kit
Thread locking is a straightforward process, but having the right tools ensures you do it right the first time. Here's what to gather before you start:
- Torque Wrench: Critical for applying precise torque (check your caster's manual for specs—most castor fixed plates use 15-30 Nm for M8-M10 bolts).
- Open-End or Socket Wrench: For removing old bolts and final tightening (after applying thread locker).
- Degreaser/Thread Cleaner: A solvent like isopropyl alcohol, brake cleaner, or specialized thread degreaser to remove oil, dirt, and rust from bolts and the castor installation base's threads.
- Thread Locker: As discussed, medium-strength (blue) is ideal for most cases. Look for brands like Loctite or Permatex—avoid generic "super glue," which can harden unevenly and damage threads.
- Clean Rags/Shop Towels: To wipe down threads and dry them thoroughly before applying locker.
- Disposable Gloves: Thread locker can irritate skin, and gloves keep oil from your hands off clean threads.
- Wire Brush or Dental Pick: For scrubbing stubborn rust or old thread locker residue from bolt holes.

Step-by-Step: Applying Thread Locker to Castor Fixed Plates
Now, let's walk through the process of securing your castor fixed plate with thread locker. Follow these steps, and you'll turn wobbly wheels into rock-solid reliability:
Step 1: Disassemble and Inspect
Start by removing the loose bolts from the castor fixed plate. Use your wrench to back them out slowly—if they're seized, apply a penetrating oil (like WD-40) and let it sit for 10 minutes. Once bolts are out, inspect the castor installation base, bolts, and caster wheel for damage: Are the base's threads stripped? Are bolts bent or rusted? If yes, replace them with new caster accessories—thread locker can't fix worn parts!
Step 2: Clean the Threads (The Most Important Step!)
Even a tiny amount of grease or dirt can ruin thread locker adhesion. Take your degreaser and spray it generously on the bolts and the castor installation base's bolt holes. Use a wire brush to scrub bolts' threads, then wipe everything with a clean rag. For bolt holes, soak a rag in degreaser and twist it into the hole to remove hidden grime. Let all parts air-dry for 5-10 minutes—moisture will prevent the locker from curing properly.
Step 3: Apply Thread Locker
Shake the thread locker bottle well. Apply a thin, even bead of locker to the male threads of the bolt (the part that screws into the castor installation base). Cover the first 2-3 threads—you don't need to douse the entire bolt! Too much locker can squeeze out and gum up the caster wheel's movement or corrode nearby parts. If you're reusing old bolts, also add a drop inside the castor installation base's bolt hole to ensure full coverage.
Step 4: Assemble and Torque to Spec
Screw the bolt into the castor installation base by hand until it's snug (this spreads the thread locker evenly). Then, attach your torque wrench and tighten to the manufacturer's recommended torque. Stop as soon as the wrench "clicks"—over-tightening can crack the castor installation base or snap the bolt.
Step 5: Let It Cure
Thread locker needs time to harden. Most medium-strength formulas "fixture" (become tacky enough to hold) in 10-20 minutes, but full curing takes 24 hours. Avoid moving the caster wheel or applying load during this time—patience here ensures a strong bond.

Pro Tips for Long-Term Success
Thread locking isn't a "set it and forget it" fix—even the best applications need maintenance. Here's how to keep your castor fixed plates tight for years:
- Inspect Regularly: Add castor fixed plates to your weekly equipment checklists. Look for signs of loosening: gaps between the plate and base, wobbling when the caster wheel moves, or visible bolt threads (if bolts have backed out).
- Retorque After Cure: For high-vibration equipment (like motorized trolleys), retorque bolts 24-48 hours after applying thread locker. The initial cure can sometimes cause slight relaxation, and a quick retighten ensures maximum hold.
- replace Worn Accessories: If the castor installation base shows cracks, or caster accessories like washers are flattened, swap them out immediately. A new base costs far less than repairing a damaged workbench or replacing spilled inventory.
- Avoid Over-Tightening During Reassembly: When replacing a caster wheel later, don't rely on brute force to break the thread locker bond. For medium-strength locker, a firm wrench turn should loosen it—if not, apply a few drops of thread locker remover or heat the bolt head with a hair dryer (on low!) to soften the adhesive.
Common Mistakes to Avoid
Even seasoned technicians make missteps with thread locking. Steer clear of these errors to ensure your castor fixed plates stay tight:
- Using the Wrong Strength: High-strength (red) locker on a light-duty caster means you'll need a torch to remove bolts later—overkill! Stick to blue for most applications.
- Ignoring Cleanliness: Skipping the degreaser step is the #1 reason thread locker fails. Greasy threads let the locker slide right off, leaving you back at square one.
- Over-Applying Locker: Excess locker oozing out of bolt holes can gum up caster wheels or damage plastic components. A little goes a long way!
- Rushing the Cure: Putting a loaded trolley back into service 30 minutes after applying locker is a recipe for failure. Let the adhesive fully cure—your future self (and safety inspector) will thank you.
Real-World Results: A Case Study
To see how effective thread locking can be, consider a mid-sized electronics manufacturer we worked with last year. Their production line used 12 turnover trolleys (each with 4 caster wheels) to move circuit boards between stations. For months, the trolleys wobbled constantly, and bolts on the castor fixed plates needed retightening every 2-3 days. Workers complained about back strain from stabilizing the trolleys, and twice, boards fell off, costing $500 in damaged parts each time.
After inspecting the setup, we found two issues: the maintenance team had been tightening bolts by hand (no torque wrench) and never cleaned threads before assembly. We recommended switching to medium-strength thread locker, using a torque wrench set to 22 Nm, and cleaning threads with isopropyl alcohol. The team followed the steps, and within a week, the wobbling stopped. Three months later, a follow-up check showed all bolts were still tight—no retightening needed. The result? Zero damaged boards, reduced worker fatigue, and maintenance time cut by 90%.
Final Thoughts: Tight Plates, Smooth Operations
Loose castor fixed plates might seem like a small problem, but in busy facilities, they're a silent productivity killer. By taking the time to clean threads, apply the right thread locker, and torque bolts properly, you'll transform shaky, unreliable equipment into a stable, efficient asset. Remember: the key isn't just "tightening bolts"—it's creating a bond that resists the daily grind of vibration, movement, and wear. Pair that with quality caster and accessories (like a sturdy castor installation base and fresh bolts), and you'll keep your caster wheels rolling smoothly for years to come. After all, in manufacturing and warehousing, the best workflows are built on the smallest, tightest details.