- Company Articles
- Products and Technology
- Installation And Maintenance
- Castor Installation Base Alignment: Ensuring Straight Movement of Workbench E

Castor Installation Base Alignment: Ensuring Straight Movement of Workbench E
Related Product
Castor Installation Base
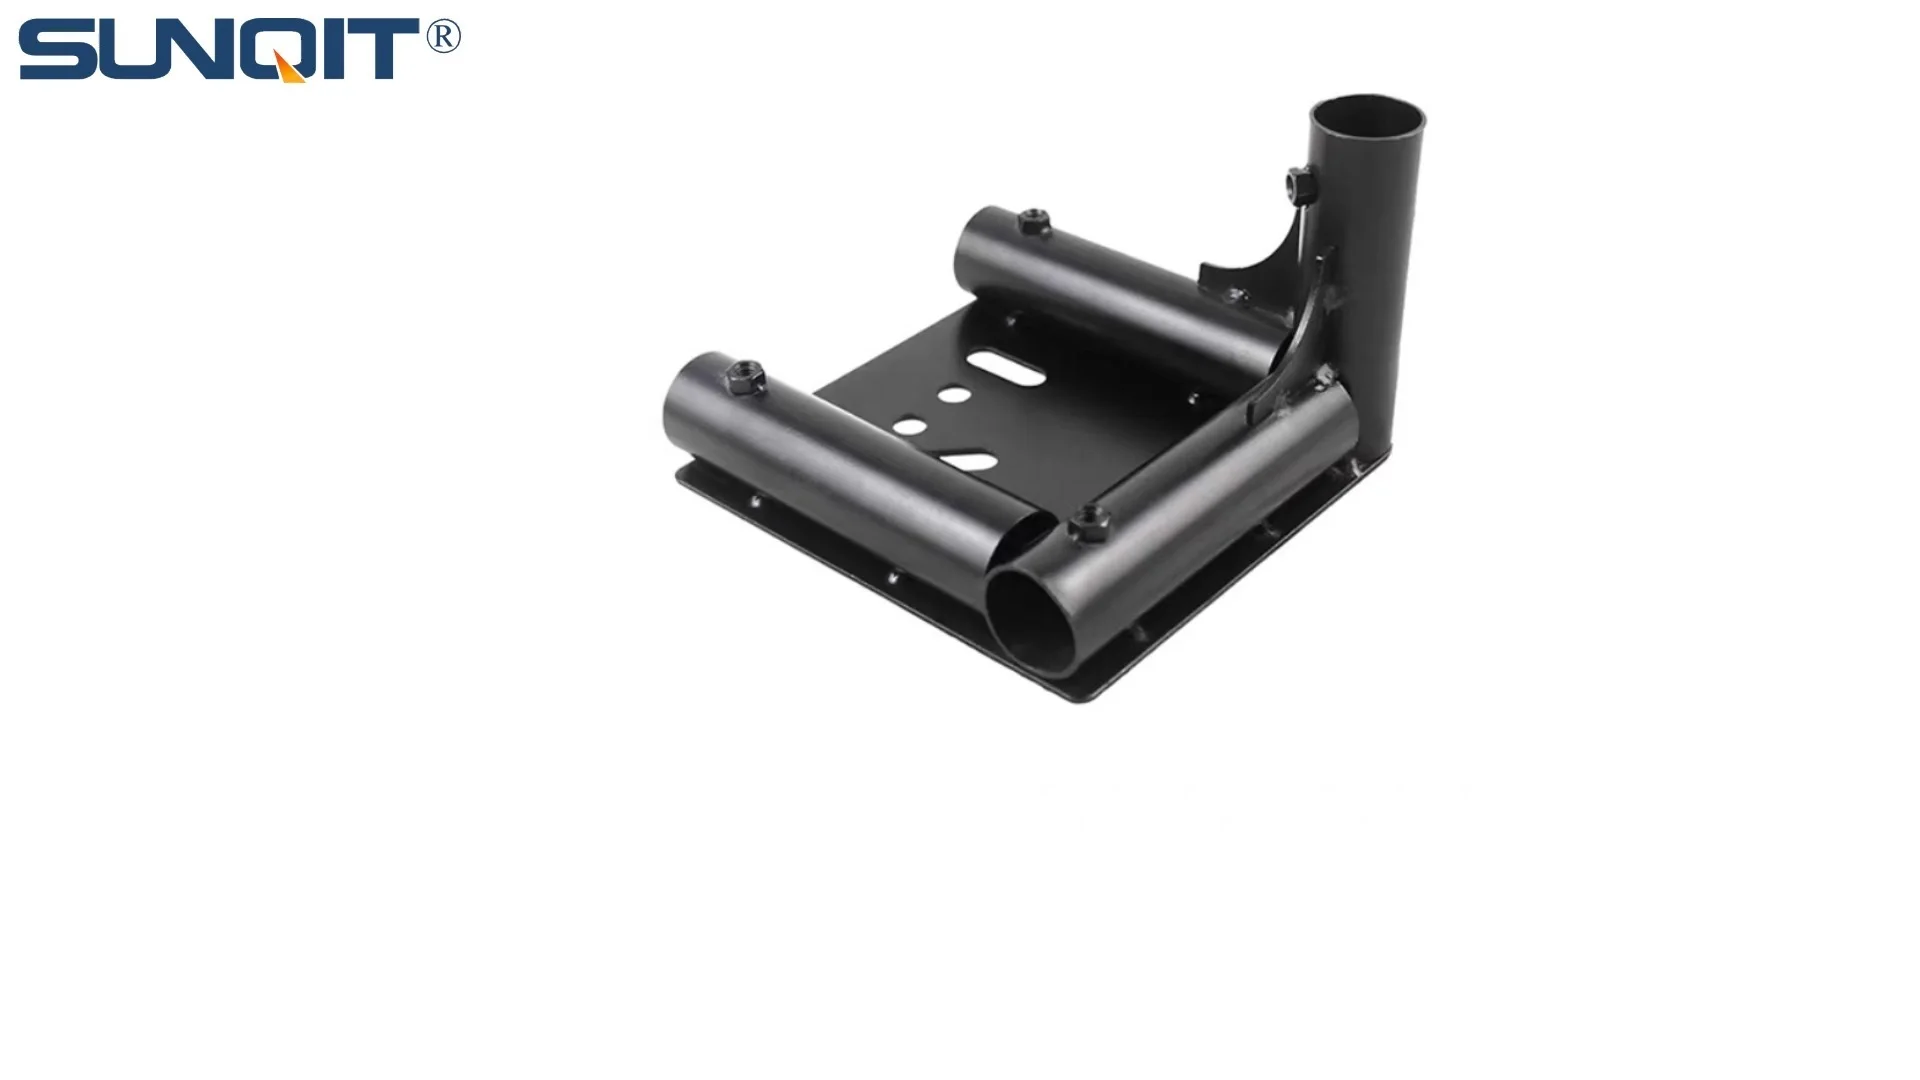
Pipe fitting castor installation base,Well made, precise and strong. Made of high quality of steel,black painting surface treatment for greater resistance to corrosion. It is used for castor or foot lever connection with lean pipe.
Introduction: The Unsung Hero of Production Efficiency – Workbench E
In the bustling hum of a modern production line, where every second counts and precision is non-negotiable, the tools and equipment that form the backbone of daily operations often go unnoticed—until something goes wrong. Take, for example, the humble Workbench E (single deck-without caster) . At first glance, it might seem like just another sturdy surface: a flat, reliable platform where assembly workers piece together components, quality inspectors check for defects, or material handlers sort parts. But for those who rely on it day in and day out, Workbench E is far more than that. It's a command center, a silent partner in maintaining workflow rhythm, and a critical link in the chain of lean manufacturing.
What makes Workbench E unique is its versatility. Designed as a "single deck-without caster" model, it's intentionally built without mobility features to prioritize stability for tasks requiring precision. Yet, in many facilities, the demands of dynamic production environments often lead teams to retrofit this workbench with casters, transforming it into a mobile unit that can be easily repositioned to adapt to shifting workflows. This retrofitting process typically involves adding casters via a caster installation base —a small but vital component that bridges the gap between the workbench's fixed structure and the mobility of casters. And here's the catch: if that base isn't aligned correctly, the workbench's newfound mobility can quickly become a liability.
Imagine this scenario: A team at a electronics assembly plant recently upgraded their Workbench E units with casters to improve line flexibility. Within days, operators began complaining. "It feels like pushing a shopping cart with a stuck wheel," one worker noted. Another added, "I have to use extra force just to keep it straight—by the end of the shift, my shoulders ache." What seemed like a simple upgrade to boost efficiency had backfired. The culprit? Misaligned caster installation bases. Instead of gliding smoothly to where it was needed, the workbench drifted to the left, scraped against neighboring equipment, and slowed down tasks that were supposed to be streamlined. This isn't just a minor annoyance; it's a productivity drain, a safety risk, and a hidden cost that erodes the very "lean" principles the upgrade was meant to support.
In this article, we'll dive deep into the world of caster installation base alignment, focusing specifically on Workbench E. We'll explore why straight movement matters, the anatomy of a caster installation base, the hidden costs of misalignment, and a step-by-step guide to getting alignment right the first time. Whether you're a production manager troubleshooting inefficiencies, a maintenance technician tasked with retrofitting equipment, or a facility owner looking to maximize the lifespan of your lean pipe workbench investments, this guide will equip you with the knowledge to ensure your Workbench E moves as straight as an arrow—because in manufacturing, even the smallest details can make the biggest difference.
Understanding the Basics: What Is a Caster Installation Base, Anyway?
Before we can fix alignment issues, we need to understand the star of the show: the caster installation base . Think of it as the translator between your Workbench E and the casters. Without it, attaching casters directly to the workbench's frame would be like trying to screw a lightbulb into a wall socket—they just wouldn't connect. The base serves as a mounting plate, a stabilizer, and a precision guide, ensuring that the casters are positioned correctly to support the workbench's weight and enable smooth movement.
Caster installation bases come in various shapes and sizes, but for Workbench E, they're typically flat, metal plates (often steel or aluminum) with pre-drilled holes that match both the workbench's frame and the caster's mounting pattern. Some are designed with raised edges for extra stability, while others have slotted holes to allow for minor adjustments during installation. What they all share, however, is a critical role: distributing the workbench's load evenly across the casters and keeping those casters pointed in the same direction. If the base is tilted, off-center, or loosely attached, the casters will fight against each other, leading to the "drifting" or "pulling" sensation workers often describe.
It's also worth noting that the caster installation base doesn't work alone. It relies on caster accessories like bolts, washers, and locknuts to stay secure. A loose bolt here or a missing washer there might seem trivial, but over time, these small oversights can cause the base to shift, throwing off alignment and turning a smooth-rolling workbench into a frustrating obstacle. In short, the caster installation base is the unsung hero of workbench mobility—quietly ensuring that every push, pull, and pivot happens exactly as it should.

The Hidden Costs of Misalignment: Why Straight Movement Matters More Than You Think
Let's get real: If your Workbench E drifts a little to the right when you push it, is that really a big deal? You might be tempted to brush it off as a minor annoyance, but the truth is, misaligned caster installation bases can cost your operation far more than just frustration. Let's break down the hidden costs—both tangible and intangible—that add up over time.
1. Lost Productivity: Time Wasted Fighting the Workbench
Picture this: Maria, an assembly line worker, needs to move Workbench E from Station A to Station B—a distance of about 20 feet. On a good day, this takes 10 seconds. But with misaligned casters, the workbench pulls hard to the left, forcing Maria to use extra strength to keep it on track. She bumps into a neighboring lean pipe workbench , pauses to readjust, and by the time she reaches Station B, 30 seconds have passed. Multiply that by 10 moves a day, 5 days a week, and suddenly Maria is losing over 16 hours a year just wrestling with a workbench. Now multiply that across an entire team, and the numbers become staggering. Misalignment turns simple tasks into battles, and in manufacturing, time is money.
2. Safety Risks: From Strained Muscles to Accidents
When a workbench doesn't roll straight, workers compensate by leaning, pulling, or twisting their bodies to correct its path. Over time, this repetitive strain can lead to musculoskeletal injuries—think back pain, shoulder strains, or carpal tunnel syndrome. These injuries not only take workers off the line but also increase workers' compensation claims and insurance costs. Worse, a workbench that suddenly veers off course could collide with other equipment, knock over tools, or even injure someone standing nearby. In 2023, the Bureau of Labor Statistics reported that over 25% of workplace injuries in manufacturing are due to "overexertion or bodily reaction"—and misaligned equipment is a silent contributor to that statistic.
3. Premature Wear and Tear: Your Workbench (and Budget) Will Thank You
Casters and their components are designed to wear evenly when rolling straight. When they're misaligned, however, the wheels drag, scrape, or bear uneven weight, causing them to wear out 2-3 times faster than normal. This means more frequent replacements of not just casters, but also caster accessories like bearings, axles, and even the caster installation base itself. Add in the cost of repairing damaged floors (scratched concrete or dented tiles from a drifting workbench) and the total bill can climb into the thousands. For small to mid-sized manufacturers, these unexpected expenses can eat into profit margins or delay other critical upgrades.
4. Quality Compromises: When Distraction Leads to Defects
Lastly, there's the intangible cost of distraction. A worker struggling with a misaligned workbench is not fully focused on their task. They're thinking about the effort it takes to move the bench, worrying about hitting something, or frustration from the constant readjustment. This mental load can lead to mistakes—missed defects, incorrect assembly, or sloppy work. In industries like aerospace or medical device manufacturing, where a single error can have life-or-death consequences, this risk is simply unacceptable. Even in less critical sectors, quality defects lead to rework, customer complaints, and damaged reputations—all because of a caster installation base that wasn't aligned properly.

Step-by-Step Guide: Aligning Your Caster Installation Base Like a Pro
Now that we understand why alignment matters, let's roll up our sleeves and fix it. Aligning a caster installation base on Workbench E isn't rocket science, but it does require patience, attention to detail, and the right tools. Follow these steps, and you'll have your workbench rolling straight in no time.
Step 1: Gather Your Tools (and Prep the Workspace)
Before you start, make sure you have everything you need. Here's your checklist:
- A spirit level (2-foot or longer for accuracy)
- A socket wrench set (with the correct size for your caster bolts)
- A measuring tape or ruler
- A pencil or marker for marking positions
- A rubber mallet (for gentle adjustments)
- Clean rags (to wipe down the workbench frame and base)
- Thread locker (optional, but recommended to prevent bolts from loosening)
- Replacement caster accessories (bolts, washers, locknuts) if the existing ones are rusted or damaged
Next, clear the area around Workbench E. You'll need space to move around the bench, and you don't want any obstacles in the way when testing movement later. If the workbench has tools or materials on it, temporarily move them to a secure location—safety first!
Step 2: Inspect and Clean the Mounting Surface
Misalignment can sometimes stem from a dirty or damaged mounting surface. Flip Workbench E onto its side (or have a helper hold it steady) so you can access the bottom frame where the caster installation base will attach. Use a clean rag to wipe away dust, grease, or debris—even a small pebble or chunk of dirt can create a gap between the base and the frame, leading to uneven mounting. Check the frame for rust, dents, or bent metal; if you spot any damage, repair or replace the frame before proceeding—an uneven foundation will always lead to alignment issues.
Step 3: Position the Caster Installation Base (and Mark Holes)
Place the caster installation base on the cleaned mounting surface. The goal here is to center it as much as possible, but precision matters more than guesswork. Use your measuring tape to ensure equal distance from the edges of the frame to the base on all sides. For example, if the frame is 30 inches wide, the base should sit 5 inches from the left and 5 inches from the right (assuming the base is 20 inches wide). Mark the positions of the pre-drilled holes on the frame with a pencil—this will guide your drilling (if needed) or bolt placement.
Pro tip: If your base has slotted holes, align them so there's room for adjustment later. You can always tighten them down once alignment is confirmed, but starting with flexibility will save you headaches.
Step 4: Attach the Base Temporarily (and Check Level)
insert the bolts through the base's holes and into the frame (or drill pilot holes if the frame isn't pre-drilled). Tighten them just enough to hold the base in place—you'll need to adjust it later, so don't fully torque them yet. Now, place your spirit level on top of the base. The bubble should sit perfectly in the center. If it tilts to one side, gently tap the base with a rubber mallet to adjust until it's level. This step ensures that the base isn't mounted at an angle, which is a common cause of drifting.
Step 5: Align Multiple Bases (for Workbenches with 4+ Casters)
Most Workbench E units use four casters (one at each corner), meaning four caster installation bases. To ensure straight movement, all four bases must be aligned in the same direction. Here's how: After mounting one base, measure the distance from its front edge to the workbench's front frame. Repeat this for the opposite base—they should be identical. Then, use a straightedge (like a long level or piece of lumber) to check that the bases are parallel. If one is angled even slightly, the casters will point in different directions, causing the workbench to pull. Adjust the bases until they're perfectly parallel and equidistant from the edges.
Step 6: Tighten Bolts (and Lock Them in Place)
Once all bases are level, centered, and parallel, it's time to secure them for good. Using your socket wrench, tighten each bolt in a "star" pattern (similar to tightening lug nuts on a car) to ensure even pressure. Over-tightening can warp the base, so follow the manufacturer's torque specifications (usually 25-30 ft-lbs for steel bases). For extra security, apply a drop of thread locker to each bolt—this prevents them from loosening due to vibration over time.
Step 7: Test, Adjust, and Repeat
Flip Workbench E back onto its casters and give it a test push. Roll it across a flat, open area and observe: Does it move straight, or does it drift? If it drifts, check which caster is causing the issue. A quick way to test is to lift one caster at a time and roll the workbench—if the drift stops when a particular caster is off the ground, that base is misaligned. Loosen the bolts, adjust the base slightly, and retest. It may take 2-3 tries, but patience pays off. Once the workbench rolls straight with minimal effort, you're done!

Troubleshooting Common Alignment Issues: When "Straight" Feels Like a Moving Target
Even with careful installation, you might run into issues. Here's how to diagnose and fix the most common problems:
| Problem | Possible Cause | Solution |
|---|---|---|
| Workbench drifts to one side | Caster installation base is angled or misaligned with others | Loosen bolts, use a straightedge to realign bases, retighten |
| Caster wobbles when rolling | Base is loose or caster accessories (e.g., bearings) are worn | Tighten bolts or replace worn bearings/axles |
| Workbench rocks or feels unstable | Base is not level or floor is uneven | Adjust base with spirit level or use adjustable leveling feet for uneven floors |
| Wheels squeak or drag | Misalignment causing uneven weight distribution | Realign bases to ensure even load across all casters |
For example, if your workbench rocks, it might not be the base's fault—some floors have slight dips or bumps. In this case, pairing your caster installation base with adjustable leveling feet can help stabilize the workbench, even on uneven surfaces. These feet thread into the base or frame, allowing you to raise or lower individual corners to compensate for floor irregularities. It's a simple add-on that can make a world of difference in alignment and stability.
Pro Tips for Long-Term Alignment: Keep Your Workbench Rolling Straight for Years
Alignment isn't a one-and-done task. To keep Workbench E moving straight for the long haul, follow these maintenance habits:
- Inspect monthly: Add caster installation base checks to your routine maintenance schedule. Tighten loose bolts, clean debris from the base, and check for signs of wear (rust, cracks, or bent metal).
- Lubricate casters: Apply a few drops of lubricant to caster wheels and bearings every 3 months to reduce friction—this prevents uneven wear that can throw off alignment.
- Train your team: Teach workers to push the workbench from the center, not the corners, to avoid putting uneven pressure on the casters. A little awareness goes a long way.
- replace worn parts early: If a caster wheel starts to wobble or a caster accessory looks damaged, replace it immediately. Waiting will only lead to bigger alignment issues down the line.
Conclusion: Straight Movement, Smoother Operations
At the end of the day, aligning a caster installation base might seem like a small task—but it's the kind of small task that defines a well-run production line. When Workbench E rolls straight, workers move faster, safer, and with more focus. Equipment lasts longer, budgets stay intact, and quality remains consistent. It's a testament to the lean manufacturing principle that every detail, no matter how minor, contributes to overall success.
So the next time you walk past a Workbench E, take a moment to appreciate the caster installation base quietly doing its job. And if you notice it drifting, don't ignore it—grab your spirit level, tighten those bolts, and set it straight. Your team, your budget, and your production line will thank you.