- Company Articles
- Products and Technology
- Installation And Maintenance
- Castor Installation Base Mounting Tools: Must-Have Equipment for Workbench E Setup

Castor Installation Base Mounting Tools: Must-Have Equipment for Workbench E Setup
Related Product
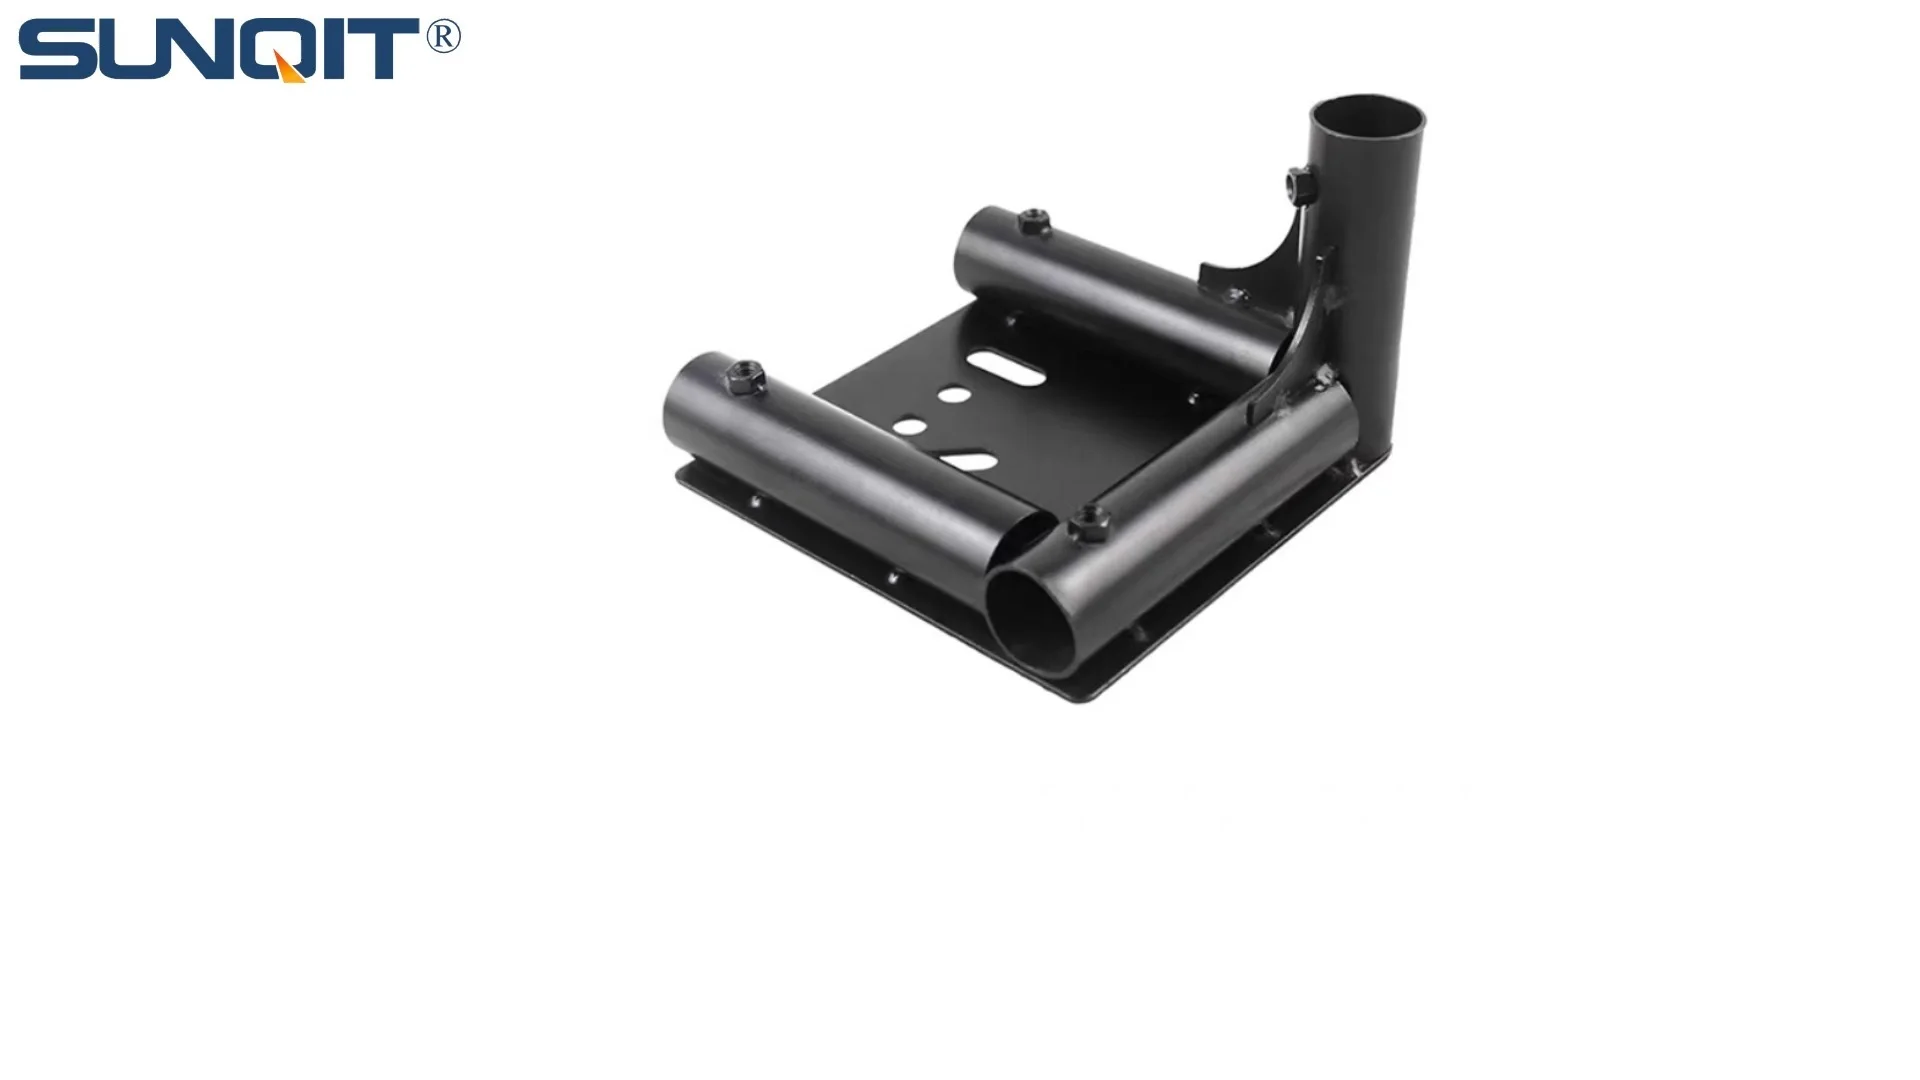
Castor Installation Base
Pipe fitting castor installation base,Well made, precise and strong. Made of high quality of steel,black painting surface treatment for greater resistance to corrosion. It is used for castor or foot lever connection with lean pipe.
A guide to equipping your workspace with mobility, stability, and efficiency
Picture this: You've just unboxed your new workbench E (single deck-without caster) —a sleek, sturdy addition to your workshop, factory floor, or lab. Its single deck offers ample surface area for assembling parts, organizing tools, or testing equipment, and its minimalist design fits perfectly into your existing layout. But there's one thing missing: mobility. Without casters, moving this workbench to accommodate a new production line, clean the area, or reconfigure your workspace feels like trying to push a boulder—cumbersome, time-consuming, and risky for both the bench and your floors. That's where the castor installation base comes in. This unassuming but critical component bridges the gap between a static workbench and a dynamic, adaptable workspace. But to install it right, you need the right tools. In this guide, we'll walk through the must-have mounting tools for setting up your Workbench E with a castor installation base, why each tool matters, and how they transform your workspace from rigid to responsive.
Understanding Workbench E: The Foundation of Your Setup
Before diving into tools, let's take a closer look at Workbench E itself. Designed as a "single deck-without caster" model, it's built for durability and simplicity. The deck, typically made from high-density particleboard or aluminum, provides a flat, stable surface resistant to scratches and heavy loads—ideal for tasks like electronics assembly, small-part manufacturing, or quality control inspections. Its frame, often constructed from steel or aluminum, is engineered to withstand daily wear, with a weight capacity that ranges from 200kg to 500kg depending on the model. But what makes Workbench E stand out is its adaptability: it's designed to be customized. Need extra storage? Add a shelf. Want to organize cables? Install a cable management tray. And, most importantly, want mobility? Attach a castor installation base.
Why casters, though? In today's fast-paced work environments, flexibility isn't a luxury—it's a necessity. A static workbench locks you into one layout, limiting how you respond to changes in production needs, team size, or workflow. With casters, suddenly your Workbench E can glide to where it's needed: from the assembly line to the packing station, from the lab to the storage room, or even outside for deep cleaning. But installing casters isn't as simple as screwing wheels to the bottom. The castor installation base acts as a buffer between the workbench frame and the casters, distributing weight evenly, protecting the frame from damage, and ensuring smooth movement. To install this base correctly, you need tools that balance precision, strength, and safety.
The Must-Have Tools: Your Castor Installation Arsenal
Installing a castor installation base on Workbench E isn't a job for a random screwdriver and a prayer. Each tool serves a specific purpose, ensuring the base is secured tightly, aligned correctly, and ready to handle the demands of daily use. Below, we've broken down the essential tools, why they're critical, and how to use them effectively.
1. Precision Measuring Tape & Carpenter's Pencil
Before you drill a single hole, you need to know where to place the castor installation base. Workbench E's frame is designed with pre-drilled mounting points (a common feature in modern lean pipe workbench systems), but even slight misalignment can lead to wobbly casters, uneven weight distribution, or damage to the frame. A 5-meter (16-foot) precision measuring tape with clear markings (metric and imperial, if possible) lets you measure the distance between mounting holes, ensuring the base is centered and level. Pair it with a carpenter's pencil—preferably with a fine tip—to mark drill points without smudging. Pro tip: Measure twice, mark once. A single misaligned mark can throw off the entire installation, leading to extra holes, weakened frame integrity, or casters that don't roll smoothly.
2. Cordless Drill with Hex Bits & Pilot Drill Bits
Once you've marked your mounting points, it's time to secure the castor installation base to the Workbench E frame. Most bases attach using hex-head bolts (often M8 or M10), which require a hex bit to tighten. A cordless drill with variable speed settings gives you the power to drive bolts quickly without stripping the heads. Look for a drill with at least 18V of power—enough to handle steel or aluminum frames without bogging down. Don't forget pilot drill bits, either. Even if the frame has pre-drilled holes, pilot bits (slightly smaller than the bolt diameter) clean out debris, align the base with the frame, and reduce the risk of cracking the metal. For steel frames, use high-speed steel (HSS) bits; for aluminum, cobalt bits work best to prevent dulling.
3. Torque Wrench
You might think, "Why not just use the drill to tighten the bolts as much as possible?" Over-tightening is a common mistake that can warp the castor installation base, strip the bolt threads, or even crack the Workbench E frame. Under-tightening, on the other hand, leads to loose casters that wobble or detach during use—safety hazards that no workspace can afford. A torque wrench solves this by letting you tighten bolts to a specific torque (measured in Newton-meters, or Nm), as recommended by the base manufacturer (typically 25-35 Nm for steel frames, 15-25 Nm for aluminum). Set the wrench to the specified torque, attach the hex socket, and tighten until you hear the "click"—a satisfying sound that means the bolt is secure, not strained.
4. Spirit Level
Imagine installing the castor base, attaching the casters, and rolling the workbench only to find it leans to one side. Not only is this annoying, but it can also damage the casters, cause tools to slide off the deck, or even lead to workplace injuries. A 60cm (24-inch) spirit level ensures the castor installation base is perfectly horizontal before you tighten the bolts. Place the level across the base (front to back and side to side) and adjust the base until the bubble sits dead center in the vial. This step is especially crucial if your floor isn't perfectly level—even a small slope can throw off the workbench's balance. For extra precision, use a digital spirit level with a backlit display, which shows angles in degrees and alerts you when level is achieved.
5. Rubber Mallet & Pry Bar (For Alignment)
Even with careful measuring, the castor installation base might not align perfectly with the Workbench E's mounting holes. Metal frames can warp slightly during shipping, or the base might shift as you position it. A rubber mallet (never a steel hammer—you'll dent the frame or base) gently taps the base into place without damaging the metal. If the base is stuck or misaligned, a small pry bar (with a rubber-tipped end to prevent scratches) can lever it into position. Think of these tools as your "fine-tuning" helpers: they turn a "close enough" installation into a "perfect fit."
6. Safety Gear: Gloves, Goggles, & Work Boots
Tools are only effective if you can use them safely. Metal shavings from drilling can fly into your eyes, sharp edges on the frame or base can cut hands, and heavy bases (some weigh 10-15kg) can pinch fingers or crush toes. Always wear cut-resistant gloves (leather or nitrile) to protect hands, safety goggles with side shields to guard eyes, and steel-toe work boots to shield feet. A dust mask is also a good idea if drilling into painted or coated frames, as paint chips can irritate lungs. Safety isn't an afterthought—it's the foundation of a successful installation.
| Tool | Purpose | Pro Tip |
|---|---|---|
| Precision Measuring Tape | Mark mounting points and ensure alignment | Use a tape with a locking mechanism to avoid retraction mid-measure |
| Cordless Drill with Hex Bits | Drive bolts into the frame and base | Keep extra bits handy—hex bits wear down with repeated use |
| Torque Wrench | Tighten bolts to manufacturer-specified torque | Calibrate annually to ensure accuracy |
| Spirit Level | Ensure the base is horizontal | Check level in two directions (front-back and side-side) |
| Rubber Mallet & Pry Bar | Align the base with mounting holes | Tap gently—force can warp the base |

Step-by-Step Installation: From Static to Mobile
Now that you have your tools, let's walk through installing the castor installation base on your Workbench E. This process takes about 30-45 minutes for a first-timer, but with practice, you'll have it down to 20. Take your time—rushing leads to mistakes that cost more time (and money) to fix later.
Step 1: Prep the Workbench & Workspace
Start by clearing the area around Workbench E. You'll need room to maneuver, so move tools, boxes, or debris at least 2 meters away. Next, flip the workbench onto its side (or have a helper hold it steady) so the bottom frame is accessible. Lay a soft cloth or cardboard on the floor to protect the deck from scratches. Inspect the frame for any shipping damage—dents, bent metal, or missing pre-drilled holes. If you find issues, contact the manufacturer before proceeding; installing a base on a damaged frame will only make problems worse.
Step 2: Unpack the Castor Installation Base & Inspect Parts
Open the castor base package and lay out all parts: the base plate, bolts, washers, and any included instructions. Check that the bolts match the size of the Workbench E's mounting holes (most use M8 or M10 bolts). If the base came with adjustable leveling feet (a common add-on for stability on uneven floors), set them aside for later—you'll install casters first, then levelers if needed.
Step 3: Measure & Mark Mounting Points
Using your measuring tape, find the center of the Workbench E's frame rails (the horizontal bars running along the bottom). Mark these centers with your carpenter's pencil—this is where the castor base will attach. For a standard Workbench E (120cm long), the mounting points are typically 30cm from each end, but always follow the manufacturer's instructions. If the frame has pre-drilled holes, align the base's holes with these marks. If not, use the base as a template: hold it against the frame, mark the hole positions with the pencil, then drill pilot holes (using the pilot bit) to guide the bolts.
Step 4: Align the Base & Secure with Bolts
Place the castor installation base on the frame, aligning its holes with the pre-drilled or marked pilot holes. If alignment is off, gently tap the base with the rubber mallet or use the pry bar to shift it into place. Once aligned, insert a bolt through each hole (with a washer under the head to prevent stripping), then hand-tighten with your fingers to hold the base in place. Switch to the cordless drill with a hex bit and drive the bolts until they're snug—but not tight. You'll use the torque wrench for final tightening.
Step 5: Level the Base & Tighten to Torque
Place the spirit level across the castor base. If the bubble isn't centered, loosen the bolts slightly and tap the base with the rubber mallet until level. Once level, set your torque wrench to the manufacturer's recommended setting (check the base's manual—if unsure, start with 25 Nm for steel frames). Attach the hex socket to the wrench, fit it over a bolt, and turn clockwise until you hear the "click." Repeat for all bolts, working in a crisscross pattern (like tightening a car tire) to ensure even pressure. This prevents warping the base or frame.
Step 6: Install Casters (and Adjustable Leveling Feet, if Needed)
With the base secured, flip the workbench upright (again, use a helper to avoid injury). Now, attach the casters to the base—most bases have pre-drilled holes for standard caster stems. Tighten the caster bolts with the drill, then test mobility: push the workbench gently. It should roll smoothly, with no wobbling or sticking. If the floor is uneven, screw in the adjustable leveling feet (threaded into the base) until they touch the floor, providing extra stability without hindering movement.
Step 7: Test & Adjust
Load the workbench with typical items—tools, parts, or equipment—to simulate daily use. Roll it across different floor surfaces (concrete, tile, vinyl) to check for resistance. If casters lock up, inspect for debris in the wheels or loose bolts. If the workbench leans, recheck the level and adjust the leveling feet. Finally, retighten all bolts with the torque wrench—vibration from rolling can loosen them over time, so a quick check ensures long-term security.

Troubleshooting Common Installation Hiccups
Even with the right tools, installation might hit a snag. Here's how to fix the most common issues:
Issue 1: Bolts Won't Tighten—Stripped Threads
If bolts spin without tightening, the threads in the frame or base are stripped. Stop immediately—forcing the bolt will make it worse. Remove the bolt, then use a thread tap (matching the bolt size) to clean or repair the threads. If the damage is severe, drill a slightly larger hole and use a larger bolt (with the manufacturer's approval).
Issue 2: Workbench Wobbles After Installation
Wobbling usually means the base isn't level or bolts are unevenly tightened. Recheck the spirit level, adjust the base, and retighten bolts in a crisscross pattern. If the floor is uneven, extend the adjustable leveling feet until they contact the ground—this "locks" the workbench in place when stationary.
Issue 3: Casters Don't Roll Smoothly
Sticky casters are often due to misaligned wheels or debris in the bearings. Remove the casters, clean the wheels with a brush and soapy water, then lubricate the bearings with silicone spray. If wheels are bent, replace them—cheap casters warp easily under heavy loads.

Why the Right Tools Make All the Difference
You might be thinking, "Can't I just use a wrench and a drill? Do I really need a torque wrench or spirit level?" The short answer: Yes, you need them. Here's why skimping on tools leads to long-term headaches:
- Warped Base or Frame: Over-tightening bolts with a drill alone bends metal, leading to uneven weight distribution and premature wear.
- Loose Casters: Under-tightened bolts cause casters to detach, risking injury or damage to equipment on the workbench.
- Scratched Floors: Misaligned casters drag instead of roll, leaving marks on concrete or vinyl.
- Reduced Lifespan: A poorly installed base stresses the Workbench E's frame, shortening its usable life by years.
Investing in the right tools isn't just about a smooth installation—it's about protecting your workspace, your equipment, and your team. A torque wrench costs $50–$100, but replacing a warped workbench frame costs hundreds. A spirit level ensures your workbench is safe to use, preventing tools from sliding off and reducing strain on your back when working at an angle.
Final Thoughts: Your Workbench E, Transformed
Installing a castor installation base on your workbench E (single deck-without caster) isn't just a DIY project—it's an investment in your workspace's efficiency and adaptability. With the right tools—the precision measuring tape for accuracy, the torque wrench for security, the spirit level for stability—you turn a static bench into a mobile asset that grows with your needs. Whether you're running a small workshop, a busy factory, or a research lab, mobility means you're no longer stuck in one place. You can pivot, adjust, and innovate—all because you took the time to install the base correctly.
So, gather your tools, clear your workspace, and get ready to roll. Your Workbench E (now with casters) is about to become the hardest-working piece of equipment in your shop. And when you're done, take a step back, push it across the floor, and smile—you didn't just install a base. You built a better way to work.