- Company Articles
- Products and Technology
- Installation And Maintenance
- Castor Installation Base Specifications for Workbench E: 3C Assembly Requirements

Castor Installation Base Specifications for Workbench E: 3C Assembly Requirements
Related Product
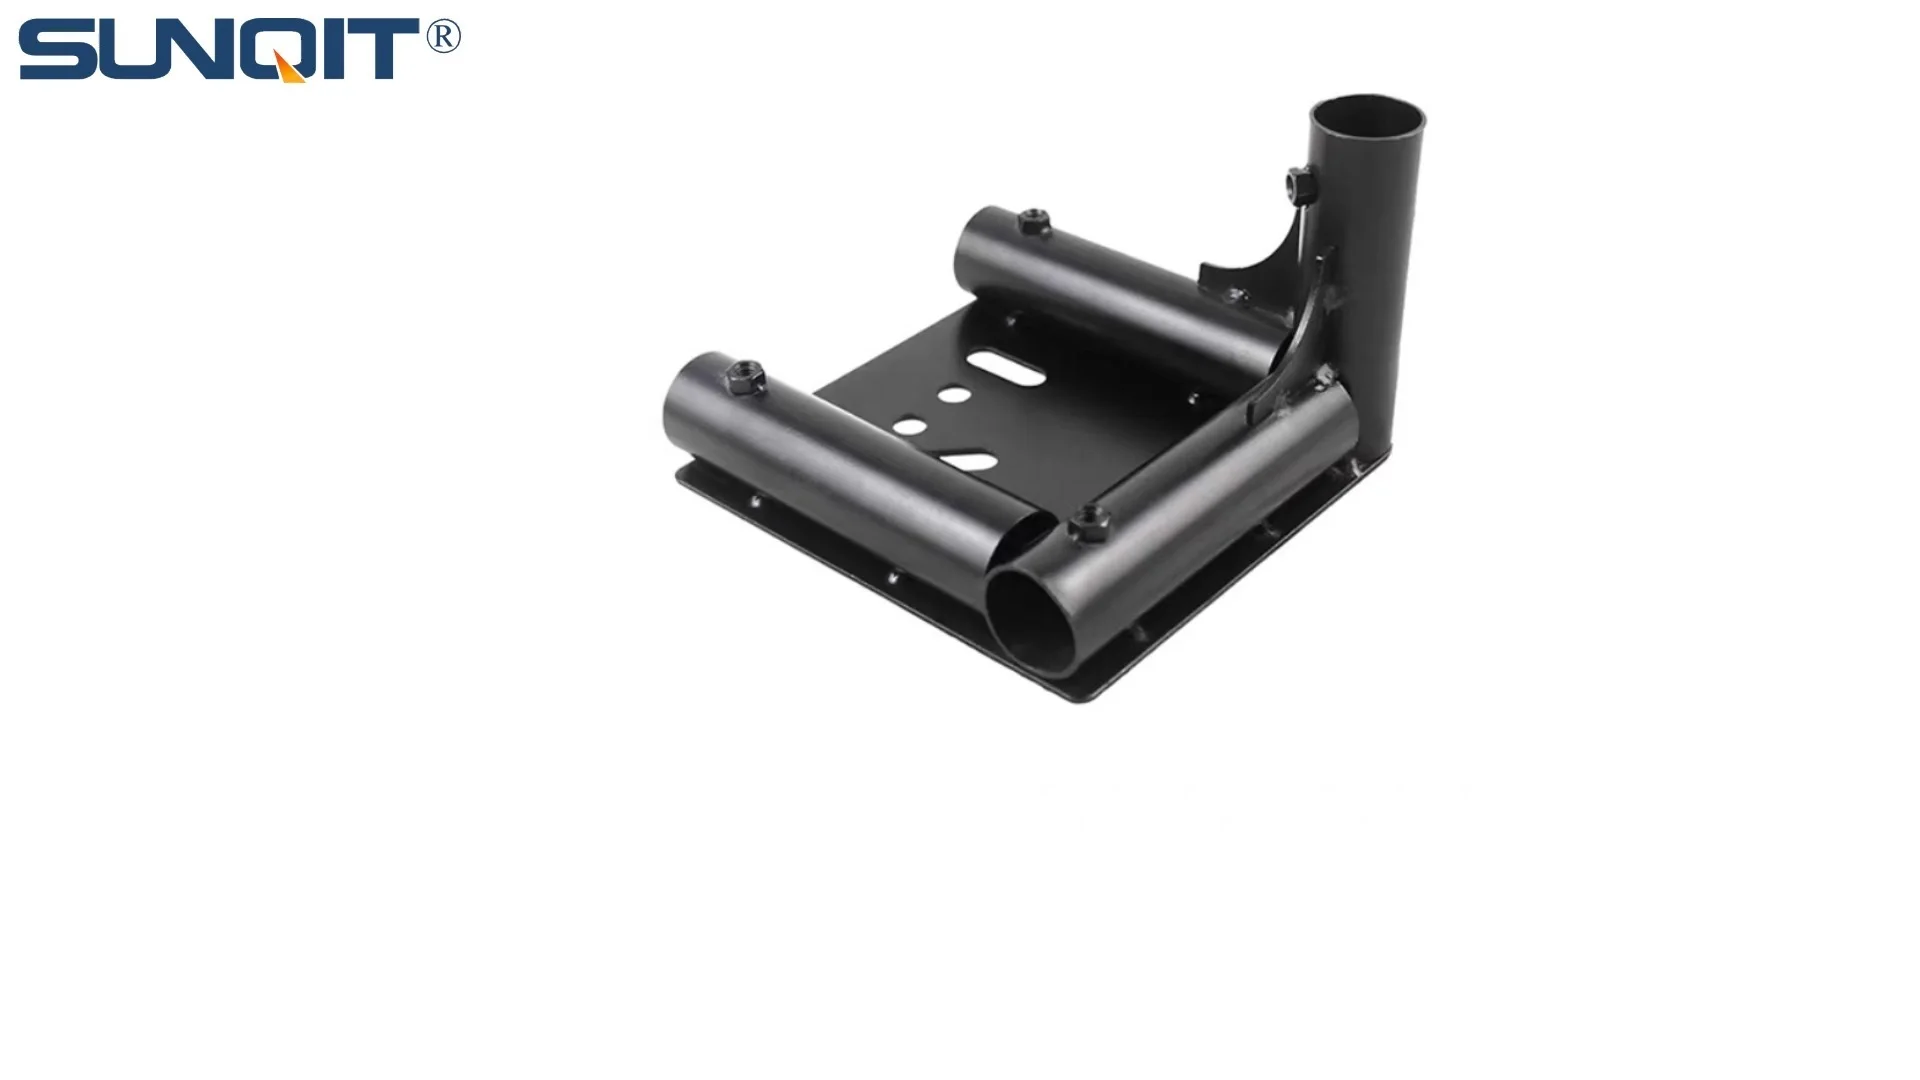
Castor Installation Base
Pipe fitting castor installation base,Well made, precise and strong. Made of high quality of steel,black painting surface treatment for greater resistance to corrosion. It is used for castor or foot lever connection with lean pipe.
Introduction: The Unsung Hero of 3C Assembly Lines
In the buzzing world of 3C manufacturing—where smartphones, laptops, and wearables come to life—every second counts. Assembly lines hum with precision, workers move in synchronized rhythms, and a single hiccup can disrupt an entire production run. At the heart of this chaos (or controlled harmony, depending on who you ask) is the workbench: the silent stage where components are pieced together into the devices we can't live without. Among these workbenches, Workbench E (single deck-without caster) stands out as a staple. Sleek, sturdy, and designed for single-deck operations, it's the go-to for tasks like circuit board soldering, screen mounting, and quality inspections. But here's the catch: it doesn't come with casters. And in a world where assembly lines need to reconfigure on the fly, where a sudden surge in demand might require shifting workstations overnight, mobility isn't just a luxury—it's a necessity.
Enter the castor installation base: a small but mighty component that transforms Workbench E from a stationary fixture into a flexible, agile asset. It's easy to overlook this unassuming piece of hardware, but anyone who's struggled to drag a heavy workbench across a factory floor (or worse, disassembled and reassembled it) knows better. The right castor installation base doesn't just add wheels—it adds efficiency, safety, and adaptability. In this article, we'll dive deep into why specifications matter, how materials like aluminum profile and aluminum profile accessories play a role, and why getting this detail right can make or break your 3C assembly line's performance.
Understanding Workbench E: The Backbone of 3C Assembly
Before we talk about castor installation bases, let's get to know Workbench E better. As the name suggests, it's a single-deck workbench—no frills, no extra shelves, just a flat, stable surface designed for focused tasks. In 3C factories, you'll find it everywhere: from smartphone assembly lines, where technicians handle delicate motherboards, to laptop production, where screens are carefully aligned with chassis. Its "without caster" design is intentional: stability is non-negotiable when working with tiny screws, microchips, and precision tools. A wobbly workbench could mean a misplaced solder joint or a scratched display—costly mistakes in an industry where margins are tight.
But here's the paradox: while stability is critical, so is flexibility. Imagine a scenario where your factory needs to switch from assembling 5-inch phones to 7-inch tablets overnight. Suddenly, the layout that worked for smaller devices feels cramped. Workbench E, bolted to the floor or stuck in one spot, becomes a roadblock. Or consider maintenance: when a machine next to Workbench E breaks down, you need to move the bench to access the repairs quickly. Without mobility, you're stuck waiting for a team to disassemble the bench, move it, and rebuild it—losing precious production time.
This is where the castor installation base steps in. It's the bridge between stability and mobility, allowing Workbench E to stay rock-solid during operations and glide smoothly when needed. But not all bases are created equal. In 3C assembly, where precision and durability are non-negotiable, the specifications of this base matter more than you might think.

Why Specifications Matter: It's Not Just About Adding Wheels
At first glance, a castor installation base might seem like a simple metal plate with holes for wheels. But in reality, it's a engineered component with specs that directly impact safety, efficiency, and longevity. Let's break down the key factors 3C manufacturers need to consider:
Load Capacity: More Than Just the Workbench Itself
Workbench E might be "single deck," but that deck carries more than just a few tools. Think about it: a typical 3C workstation has a soldering iron, a magnifying lamp, bins of screws and connectors, a laptop for diagnostics, and sometimes even a small testing device. Add in the weight of the workbench itself (often made of aluminum or steel) and the components being assembled, and you're looking at a significant load. A castor installation base that can't handle this weight won't just bend or break—it could cause the workbench to tip, putting workers and products at risk.
For 3C applications, most manufacturers recommend a minimum load capacity of 150kg per base (and since Workbench E typically uses 4 bases, that's 600kg total). But if your line handles heavier equipment—like industrial-grade testing machines—you might need 200kg or more. Always check the load rating, and remember: it's better to overestimate than cut corners.
Material: The Battle Between Aluminum and Steel
When it comes to castor installation bases, two materials dominate: steel and aluminum. Steel is strong, no doubt, but it's heavy—adding unnecessary weight to an already loaded workbench. Aluminum, on the other hand, is a game-changer. Thanks to aluminum profile technology, modern bases are lightweight yet surprisingly durable. Aluminum resists corrosion (critical in factories where cleaning agents or humidity are common), and it's easy to machine, allowing for precise holes and slots that align perfectly with Workbench E's frame.
But aluminum alone isn't enough. The best bases use aluminum profile accessories like reinforced brackets and precision-cut threads to enhance strength. For example, some bases feature T-slot aluminum profiles, which let you add extra support or customize the design (like attaching a tool holder) without welding. In 3C environments, where every inch of space is optimized, this flexibility is a lifesaver.
Compatibility: Not All Casters Are Created Equal
A castor installation base is only as good as the casters it supports. And in 3C factories, casters come in all shapes and sizes: swivel casters for maneuverability, brake casters for stability, heavy-duty casters for rough floors. The base must be compatible with these caster and accessories to ensure a secure fit. For example, if your casters have a 10mm stem, the base's mounting holes need to be 10mm in diameter—no exceptions. A loose fit can lead to wobbling, which, as we've established, is disastrous for precision work.
Another compatibility factor is the caster's height. Adding casters raises the workbench, which might seem trivial until you realize it could throw off ergonomics. Workers used to a certain height may strain their backs or necks, leading to fatigue and errors. The best castor installation bases are designed with this in mind, offering options for low-profile casters that keep the workbench at a comfortable height.

Key Specifications: A Closer Look
Now that we understand why specs matter, let's dive into the details. Below is a breakdown of the most critical specifications for castor installation bases on Workbench E, tailored to 3C assembly requirements:
| Specification | 3C Assembly Requirement | Why It Matters | Example Value |
|---|---|---|---|
| Material | Aluminum alloy (6061-T6 preferred) | Lightweight, corrosion-resistant, and strong enough for 3C loads. | 6061-T6 aluminum profile with 3mm wall thickness |
| Load Capacity (per base) | 150-200kg | Supports workbench, tools, and components without bending. | 180kg (tested with 200kg overload for safety) |
| Dimensions (L x W x H) | 100mm x 100mm x 25mm (varies by Workbench E model) | Must fit Workbench E's frame without overhang or gaps. | 120mm x 120mm x 30mm (for Workbench E's reinforced corners) |
| Mounting Hole Pattern | M8 or M10 threaded holes, 80mm center-to-center | Aligns with Workbench E's existing bolt holes for secure attachment. | M10 threaded holes, 80mm x 80mm square pattern |
| Compatible Casters | Stem casters (10-12mm stem diameter), swivel or rigid | Ensures casters fit snugly and rotate smoothly. | 10mm stem swivel casters with brake (max load 50kg per caster) |
| Surface Treatment | Anodized (clear or black) | Resists scratches, chemicals, and fingerprints common in 3C environments. | Type II anodization, 10µm thickness |
Material: Why 6061-T6 Aluminum Profile Reigns Supreme
We've mentioned aluminum profile, but let's zoom in on 6061-T6 aluminum specifically. This alloy is a favorite in manufacturing for good reason: it's strong (tensile strength of 310 MPa), lightweight (about 2.7g/cm³), and resistant to corrosion. In 3C factories, where cleaning solutions and humidity are part of daily life, corrosion resistance is a must—no one wants a rusted base compromising the workbench's stability. The T6 temper (heat-treated) adds, making it less likely to dent or bend under heavy loads. Plus, it's easy to machine, so manufacturers can create intricate designs like reinforced edges or T-slots for aluminum profile accessories (think cable management clips or tool hooks).
Load Capacity: Safety First
150-200kg per base might sound like overkill, but let's do the math. A typical Workbench E weighs around 50kg. Add a 10kg soldering station, 5kg of tools, 15kg of components (think boxes of screws, screens, and batteries), and a 5kg laptop for diagnostics—that's 85kg. Multiply by four bases, and you're at 340kg total. But what if two workers lean on the bench at the same time? Or if you need to stack a box of finished products temporarily? Suddenly, 150kg per base (600kg total) feels like a smart buffer. Overloading a base can lead to cracks, which start small but grow over time—until one day, the bench collapses. In 3C, where a single production run can cost millions, that's a risk you can't take.
Surface Treatment: More Than Just Looks
Anodization isn't just for aesthetics (though a sleek black or clear finish does look professional). It's a protective layer that prevents aluminum from reacting with moisture and chemicals. In 3C factories, workers often use alcohol-based cleaners to sanitize workbenches, which can corrode untreated aluminum. Anodized surfaces stand up to these cleaners, ensuring the base lasts for years (not months). They also resist fingerprints, which might seem trivial until you realize how many times a workbench is touched daily—smudges can hide small spills or debris, leading to contamination of sensitive components.

Installation and Compatibility with Adjustable Leveling Feet
Installing a castor installation base isn't as simple as screwing on wheels—and in 3C, where precision is everything, improper installation can undo all the benefits of a well-designed base. One tool that's indispensable here is the adjustable leveling feet . These small, threaded feet attach to the base (or the workbench itself) and let you fine-tune the height of each corner, ensuring the workbench stays level even if the factory floor is uneven. Why does this matter? A level workbench prevents tools from rolling off, ensures components lie flat during assembly, and reduces strain on workers' wrists and arms.
Here's a step-by-step guide to installation, tailored to 3C environments:
- Prep the Workbench: Clear Workbench E of all tools and components. If it's bolted to the floor, remove the bolts—this might require a power drill or wrench.
- Clean the Frame: Use a cloth and alcohol to wipe down the bottom of the workbench frame. Dust, grease, or debris can prevent the castor installation base from sitting flush, leading to wobbling.
- Align the Base: Place the castor installation base on the workbench's corner, ensuring the mounting holes line up with the frame's pre-drilled holes. For extra precision, use a level to check that the base is straight.
- Secure with Bolts: Use high-tensile bolts (M8 or M10, depending on the base) to attach the base to the frame. Tighten them with a torque wrench to the manufacturer's specification—over-tightening can strip the threads, while under-tightening leaves the base loose.
- Attach Casters: Screw the casters into the base's stem holes. If the casters have brakes, test them to ensure they engage smoothly (you don't want a stuck brake causing the bench to jerk during movement).
- Level the Workbench: Adjust the adjustable leveling feet (if included) by turning them clockwise or counterclockwise. Use a level on the workbench surface to confirm all corners are even.
- Test Mobility and Stability: Push the workbench gently to see if it rolls smoothly. Then, lock the brakes and try to wiggle the bench—there should be no movement. If it wobbles, check the bolts and leveling feet again.
In 3C factories, where time is tight, this process should take no more than 30 minutes per workbench. The best castor installation bases come with pre-drilled holes and clear instructions, minimizing downtime.
Common Pitfalls to Avoid
Even with the right specs, mistakes can happen. Here are some common pitfalls to watch out for when choosing or installing a castor installation base for Workbench E:
Choosing the Wrong Material
Steel might seem like a stronger choice, but in 3C environments, where workers often handle electronics, corrosion is a hidden enemy. Steel rusts, and rust flakes can contaminate circuit boards or scratch screens. Aluminum profile is almost always the better bet—just make sure it's a high-grade alloy like 6061-T6.
Ignoring Ergonomics
Adding casters raises the workbench, but how much? A 5cm increase might not sound like much, but over an 8-hour shift, it can lead to chronic back pain. Always check the total height (workbench + base + caster) and ensure it aligns with your workers' ergonomic needs. Many manufacturers offer low-profile bases (25mm height or less) to mitigate this.
Overlooking Compatibility with Aluminum Profile Accessories
If your factory uses aluminum profile accessories like tool rails or bin holders, make sure the castor installation base doesn't block their mounting points. For example, a base with a large overhang might prevent you from attaching a tool rail to the workbench's side. Always measure twice and check the base's dimensions against your existing accessories.
Conclusion: Small Part, Big Impact
In the grand scheme of 3C manufacturing, the castor installation base might seem like a minor detail. But as we've explored, it's a detail that ripples through your entire operation: from worker productivity and ergonomics to product quality and line adaptability. Choosing the right base—with the right material, load capacity, and compatibility—isn't just about adding wheels; it's about investing in a more efficient, flexible, and safe assembly line.
So the next time you walk through your factory and see a Workbench E, take a moment to look at its base. If it's missing a castor installation base (or has a cheap, flimsy one), consider this: that small upgrade could be the difference between meeting your production targets and falling behind. In 3C, where innovation moves at the speed of light, your workbenches should too.
Whether you're a factory manager, a procurement specialist, or a production engineer, remember: the best assembly lines are built on details. And when it comes to details, the castor installation base for Workbench E is one you can't afford to ignore.