- Company Articles
- Products and Technology
- Installation And Maintenance
- Cleaning Guide for Vertical Lean Pipe Joint Chrome: Daily Maintenance Routine

Cleaning Guide for Vertical Lean Pipe Joint Chrome: Daily Maintenance Routine
Related Product
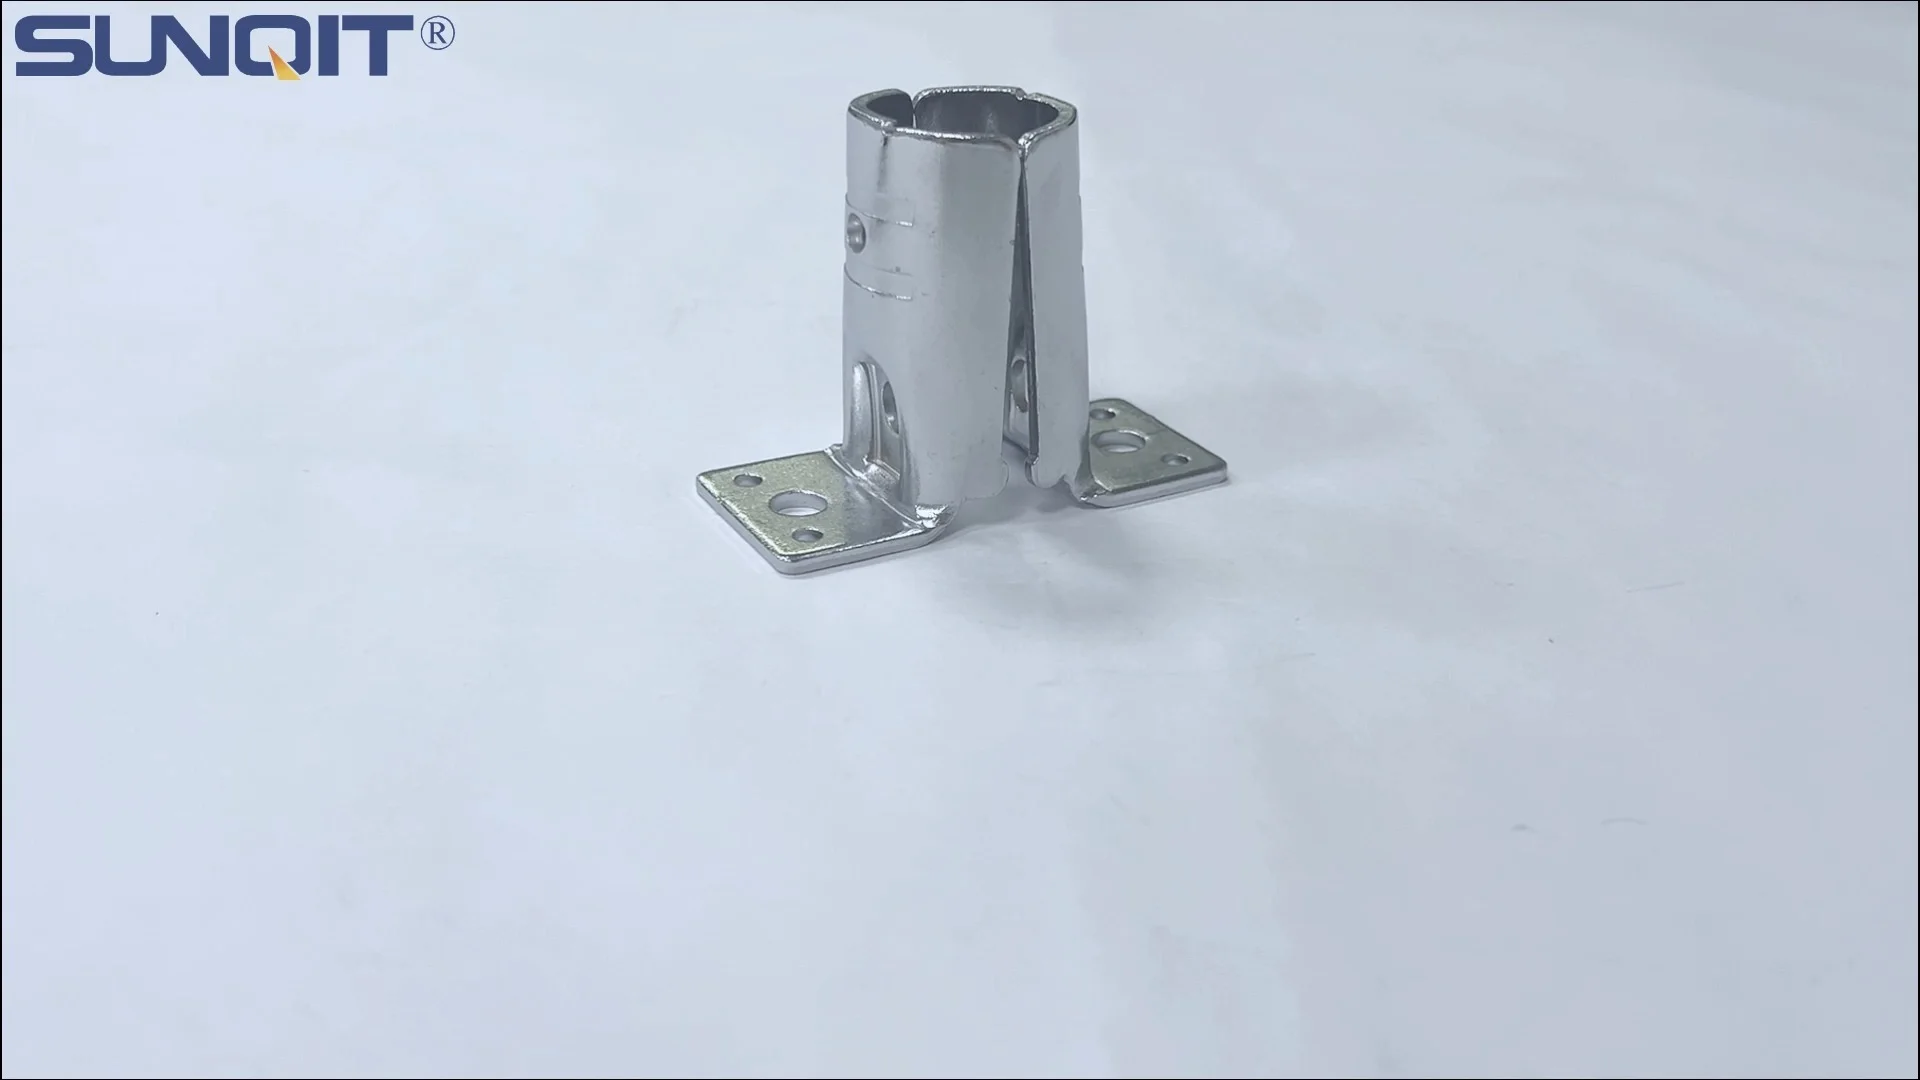
Vertical Lean Pipe Joint Chrome
Vertical lean pipe joint is used for 28mm lean pipe fixed on ground and keep it stable.
Picture this: You're standing on the factory floor early Monday morning, coffee in hand, scanning the production line. The conveyor belts hum, workbenches are stacked with components, and every team member is focused on hitting today's targets. From a distance, everything looks perfect—a symphony of efficiency. But if you kneel down and peer at the vertical supports holding up that material rack by the assembly station, you might notice something off: a faint brown spot on the shiny chrome joint, a tiny rattle when you nudge the rack, or a sticky feeling when you try to adjust the height. These small details? They're not just cosmetic. They're the first whispers of a problem that could bring your entire lean pipe system to a grinding halt.
Vertical lean pipe joint chrome isn't the flashiest part of your setup, but it's the backbone. It's the connector that turns simple aluminum profiles and lean pipes into sturdy workbenches, stable material racks, and reliable conveyor supports. Ignore its care, and you're gambling with more than just a squeaky joint—you're risking downtime, safety hazards, and the kind of unexpected repair costs that eat into your bottom line. But here's the good news: keeping these joints in top shape doesn't require a degree in engineering or a closet full of fancy tools. It just takes a little daily attention, a few simple steps, and the kind of care you'd give to any hardworking team member. In this guide, we're breaking down exactly how to do it—no jargon, no shortcuts, just practical, actionable advice to keep your vertical lean pipe joints (and your entire lean system) running like clockwork.
What Even Is a Vertical Lean Pipe Joint Chrome, Anyway?
Before we dive into maintenance, let's make sure we're all on the same page. A vertical lean pipe joint chrome is, at its core, a unsung hero of your production setup. Imagine you're building a (Lego) structure: the lean pipes are the long bricks, and the joints are the connectors that hold them together at angles. Now, make those connectors vertical—meaning they join pipes that stand straight up and down—and coat them in chrome, and you've got our star today. The chrome isn't just for looks (though that shine does make your floor look more professional); it's a protective shield. Chrome resists rust, repels water, and stands up to the daily dust, oil, and occasional spills that come with factory life. Without that coating, the metal underneath would corrode in months, turning your sturdy support into a wobbly liability.
These joints are everywhere. They're what keep your workbench from leaning when you pile heavy components on it. They're the reason your material rack doesn't tip over when you slide a bin of parts onto the top shelf. They even play a role in conveyor systems, where vertical supports keep the roller tracks aligned and stable. In short, if your lean pipe system is the body of your production line, vertical joints are the bones—quietly holding everything upright so the rest can do its job.
Why Daily Maintenance Matters (Spoiler: It's Not Just About Cleanliness)
Let's get real: Between meeting deadlines, training new hires, and troubleshooting unexpected hiccups, who has time to "play maintenance" on a single joint? But here's the thing: skipping that 5-minute daily check isn't just lazy—it's expensive. Consider this: A 2023 study by the Manufacturing Maintenance Association found that unplanned downtime costs factories an average of $22,000 per minute. Per minute . Now, think about what happens when a vertical joint fails: A workbench collapses, spilling parts everywhere. A material rack tips, damaging inventory. A conveyor support gives way, jamming the line. Suddenly, that "quick" 5-minute check seems like a steal compared to hours (or days) of lost production.
And it's not just about money. Loose or corroded joints create safety risks. A wobbly workbench could lead to a fall. A failing support might drop a heavy load on someone's foot. OSHA reports that over 20% of workplace injuries in manufacturing stem from unstable equipment—often traceable to neglected maintenance. Your team deserves better than that, and so does your reputation.
The best part? Daily maintenance isn't about deep cleaning or overhauls. It's about forming a habit—spending a few minutes each day to inspect, wipe, and tweak. Think of it like brushing your teeth: You don't need to floss every crevice or get a professional cleaning daily, but skipping the basics leads to cavities (or, in this case, broken joints) down the line.

Your Daily Maintenance Toolkit: What You'll Need (and What to Avoid)
Before we jump into the step-by-step routine, let's gather your supplies. You don't need a workshop full of tools—just a few essentials to get the job done right. Here's your checklist:
- Microfiber cloths: Not paper towels (they scratch chrome) or old rags (they leave lint). Opt for 16x16 inch, lint-free microfiber—they're gentle, absorbent, and reusable.
- Soft-bristle brush: An old toothbrush works (but dedicate it to maintenance, not your teeth!). The soft bristles get into tiny crevices around the joint without scratching.
- Mild dish soap: Think Dawn or Palmolive—diluted 1:10 with warm water. Avoid bleach, ammonia, or industrial degreasers; they'll strip the chrome.
- Isopropyl alcohol (70%): Great for cutting through oil and grease. It evaporates fast, so no streaks or water spots.
- Adjustable wrench or torque wrench: Most lean pipe joints use 8mm or 10mm bolts—aim for 15-20 ft-lbs of torque (too tight = stripped threads; too loose = wobbly joint).
- Silicone-based lubricant: Spray or gel, labeled "non-drying." Avoid oil-based lubes—they attract dust and turn into a sticky mess.
- Nitrile gloves: Protects your hands from cleaners and keeps skin oils (which attract dust) off the chrome.
Pro tip: Keep these tools in a small caddy near your most-used workbenches. The easier they are to grab, the more likely you'll stick to the routine.

Step-by-Step: Your Daily Vertical Lean Pipe Joint Chrome Maintenance Routine
Now, let's break down the routine into six simple steps. Set a timer—you'll be done in 5-7 minutes per joint, tops.
Step 1: Inspection—The "Health Check"
Start with your eyes and hands. Put on those gloves, grab your microfiber cloth, and wipe away surface dust—you can't spot issues if they're hidden under grime. Now, get up close. Chrome should look like a mirror; if it's dull, spotted, or scratched, that's a red flag. Run your finger along the joint: smooth = good. Rough, pitted, or sticky = bad. Check for:
- Corrosion: Brown, green, or white spots (rust, oxidation) mean the chrome is failing. Even tiny spots spread fast in humid environments.
- Looseness: Grasp the lean pipe above and below the joint, then wiggle gently. More than ¼ inch of movement? Time to tighten.
- Damage: Dents, cracks, or bent parts—chrome can't protect a joint that's physically broken.
- Debris: Dust, oil, or metal shavings in the joint's crevices—these grind against moving parts, wearing them down.
Pro move: Take a quick photo of the joint with your phone each day. Compare shots over a week—you'll spot trends (like new corrosion spots) you might miss with just your eyes.
Step 2: Cleaning—From Dull to Dazzling (and Functional)
Chrome loves being clean, but it's picky about how you do it. Harsh scrubbing or chemicals will ruin it faster than neglect. Follow this process:
- Dust first: Wipe the joint with a dry microfiber cloth to remove loose dirt. This prevents scratching during wet cleaning.
- Attack grime: Dip your soft-bristle brush in warm, soapy water (1 part dish soap to 10 parts water). Gently scrub around the joint's edges and any crevices where dust builds up. Focus on spots that looked dull or sticky during inspection.
- Degrease: If there's oil or grease (common near conveyor systems), dampen a corner of your cloth with isopropyl alcohol and wipe the area. Alcohol cuts through grease without leaving residue.
- Rinse (if needed): If you used soapy water, dampen a clean part of the cloth with plain water and wipe away soap suds. Soap left on chrome can dry into a film, attracting dust.
- Dry thoroughly: Use a fresh microfiber cloth to buff the joint dry. Water spots are more than unsightly—they're tiny pools where corrosion starts. For extra shine, use a second dry cloth to polish in small circles.
| Cleaning Agent | Best For | How to Use | Pros | Cons |
|---|---|---|---|---|
| Mild Soap + Water | General dust, light grime | Dilute 1:10, scrub with soft brush, rinse | Gentle, safe for daily use, cheap | Not great for grease; needs rinsing |
| Isopropyl Alcohol (70%) | Oil, grease, fingerprints | Dampen cloth, wipe, let air dry | Evaporates fast, no streaks, degreases well | Can dry out skin; avoid prolonged use |
| Chrome Polish (e.g., Mothers) | Heavy tarnish, restoring shine | Apply small amount, buff with cloth | Revives dull chrome, adds protective layer | Too harsh for daily use; can strip thin chrome |
| Distilled Water | Water spots, mineral deposits | Wipe with damp cloth, dry immediately | No chemicals, safe for sensitive chrome | Only works on water-based stains |
Pro Tip:
Avoid using steel wool, scouring pads, or abrasive sponges—even the "soft" ones. They'll scratch the chrome, creating tiny grooves where corrosion can hide. Stick to microfiber and soft brushes, and your joints will thank you.
Step 3: Lubrication—Keep It Moving (But Not Too Much)
If inspection is the check-up and cleaning is the bath, lubrication is the vitamins—keeping your joint healthy and mobile. Most vertical joints have moving parts (like hinges or adjustable collars) that need a little help to glide smoothly. Without lubrication, metal rubs against metal, causing friction, heat, and wear. Over time, that leads to stuck joints, stripped threads, or even cracks.
But not all lubricants are created equal. Oil-based products (like WD-40, which is a solvent, not a lubricant!) dry out quickly and attract dust, turning into a gritty paste that gums up the works. Instead, opt for a silicone-based spray or gel. Silicone is waterproof, non-drying, and repels dust—perfect for factory environments.
Here's how to apply it:
- Target the crevices: Hold the lubricant can 6-8 inches from the joint. Spray a tiny amount into the gaps where the joint meets the lean pipe or aluminum profile. If it's a gel, use a toothpick to apply a pea-sized dab—you want just enough to coat the metal, not enough to drip.
- Work it in: Move the joint gently (adjust the height, swivel if it's a rotating model) to spread the lubricant. This ensures it reaches all the moving parts.
- Wipe excess: Use a clean microfiber cloth to wipe away any drips or pooling lubricant. Too much attracts dust, undoing your cleaning work.
How often? For joints that move daily (like adjustable workbench supports), lubricate once a week. For fixed joints, once a month is enough—unless you work in a dusty or humid environment, then bump it up to twice a month.
Step 4: Tightening—The "Firm Handshake" Test
Even the best joints loosen over time. Vibration from conveyor belts, repeated loading/unloading, and temperature changes all conspire to wiggle those bolts loose. A loose joint isn't just noisy—it's dangerous. Think of it like a handshake: too loose, and you're not connected; too tight, and you'll crush the connection.
Here's how to get it just right:
- Find the fasteners: Most vertical lean pipe joints have 2-4 bolts or set screws holding them to the lean pipe or aluminum profile. They might be hidden under plastic caps—pop those off gently with a flathead screwdriver.
- Check for wear: Look at the bolt heads—are they stripped? (If the screwdriver slips, that's a yes.) Are the threads on the lean pipe damaged? Stripped bolts or threads need replacing, not tightening.
- Tighten gradually: Use your wrench to turn bolts clockwise, but go slow. Aim for "firm but not forceful"—about 15-20 ft-lbs of torque (if you don't have a torque wrench, tighten until you feel resistance, then give it a ¼-turn more). Tighten in a star pattern (like tightening lug nuts on a car) to distribute pressure evenly.
- Test again: Wiggle the joint—if it still moves, repeat. If it won't tighten, stop! Over-tightening strips threads, turning a $5 fix into a $50 replacement.
Step 5: Testing—Prove It's Ready for Action
You've inspected, cleaned, lubricated, and tightened—now it's time to make sure your joint can handle real-world stress. This isn't just about peace of mind; it's about catching issues before they cause problems during production.
Start with a static test : Apply gentle pressure to the lean pipe above the joint—push, pull, twist. The joint should stay firm, with no more than 1/8 inch of movement. Next, do a dynamic test : If the joint is part of a moving component (like an adjustable workbench), move it through its full range of motion. It should glide smoothly, no sticking or squeaking. Finally, do a load test : If it's supporting a workbench, place a typical load on it (a box of parts, tools, etc.) and check for sagging or shifting. If everything holds, you're good to go.
Troubleshooting: When Your Joint Needs More Than a Wipe
Even with daily care, joints can act up. Here's how to fix the most common issues:
Problem 1: Corrosion Spots
Why it happens: Humidity, chemical spills (like degreasers or coolants), or chips in the chrome exposing the metal underneath. Coastal factories or those with poor ventilation are extra prone.
Quick fix: For small spots (smaller than a dime), apply a tiny amount of chrome polish to a microfiber cloth and rub in circles until the spot fades. Wipe clean with alcohol to remove excess polish.
When to replace: If the spot is larger than a quarter, or if you can feel a pit (a tiny hole) with your finger, the chrome is too damaged to save. Corrosion spreads under the coating, so replace the joint ASAP to avoid failure.
Problem 2: Stiff or Stuck Joint
Why it happens: Lack of lubrication, debris in the moving parts, or rust on internal components.
Quick fix: First, clean the joint thoroughly with alcohol to remove dust and old lubricant. Then apply silicone lubricant and work the joint back and forth—you might need to gently tap it with a rubber mallet (not a hammer!) to loosen stuck parts. If it still won't move, check for corrosion inside the joint; if rust is visible, replace it.
Problem 3: Persistent Looseness
Why it happens: Stripped threads on the lean pipe or bolts, worn washers, or a joint that's the wrong size for your pipe (common with generic "one-size-fits-all" parts).
Quick fix: replace the bolts first—they're cheap and often the culprit. If that doesn't work, check the lean pipe threads; if they're stripped, you'll need to cut off the damaged section and reattach the joint. If the joint itself is worn (cracks, bent metal), replace it entirely.
The Big Picture: Making Maintenance a Habit
Daily maintenance works only if it's consistent. Here's how to turn these steps into a routine your team will actually follow:
- Assign "joint guardians": Put a team member in charge of specific joints (e.g., "Maria handles the three workbenches by assembly; Raj checks the conveyor supports"). Ownership makes people care.
- Create a checklist: Print simple checklists and tape them near each joint. Include boxes for "inspected," "cleaned," "lubricated," and "tightened." It turns vague "maintenance" into actionable steps.
- Reward consistency: Monthly "Maintenance MVP" awards (a gift card, extra break time) encourage participation. People love being recognized for the "little" tasks that keep the line running.
- Train the team: Hold a 15-minute demo to show everyone how to do the routine. Most people want to help—they just need to know how.
Final Thoughts: Your Joints, Your System, Your Success
Vertical lean pipe joint chrome might not make it onto your "most exciting parts" list, but it deserves a spot on your "most important" list. It's the quiet force that turns aluminum profiles and lean pipes into the backbone of your production line. By spending 5 minutes a day inspecting, cleaning, and caring for these joints, you're not just maintaining equipment—you're protecting your team, your budget, and your ability to deliver on time, every time.
So tomorrow morning, when you walk the floor, take a minute to kneel down and say hello to those vertical joints. Wipe them, check them, give them a little love. They'll pay you back in spades—with smoother runs, fewer headaches, and a production line that keeps humming, day in and day out.
After all, in manufacturing, the difference between good and great isn't in the flashy machines. It's in the details. And right now, those details are shining—literally.