- Company Articles
- Products and Technology
- Installation And Maintenance
- Cleaning Lean Pipe Fixed Clamps: Best Practices for Industrial Environments

Cleaning Lean Pipe Fixed Clamps: Best Practices for Industrial Environments
Related Product
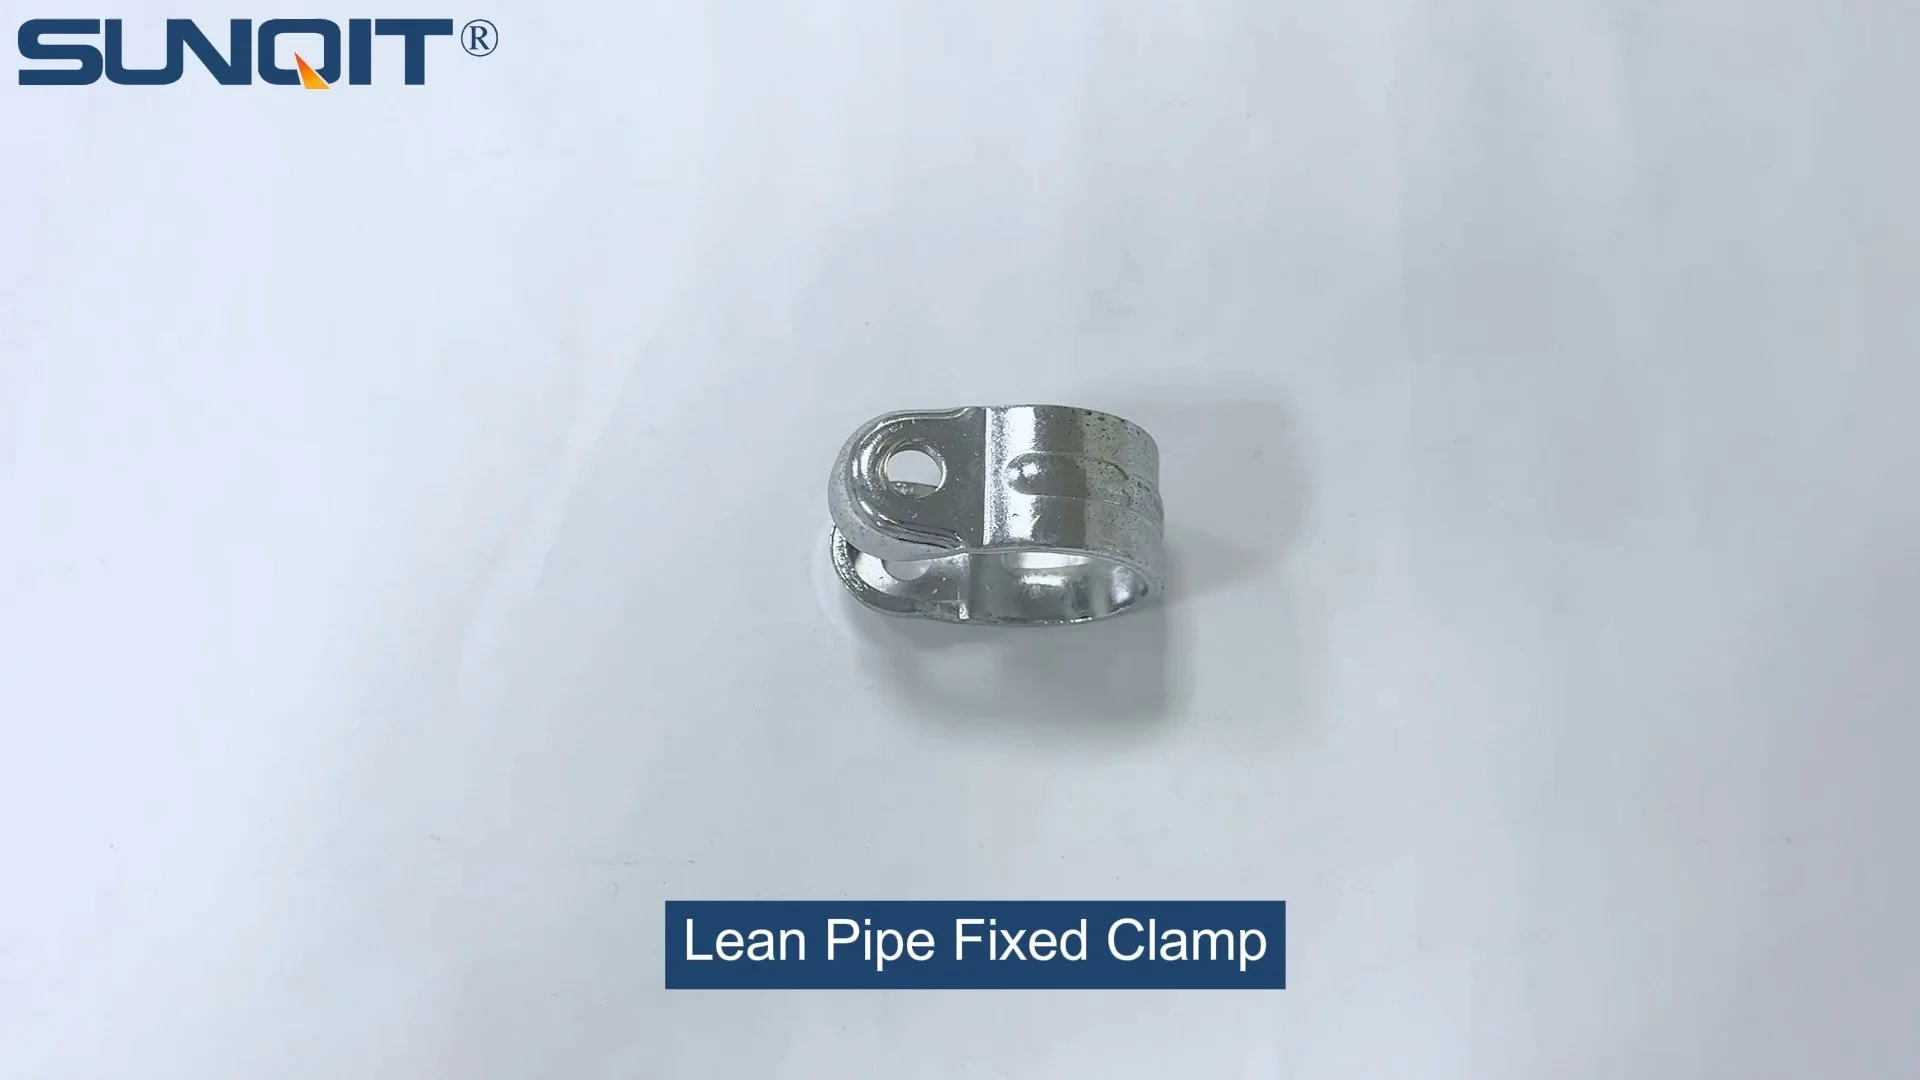
Lean Pipe Fixed Clamp
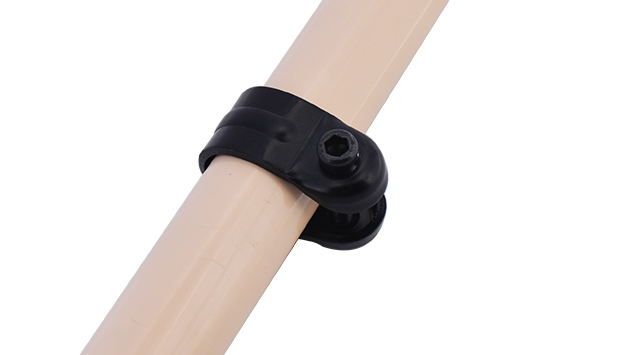
Lean pipe fixed clamp is used for pipe connector fixing the correct position during workbench flow rack hand trolley assemble work.
If you've ever walked through a busy factory floor or a bustling production facility, you've likely seen them—those unassuming metal or plastic connectors that hold together the sleek, modular structures of lean pipe workbenches, flow racks, and material trolleys. They're easy to overlook, but lean pipe clamps are the unsung heroes of efficient workflows. These small, often underappreciated components keep everything from assembly lines to warehouse storage systems stable, secure, and moving smoothly. Yet, like any hardworking part of your operation, they need care to keep performing at their best. In this guide, we'll dive into the why, how, and when of cleaning lean pipe fixed clamps, sharing practical tips to extend their lifespan, reduce downtime, and keep your lean system running like a well-oiled machine.
Why Cleaning Lean Pipe Clamps Matters More Than You Think
Let's start with the basics: Why bother cleaning a clamp? After all, it's just a metal piece holding pipes together, right? Wrong. Lean pipe clamps—whether they're part of a simple workbench or a complex conveyor system—are exposed to a daily barrage of industrial realities: dust, grease, oil spills, metal shavings, and even the occasional splash of coolant. Over time, these contaminants build up, and what starts as a minor annoyance can snowball into major problems.
Consider this scenario: A lean pipe joint on a material rack B (3 row and 3 floor) in your warehouse has been collecting dust and grime for months. At first, it's just unsightly. But as the buildup thickens, it starts to trap moisture. If the clamp is made of steel, that moisture leads to rust. Rust doesn't just look bad—it weakens the clamp's grip. One day, while an operator is loading a heavy bin onto the rack, the corroded clamp slips. The bin crashes to the floor, damaging parts and halting work while the mess is cleaned up. That's downtime, lost productivity, and potential safety hazards—all because of a neglected clamp.
Then there's the issue of precision. Lean systems thrive on adjustability; you can reconfigure a workbench or trolley in minutes to adapt to new production needs. But a clamp caked in grease or debris won't rotate or tighten smoothly. Trying to adjust it becomes a struggle, leading to frustration for your team and imprecise setups that throw off workflow efficiency. In worst cases, a stuck clamp might even require replacement, adding unnecessary costs to your operation.
And let's not forget ESD safety. If your facility uses ESD workbenches or workstations—critical for electronics manufacturing or sensitive component handling—contaminants on clamps can interfere with static dissipation. A dirty clamp might act as an insulator, trapping static charges instead of grounding them, putting delicate parts at risk of damage. When every component counts, the last thing you need is a preventable ESD event caused by a grimy clamp.
The Tools You'll Need: Assembling Your Cleaning Kit
Before you roll up your sleeves, let's gather the right tools. Cleaning lean pipe clamps isn't complicated, but using the wrong supplies can do more harm than good. For example, abrasive scrubbers might scratch ESD-safe coatings, while harsh chemicals could corrode aluminum or plastic components. Here's what you'll need for a safe, effective cleaning session:
- Soft-bristle brushes: A small nylon brush (think toothbrush size) works wonders for scrubbing crevices in lean pipe joints, where dust and debris love to hide. Avoid wire brushes—they're too abrasive for most clamp materials.
- Microfiber cloths: These are gentle on surfaces and great for wiping away loosened grime without leaving lint behind. Keep a few on hand—you'll go through them quickly with greasy clamps.
- Mild detergent: A pH-neutral soap (like dish soap diluted in warm water) is safe for most clamps, including PE-coated lean pipe and aluminum. Avoid bleach, ammonia, or heavy-duty degreasers unless the clamp is heavily soiled (more on that later).
- Isopropyl alcohol (70% or higher): Ideal for disinfecting clamps and removing oil or grease that soap and water can't tackle. It evaporates quickly, so it won't leave streaks or moisture behind.
- Compressed air canister: For blowing dust out of tight spots, like the threads on a clamp bolt or the gaps between a clamp and the pipe it's holding. A small air compressor with a nozzle attachment works even better for larger jobs.
- Toothpicks or wooden skewers: These are perfect for picking out stubborn debris from the nooks of lean pipe joints—just be gentle to avoid scratching.
- Gloves: Nitrile gloves protect your hands from chemicals and grime, and they prevent oils from your skin from transferring back onto clean clamps.
Pro tip: Keep your cleaning kit organized in a portable caddy. That way, you can easily take it to the clamp instead of hauling the clamp to a sink, which saves time and reduces the risk of damaging the surrounding lean system components during transport.
Step-by-Step: How to Clean Lean Pipe Fixed Clamps (Without Breaking Them)
Now, let's get into the nitty-gritty. Cleaning a clamp is a straightforward process, but attention to detail is key. Follow these steps to ensure you remove contaminants without harming the clamp or its finish:
Step 1: Safety First—Power Down and Secure the Area
Before you start, make sure the clamp is part of a system that's powered down (if it's near machinery) or unloaded (if it's holding a workbench or rack). You don't want a sudden movement or weight shift while you're cleaning. If the clamp is on a mobile trolley, lock the casters to prevent rolling. Wear your gloves, and if you're using alcohol or degreasers, work in a well-ventilated area to avoid fumes.
Step 2: Dry Brush to Remove Loose Debris
Grab your soft-bristle brush and gently scrub the clamp to dislodge loose dust, dirt, and dry particles. Pay extra attention to the areas where the clamp meets the pipe—this is where debris often accumulates. Use the compressed air to blow away the loosened dust; holding the canister a few inches from the clamp ensures you don't damage any sensitive parts (like plastic components on ESD clamps).
Step 3: Tackle Grease and Oil with Soap and Water (or Alcohol)
For most day-to-day grime, a damp microfiber cloth with a drop of mild detergent will do the trick. Wring out the cloth so it's just damp (not soaking wet) to avoid introducing excess moisture, then wipe down the entire clamp, including the bolts and any moving parts. If the clamp has visible oil or grease—common in manufacturing settings—dampen the cloth with isopropyl alcohol instead. The alcohol cuts through grease quickly and evaporates, leaving no residue.
For tough spots, like dried coolant or caked-on grime, let the soapy water or alcohol sit on the clamp for 30 seconds to a minute before gently scrubbing with the brush. Avoid applying excessive pressure—you want to dissolve the grime, not scrape the clamp's surface.
Step 4: Clean the Crevices with Toothpicks or Skewers
Lean pipe joints and clamps often have small gaps where debris hides, like the threads of a tightening bolt or the hinge of a swivel clamp. Take a toothpick or wooden skewer (avoid metal tools—they can scratch) and carefully pick out any remaining dirt. Be gentle here—you don't want to bend or damage the clamp's components.
Step 5: Rinse (If Needed) and Dry Thoroughly
If you used soapy water, wipe the clamp again with a clean, damp cloth to remove any soap residue. Then, dry the entire clamp with a dry microfiber cloth. Moisture is the enemy of metal clamps, so make sure every nook and cranny is dry. For hard-to-reach areas, use compressed air to blow out any remaining water droplets.
Step 6: Inspect for Damage
Now that the clamp is clean, take a moment to inspect it. Look for signs of wear: cracks, rust, bent parts, or stripped threads. A clean clamp makes it easier to spot these issues early. If you notice damage, replace the clamp immediately—don't risk using a compromised component in your lean system.
Step 7: Reassemble (If Disassembled) and Test
If you had to remove the clamp for deep cleaning (uncommon for fixed clamps, but sometimes necessary), reassemble it according to the manufacturer's instructions. Tighten the bolts to the recommended torque—over-tightening can strip threads, while under-tightening leaves the clamp loose. Once back in place, give the clamp a gentle tug or wiggle to ensure it's secure. It should feel firm, with no play or movement.

Choosing the Right Cleaning Agent: A Quick Reference Table
Not all clamps are created equal—some are stainless steel, others are aluminum or PE-coated. Using the wrong cleaner can damage the material. Use this table to match your clamp type with the best cleaning agent:
| Clamp Material | Best Cleaning Agent | What to Avoid | Pro Tips |
|---|---|---|---|
| Stainless Steel (e.g., stainless steel pipe series) | Mild soap and water; isopropyl alcohol for grease | Bleach, hydrochloric acid, or abrasive pads | After cleaning, dry immediately to prevent water spots. |
| Aluminum (e.g., aluminum lean pipe clamps) | pH-neutral detergent; aluminum-safe degreaser | Strong alkalis (like oven cleaner), ammonia | Avoid leaving water on aluminum—it can cause white spots. |
| PE-Coated Lean Pipe Clamps | Soapy water; isopropyl alcohol (in small amounts) | Acetone, paint thinners, or abrasive brushes | Test alcohol on a hidden area first to ensure it doesn't discolor the coating. |
| ESD-Safe Clamps (e.g., ESD workbench components) | ESD-approved cleaning wipes; mild soap and water | Harsh chemicals, static-generating cloths | Use lint-free ESD microfiber cloths to maintain static-dissipative properties. |

Common Mistakes to Avoid When Cleaning Clamps
Even with the best intentions, it's easy to slip into bad habits when cleaning clamps. Here are four mistakes to watch out for:
Mistake 1: Using Abrasive Tools
Steel wool, wire brushes, or scouring pads might seem like the solution for tough grime, but they scratch the surface of clamps. Scratches create tiny crevices where more dirt can hide, and on stainless steel or aluminum, they can even accelerate corrosion. Stick to soft brushes and microfiber cloths.
Mistake 2: Ignoring Moving Parts
Some clamps, like the parallel rotatory lean pipe joint, have moving components that need extra care. If you only clean the exterior and ignore the hinges or rotating parts, grime can build up inside, causing them to seize. Use the toothpick or skewer to clean these areas, and if the clamp has lubricated parts (like caster wheel bearings), a drop of light machine oil after cleaning can keep them moving smoothly (check the manufacturer's guidelines first).
Mistake 3: Overlooking Frequency
Cleaning clamps "when they look dirty" is a recipe for buildup. In high-dust environments (like woodworking or metal fabrication), clamps might need weekly cleaning. In cleaner settings (like electronics assembly), monthly cleaning may suffice. Create a schedule and stick to it—consistency is key.
Mistake 4: Using Excess Moisture
Drowning a clamp in water or cleaning solution introduces moisture that can lead to rust, especially in hard-to-dry areas. Always use a damp (not wet) cloth, and dry thoroughly after cleaning. For metal clamps, a quick wipe with a dry cloth after cleaning can prevent water spots and corrosion.
Creating a Maintenance Schedule: When to Clean Your Clamps
So, how often should you clean your lean pipe clamps? The answer depends on your environment. Here's a sample schedule to adapt to your facility:
- High-traffic, high-contamination areas (e.g., production lines with oil or coolant): Weekly cleaning. These clamps are exposed to heavy grime and need frequent attention.
- Moderate-contamination areas (e.g., warehouse flow racks, general assembly workbenches): Bi-weekly to monthly cleaning. Dust and occasional spills are the main culprits here.
- Low-contamination areas (e.g., ESD workstations, cleanrooms): Monthly to quarterly cleaning. These clamps stay cleaner, but regular checks prevent buildup.
- After any major spill or incident: Clean clamps immediately if they're exposed to oil, chemicals, or coolant. Don't let the spill dry and harden.
Pro tip: Assign ownership. Have operators or team leads responsible for specific workbenches or racks check the clamps during their daily inspections. A quick visual scan takes 30 seconds and can catch early signs of buildup.
Case Study: How Regular Cleaning Reduced Downtime at a Manufacturing Plant
Let's put this into perspective with a real-world example. A mid-sized automotive parts manufacturer was struggling with frequent breakdowns on their assembly line. The issue? Their lean pipe workbenches, which held tools and components for workers, kept wobbling. The maintenance team initially blamed the pipes or joints, but after closer inspection, they discovered the problem: the lean pipe clamps holding the workbenches together were caked in oil and metal shavings. The grime had caused the clamps to loosen, leading to instability.
The plant implemented a weekly cleaning schedule for all clamps on the assembly line, using the steps outlined above. Within a month, wobbling workbenches became a thing of the past. Downtime due to workbench adjustments dropped by 75%, and operators reported less frustration when reconfiguring their stations. The maintenance team also noticed that clamp replacements decreased—they were no longer replacing corroded or seized clamps every few months. The takeaway? A small investment in cleaning time yielded big returns in productivity and cost savings.
Final Thoughts: Clamps Are the Foundation—Treat Them Like It
Lean manufacturing is all about efficiency, and efficiency starts with the details. Lean pipe clamps may be small, but their role in keeping your system stable and adaptable is huge. By taking the time to clean them regularly, using the right tools and techniques, you're not just maintaining equipment—you're protecting your workflow, your team's productivity, and your bottom line.
So, the next time you walk past that lean pipe workbench or flow rack, take a second to look at the clamps. Give them a quick wipe with a cloth, or add them to your cleaning checklist. Your future self (and your production schedule) will thank you.