- Company Articles
- Products and Technology
- Installation And Maintenance
- Common Mistakes to Avoid When Using Vertical Lean Pipe Joint Chrome

Common Mistakes to Avoid When Using Vertical Lean Pipe Joint Chrome
Related Product
Vertical Lean Pipe Joint Chrome
Vertical lean pipe joint is used for 28mm lean pipe fixed on ground and keep it stable.
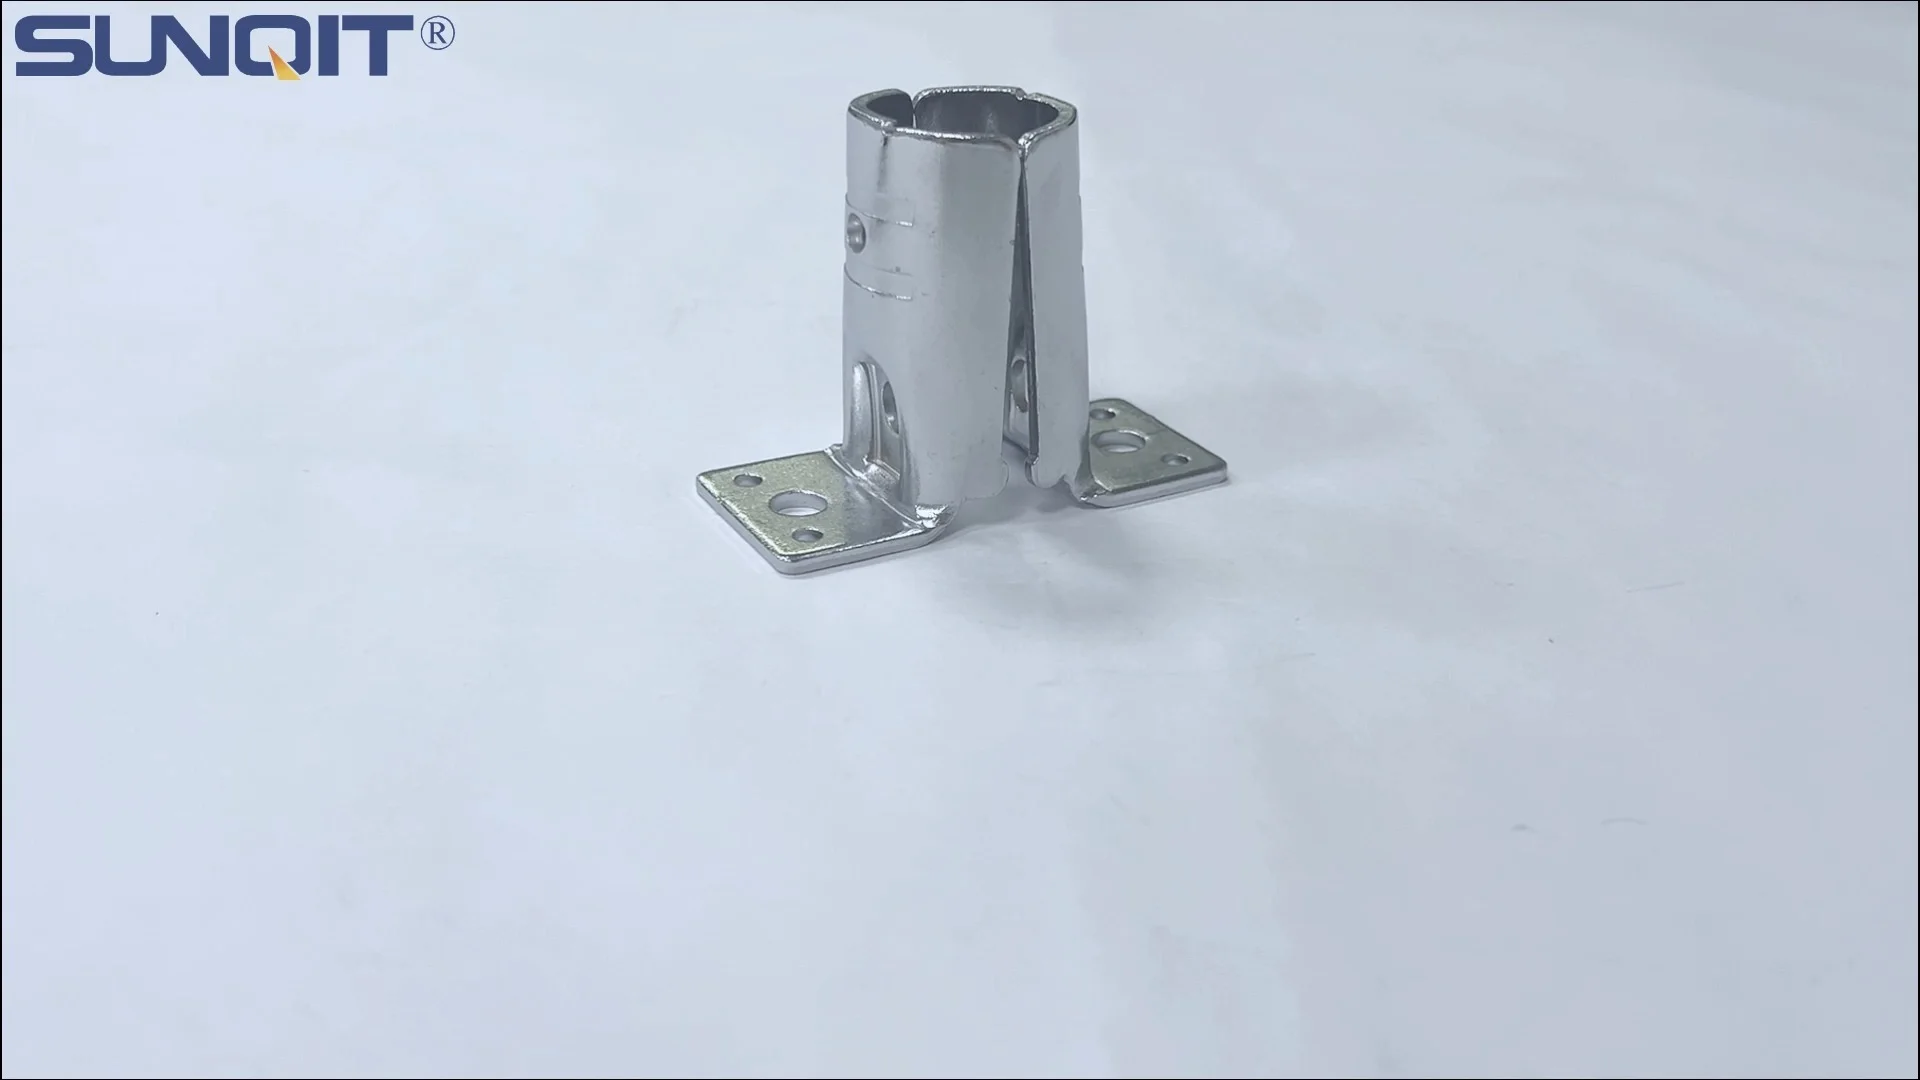
In the fast-paced world of manufacturing and assembly, where efficiency is king and downtime is the enemy, the tools and components that keep operations running smoothly often go unnoticed—until they fail. One such unsung hero is the vertical lean pipe joint chrome, a small but critical piece in the larger puzzle of lean systems. These joints are the connective tissue of lean pipe structures, holding together everything from workbenches and flow racks to conveyor systems and turnover trolleys. They're designed to be strong, flexible, and durable, but like any tool, they're only as reliable as the hands that install and maintain them.
Over the years, I've worked with countless production teams, and I've seen firsthand how a single misused or overlooked vertical lean pipe joint can disrupt an entire workflow. A loose joint might cause a workbench to wobble, leading to errors in assembly. A corroded joint could fail under load, bringing a conveyor to a halt. Even something as simple as over-tightening a joint can strip its threads, turning a 5-minute fix into a costly hour of downtime. The good news? Most of these issues are preventable. In this article, we'll dive into the most common mistakes teams make when using vertical lean pipe joint chrome, why they happen, and how to avoid them—so you can keep your lean system running like a well-oiled machine.
Understanding the Vertical Lean Pipe Joint Chrome: More Than Just a "Connector"
Before we jump into the mistakes, let's take a moment to appreciate what vertical lean pipe joint chrome actually does. These joints are engineered to connect lean pipes (typically steel or aluminum) at vertical angles, providing stability and support for structures that need to bear weight, resist vibration, or maintain alignment. The "chrome" in their name refers to the plating, which adds a layer of corrosion resistance—critical in environments where moisture, oils, or chemicals might be present. They're part of a broader family of lean pipe and accessories, designed to work seamlessly with other components like casters, roller tracks, and aluminum profiles.
What makes them unique is their versatility. Unlike rigid welded connections, vertical lean pipe joints allow for quick adjustments. Need to reconfigure a workbench to accommodate a new product? Loosen the joints, adjust the pipes, retighten, and you're done. This flexibility is why lean systems are so popular—they adapt to changing needs without requiring a complete overhaul. But with that flexibility comes responsibility: these joints rely on precise installation and maintenance to perform as intended. Cut corners here, and you'll quickly find yourself dealing with the consequences.
Mistake #1: Incorrect Torque During Installation—"Tighter Is Better, Right?" Wrong.
If I had a dollar for every time I've heard someone say, "I just cranked it until it wouldn't turn anymore," I'd be retired by now. When it comes to vertical lean pipe joint chrome, over-tightening is hands down the most common mistake. It's easy to see why: we're taught that "tight" means "secure," so it's natural to assume that applying more force will make the joint stronger. But here's the problem: vertical lean pipe joints are designed with specific torque limits. Exceed those limits, and you'll do more harm than good.
Why It Happens
Most teams don't use torque wrenches when installing these joints. Instead, they rely on hand tools like adjustable wrenches or even pliers, judging "tightness" by feel. This is a recipe for inconsistency. One person might tighten a joint with 20 Nm of force, another with 40 Nm—and neither has any idea they're over or under the mark. Even experienced installers can misjudge, especially if they're in a hurry to get the line up and running.
The Consequences
Over-tightening a vertical lean pipe joint chrome can lead to two major issues. First, it can strip the threads on the joint or the pipe itself. Chrome-plated joints have precise threading, and excessive force can wear down these threads, making the joint impossible to tighten properly in the future. Second, it can warp the joint's internal components. Many joints have plastic or rubber gaskets to enhance grip; over-tightening compresses these gaskets beyond their limits, causing them to crack or lose elasticity. The result? A joint that feels tight initially but loosens over time as the gaskets degrade, leading to wobbling structures or sudden failure under load.
Under-tightening is just as problematic. A joint that's not tight enough will vibrate loose over time, especially in high-traffic areas like near conveyor belts or busy workbenches. I once visited a facility where a flow rack had collapsed because the vertical joints hadn't been tightened properly. The root cause? The installer had been in a rush and skipped the final "check" step. The rack held up for a week, then gave way under the weight of incoming parts—costing the team hours of cleanup and lost production.
How to Avoid It
The solution here is simple: use a torque wrench. Most vertical lean pipe joint chrome manufacturers provide torque specifications (usually between 15-25 Nm for standard joints). Invest in a good-quality adjustable torque wrench, and train your team to use it. It might add 30 seconds to each installation, but that time is nothing compared to the hours lost fixing a stripped joint. For quick checks, mark the joint and pipe with a paint pen after tightening—if the marks shift later, you'll know the joint has loosened and needs re-tightening.

Mistake #2: Ignoring Material Compatibility—Mixing Metals Is a Corrosion Disaster
Vertical lean pipe joint chrome is designed to work with specific types of lean pipes, but that doesn't stop teams from mixing and matching materials to "save time" or "use what's on hand." I've seen stainless steel pipes paired with chrome-plated joints, aluminum pipes with steel joints, and even plastic-coated pipes with unplated metal joints. On the surface, they might seem to fit—but chemically, they're a disaster waiting to happen.
Why It Happens
Material compatibility is one of those "invisible" issues that gets overlooked until corrosion sets in. Teams often assume that if a pipe fits into a joint, it's "compatible." They might have leftover aluminum pipes from an old project and decide to use them with their new chrome joints to avoid ordering more steel pipes. Or they might not realize that the "silver" pipe in the corner is actually stainless steel, not plain steel. The problem is that different metals have different electrochemical properties, and when they're in contact (especially in damp or humid environments), they create a galvanic cell—a process that accelerates corrosion.
The Consequences
Galvanic corrosion is sneaky. It starts as a small discoloration or pitting on the joint or pipe, but over time, it eats away at the metal. I once worked with a food packaging plant that had installed aluminum lean pipes with chrome-plated joints in their washdown area. The high humidity and occasional water splashes created the perfect conditions for galvanic corrosion. Within six months, the joints had corroded so badly that they could be twisted by hand—even though they'd been torqued correctly during installation. The team had to replace all 200+ joints, costing thousands of dollars and shutting down the line for two days.
Even in dry environments, mixing materials can cause issues. For example, plastic-coated lean pipes (common in ESD workstations) can react with certain chrome plating chemicals, causing the coating to crack or peel. This exposes the underlying steel pipe to moisture, leading to rust that weakens the entire structure.
How to Avoid It
The first step is to read the manufacturer's guidelines. Reputable lean pipe suppliers will clearly state which pipes are compatible with their vertical lean pipe joint chrome. As a general rule: chrome-plated steel joints work best with plain steel or chrome-plated steel pipes. For aluminum pipes, use aluminum joints (look for "aluminum lean pipe joint" or "multi-angle fixed aluminum joint" in your supplier's catalog). If you must mix metals (e.g., using a steel joint with an aluminum pipe), use an insulating barrier—a plastic washer or sleeve between the joint and pipe—to prevent direct contact. And always store pipes and joints separately to avoid cross-contamination from oils or chemicals on incompatible materials.

Mistake #3: Overlooking Load Capacity—"It Looks Strong Enough, Right?"
Vertical lean pipe joint chrome is built to be strong, but "strong" doesn't mean "indestructible." Every joint has a maximum load capacity—the amount of weight it can safely support without bending, breaking, or deforming. Yet time and again, I see teams pile parts, tools, or equipment onto a structure without checking if the joints can handle the load. It's a classic case of "out of sight, out of mind"—the joints are hidden behind pipes or panels, so no one thinks to verify their limits.
Why It Happens
Load capacity confusion often stems from a lack of clear documentation. Many teams don't keep track of the specs for their lean pipe components, especially if they've been using the same system for years. A new supervisor might assume that a workbench built with vertical joints can support twice its original load because "it's made of metal." Or a team might add shelves to a flow rack without calculating the additional weight each vertical joint will have to bear. Even well-intentioned upgrades—like adding a heavier tool to a workbench—can push joints past their limits if the load isn't checked first.
The Consequences
Exceeding a joint's load capacity is a ticking time bomb. At first, the joint might just bend slightly, causing the structure to lean. Over time, the metal fatigues, and eventually, the joint fails. I visited a automotive parts plant where a vertical joint supporting a 300kg material rack gave way, dumping parts onto the floor and damaging a nearby conveyor. The root cause? The team had added an extra shelf to the rack six months earlier, increasing the load by 100kg—but no one checked if the joints could handle it. The joint didn't fail immediately; it "crept" over time, bending until it couldn't take the strain anymore.
Even if the joint doesn't fail, overloading can lead to other issues. A bent joint puts stress on adjacent pipes and joints, causing them to loosen or wear prematurely. It can also throw off the alignment of the entire structure—for example, a misaligned roller track on a conveyor might jam, slowing down production. In worst-case scenarios, overloaded joints can cause structures to collapse, putting workers at risk of injury.
How to Avoid It
Start by creating a "load map" for every lean structure in your facility. For each workbench, rack, or conveyor, note the maximum weight it's designed to hold, and which vertical joints are critical to supporting that weight. Keep a copy of the manufacturer's load capacity chart for your vertical lean pipe joint chrome (most suppliers provide this on their website or in product manuals). When adding new components or increasing the load, recalculate the weight each joint will bear—if it exceeds the limit, add extra supports or upgrade to a higher-capacity joint. And train your team to spot the warning signs: a leaning structure, creaking joints, or pipes that look bent are all red flags that the load might be too high.
Mistake #4: Skipping Regular Inspections—"If It Ain't Broke, Don't Fix It"
Vertical lean pipe joint chrome is built to last, but "last" doesn't mean "last forever without maintenance." I've walked into plants where the lean system has been in place for 5+ years, and the joints haven't been inspected once. The teams assume that because the structure is still standing, the joints are "fine." But the truth is, joints loosen over time due to vibration, temperature changes, and regular use. Chrome plating can chip or wear off, exposing the underlying metal to corrosion. Threads can get gunked up with dirt or oil, making them harder to adjust. By the time a joint "breaks," it's usually been failing slowly for months.
Why It Happens
Inspections fall by the wayside for a simple reason: they're seen as "non-essential." When production targets are tight, teams prioritize tasks that directly contribute to output—like assembling products or loading conveyors. Inspecting joints feels like "wasting time" on something that might not need fixing. Plus, without a clear schedule or checklist, inspections become easy to forget. A team might promise to "check the joints next week," but next week turns into next month, and so on.
The Consequences
Skipping inspections turns small issues into big problems. A joint that's slightly loose might tighten back up temporarily, but over time, the vibration will wear down the threads, making it impossible to tighten later. A tiny chip in the chrome plating might not seem like a big deal, but in a humid environment, that chip will start to rust—spreading under the plating until the joint is compromised. I worked with a electronics manufacturer that had a line of ESD workstations with vertical chrome joints. They skipped inspections for over a year, and when a joint finally failed, they discovered that half the joints on the line had rusted from the inside out—all because of a few small chips in the plating that went unnoticed.
How to Avoid It
Set up a regular inspection schedule. For high-traffic areas (like workbenches or conveyors that run 24/7), inspect joints weekly. For lower-traffic structures (like storage racks), monthly inspections should suffice. Create a simple checklist: check for looseness (try to wiggle the joint—if it moves, it needs tightening), corrosion (look for rust or discoloration), damage (chips in plating, bent threads), and alignment (is the joint holding the pipes at the correct angle?). Assign a team member to lead inspections, and make it part of their daily or weekly duties. For extra peace of mind, mark joints with a date sticker after each inspection—so you can track when they were last checked.
Mistake #5: Using Damaged or Counterfeit Joints—"They Look the Same, Right?"
In an effort to cut costs, some teams turn to cheap, off-brand, or counterfeit vertical lean pipe joint chrome. These joints often look identical to the real thing—same shape, same chrome plating, same size—but under the surface, they're built with inferior materials. I've seen joints made with recycled steel (which is weaker and more prone to bending), thin chrome plating (which chips easily), and imprecise threading (which doesn't grip pipes properly). The allure is obvious: they cost 30-50% less than genuine joints. But as the old saying goes, "buy cheap, buy twice."
Why It Happens
Cost pressure is the main driver here. Production budgets are tight, and it's easy to see a bin of "generic" vertical joints for $5 each and think, "Why pay $10 for the brand name?" Some teams also don't realize they're buying counterfeits—shady suppliers often package these joints in boxes that look like the real deal, with fake logos and "certifications." Others assume that "chrome is chrome" and that all joints are made to the same standards. But the reality is that reputable lean pipe suppliers invest in quality control: they test their joints for strength, corrosion resistance, and durability, and they stand behind their products with warranties. Counterfeit joints skip all these steps.
The Consequences
Counterfeit or damaged joints fail early and often. I worked with a small manufacturer that bought a batch of "discount" vertical chrome joints to build new workbenches. Within three months, the joints started to bend under the weight of tools and parts. The team had to replace all 50+ joints, and by then, the cheap joints had already damaged the pipes (due to poor threading), requiring even more replacements. The total cost? Three times what they would have paid for genuine joints in the first place.
Worse, damaged joints (even genuine ones) are just as risky. A joint that was dropped during shipping might have a hairline crack that's invisible to the naked eye—but under load, that crack will spread, causing the joint to fail. I've seen teams "salvage" joints from old, broken structures and reuse them without inspecting for damage. It's a false economy: that "free" joint could cost you a day of downtime when it fails.
How to Avoid It
Stick with reputable lean pipe suppliers. Do your research: look for suppliers with good reviews, certifications (like ISO 9001), and clear warranty policies. Ask for samples before buying in bulk—test the joint's strength, check the thickness of the chrome plating, and verify that the threading is precise (it should grip the pipe snugly without stripping). Inspect all joints when they arrive: look for cracks, chips, or uneven plating. And never reuse joints from damaged structures—even if they "look okay," they might have internal damage you can't see. Remember: a genuine vertical lean pipe joint chrome might cost more upfront, but it will save you money in the long run by lasting longer and avoiding downtime.
| Mistake | Common Causes | Potential Consequences | How to Avoid |
|---|---|---|---|
| Incorrect torque during installation | Using hand tools instead of torque wrenches; rushing installation | Stripped threads, warped gaskets, loose joints, structural instability | Use a torque wrench set to manufacturer specs; mark joints after tightening to check for loosening |
| Ignoring material compatibility | Mixing metals (e.g., aluminum pipes with steel joints); using leftover materials | Galvanic corrosion, cracked plastic coatings, weakened structures | Follow manufacturer guidelines; use insulating barriers if mixing metals; store materials separately |
| Overlooking load capacity | Lack of load documentation; adding unplanned weight to structures | Joint bending/failure, structural collapse, worker injury | Create load maps for all structures; check joint specs before adding weight; train teams to spot warning signs |
| Skipping regular inspections | Viewing inspections as "non-essential"; lack of schedule/checklists | Loose joints, corrosion, misalignment, premature wear | Inspect high-traffic joints weekly, low-traffic monthly; use a checklist for looseness, corrosion, damage |
| Using damaged/counterfeit joints | Cost-cutting, unknowingly buying fakes, reusing old damaged joints | Early joint failure, pipe damage, costly replacements, safety risks | Buy from reputable suppliers; inspect joints on arrival; avoid reusing damaged joints |
Mistake #6: Improper Alignment—"Close Enough" Is Never Good Enough
Even if you've torqued the joint correctly, used compatible materials, and stayed within load limits, poor alignment during installation can doom a vertical lean pipe joint to failure. I'm talking about joints where the pipes are slightly off-kilter—maybe one pipe is angled 5 degrees to the left, or the vertical pipe isn't perfectly straight. To the untrained eye, it might look "close enough," but that small misalignment puts enormous stress on the joint.
Why It Happens
Alignment issues usually stem from rushing the assembly process. Teams often "eyeball" pipe angles instead of using tools like levels or straightedges. They might start tightening the joint before the pipes are fully seated, or they might force a pipe into place if it doesn't quite fit (e.g., "bending" a pipe to align with the joint). In some cases, the floor itself is uneven, causing the entire structure to lean—but teams don't account for this when installing the joints.
The Consequences
Misaligned joints create "point loads"—areas where stress is concentrated on one part of the joint instead of being evenly distributed. Over time, this leads to premature wear. For example, a vertical joint that's slightly tilted will put extra pressure on one side of its threads, causing them to wear faster than the other. I visited a facility where a conveyor's roller track kept jamming, and we traced the issue to misaligned vertical joints supporting the track. The joints had been installed "by eye," and the track was off by just 2 degrees—enough to cause rollers to bind. Fixing it required loosening all the joints, realigning the track, and retightening everything—a 3-hour job that could have been avoided with a 5-minute level check during installation.
Worse, misalignment can cause the entire structure to "walk." A workbench with misaligned vertical joints might vibrate during use, slowly shifting across the floor. This not only disrupts workflow but can also damage the floor or nearby equipment. In extreme cases, a severely misaligned structure might become unstable, risking collapse.
How to Avoid It
Invest in basic alignment tools: a spirit level, a straightedge, and a measuring tape. Before tightening any vertical joint, use the level to ensure the pipes are plumb (vertical) and square (at 90-degree angles to each other). For longer structures (like conveyors or long racks), use a string line to check alignment across multiple joints. If the floor is uneven, use shims or adjustable leveling feet to stabilize the base before installing the joints. And take your time: rushing through alignment is a false economy. An extra 5 minutes with a level can save hours of rework later.
Wrapping Up: Your Joints Are Only as Strong as Your Process
At the end of the day, vertical lean pipe joint chrome is a tool—and like any tool, its performance depends on the process around it. Avoiding these mistakes isn't about being "perfect"; it's about being intentional. It's about training your team to use torque wrenches, checking material compatibility, respecting load limits, inspecting regularly, choosing quality over cost, and aligning with care. These small habits add up to big results: a lean system that's more reliable, more efficient, and safer for everyone who uses it.
Remember, the goal of lean manufacturing is to eliminate waste—and nothing wastes time, money, or morale like a failed joint. By taking the time to do it right the first time, you'll keep your production line moving, your team confident, and your bottom line healthy. And when in doubt, partner with a trusted lean pipe supplier—they're not just selling parts; they're selling expertise. A good supplier will help you choose the right joints, provide installation guidance, and stand behind their products. After all, your success is their success.
So the next time you're installing or maintaining vertical lean pipe joint chrome, take a moment to slow down. Check the torque. Verify the materials. Align the pipes. Inspect for damage. Your future self (and your production schedule) will thank you.