- Company Articles
- Products and Technology
- Product knowledge
- Complete Guide to Sizing External Straight Aluminum Joints for Your Project

Complete Guide to Sizing External Straight Aluminum Joints for Your Project
Related Product
External Straight Aluminum Joint
Aluminum pipe joint outside connection used for two pcs 28pcs aluminum pipe connection in straight angle,it connects two pcs pipe from outside.
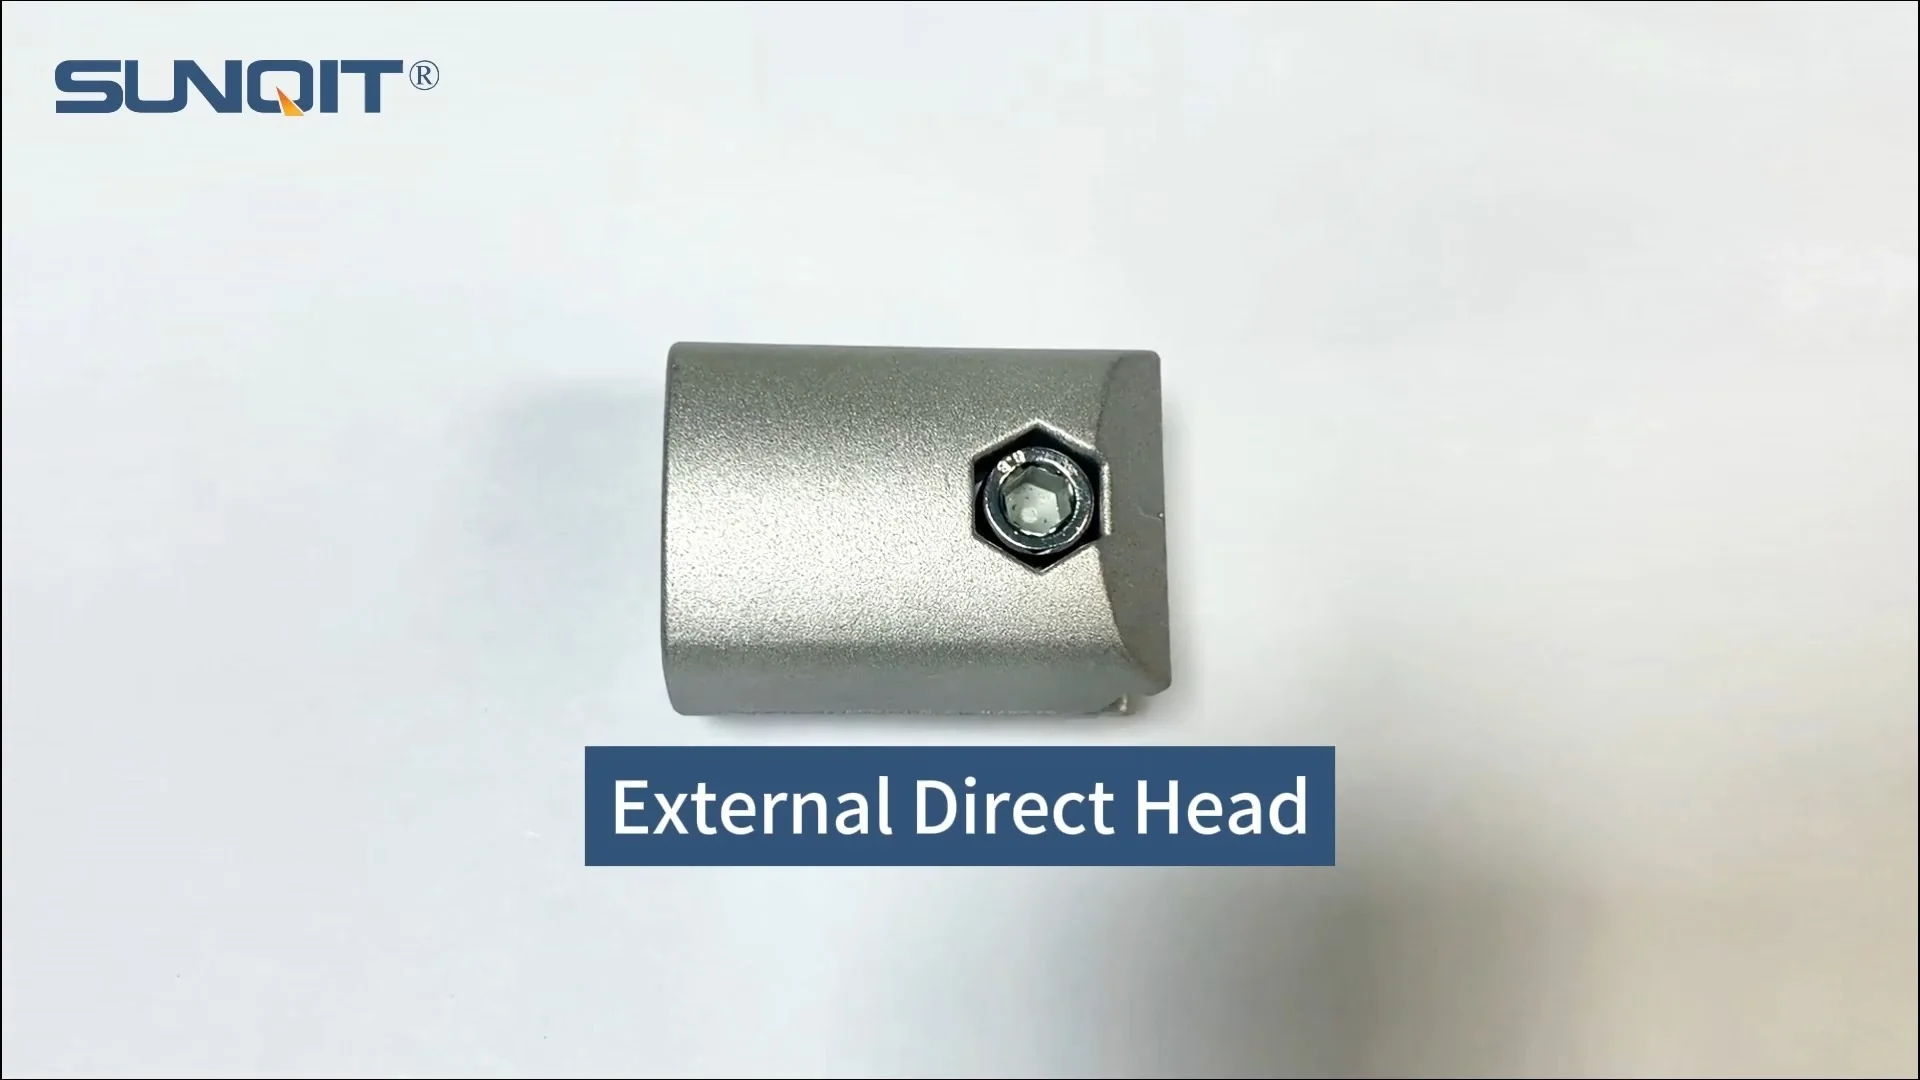
If you've ever worked on a project involving aluminum lean pipe systems—whether building a workbench, assembling a material rack, or setting up a lean manufacturing line—you know that the little components often make the biggest difference. Today, we're zeroing in on one of those unsung heroes: the external straight aluminum joint. These small but mighty connectors are the glue that holds your aluminum pipe and accessories together, and getting their size right can mean the difference between a sturdy, long-lasting setup and a wobbly, frustrating one that fails when you need it most.
Maybe you're a seasoned project manager who's had a joint fail mid-operation, or perhaps you're new to aluminum profile projects and want to avoid rookie mistakes. Either way, this guide will walk you through everything you need to know about sizing external straight aluminum joints. We'll break down what they are, why sizing matters, the key factors that influence your choice, and even walk through real-world examples to make it all click. Let's dive in.
What Are External Straight Aluminum Joints, Anyway?
First things first: let's make sure we're all on the same page. External straight aluminum joints are specialized connectors designed to link two or more aluminum pipes in a straight line—think of them as the "elbows" of the straight world, but without the bend. Unlike internal joints, which fit inside the pipe, these joints clamp around the outside of the aluminum pipe, creating a secure bond that's both strong and relatively easy to disassemble if needed.
You'll find these joints in almost any aluminum lean pipe system. They're the backbone of workbenches, material racks, assembly lines, and even custom storage solutions. What makes them so popular? For starters, they're versatile. Pair them with basic aluminum tube, aluminum profile, or even other aluminum pipe accessories, and they adapt to just about any project. They're also durable—made from corrosion-resistant aluminum, they hold up in factories, warehouses, and even some outdoor settings. But here's the catch: their effectiveness lives or dies by how well they're sized to your specific pipes and project needs.
Why Sizing External Straight Aluminum Joints Matters More Than You Think
Let's say you're building a workbench using aluminum profile. You've picked out the perfect aluminum pipe, grabbed some caster wheels for mobility, and even splurged on a nice aluminum honeycomb panel for the top. But if you skimp on sizing the external straight joints that connect the legs to the frame, here's what could happen: within a month, the joints start to slip. The workbench wobbles when you set down heavy tools. One day, you lean on it, and—*crack*—the joint gives way, sending your equipment crashing to the floor. Not exactly the outcome you had in mind, right?
Sizing isn't just about "making it fit." It's about ensuring the joint can handle the weight you'll put on it, the environment it's in, and the stress of daily use. A joint that's too small for your pipe will never clamp tightly enough, leading to instability. One that's too large? It'll slide around, creating gaps that weaken the entire structure. And if you ignore factors like load capacity or compatibility with other aluminum pipe accessories? You're basically setting yourself up for a project redo (or worse, a safety hazard).

Key Factors That Influence Sizing: It's Not Just About Pipe Diameter
When it comes to sizing external straight aluminum joints, most people's first thought is, "What's the diameter of my pipe?" And while that's a great starting point, it's far from the only thing to consider. Let's break down the big four factors that should guide your decision:
1. Load Capacity: How Much Weight Will It Really Hold?
Here's a truth bomb: not all external straight aluminum joints are created equal. A joint designed for a lightweight shelving unit won't cut it for a workbench that holds 200 pounds of tools. Load capacity—the maximum weight a joint can support without bending or breaking—is non-negotiable.
Start by asking: What's the total load my project will carry? If it's a workbench, add up the weight of the tools, materials, and even the people who might lean on it. For a material rack, factor in the heaviest boxes or parts it will hold, multiplied by how many levels you're using. Then, divide that total by the number of joints in your structure—each joint should handle its "share" of the load, plus a 20% buffer (because life is unpredictable, and you don't want to push things to the edge).
Pro tip: Check the manufacturer's specs for "static load" vs. "dynamic load." Static load is weight that stays put (like a shelf of boxes), while dynamic load is weight that moves (like parts sliding down a roller track). If your project involves movement—say, a trolley with caster wheels—opt for joints rated for higher dynamic loads.
2. Pipe Diameter: Measure Twice, Buy Once
Okay, let's talk pipe diameter—the most obvious (but still crucial) factor. External straight aluminum joints are designed to fit specific pipe sizes, and even a millimeter off can throw everything off. Common aluminum pipe diameters include 20mm, 30mm, and 40mm, but there are variations. For example, a "20mm pipe" from one supplier might actually measure 19.8mm, while another's is 20.2mm. That tiny difference? It can mean the joint either won't clamp properly or will crush the pipe.
Grab a caliper (not a ruler—rulers are too imprecise for this) and measure the outer diameter of your pipe at three different points. Pipes can sometimes be slightly oval-shaped, especially if they've been stored improperly, so averaging the measurements will give you the most accurate number. Once you have that, match it to the joint's specified pipe size. Most manufacturers list compatible pipe diameters right on the product label (e.g., "Fits 30mm Aluminum Pipe"), but if you're unsure, ask for a spec sheet.
3. Project Environment: Will It Stand Up to the Elements?
Where will your project live? A dry, climate-controlled factory floor is a far cry from a humid warehouse or a garage that gets rained on occasionally. External straight aluminum joints are corrosion-resistant, but some are better suited to harsh environments than others. For example, if you're working in a food processing plant with lots of water and cleaning chemicals, you might want joints with a thicker anodized coating. In an electronics factory, ESD (electrostatic discharge) protection might be necessary—look for joints labeled "ESD-safe" to avoid damaging sensitive components.
Even temperature matters. If your joint will be exposed to extreme heat (like near a furnace) or cold (like a walk-in freezer), check that the aluminum and any rubber gaskets or clamps can handle those conditions. A joint that becomes brittle in the cold won't clamp as tightly, and one that softens in the heat could lose its grip over time.
4. Compatibility with Other Aluminum Pipe Accessories
Your external straight aluminum joint doesn't exist in a vacuum. It has to play nice with the other components in your project: the aluminum profile, the roller track, the caster accessories, even the plastic pipe end caps. For example, if you're using a 40mm aluminum pipe with a 40mm external straight joint, but the next component in your structure is a 30mm aluminum guide rail, you'll need an adapter—or a joint that can transition between sizes (though external straight joints are typically for straight, same-diameter connections). Mixing and matching incompatible parts is a recipe for frustration, so always map out your entire assembly before picking joints.

Step-by-Step Guide to Sizing External Straight Aluminum Joints: From Planning to Perfect Fit
Ready to stop guessing and start sizing like a pro? Let's walk through the process step by step. By the end, you'll have a joint that fits, holds, and lasts.
Step 1: Map Out Your Project in Detail
Before you even look at a joint, grab a notebook (or open a spreadsheet) and answer these questions: What am I building? (e.g., "a 6-foot workbench with a shelf") What materials will go on it? (e.g., "200 lbs of tools, 50 lbs of parts") Where will it be located? (e.g., "indoor warehouse, temperature-controlled") What other components will I use? (e.g., "40mm aluminum profile, 3-inch caster wheels, plastic roller track guide rail"). The more specific you are, the easier sizing will be.
Step 2: Measure Your Aluminum Pipe (Yes, Again)
We talked about this earlier, but it's worth repeating: measure your pipe's outer diameter with a caliper. Write down the average measurement (e.g., "30.1mm"). If you're using multiple pipes, measure a few—sometimes batches vary slightly. This number will be your north star for joint size.
Step 3: Calculate Your Total Load (and Add a Buffer)
Let's say you're building a material rack with 3 rows and 3 floors (sound familiar? It's one of the common setups we see). Each floor will hold 10 boxes, each weighing 25 lbs. Total load per floor: 250 lbs. With 3 floors, that's 750 lbs total. Now, how many external straight joints are in the rack? Let's say 8 joints supporting the vertical structure. Divide 750 by 8, and you get ~94 lbs per joint. But remember that buffer we mentioned? Add 20%, so aim for joints rated for at least 113 lbs each. It might seem like overkill, but trust us—you'd rather have a joint that's overqualified than under.
Step 4: Match Joint Specs to Your Pipe and Load
Now, it's time to shop (or at least research). Look for external straight aluminum joints that: (1) list a compatible pipe diameter matching your measurement (e.g., "Fits 30mm Pipe"), and (2) have a load capacity rating higher than your calculated buffer (e.g., "Max Static Load: 150 lbs"). Most manufacturers provide spec sheets online, so don't be shy about downloading them. If you're stuck, reach out to your aluminum lean pipe supplier—they deal with this stuff daily and can point you to the right joint.
Step 5: Check Compatibility with Other Accessories
Let's say you've found a joint that fits your 30mm pipe and handles 150 lbs. Great! Now, check if it plays nice with the rest of your setup. If your workbench uses aluminum guide rail A, will the joint's clamp interfere with the rail? If you're adding caster accessories, does the joint's design leave enough space for the caster mount? When in doubt, order one joint first and do a test fit with your other components. It's cheaper to return one joint than to redo an entire project.
Step 6: Test the Fit (and Adjust If Needed)
You've got your joint, your pipe, and your tools. Now, do a dry assembly (no glue or permanent fasteners yet). Slide the joint onto the pipe and tighten the clamp according to the manufacturer's instructions (usually with an Allen wrench). Give it a wiggle—does it move? If yes, check if the pipe diameter matches or if the clamp needs to be tighter (but don't over-tighten—you could strip the threads or dent the pipe). If it's rock-solid, congratulations—you're on the right track!
Step 7: Document and Standardize (for Big Projects)
If you're building multiple units (like a lean system with 10 workstations), write down the joint size, pipe diameter, and load capacity you used. That way, every workstation is consistent, and if you need to replace a joint later, you won't have to guess what size to buy. Trust us—future you will thank you for this step.

The Tools You'll Need: No Fancy Gear Required
You don't need a fully stocked workshop to size external straight aluminum joints, but a few key tools will make the process way easier:
- Digital caliper: For precise pipe diameter measurements (analog works too, but digital is more accurate).
- Torque wrench: To tighten the joint's clamp to the manufacturer's recommended torque (prevents over-tightening).
- Manufacturer spec sheets: These list load capacity, compatible pipe sizes, and material info—save them on your phone or print them out.
- Test pipe: A scrap piece of your project's pipe to test joint fit without messing up your actual materials.
Common Sizing Mistakes (and How to Avoid Them Like the Plague)
Even pros make mistakes— but with a little awareness, you can sidestep the most common ones. Let's take a look at what to watch out for:
Mistake #1: "Close Enough" Pipe Measurements
We once had a customer swear their pipe was 25mm, so they bought 25mm joints. Turned out, their pipe was actually 28mm (they'd used a ruler and guessed). The joints wouldn't clamp, and the whole structure wobbled. Moral of the story: Always use a caliper. "Close enough" in measurements = "not close enough" in performance.
Mistake #2: Ignoring Dynamic Loads for Moving Projects
A customer built a turnover trolley with caster wheels using joints rated for static load only. The first time they rolled it across the warehouse, the joints loosened—because rolling adds extra stress (dynamic load) that static ratings don't account for. Solution: Always check if your project moves, and size joints for dynamic load if needed.
Mistake #3: Forgetting About Corrosion in Humid Areas
A bakery used standard external straight joints in a room with steam ovens. Within six months, the joints started to rust—ruining the trolley they were attached to. Oops. If your project is in a humid, wet, or chemical-heavy environment, opt for joints with anodized or powder-coated finishes (or even stainless steel, though that's pricier).
Real-World Project Examples: Sizing in Action
Sometimes, seeing how it all comes together in real life is the best way to learn. Let's walk through two common projects and how sizing played a role in their success.
Example 1: The Manufacturing Workbench
Project: A 5-foot workbench for an electronics assembly line, with a shelf for tools and a top made of aluminum honeycomb panel. Needs: Must hold 300 lbs (tools + parts), be ESD-safe, and fit 40mm aluminum profile legs. Sizing Steps:
- Measured pipe diameter: 40.2mm (average of 3 measurements).
- Calculated load: 300 lbs total ÷ 4 joints (one per leg) = 75 lbs per joint + 20% buffer = 90 lbs.
- Chose an ESD-safe external straight aluminum joint rated for 40mm pipe and 120 lbs static load (well above the 90 lbs needed).
- Test fit with aluminum guide rail B (used for the shelf) to ensure no interference.
Result: The workbench has been in use for 18 months with zero wobbling or joint issues. The ESD rating protected sensitive components, and the joints have held up to daily tool use.
Example 2: The Material Handling Trolley
Project: A trolley for moving heavy boxes in a warehouse, with 60mm aluminum pipe frame and caster wheels. Needs: Must carry 500 lbs (dynamic load, since it rolls), fit 60mm pipe, and resist corrosion in a humid warehouse. Sizing Steps:
- Measured pipe diameter: 60.1mm.
- Calculated dynamic load: 500 lbs ÷ 6 joints (frame corners) = 83 lbs per joint + 30% buffer (since rolling adds stress) = 108 lbs.
- Chose a powder-coated external straight joint rated for 60mm pipe and 150 lbs dynamic load, with corrosion resistance.
- Ensured joint design left space for caster installation base (no overlapping parts).
Result: The trolley glides smoothly, even when fully loaded, and the joints have shown no signs of rust after 1 year in the humid warehouse.
A Handy Reference Table: External Straight Aluminum Joint Sizes & Uses
| Joint Size (Fits Pipe Diameter) | Max Static Load (lbs) | Max Dynamic Load (lbs) | Common Applications | Best For |
|---|---|---|---|---|
| 20mm | 50 | 30 | Shelving, small carts, lightweight workbenches | Light loads, 2020 national standard profile |
| 30mm | 100 | 70 | Medium workbenches, material racks (3 row/3 floor), tool trolleys | Moderate loads, 3030 national standard profile |
| 40mm | 150 | 100 | Heavy-duty workbenches, assembly lines, lean system stations | Heavy loads, 4040/4080 EU standard aluminum profile |
| 60mm | 250 | 180 | Industrial trolleys, large material racks, outdoor structures | Very heavy loads, 6060 aluminum extrusion profile |
Wrapping Up: Your Project Deserves the Right Joint
Sizing external straight aluminum joints might seem like a small detail in the grand scheme of your project, but as we've seen, it's the detail that ensures everything else holds together. By taking the time to measure your pipe, calculate your load, consider your environment, and test for fit, you're not just building something—you're building something that lasts.
And remember: you don't have to do it alone. Reputable aluminum lean pipe suppliers (like the ones who provide quality aluminum pipe accessories and lean system components) are there to help. They can share spec sheets, recommend joints for your specific needs, and even send samples for testing. So next time you're staring at a pile of aluminum pipe and joints, take a deep breath, grab your caliper, and size like a pro. Your project (and your peace of mind) will thank you.