- Company Articles
- Products and Technology
- Installation And Maintenance
- Corrugated Aluminum Pipe Installation Tools: A Complete Checklist

Corrugated Aluminum Pipe Installation Tools: A Complete Checklist
Related Product
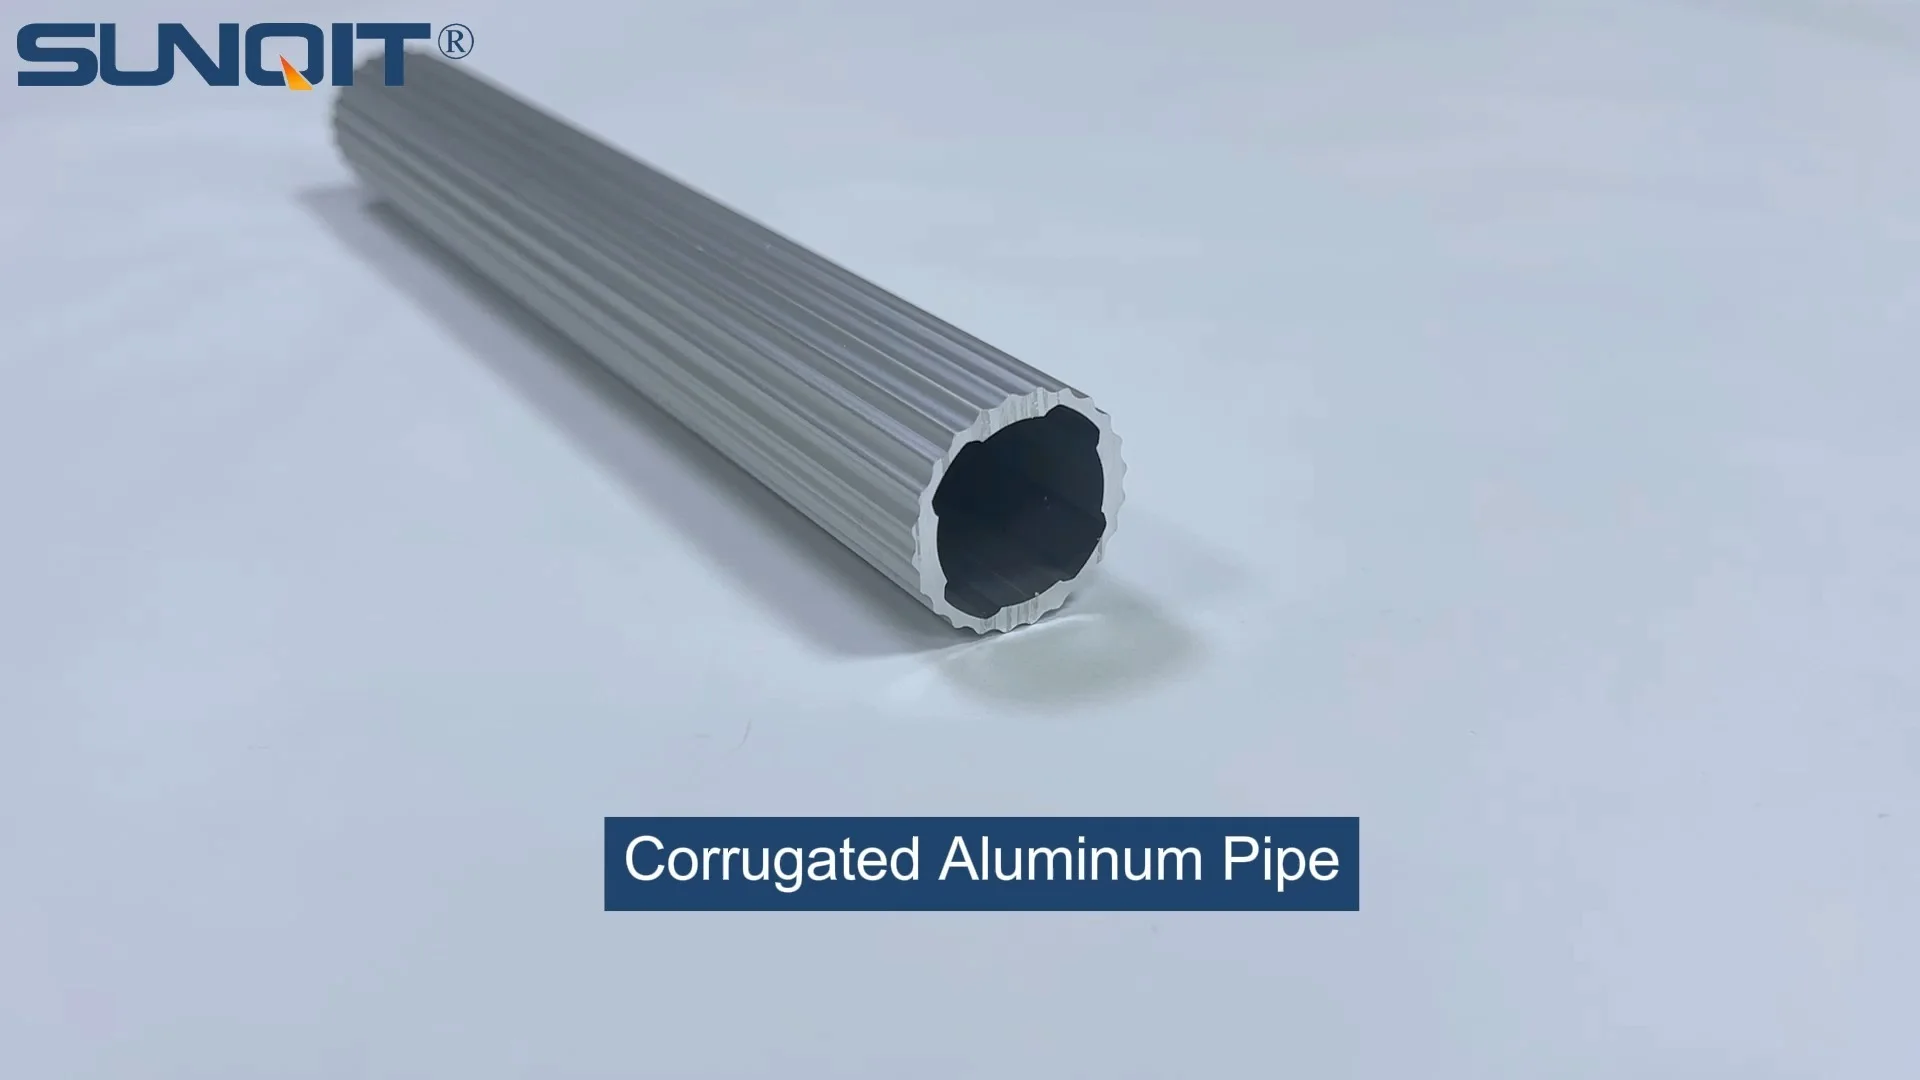
Corrugated Aluminum Pipe
Product Description The slot side is 10mm which can work with a T sliding block for connection accessories Quick Detail Product name Corrugated Aluminum pipe model GLT28-T-3010A Material Science 6005-T6 thickness 1.7mm surface treatment anodic oxidat
Introduction: The Backbone of Efficient Workspaces
Walk into any well-organized factory, warehouse, or workshop, and you'll likely spot the unsung heroes holding everything together: corrugated aluminum pipes. These lightweight yet durable tubes are the building blocks of lean systems, from workbenches and material racks to conveyor lines and turnover trolleys. What makes them so indispensable? Their flexibility. Unlike rigid metal pipes, corrugated aluminum pipes bend slightly under pressure, absorb vibrations, and adapt to evolving workspace needs—whether you're rearranging a production line or scaling up a storage area.
But here's the thing: even the sturdiest corrugated aluminum pipe is only as reliable as its installation. A wobbly joint, a misaligned cut, or a loose connection can turn a sleek, efficient setup into a frustrating, accident-prone mess. That's where the right tools come in. Installing corrugated aluminum pipes isn't just about screwing pieces together; it's about precision, care, and using tools designed to handle the unique properties of aluminum—its softness, its tendency to warp if mishandled, and its need for secure, long-lasting connections.
In this guide, we'll walk through the essential tools you need to install corrugated aluminum pipes like a pro. We'll cover everything from measuring and cutting to joining and mounting, with a focus on the aluminum pipe accessories and specialized tools that make the job easier, safer, and more effective. Whether you're a seasoned facility manager or a small business owner setting up your first workshop, this checklist will ensure you're prepared to build a workspace that's not just functional, but built to last.
Why the Right Tools Matter More Than You Think
Let's start with a scenario we've all faced: trying to fix something with the wrong tool. Maybe you've used a butter knife as a screwdriver or a rock as a hammer. It works—sort of—but it's slow, messy, and risks damaging the item (or your hand). Installing corrugated aluminum pipes is no different. Using subpar tools or skipping key equipment can lead to:
- Wasted time: A dull saw blade might take twice as long to cut through a pipe, and a loose tape measure could force you to redo an entire section.
- Weak connections: Aluminum pipe accessories like lean pipe joints rely on precise torque to stay tight. A generic wrench might over-tighten (stripping the joint) or under-tighten (leaving gaps that loosen over time).
- Safety hazards: Sharp, jagged pipe edges from a poor cut can slice hands. Wobbly structures built with misaligned pipes might collapse, risking injury or damaged inventory.
- Shortened lifespan: Corrugated aluminum pipes are designed to last decades, but improper installation can cause premature wear—like cracks from over-tightened joints or rust from exposed, unsmoothed edges.
The good news? Investing in the right tools isn't just about avoiding headaches—it's about investing in your workspace's efficiency. With the proper gear, you'll install pipes faster, reduce errors, and create structures that stand up to daily use. Plus, many tools on this list are multi-purpose, so they'll serve you beyond just corrugated aluminum pipe projects—think assembling aluminum profile workbenches, repairing roller tracks, or building custom storage racks.

The Complete Installation Tool Checklist
Now, let's dive into the tools you'll need, organized by the stage of installation. We've broken this down into five categories: measuring & marking, cutting & shaping, joining & connecting, mounting & securing, and finishing & safety. Each tool has a purpose, and skipping even one can throw off your entire project.
1. Measuring & Marking Tools: Get It Right the First Time
Before you even touch a saw, you need to know exactly where to cut. Precision here prevents wasted materials and misaligned structures. Here's what you'll need:
| Tool | Purpose | Pro Tip |
|---|---|---|
| Digital Caliper | Measures pipe diameter, wall thickness, and joint dimensions to ensure compatibility with aluminum pipe accessories. | Zero out the caliper before each use to avoid measurement drift—even a 1mm error can make a joint too loose or too tight. |
| Tape Measure (16ft+) | Marks pipe lengths for cutting and ensures parallel pipes (like in a workbench frame) are evenly spaced. | Use a tape with a magnetic hook to free up your hands when measuring metal surfaces. Look for one with both metric and imperial units. |
| Carpenter's Square | Checks right angles when marking cuts or aligning pipes (critical for square workbenches or 90-degree rack corners). | Opt for a metal square over plastic—aluminum can scratch plastic, throwing off your angle measurements. |
| Marker (Fine-Tip, Permanent) | Makes clear, visible marks on corrugated aluminum (which can be slippery and hard to mark with regular pens). | Use a silver or white marker on dark pipes and black on light ones. Avoid smudging by letting the ink dry for 10 seconds before cutting. |
| Straightedge (2ft+) | Draws straight lines along the corrugated ridges—essential for clean, even cuts. | Clamp the straightedge to the pipe before marking to prevent it from slipping. A metal ruler works, but a rigid aluminum profile (like a 2020 or 3030 extrusion) is even sturdier. |
Pro Hack:
For long pipes (6ft+), use a string line with chalk to mark straight cuts. Stretch the string between two clamps, pull it tight, and snap it against the pipe—faster and more accurate than using a ruler for extended lengths.
2. Cutting & Shaping Tools: Smooth Edges, Perfect Fits
Corrugated aluminum pipes have a unique texture—ridges and valleys that can catch saw blades or cause uneven cuts. The right cutting tools will glide through the metal, leaving clean edges that fit snugly into joints. Here's what you need:
| Tool | Purpose | Pro Tip |
|---|---|---|
| PVC/Aluminum Pipe Cutter (Ratchet Style) | Makes clean, burr-free cuts on pipes up to 2" diameter. Ideal for corrugated aluminum, which is softer than steel. | replace blades every 50-100 cuts. Dull blades crush the pipe instead of cutting it, leading to jagged edges. |
| Miter Saw with Aluminum Blade | For high-volume cuts or angled cuts (45°, 90°). The blade's fine teeth (60-80 TPI) prevent tearing the corrugated ridges. | Clamp the pipe securely—aluminum can shift mid-cut, ruining the angle. Use a blade labeled "non-ferrous" to avoid overheating. |
| Deburring Tool | Removes sharp, jagged edges (burrs) from cut pipes. Burrs can tear gloves, damage O-rings, and prevent joints from seating properly. | Spin the tool clockwise around the pipe's inner and outer edges. A few passes are enough—over-deburring can widen the pipe end. |
| File Set (Round, Flat, and Half-Round) | Smooths rough spots, reshapes bent pipe ends, or adjusts pipe diameter slightly to fit tight joints. | Use a medium-grit file for initial smoothing, then a fine-grit file for a polished finish. Wipe away aluminum dust with a dry cloth to avoid clogging the file. |
| Pipe Bender (Manual or Hydraulic) | Bends corrugated aluminum pipes to specific angles (30°, 45°, 90°) without kinking. Useful for custom shapes like curved handrails or corner racks. | Match the bender to your pipe diameter—using a 1" bender on a 0.75" pipe will crumple the metal. Lubricate the bender dies with wax to reduce friction. |
Pro Hack:
If you're cutting multiple pipes to the same length, build a simple jig: clamp a stop block to your workbench at the desired length, then butt each pipe against it before cutting. This ensures every pipe is identical—critical for symmetrical structures like shelving units.
2. Joining & Connecting Tools: The Glue That Holds It All Together
Corrugated aluminum pipes don't just "stick" together—they rely on specialized aluminum pipe accessories and joints to create strong, flexible connections. This is where tools like lean pipe joints and torque wrenches become non-negotiable. Here's what you'll need to ensure joints stay tight for years:
| Tool | Purpose | Pro Tip |
|---|---|---|
| Hex Key Set (Metric, Ball-End) | Tightens hex-head screws on lean pipe joints, aluminum profile connectors, and pipe clamps. | Invest in a set with a rubber grip—you'll be turning these for hours, and slippery keys lead to stripped screws. |
| Torque Wrench (1/4" Drive) | Ensures lean pipe joints are tightened to the manufacturer's specs (usually 8-12 Nm for aluminum). Prevents over-tightening (which cracks joints) or under-tightening (which leads to wobble). | Set the torque before use and listen for the "click"—that's when you stop. Reset to zero after each project to preserve accuracy. |
| Thread Locker (Medium-Strength, Removable) | Applied to joint screws to prevent loosening from vibrations (common in conveyor lines or near machinery). | Use sparingly—a drop per screw is enough. Avoid permanent thread locker unless you never plan to disassemble the structure. |
| Joint Alignment Tool | Keeps pipes straight and centered in lean pipe joints during assembly. Prevents crooked connections that weaken the structure. | Slide the tool into the joint before inserting pipes—if the pipes don't align with the tool's guides, adjust them before tightening. |
| Rubber Mallet | Gently taps pipes into joints without damaging the aluminum. Useful for tight-fitting connections or seating pipes fully in deep joints. | Wrap the pipe end with a cloth before tapping to avoid leaving dents. Tap near the joint, not the middle of the pipe, to prevent bending. |
One thing to note: not all joints are created equal. Lean pipe joints, for example, are designed specifically for aluminum and steel pipes, with grooves that grip the corrugated surface. Using generic plastic joints might save a few dollars upfront, but they'll slip over time—especially under heavy loads. Always pair corrugated aluminum pipes with compatible aluminum pipe accessories to ensure a secure fit.
3. Mounting & Securing Tools: Keep It Stable
Once your pipes are cut and joined, you need to mount them to walls, floors, or mobile bases (like caster wheels). This step ensures your structure stays put—whether it's a stationary workbench or a rolling turnover trolley. Here's what you'll need:
| Tool | Purpose | Pro Tip |
|---|---|---|
| Drill Driver (Cordless, 18V+) | Drives screws into walls, floors, or aluminum profiles to mount pipes. A keyless chuck makes switching bits fast. | Use a variable speed setting—low speed for starting screws, high speed for driving them home. Keep a spare battery charged—aluminum drilling drains power quickly. |
| Masonry Drill Bits (for concrete floors/walls) | Creates pilot holes for anchors when mounting to concrete or brick. Corrugated aluminum structures mounted to concrete need secure anchors to avoid tipping. | Use water to cool the bit—dry drilling in concrete overheats bits and reduces their lifespan. A spray bottle with water works well. |
| Toggle Bolts & Wall Anchors | Secures pipes to drywall or hollow walls. Choose anchors rated for at least 50 lbs per pipe—more if the structure holds heavy tools or materials. | Drill the pilot hole slightly smaller than the anchor's diameter. Tap the anchor in with a hammer until it's flush with the wall before inserting the bolt. |
| Caster Wheel Installation Kit | Attaches caster wheels to the base of mobile structures (like turnover trolleys or portable workbenches). Includes mounting plates, bolts, and washers. | Use lockable caster wheels for stability—even a slight slope can send an unlocked trolley rolling. Tighten bolts with a torque wrench to prevent wobbling. |
| Level (2ft+) | Ensures mounted pipes are straight horizontally (for conveyors) or vertically (for racks). A level structure distributes weight evenly, preventing stress on joints. | Check level in two directions (front-back and left-right) before final tightening. Shims (small plastic or metal wedges) can adjust for uneven floors. |
Mobile structures deserve extra attention. If you're mounting caster wheels, make sure the base pipes are reinforced with cross-bracing—otherwise, the trolley might sway when loaded. Also, test the brakes: lock the casters and push the structure gently. If it moves, the brakes need adjustment or the wheels need better traction (rubber wheels work best on smooth floors).
4. Finishing & Safety Tools: Protect Your Pipes (and Yourself)
You're almost done! The final step is adding finishing touches to protect your pipes and ensure a safe workspace. Overlooking these tools can lead to rust, scratches, or injuries—so don't skip them.
| Tool | Purpose | Pro Tip |
|---|---|---|
| Aluminum Primer & Paint | Coats exposed pipe ends or joints to prevent oxidation (aluminum rusts too, just not as visibly as steel). Use paint matched to your workspace's color scheme for a polished look. | Sand the pipe lightly with fine-grit sandpaper before painting to help the primer adhere. Let the primer dry 24 hours before adding paint. |
| Rubber Pipe End Caps | Covers sharp pipe ends to prevent cuts and keep dust/debris out of hollow pipes. Essential for workbenches or structures at waist height where people might brush against them. | Choose caps with a snug fit—loose caps fall off over time. Heat the cap with a hair dryer for 10 seconds before installing to make it stretch easier. |
| Safety Glasses | Protects eyes from flying aluminum shavings during cutting, filing, or drilling. Even a tiny sliver can cause serious injury. | Opt for wrap-around glasses—they block debris from the sides, too. replace them if the lenses scratch or crack. |
| Cut-Resistant Gloves | Shields hands from sharp burrs, rough pipe edges, and pinch points when handling joints. Aluminum is soft, but its edges can still slice through regular gloves. | Look for gloves with a grip pattern on the palms—they'll help you hold slippery pipes and tools. Wash them regularly to remove aluminum dust, which can irritate skin. |
| Shop Vacuum with HEPA Filter | Cleans up aluminum dust and shavings. Inhaling aluminum dust is harmful, and loose shavings are a slipping hazard. | Vacuum immediately after cutting or filing—dust settles quickly and is hard to sweep up. Empty the vacuum outside to avoid spreading dust indoors. |
Pro Tips for Smooth Installation
Even with the right tools, installation can hit snags. Here are a few extra tips to keep your project on track:
- Test-fit before tightening: Always assemble the entire structure loosely first (just hand-tighten joints) to check alignment. If something's crooked, it's easier to adjust now than after you've torqued all the screws.
- Label parts: If you're building a complex structure (like a multi-level material rack), label pipes and joints with masking tape and numbers. This prevents mix-ups when disassembling and reassembling.
- Use a rubber mallet for stuck joints: If a lean pipe joint won't seat, tap it gently with a rubber mallet while twisting the pipe. The vibration often loosens debris or aligns the corrugations.
- Check for wobble: After assembly, push and pull the structure from all sides. If it wobbles, tighten the joints nearest the movement—wobble usually comes from a single loose connection.
- Plan for expansion: Leave extra pipe length if you think you might extend the structure later. Corrugated aluminum pipes are easy to cut down, but adding length requires new joints and pipes.
Troubleshooting Common Issues
Even pros run into problems. Here's how to fix the most common installation headaches:
Problem: Joints keep loosening
Solution: Apply medium-strength thread locker to the screws. If the joint itself is worn (common with used lean pipe joints), replace it. Worn joints have stripped grooves that can't grip the pipe.
Problem: Pipe bends when cutting
Solution: Clamp the pipe at both ends of the cut line to prevent flexing. For very thin-walled pipes, wrap the cut area with masking tape to add rigidity.
Problem: Caster wheels won't roll smoothly
Solution: Check if the mounting plate is bent—this tilts the wheel and causes drag. Straighten the plate with pliers or replace it. Also, clean wheel bearings with a degreaser if they're clogged with dust.
Problem: Pipes don't align with aluminum profile connectors
Solution: Use a file to slightly widen the connector's hole (if it's metal) or sand the pipe end to reduce diameter (if it's aluminum). Be careful not to remove too much material—you need a snug fit.
Conclusion: Build to Last, Build with Confidence
Installing corrugated aluminum pipes isn't rocket science, but it does require care, precision, and the right tools. From measuring with a digital caliper to securing joints with a torque wrench, every step matters. By following this checklist, you'll avoid the most common mistakes, save time, and create structures that not only look professional but stand up to the demands of daily use.
Remember: your workspace is a reflection of your efficiency. A well-built corrugated aluminum pipe structure—whether it's a workbench, a conveyor line, or a storage rack—keeps tools organized, reduces downtime, and makes every task just a little easier. And when you use quality aluminum pipe accessories, lean pipe joints, and the tools on this list, you're not just building a structure—you're building a foundation for success.
So grab your tools, measure twice, cut once, and get ready to transform your workspace. Your future self (and your team) will thank you.