- Company Articles
- Products and Technology
- Product knowledge
- Custom Workbench Construction with Three Way Aluminum Pipe Joints

Custom Workbench Construction with Three Way Aluminum Pipe Joints
Related Product
Three Way Aluminum Pipe Joint
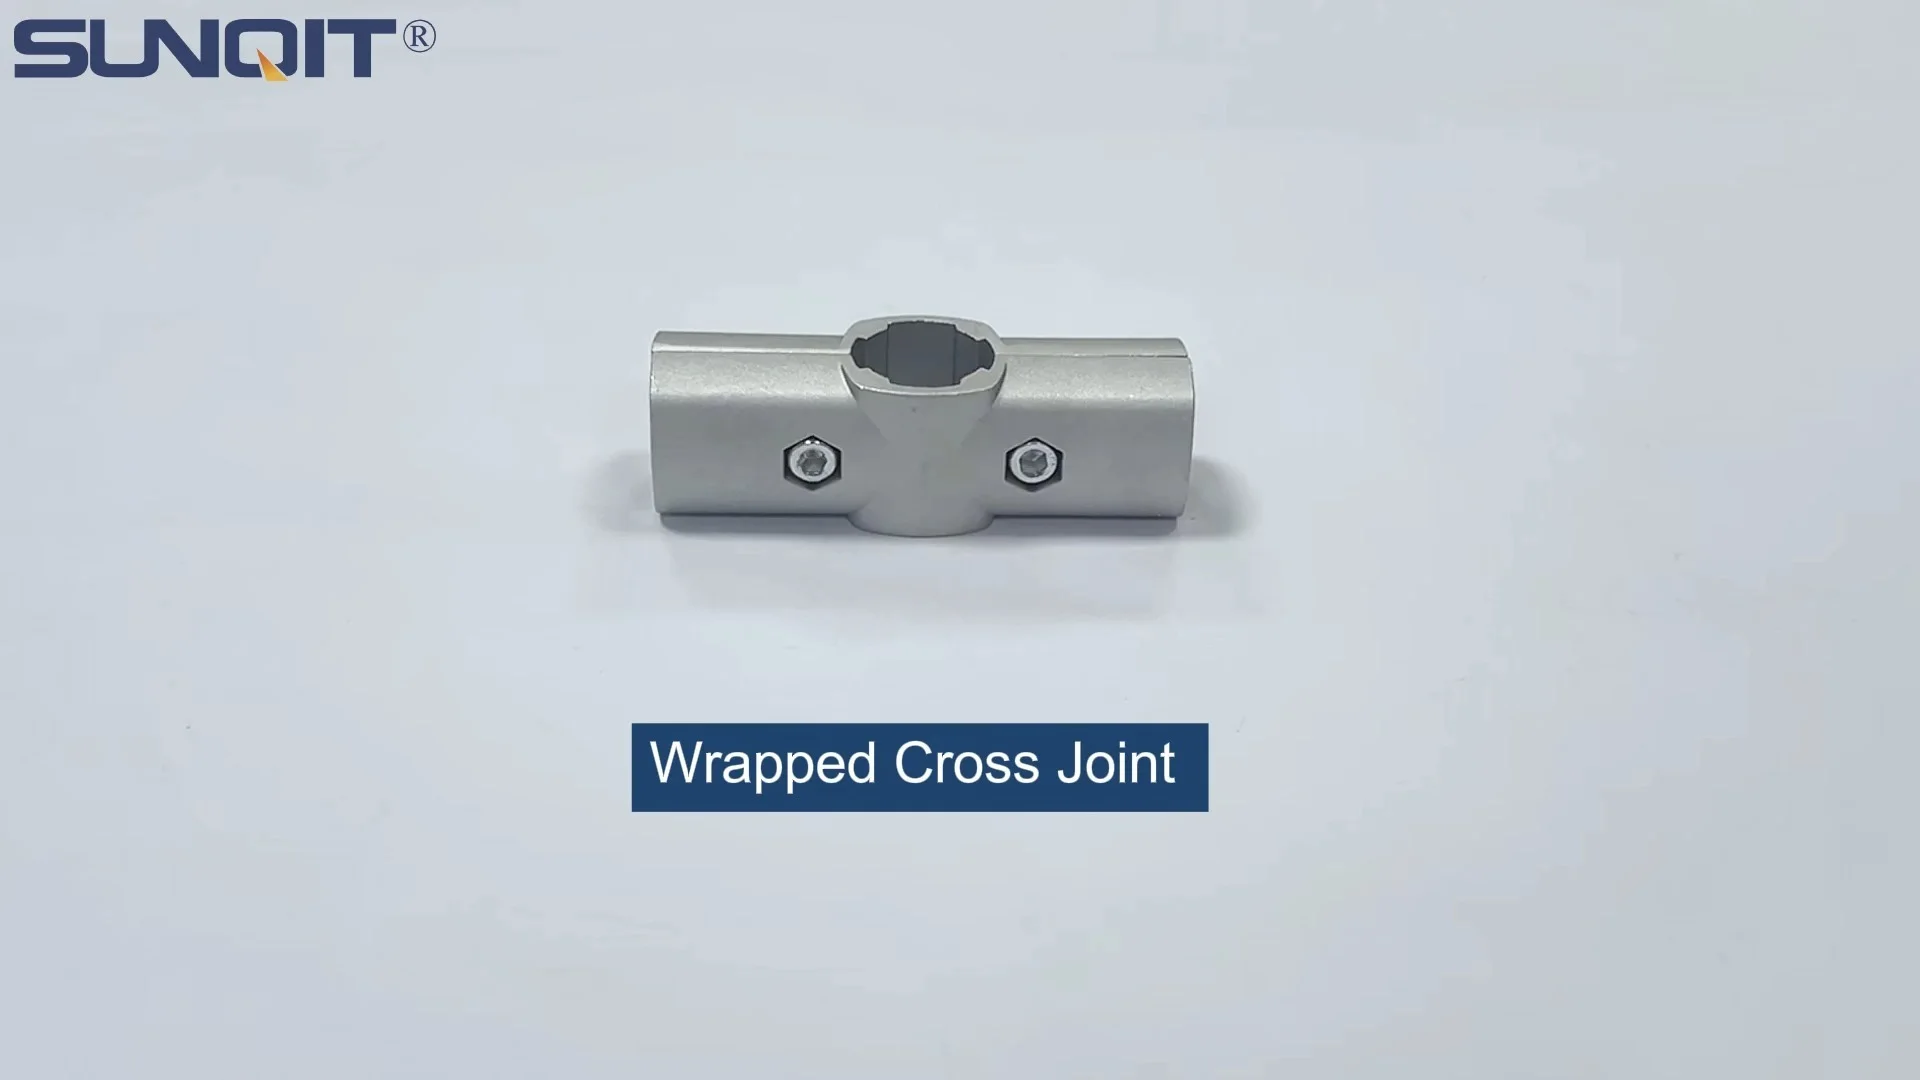
Aluminum 3 way pipe joint for 28mm aluminum pipe connection in 3 direction.
Walk into any busy workshop, manufacturing floor, or even a home garage, and you'll notice one thing quickly: the workbench is the heartbeat of the space. It's where ideas take shape, parts get assembled, and problems get solved. But here's the catch—most off-the-shelf workbenches feel like they're designed for someone else's needs. Too tall, too short, no space for tools, or shelves that don't quite fit the materials you use daily. If you've ever found yourself rearranging your workspace around a clunky, rigid bench, you're not alone. The solution? A custom workbench built with three way aluminum pipe joints. It's a game-changer that blends flexibility, durability, and practicality into a single, adaptable workspace.
In this guide, we're diving deep into how to build a custom workbench using three way aluminum pipe joints. We'll cover why aluminum is the ideal material, break down the role of those clever three way joints, walk through the step-by-step construction process, and even explore how to tailor your bench to specific needs—whether you're assembling electronics, woodworking, or managing a lean manufacturing line. By the end, you'll see why this approach isn't just about building a workbench; it's about building a workspace that grows with you.
Why Aluminum? The Backbone of Modern Custom Workbenches
Before we talk about joints or construction, let's start with the material itself: aluminum. When it comes to building something custom, aluminum checks all the boxes. Unlike wood, it won't warp or splinter over time. Unlike steel, it's lightweight enough to move (if you want) but strong enough to handle heavy loads. And let's not forget corrosion resistance—spills, humidity, or even occasional rain (if you're working in a garage with an open door) won't leave rust stains or weaken the structure.
But what really makes aluminum stand out is its modularity, especially when paired with aluminum profile systems. Aluminum extrusion profiles—those sleek, T-slot rails you've probably seen in industrial setups—are designed to connect seamlessly with accessories like joints, brackets, and panels. This means you're not stuck with a fixed design. Need to add a shelf six months from now? Just slide in a new bracket. Want to lower the height? Swap out a few pipes. It's like building with giant, industrial-grade Legos, but for grown-ups with real work to do.
And let's talk about cost. At first glance, aluminum might seem pricier than a basic plywood workbench, but think long-term. Wood benches need replacing every few years; aluminum ones can last decades. Plus, when your needs change, you don't have to buy a whole new bench—just reconfigure the parts you already have. That's the beauty of investing in a system, not just a single piece of furniture.
The Star Player: Three Way Aluminum Pipe Joints Explained
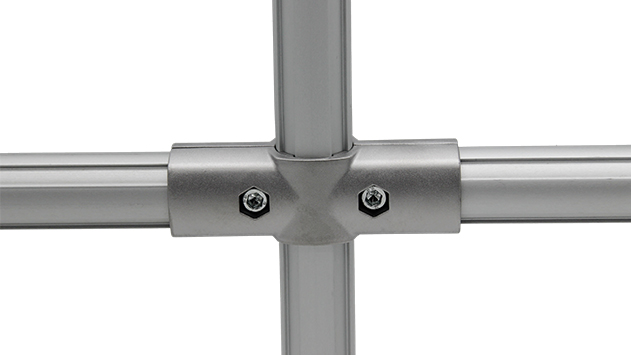
If aluminum profiles are the bones of your workbench, three way aluminum pipe joints are the joints that hold everything together—literally. These small but mighty connectors are what make customization possible. So, what exactly is a three way joint? As the name suggests, it's a fitting that allows you to connect three aluminum pipes at once, typically at 90-degree angles (though some designs let you adjust the angle slightly). Picture a T-shape or a Y-shape, but engineered to lock pipes securely in place.
What makes three way joints so special? Versatility. With a two-way joint, you can build a straight line or an L-shape, but three way joints let you branch out. Need a vertical support with a horizontal shelf? Three way joint. Want to add a side rail for tools? Three way joint. They turn simple pipes into a 3D framework, giving you the freedom to design up, down, and sideways. And unlike welding or bolting, these joints connect with a simple twist or bolt, meaning you can assemble, disassemble, and reassemble without special tools or permanent modifications.
Let's compare a few common joint types to see why three way joints are indispensable for custom workbenches:
| Joint Type | Key Functionality | Load Capacity (Approx.) | Best For |
|---|---|---|---|
| Three Way Aluminum Pipe Joint | Connects 3 pipes, often at 90° angles; adjustable in some designs | Up to 200 lbs per joint (depending on pipe thickness) | Vertical supports with shelves, corner reinforcements, tool rail attachments |
| Two Way Aluminum Pipe Joint | Connects 2 pipes in a straight line or L-shape | Up to 150 lbs per joint | Straight edges, simple frames, basic shelving |
| 90° Crossing Aluminum Joint | Connects 4 pipes in a cross shape (2 horizontal, 2 vertical) | Up to 250 lbs (distributed across 4 pipes) | Central support columns, heavy-duty workbench corners |
| 45° Reinforce Aluminum Pipe Joint | Connects pipes at 45° angles for diagonal bracing | Up to 180 lbs (ideal for stability, not heavy vertical loads) | Reinforcing frames, angled shelves, sloped work surfaces |
See the pattern? Three way joints strike the perfect balance between strength and flexibility. They're not just for support—they're for creating a structure that adapts to how you work. And when paired with the right aluminum pipe accessories, they become the foundation of a truly custom workspace.
Building Blocks: Essential Materials and Accessories
Now that we've covered the "why" of aluminum and three way joints, let's talk about the "what"—the materials and accessories you'll need to bring your workbench to life. Think of this as your shopping list, but don't worry—you won't need a truckload of parts. Aluminum systems are designed to be modular, so you can start with the basics and add on later.
The Core Components
Aluminum Pipes/Profiles: Start with basic aluminum tube or aluminum extrusion profiles. For most workbenches, 20mm or 30mm diameter pipes (or 40x40mm T-slot profiles) work best—they're sturdy without being overly heavy. Look for anodized aluminum, which adds a protective layer and gives a clean, professional finish.
Three Way Aluminum Pipe Joints: These are non-negotiable. Opt for internal rotary aluminum joints if you want slight angle adjustments, or fixed joints for maximum stability. Most come with set screws or bolts to lock pipes in place—no welding required.
Work Surface: The top of your bench can be as simple as a plywood sheet cut to size, but for durability, consider an aluminum honeycomb panel (lightweight, impact-resistant) or a plastic laminate board (easy to clean). If you're working with electronics, an ESD (electrostatic discharge) workbench top is a must to protect sensitive components from static damage.
Aluminum Pipe Accessories: The Little Things That Make a Big Difference
Accessories are where customization really shines. Here are the essentials:
- End Caps: Plastic or aluminum caps that fit over pipe ends to prevent snags, protect hands, and give a finished look.
- Clamps and Brackets: Use these to attach shelves, tool rails, or even a monitor arm. T-slot aluminum profile accessories like sliding brackets let you adjust positions easily.
- Casters (Optional): If you want a mobile workbench, add caster wheels with brakes. Look for heavy-duty casters (at least 50 lbs capacity each) to handle the weight of the bench and your materials.
- Leveling Feet: For a stationary bench, adjustable leveling feet ensure stability on uneven floors. They're a small detail, but wobbly workbenches are a productivity killer.
- Side Rails and Tool Hooks: Aluminum guide rail (like aluminum guide rail A or B) mounted along the back or sides gives you a place to hang tools, cables, or bins. No more digging through drawers!
Pro tip: Start with the frame and work surface, then add accessories as you use the bench. You might realize you need a tool rail after a week of tripping over pliers, or a shelf for bins once you see how much counter space you're wasting. The beauty of aluminum systems is that you can upgrade later without rebuilding from scratch.

Step-by-Step: Constructing Your Custom Workbench
Okay, you've got your materials, and you're ready to build. Let's walk through the process step by step. Don't worry if you're not a DIY pro—this is beginner-friendly, I promise. The key is to plan first, then assemble. Rushing the design phase is the biggest mistake people make, so take your time here.
Step 1: Plan Your Design (Measure Twice, Cut Once—But with Aluminum, You Might Not Even Cut)
Start by asking: What will this workbench be used for? If you're assembling small electronics, you might need a lower height (30-32 inches) and ESD protection. If you're woodworking, a taller bench (36-40 inches) with a thicker top makes sense. Measure your space, too—you don't want to build a 6-foot bench only to realize it blocks the door.
Sketch your design on paper or use a simple app like SketchUp. Include dimensions for the frame (length, width, height), shelf positions, and any accessories (tool rails, casters). A basic design might look like this: 4 legs (vertical pipes), 2 long horizontal pipes (front and back, connecting the top of the legs), 2 short horizontal pipes (sides, connecting the top), and a shelf halfway up for storage. That's 4 vertical pipes, 4 horizontal pipes, and 8 three way joints (one at each corner, connecting leg, front/back rail, and side rail).
Pro tip: Most aluminum suppliers sell pipes in standard lengths (1m, 2m, 3m). If your design needs a pipe shorter than standard, you can cut it with a hacksaw or miter saw (use a metal-cutting blade). Sand the cut edge to remove burrs before assembling.
Step 2: Gather Tools and Prep Your Workspace
You won't need a workshop full of tools, but having these on hand will make assembly smoother:
- Tape measure and pencil
- Level (2-foot or longer)
- Hex key set (most joints use hex bolts)
- Rubber mallet (to tap pipes into joints without damaging them)
- Screwdriver (for attaching brackets or accessories)
- Optional: Miter saw or hacksaw (if cutting pipes)
Clear a flat space to work—preferably the floor, where you can lay out all the parts. Lay down a drop cloth or cardboard to protect the floor (and your pipes from scratches).
Step 3: Assemble the Frame (The "Skeleton" of Your Bench)
Start with the corners. Take a three way joint and insert one vertical pipe (a leg) into the bottom opening. Then, attach a horizontal pipe (front rail) to one side opening and a horizontal pipe (side rail) to the other side opening. Tighten the joint's set screws just enough to hold the pipes in place—you'll fully tighten later. Repeat this for all four corners.
Next, connect the front and back rails. Take the two front corner assemblies and connect them with a horizontal pipe (side rail) using two way joints. Do the same for the back corners. Now you should have a rectangular frame with four legs. Stand it up—if it wobbles, check that all pipes are fully inserted into the joints and that the frame is square (measure diagonally from corner to corner; both measurements should be equal).
Add the shelf (if using). Measure the distance between the legs halfway up, cut a horizontal pipe to length, and attach it using three way joints (one on each leg, with the joint's third opening facing inward for the shelf rail). Connect the shelf rails across the front and back, then add vertical supports in the middle if the shelf will hold heavy items.
Once the frame is square and stable, go back and fully tighten all joint screws. Use a hex key and apply firm pressure—you want the joints to grip the pipes tightly, but don't over-tighten (you might strip the threads).
Step 4: Attach the Work Surface and Accessories
Lay your work surface (plywood, aluminum panel, etc.) on top of the frame. Center it so there's an even overhang (if desired) and mark where the frame's top rails sit. Pre-drill small holes through the work surface (to prevent splitting, if using wood) and attach it to the frame using brackets or screws. For T-slot profiles, use T-nuts and bolts that slide into the slots—no drilling needed!
Now add your accessories: Attach casters (if using) by bolting them to the bottom of the legs (use caster installation bases for a secure fit). Add leveling feet if you're keeping the bench stationary—adjust them until the bench is level using a bubble level. Mount tool rails or shelves using clamps or brackets, sliding them into position on the T-slots.
Step 5: Test and Adjust
Give your bench a test run. Lean on it, place a heavy box on the shelf, and wiggle the legs. If anything feels loose, tighten the joints. If the shelf sags, add a middle support. This is also the time to tweak small things—maybe the tool rail is too high, or the shelf is too low. Since everything is modular, you can loosen a joint, adjust the pipe, and retighten in minutes.

Beyond the Basics: Enhancing Your Workbench
Your basic workbench is done, but why stop there? Aluminum systems let you add features that turn a good bench into a great one. Here are a few popular upgrades, depending on your needs:
ESD Protection for Electronics Work
If you're working with circuit boards, microchips, or other static-sensitive components, an ESD workstation is a must. Swap out the standard work surface for an ESD mat or an ESD workbench top (many suppliers sell these pre-cut to size). Add ESD wrist straps and ground the bench to a nearby outlet using a grounding cable—simply attach one end to the frame and the other to a grounded outlet plate.
Mobility with Casters
Need to move your bench out of the way for deep cleaning or to make space for a large project? Upgrade to heavy-duty caster wheel with brakes. Look for casters rated for at least 100 lbs each (400 lbs total for a 4-leg bench). Lock the brakes when you're working to keep the bench stable.
Storage Solutions: From Shelves to Roller Tracks
Maximize vertical space with additional shelves or a material rack. For small parts, add plastic bins on the lower shelf. If you're moving materials across the bench (like in a lean system), install roller track along the back edge. Roller track guide rail (yellow or grey, depending on your preference) lets parts glide smoothly from one end to the other, reducing the need to lift heavy items.
Lighting and Power
Add a LED light bar above the bench by mounting it to the back rail with brackets. For power, install a surge protector under the shelf or along the back rail using T-slot clamps—no more crawling under the bench to plug in tools.
Real-World Applications: How Teams Are Using Custom Workbenches
Still not convinced? Let's look at how real teams are using aluminum custom workbenches to transform their workflows. These aren't just hypothetical examples—they're stories from workshops, factories, and labs that made the switch.
Small Manufacturing: A Lean System Success Story
A local electronics manufacturer was struggling with a rigid assembly line. Their old steel workbenches couldn't be adjusted, so workers had to stretch or bend to reach parts. They switched to aluminum workbenches with three way joints, adding roller track to move circuit boards between stations. Now, they can reconfigure the line in an hour if a new product comes in, and workers report less fatigue (thanks to adjustable heights). It's a classic example of lean system principles in action—reducing waste (in this case, wasted movement) and improving flow.
Home Garage: From Cluttered to Organized
A hobbyist mechanic was tired of his cluttered garage workbench. He built a 6-foot aluminum bench with a plywood top, added a shelf for toolboxes, and mounted a pegboard on the back using aluminum pipe accessories. He even added casters so he can roll the bench out of the way when parking his car. "I used to spend 10 minutes looking for a wrench," he says. "Now everything has a place, and the bench moves when I need it to."
Lab Research: Clean, Custom, and ESD-Safe
A university lab needed workbenches for testing sensitive electronic equipment. They chose aluminum frames with ESD workbench tops, added adjustable shelves for lab supplies, and used aluminum profile accessories to mount microscopes and monitors. The modular design means they can add or remove shelves as experiments change, and the corrosion-resistant aluminum holds up to frequent cleaning with disinfectants.
Maintenance Tips: Keeping Your Workbench in Top Shape
An aluminum workbench is built to last, but a little maintenance goes a long way. Here's how to keep it looking and functioning like new:
- Clean Regularly: Wipe down the frame and work surface with a damp cloth. For grease or oil, use mild soap and water—avoid harsh chemicals that might damage the anodized finish.
- Tighten Joints Annually: Over time, vibrations can loosen joint screws. Do a quick check every 6-12 months and tighten any that feel loose.
- replace Worn Parts: Casters, roller track wheels, or end caps might wear out after heavy use. Most aluminum pipe suppliers sell replacement parts, so you don't have to replace the whole bench.
- Protect Against Scratches: Use a rubber mat on the work surface if you're working with sharp tools or heavy metal parts. Avoid dragging heavy objects across the top—lift instead.
Conclusion: Invest in Flexibility, Build for the Future
Building a custom workbench with three way aluminum pipe joints isn't just about creating a place to work—it's about taking control of your workspace. It's about saying goodbye to the frustration of one-size-fits-all furniture and hello to a bench that adapts to your needs, your projects, and your team. Whether you're a hobbyist, a small business owner, or part of a large manufacturing operation, the modularity, durability, and versatility of aluminum systems make them a smart investment.
So, what are you waiting for? Grab a tape measure, sketch your design, and start building. Your future self—organize, efficient, and free from clunky workbenches—will thank you.