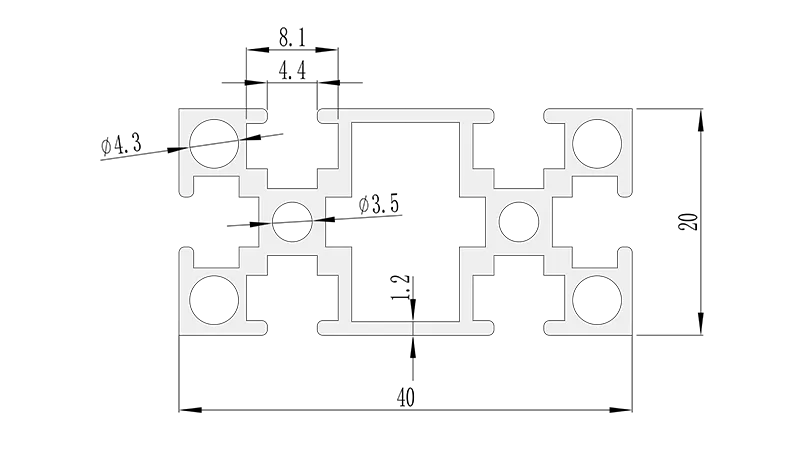
Creating a lean workbench with 2040 national standard profile isn't about throwing parts together—it's about intentional design. Here's how to approach it, from assessing your needs to putting the final touches on your bench.
1. Start with the "Why": Define Your Workbench's Purpose
Before picking up a single piece of aluminum profile, ask: What will this workbench be used for? Will it hold heavy machinery, or is it for light assembly? Do workers need to move it around the shop, or will it stay stationary? Are there special requirements, like ESD protection for electronics (making it an ESD workstation) or extra storage for tools?
For example, a workbench in an electronics assembly line might need an ESD-safe surface to prevent static damage, while a bench in a warehouse might prioritize mobility with caster wheels and extra shelving for parts. By clarifying these needs upfront, you'll avoid overbuying accessories or overlooking critical features—key to keeping waste out of your lean system.
2. Sketch the Layout: Map Workflow and Ergonomics
Next, sketch a rough layout. Consider the height of the workbench (typically 80-90cm for standing work, or adjustable with leveling feet), the placement of shelves (above, below, or to the side), and the flow of materials. A lean workbench should minimize unnecessary movement: tools should be within arm's reach, materials should arrive at one end and exit at the other, and there should be no "dead space" that collects clutter.
Ergonomics matter too. If workers will be standing for long hours, anti-fatigue mats might pair well with the bench. If they need to sit occasionally, ensure there's legroom underneath. The goal is to design a space that feels intuitive—where every action, from grabbing a screwdriver to placing a finished part, happens without thought.
3. select Materials: Building Blocks of Your Bench
With your layout in mind, it's time to choose materials. The star, of course, is the 2040 national standard profile for the frame. But you'll also need:
-
Aluminum profile accessories
: Joints (90° aluminum joint, three-way aluminum joint) to connect profiles, end caps to cover sharp edges, and brackets to mount shelves or tools.
-
Worktop
: Options range from aluminum honeycomb panels (lightweight and strong) to ESD laminates (for electronics) or even wood (for a warmer feel, though less durable). The 2040 profile's T-slots make it easy to secure the worktop with brackets.
-
Mobility and stability
: Caster wheels (with brakes for safety) if you need to move the bench, or heavy-duty leveling feet if it will stay put. Look for caster accessories like mounting plates to attach them securely to the frame.
-
Extras
: Shelves, tool hooks, or cable management solutions—all attachable via the T-slots.
4. Assemble: Bringing It All Together
Assembly is where the 2040 profile truly shines. Start by cutting the profiles to your desired lengths (most suppliers offer custom cutting, or you can do it yourself with a miter saw). Then, use the aluminum joint accessories to connect the vertical and horizontal frame pieces. Tighten the joints with a hex key—just enough to hold firm, but not so tight that you strip the threads.
Once the frame is up, attach the worktop. If you're using casters, mount them to the bottom of the frame; if using leveling feet, adjust them to ensure the bench sits evenly. Finally, add shelves, hooks, or other accessories. The beauty here is that if you make a mistake—or if your needs change later—disassembling and reconfiguring takes minutes, not hours.