- Company Articles
- Products and Technology
- Product knowledge
- DIY Guide: Building a Workbench with Four Way Straight Lean Pipe Joint Chrome

DIY Guide: Building a Workbench with Four Way Straight Lean Pipe Joint Chrome
Related Product
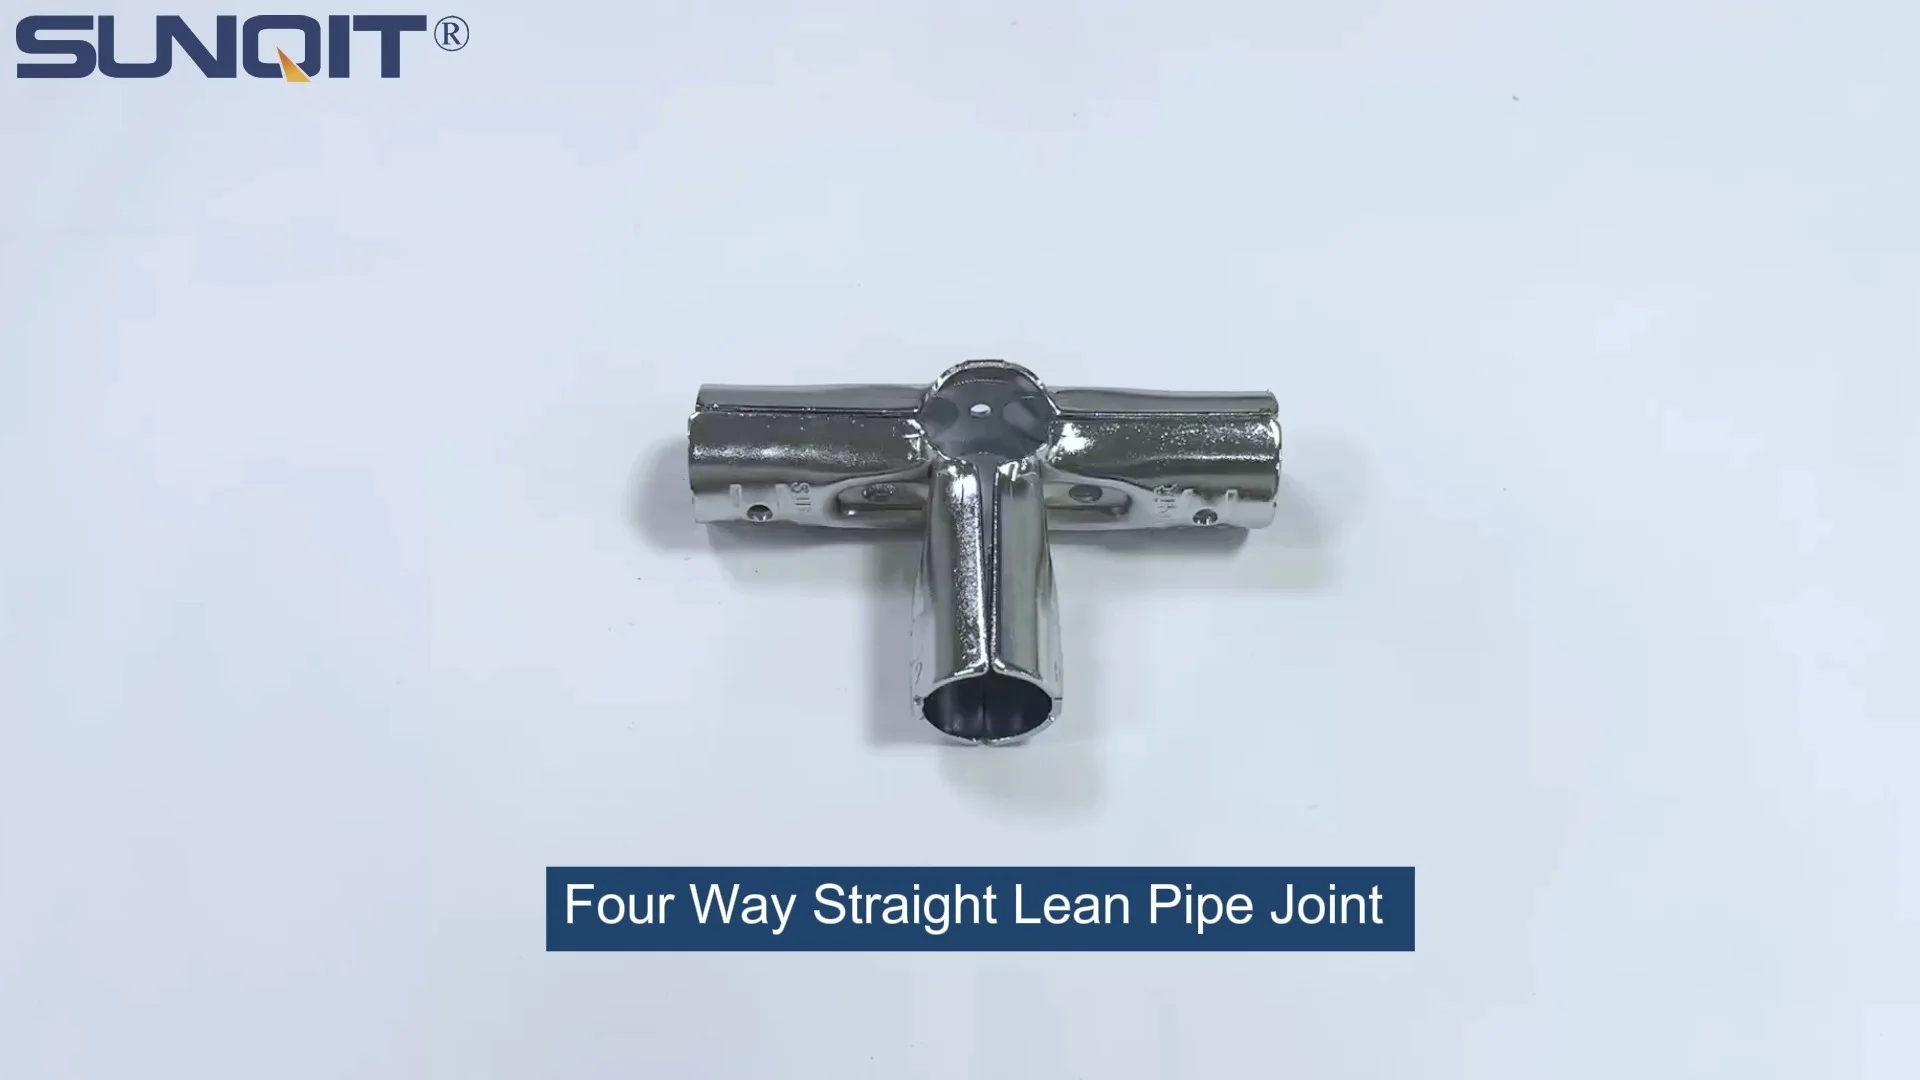
Four Way Straight Lean Pipe Joint Chrome
Four way lean pipe joint for 4 pcs 28MM lean pipe connection in straight angle, which used widely in workbench, flow rack, hand trolley frame connection.
Why Build Your Own Workbench?
Let's be real—store-bought workbenches are like one-size-fits-all gloves: they sort of work, but never quite fit. Maybe they're too short, too narrow, or lack that extra shelf you need for your tools. Or worse, they cost a small fortune for something that feels flimsy the second you set a power drill on it. That's where building your own comes in. DIY workbenches let you call the shots: size, height, features, and most importantly, sturdiness. And when you use lean pipe components? You're not just building a workbench—you're building a flexible, modular system that can grow with your needs.
I've built a few workbenches over the years, and the one I use daily? It's made with lean pipe and four way straight lean pipe joint chrome. Why? Because lean pipe (also called "kitchen pipe" or "flexible pipe") is lightweight but tough, and those chrome joints? They lock everything together so solidly, I've stood on the bench more than once to reach a high shelf (don't tell my wife). Plus, if I ever need to add a side shelf or make it taller, I just grab a few extra pipes and joints and reconfigure—no need to start from scratch. Trust me, once you go modular, you'll never go back.
Materials You'll Need (and Why We Chose Them)
Before we dive into building, let's gather our supplies. The star here is the four way straight lean pipe joint chrome —these are the connectors that will hold your frame together. But we'll also need a few other key components. I've listed everything below, along with why each part matters. Pro tip: Lay everything out on a clean floor or table before starting—you'll avoid hunting for parts mid-build.
| Item | Quantity | Why You Need It |
|---|---|---|
| Four way straight lean pipe joint chrome | 8–12 (depending on size) | These are the "cornerstones" of your frame. The four-way design lets you connect pipes in four directions (up, down, left, right), making it easy to build a square or rectangular base. Chrome plating adds rust resistance—important if your workspace gets damp. |
| 1.5mm PE coated lean pipe (1.5-inch diameter) | 8–10 pieces (6ft or 8ft length) | Lean pipe is the backbone of the frame. The PE coating (that's polyethylene, by the way) protects against scratches and gives a grippy surface, so tools won't slide around. 1.5mm thickness is perfect—stiff enough to support weight, but easy to cut to length. |
| Aluminum profile (16mm x 16mm or 20mm x 20mm) | 4 pieces (length of your bench top) | Aluminum profile will be the "frame" for your bench top. It's lightweight but rigid, and the T-slot design lets you attach accessories later (like tool hooks or a power strip mount). I used 20mm x 20mm profile—sturdy enough to support a plywood or MDF top. |
| Caster wheel (with brake) | 4 | Want your workbench to roll? Add casters. Look for ones with locks (called "brake casters") so you can keep the bench steady when you're using it. I went with 3-inch casters—big enough to roll over shop rugs, small enough to not make the bench too tall. |
| Roller track (1.5-inch width) | 2–4 pieces (depending on shelf length) | Optional but game-changing: roller track. I added a shelf halfway up the bench using roller track, and now I can slide tools or materials across it without lifting. It's like a mini conveyor belt for your workspace. |
| Hex key set (metric) | 1 set | Most lean pipe joints use hex screws (Allen screws), so a metric hex key set is a must. Get one with a ball end—they're easier to use in tight spots. |
| Measuring tape, level, and pencil | 1 each | You can't build straight without measuring. A 25ft tape measure works for most projects, and a 2ft level will keep your frame from leaning like the Tower of Pisa. |
Pro Tip: Buy Extra Joints and Pipes
Always grab 2–3 extra four way joints and a couple of extra pipes. Pipes can get bent if you cut them wrong, and joints? They have a sneaky way of rolling under the fridge when you drop them. Trust me, running to the hardware store mid-build is no fun.
Tools to Have on Hand
You don't need a fully stocked workshop to build this, but a few basic tools will make the job way easier. Here's what I used:
- Hacksaw or pipe cutter : To cut lean pipes to length. A pipe cutter is cleaner, but a hacksaw works in a pinch (just wear safety glasses—metal shavings fly!).
- Rubber mallet : For tapping joints into place. Metal hammers can scratch the chrome on the joints, so a rubber mallet is gentler (and quieter).
- Level (2ft or longer) : Critical for making sure your bench isn't wobbly. A digital level is fancy, but a bubble level works just fine.
- Tape measure and pencil : Measure twice, cut once—oldest rule in DIY, and for good reason.
- Hex key set (metric) : As I mentioned earlier, most lean pipe joints use hex screws. Get a set with sizes 4mm, 5mm, and 6mm—those are the most common.

Step 1: Plan Your Workbench Dimensions
First, figure out how big your workbench should be. Ask yourself: What will you use it for? If it's for woodworking, you might want a larger top (like 6ft x 2ft). If it's for electronics or small projects, 4ft x 2ft might be enough. I build small furniture and fix bikes, so I went with 5ft long (60 inches), 2ft deep (24 inches), and 36 inches tall (standard counter height—comfortable for standing). Write down your dimensions: length (L), depth (D), height (H).
Next, sketch a rough design. My bench has a simple frame: four vertical legs, two horizontal pipes on each side (front, back, left, right), and a lower shelf for storage. The top is made of aluminum profile with a plywood sheet screwed on top. Here's a quick breakdown of pipe lengths you'll need (adjust based on your dimensions):
- Vertical legs : 4 pipes, each cut to your height (H). I used 36 inches.
- Horizontal front/back pipes : 4 pipes (2 for the top frame, 2 for the bottom frame), each cut to length (L). I used 60 inches.
- Horizontal side pipes : 4 pipes (2 for the top frame, 2 for the bottom frame), each cut to depth (D). I used 24 inches.
- Shelf supports : 4 pipes (if adding a shelf), cut to depth (D). I added a shelf halfway up, so these were 24 inches too.
Don't Overcomplicate the Design
Stick to a simple rectangle frame for your first build. Angled legs or fancy cross-braces might look cool, but they add complexity—save that for version 2.0.
Step 2: Cut Your Lean Pipes to Length
Now it's time to cut the pipes. If you bought pre-cut pipes, skip this step (lucky you). If not, grab your hacksaw or pipe cutter and measure twice! Mark each pipe with a pencil, then clamp it to a work surface (a vice works, or even a heavy table with a C-clamp). For straight cuts with a hacksaw, use a miter box to guide the blade—no one wants a wonky pipe. If using a pipe cutter, rotate it around the pipe, tightening slightly each turn, until it cuts through. Sand the cut ends with fine-grit sandpaper to remove burrs (those sharp metal edges can scratch you or the PE coating).
Once all pipes are cut, lay them out in groups: legs, front/back, sides, shelf supports. This will save time later when assembling.
Step 3: Assemble the Frame with Four Way Straight Lean Pipe Joint Chrome
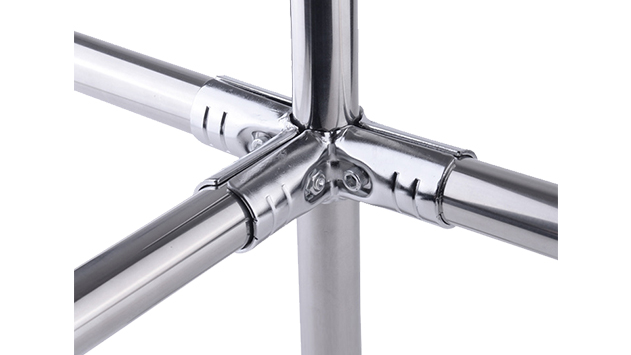
Now for the fun part: putting it all together with those four way straight lean pipe joint chrome. These joints are genius—each has four ports (one on each side) that the pipes slide into, and a hex screw to tighten them. Here's how to build the frame:
- Build the top frame : Take two front/back pipes (length L) and two side pipes (depth D). Connect them using four way joints to make a rectangle. Slide one end of a front pipe into a joint, then do the same with a side pipe, making a corner. Tighten the hex screws just enough to hold the pipes in place (you'll fully tighten later). Repeat for all four corners—now you have a rectangular top frame.
- Add the vertical legs : Take the four vertical leg pipes (height H) and attach one to each corner of the top frame. The four way joints have a top port (where the leg goes) and three horizontal ports (for the frame pipes). Slide the leg into the top port, tighten the hex screw gently.
- Build the bottom frame : Repeat step 1 to make a second rectangle (same L and D as the top frame). This will be the base of the bench. Then, attach this bottom frame to the bottom of the vertical legs using four way joints—one joint per leg, connecting the bottom frame pipes to the leg bottoms.
- Square up the frame : Now, check if the frame is square. Measure the diagonals (from corner to opposite corner). If the measurements are equal, it's square. If not, gently push/pull the corners until the diagonals match. Once square, fully tighten all hex screws with your hex key—snug, but don't strip the screws!
At this point, you should have a free-standing frame: four legs, a top rectangle, and a bottom rectangle. Give it a shake—if it wobbles, check the joints; they might need a little more tightening. If it still wobbles, add diagonal cross-braces (cut two short pipes and attach them from corner to corner on the back or sides using two way joints). I skipped cross-braces, and my frame is solid, but better safe than sorry!
Step 4: Attach the Caster Wheels (Optional but Awesome)
If you want your bench to roll, now's the time to add casters. Flip the frame upside down so the bottom frame is facing up. Place a caster in each corner, aligning the holes in the caster plate with the pipes of the bottom frame. Most casters come with screws, but if not, use self-tapping screws (1/2 inch long should work). Screw the casters into the pipes—lean pipe is hollow, so the screws will bite into the PE coating and metal inside. Tighten until the caster is snug—no wiggling!
Once all four casters are on, flip the frame right side up. Roll it around a bit—if it's hard to push, check if the casters are locked (unlock them!). If it leans to one side, one of the casters might be loose—tighten the screws.
Step 5: Add the Aluminum Profile Top Frame
The top frame (the rectangle we built in step 3) is strong, but it's just pipes—we need a solid surface to work on. That's where the aluminum profile comes in. Cut four pieces of aluminum profile: two to match the bench length (L) and two to match the depth (D). Connect them into a rectangle using 90-degree aluminum profile connectors (these slide into the T-slots of the profile and lock with hex screws). This rectangle will sit on top of the lean pipe frame and support your work surface (plywood, MDF, or even a metal sheet).
Place the aluminum profile rectangle on top of the lean pipe frame. Center it so there's equal overhang on all sides (or none, if you prefer). Then, secure it to the lean pipe frame using pipe clamps or zip ties (I used metal pipe clamps—sturdier). Now, cut your work surface (plywood, MDF, etc.) to size (L x D) and place it on top of the aluminum profile. Screw it down using short wood screws (be careful not to drill through the bottom of the profile!).
Step 6: Add Roller Track for a Material Shelf (Optional Upgrade)
Remember that roller track I mentioned earlier? Let's add it as a middle shelf. Cut two pieces of roller track to your bench length (L). Then, cut four short pipes (about 12 inches long) to use as shelf supports. Attach these supports to the vertical legs using two way joints, positioning them halfway up the legs (adjust height based on what you'll store). Then, attach the roller track to the supports using pipe clamps—now you have a sliding shelf! I use mine for toolboxes and parts bins—sliding them in and out is way easier than lifting.
Final Touches: Make It Yours
Your workbench is almost done—now it's time to customize. Here are a few ideas:
- Tool hooks : Slide T-slot hooks into the aluminum profile top frame to hang pliers, tape measures, or a shop rag.
- Power strip mount : Drill a hole in the back of the bench top and mount a power strip—no more crawling under the bench to plug in tools.
- Drawers : Add a small drawer unit under the roller track shelf for screws, nuts, and bolts.
- LED strip : Stick an LED strip under the top shelf for extra lighting—super helpful for detailed work.
I added a magnetic tool strip to the side of my bench—perfect for keeping screwdrivers and wrenches within arm's reach. And I stained the plywood top with a dark finish to hide tool marks (because let's be honest, it's going to get beat up).
Troubleshooting Common Issues
Even with careful planning, things can go wrong. Here's how to fix the most common problems:
- Wobbly frame : Check if all joints are fully tightened. If that doesn't work, add diagonal cross-braces (step 3).
- Pipes don't fit into joints : Sand the cut ends of the pipes—sometimes burrs make them too thick. If the joint is too tight, gently tap the pipe into the joint with a rubber mallet.
- Work surface is uneven : Use a level on the top—if one corner is low, add a shim (a small piece of wood or metal) under the aluminum profile.
- Casters keep locking : Make sure the brake levers aren't catching on the floor. If they're loose, tighten the caster screws.
Enjoy Your New Workbench!
Stand back and admire your handiwork. That bench you built? It's more than just wood and pipes—it's proof that you can create something functional, sturdy, and uniquely yours. I still get a little proud every time I set a project on mine. And the best part? If you ever need to change it—make it longer, add a shelf, or even take it apart and rebuild it somewhere else—those four way straight lean pipe joint chrome and modular components make it easy.
So grab your tools, gather your materials, and get building. Your future self (the one with a perfectly sized, rock-solid workbench) will thank you.