- Company Articles
- Products and Technology
- Installation And Maintenance
- DIY Guide: Installing Roller Track Placon Mount Brackets on Lean Workbenches

DIY Guide: Installing Roller Track Placon Mount Brackets on Lean Workbenches
Related Product
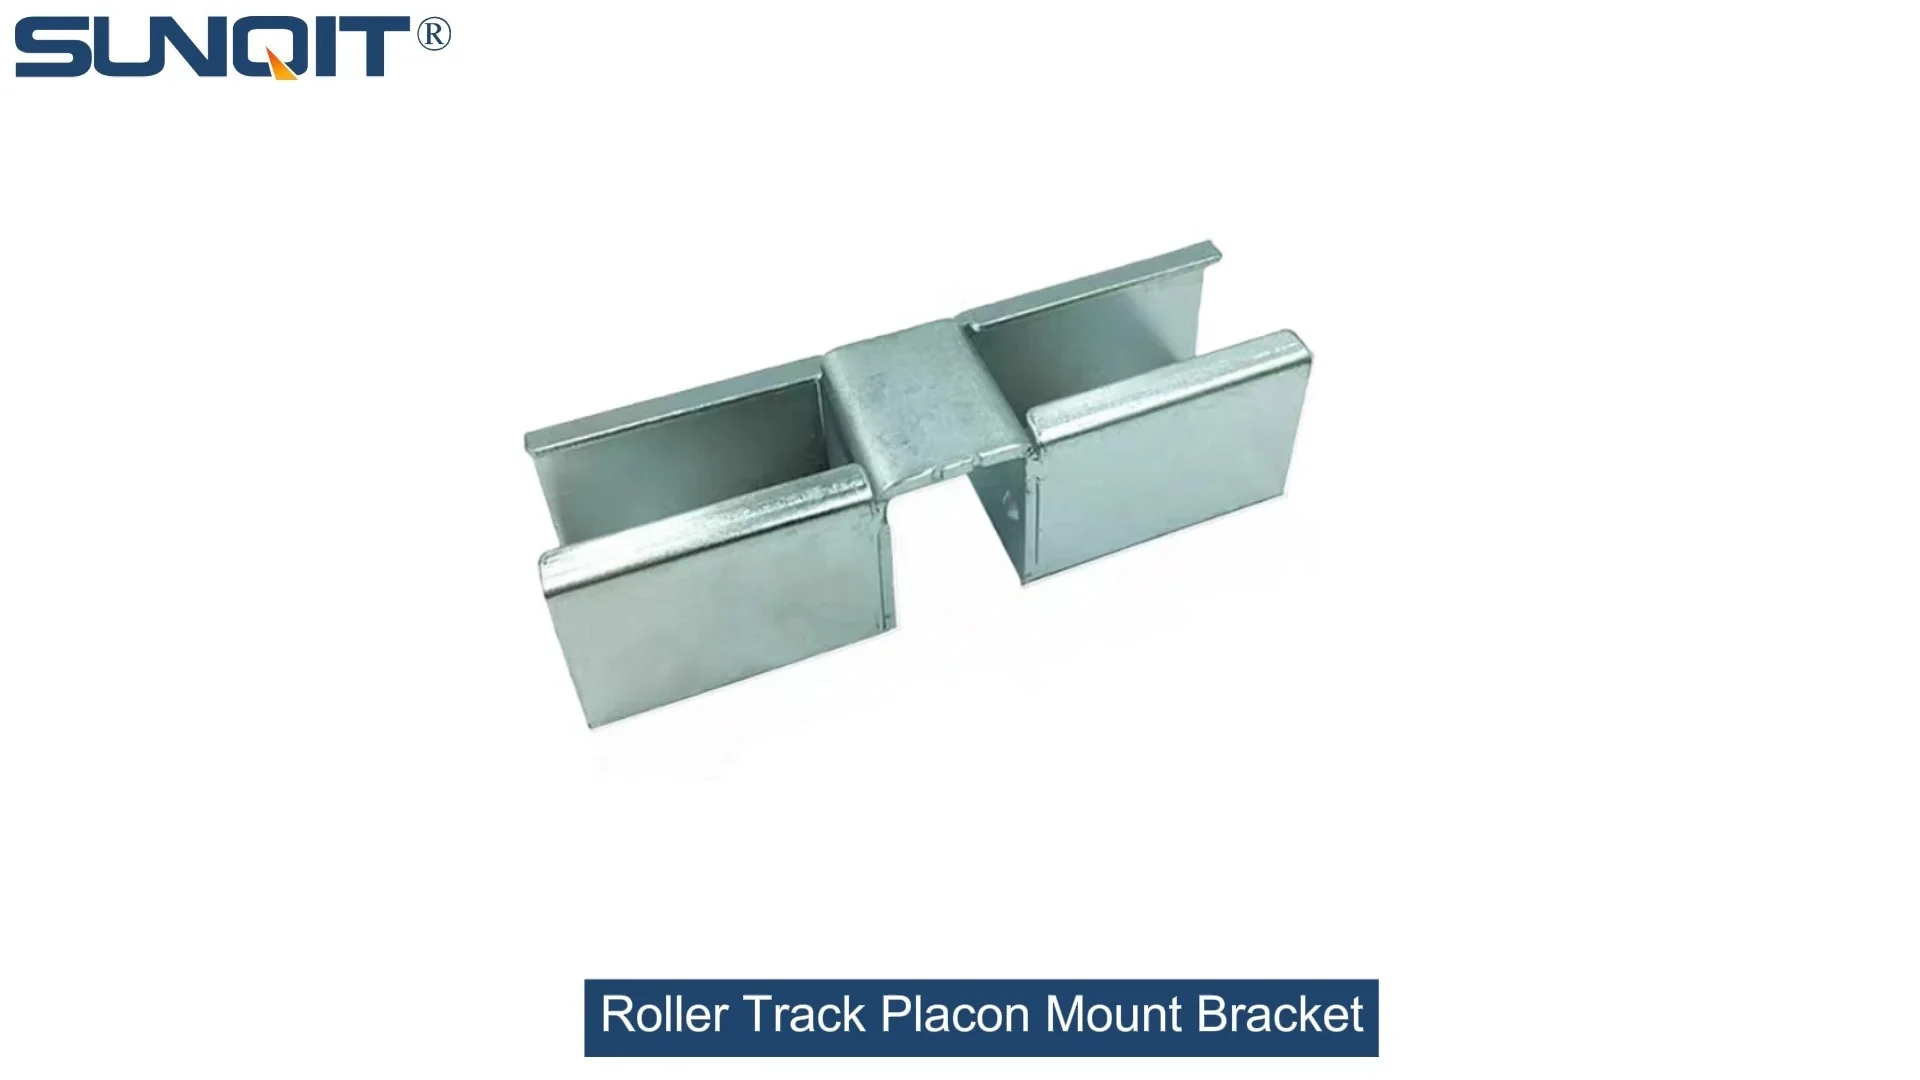
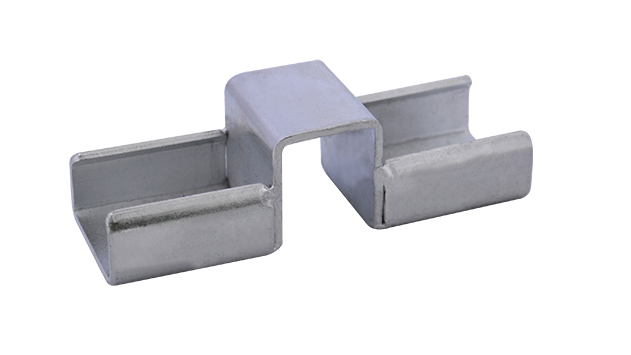
Roller Track Placon Mount Bracket
Roller track placon mount work as a connector for roller track and pipe or aluminum profile in rack syetem, it is a necessary parts in rack system which widely used in industrial plant and logistic,warehouse storage.
There's something uniquely satisfying about building or upgrading your own workspace—especially when it's a tool that directly boosts your team's productivity. If you've ever looked at your lean pipe workbench and thought, "This could flow better," you're not alone. Roller track placon mount brackets are the unsung heroes of efficient material handling, turning a static workbench into a dynamic hub where parts glide smoothly, errors drop, and every second counts. Whether you're setting up a new station in a 3C assembly line or revamping a medical device production area, this guide will walk you through the process step by step. No fancy tools required, just a bit of patience and that classic DIY spirit. Let's dive in and turn that workbench into a productivity powerhouse.
Why Roller Track Placon Mount Brackets Matter
Before we grab our screwdrivers, let's talk about why these brackets are worth your time. In manufacturing, every inch of space and every movement of your team matters. A lean pipe workbench with a properly installed roller track system does more than just hold parts—it creates a rhythm. Materials slide exactly where they need to be, reducing the need for manual lifting or reaching. Think about those busy mornings on the production floor: when components flow seamlessly from one station to the next, bottlenecks vanish, and suddenly, your team isn't just working hard—they're working smart.
And here's the best part: these brackets are designed with the same "reusable, sustainable improvement" that makes lean systems so powerful. Made to fit standard aluminum profiles, they're easy to adjust, replace, or repurpose if your workflow changes. That means today's upgrade isn't a one-time fix—it's an investment in a workspace that grows with your needs. Whether you're dealing with small electronics in a 3C assembly line or heavier parts in automotive manufacturing, these brackets adapt. Let's get started on making that adaptability a reality.
Prep Work: What You'll Need
DIY success starts with preparation. Gather these tools and materials before you begin, and you'll sail through the installation without scrambling for a missing wrench. Pro tip: Lay everything out on a clean surface—you'll thank yourself later.
| Category | Items | Why You Need Them |
|---|---|---|
| Tools | Phillips-head screwdriver (magnetic) | Keeps screws from slipping—essential for tight spaces |
| Tape measure (10ft/3m minimum) | Precise measurements prevent misaligned tracks | |
| Level (2ft/60cm spirit level) | Ensures the track is perfectly horizontal—no stuck parts! | |
| Marker or pencil | Marking drill points without damaging the aluminum profile | |
| Rubber mallet | Gently tapping brackets into place without bending metal | |
| Hex key set (included with most brackets) | Tightening specialty screws on placon mount brackets | |
| Materials | Roller track placon mount brackets (quantity based on track length) | The star of the show—choose brackets rated for your load (check product specs!) |
| Roller track (match length to your workbench width) | Opt for steel or aluminum based on your needs—steel for heavy loads, aluminum for lightweight agility | |
| M5 or M6 screws (stainless steel, 16-20mm length) | Weather-resistant and strong enough for daily use | |
| Washers (flat and lock washers) | Lock washers prevent screws from loosening over time | |
| Lean pipe workbench (already assembled) | Your canvas—ensure it's stable before starting (adjust caster wheels if needed!) |
Quick check: Most roller track kits include brackets, screws, and basic hardware, but double-check the packaging. If you're sourcing separately, confirm bracket compatibility with your aluminum profile—standard 4040 or 3030 profiles work with most placon mount designs.
Step-by-Step Installation: Let's Build Something Great
Now for the fun part! Follow these steps, and you'll have your roller track system up and running in under an hour. Take it slow—precision here saves time later.
Step 1: Plan Your Layout
Before drilling a single hole, map out where the roller track will go. Stand at your lean pipe workbench and visualize how materials will flow: Will parts come from the left and exit to the right? Do you need multiple tracks for different components? Mark the start and end points with your marker—this is your guide.
Measure twice, mark once! Use your tape measure to confirm the track length matches your workbench. For example, a 120cm workbench works best with a 110cm track (leaving 5cm on each side for clearance).
Key metric: The bracket spacing should be no more than 40cm apart to prevent sagging. For a 120cm track, that means 3 brackets (one at each end, one in the middle).
Step 2: Position the Brackets on the Aluminum Profile
Your lean pipe workbench's frame is likely made of aluminum profile—this is where the brackets attach. Lay the first bracket against the profile at your starting mark. Align the bracket's mounting holes with the profile's T-slot (the long groove running along the profile). These slots are designed for easy adjustments, so don't stress if it's not perfect yet.
Hold the bracket steady and use your marker to dot the center of each mounting hole. Repeat this for all brackets—spacing them evenly as planned in Step 1.
Don't skip marking! Drilling into aluminum without a guide can scratch the profile or misalign the bracket.
Step 3: Pre-Drill Pilot Holes (If Needed)
Most aluminum profiles don't require pre-drilling, but if your screws are longer than 16mm, a small pilot hole (2mm drill bit) prevents the profile from cracking. Gently drill at each marked point—keep the drill straight to avoid angled holes.
If you're using self-tapping screws (common in lean system kits), skip this step—they'll bite into the aluminum smoothly with a screwdriver.
Step 4: Secure the Brackets to the Profile
Now, let's lock those brackets in place. Place a bracket over the marked holes, insert a screw through the bracket's hole, and into the aluminum profile's T-slot. Use your Phillips-head screwdriver to tighten—turn until the screw is snug, but don't overdo it (aluminum strips easily!).
Add a lock washer between the screw head and bracket for extra security—this is a game-changer for high-vibration environments like production lines.
Repeat for all brackets. Once done, give each bracket a gentle wiggle—if it moves, tighten the screws a quarter-turn more.
Step 5: Mount the Roller Track to the Brackets
With the brackets secured, it's time to add the roller track. Most roller tracks have pre-drilled holes that line up with the brackets' top slots. Lift the track and align these holes—this might take two hands, so ask a friend for help if the track is long.
insert screws through the track into the brackets and tighten with your hex key. Go slowly here—uneven tightening can bend the track, leading to jams later. Once all screws are in, place your level on top of the track. If the bubble is off-center, loosen the screws slightly and tap the track with your rubber mallet until it's level.
Test the track: Roll a small part (like a plastic bin or metal bracket) along the track. It should glide smoothly without stopping—if it catches, check for uneven brackets or debris in the rollers.
Step 6: Fine-Tune and Test the System
You're almost there! Stand back and inspect your handiwork. The track should run parallel to the workbench edge, and the brackets should sit flush against the profile. If the track dips in the middle, add an extra bracket for support—better safe than sorry with heavy loads.
Load-test with a typical part from your workflow (e.g., a 3C assembly component or medical device part). If it rolls smoothly, congratulations—you've nailed it! If not, check the following:
- Are the brackets level? Use the spirit level again.
- Are any rollers stuck? Spin each roller by hand—debris or misalignment can cause jams.
- Is the track too tight? Loosen the bracket screws slightly and adjust the track's position.

Troubleshooting Common Hiccups
Even the best DIYers hit snags. Here's how to fix the most common issues without pulling your hair out:
| Problem | Why It Happens | Quick Fix |
|---|---|---|
| Track sags in the middle | Brackets spaced too far apart or underrated for load | Add a middle bracket; replace with heavier-duty brackets if needed |
| Screws keep stripping | Over-tightening or using the wrong screwdriver size | Switch to a magnetic screwdriver; tighten until resistance is felt, then stop |
| Rollers stick when parts move | Dust in rollers or misaligned track | Wipe rollers with a dry cloth; adjust track with level and rubber mallet |
| Brackets slide on the profile | T-slot screws not seated properly | Remove screw, add a drop of thread locker (blue, not red!), and retighten |
Remember: Every problem is just a detour, not a dead end. Lean systems are built on continuous improvement—so if something doesn't work the first time, tweak it until it does. That's the mindset that makes manufacturing teams thrive!

Beyond Installation: Making Your Lean Workbench Work for You
Installing roller track brackets is just the start. Now that you've upgraded your workbench, let's talk about how to maximize its potential—because a truly lean workspace adapts to your needs.
Customize with Accessories
Your lean pipe workbench is a blank canvas. Add these accessories to tailor it to your workflow:
- Tool hooks: Hang wrenches, tape measures, or cable organizers from the aluminum profile—no more hunting for tools.
- ESD mats: If you're in 3C assembly or electronics manufacturing, an ESD (electrostatic discharge) mat protects sensitive parts from static damage. Lay it on the workbench surface under the roller track.
- Caster wheels: Want to move your workbench? Swap out fixed feet for swivel casters with brakes—suddenly, your workspace is mobile. Look for caster accessories like brake locks for extra stability.
Embrace the Lean Philosophy
You've just lived the "sustainable improvement" core of lean systems. By installing these brackets yourself, you've:
- Eliminated waste: No waiting for a technician—you took control of the timeline.
- Built flexibility: If your workflow changes next month, you can adjust the track or add more brackets in minutes.
- Empowered your team: DIY skills boost confidence—next time, you might teach a coworker how to do it too.
Lean isn't just about tools and systems—it's about mindset. When you see a problem (like a clunky workbench), you don't just accept it—you fix it. That's how great manufacturing teams stay ahead.
You Did It—Now Go Build Something Amazing
Take a step back and admire your handiwork. That roller track system isn't just metal and screws—it's proof that you can upgrade your workspace, one bracket at a time. Whether you're assembling smartphones, packaging medical devices, or organizing a warehouse, this small change will ripple through your day: fewer delays, smoother workflows, and more time to focus on what really matters—creating great products.
And remember: This is just the beginning. Lean systems thrive on iteration, so keep experimenting, keep improving, and keep building. Your workspace should work as hard as you do—and now, thanks to your DIY skills, it will.
Happy building!