- Company Articles
- Products and Technology
- Installation And Maintenance
- DIY Installation: Roller Track Placon Mount Connector Setup Tutorial

DIY Installation: Roller Track Placon Mount Connector Setup Tutorial
Related Product
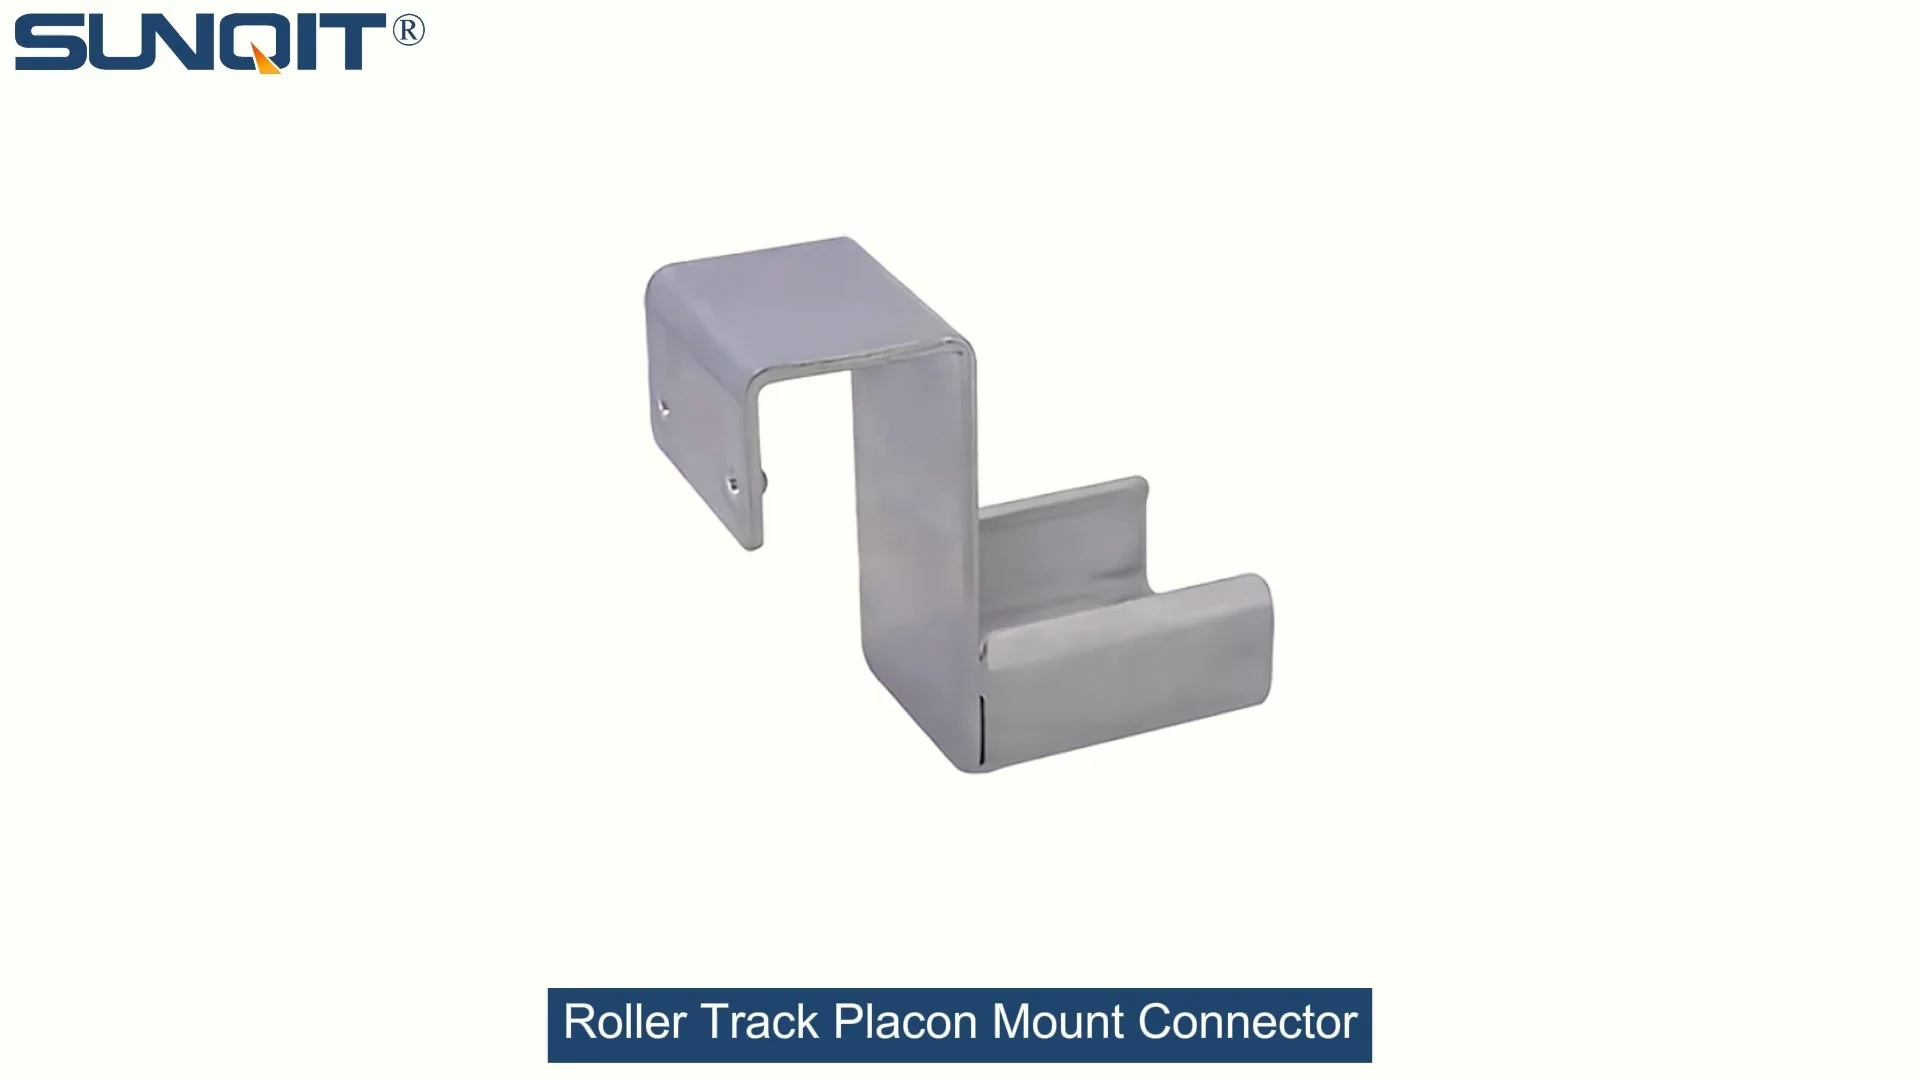
Roller Track Placon Mount Connector
Roller track placon mount work as a connector for roller track and pipe or aluminum profile in rack syetem, it is a necessary parts in rack system which widely used in industrial plant and logistic,warehouse storage.
Let's be real—when it comes to setting up or upgrading your production line, every minute and dollar counts. Hiring a professional installer can eat into your budget, and waiting for their schedule? That's time your team could be using to boost productivity. But what if you could take matters into your own hands? Enter DIY installation, and today, we're diving into one of the most essential components for smooth material flow: the roller track placon mount connector . Whether you're building a flow rack, assembling a conveyor system, or tweaking a workstation, this little but mighty part will be your new best friend. Let's roll up our sleeves and get started!
First Things First: What Even Is a Roller Track Placon Mount Connector?
You might be staring at that long name and thinking, "Is this really necessary?" Trust us—yes. Think of your roller track system (those grooved tracks with wheels that let boxes, parts, or products glide effortlessly) as a puzzle. The roller track placon mount connector is the piece that holds those puzzle pieces together. It's the hardware that attaches roller tracks to aluminum profiles, workbenches, or flow rack frames, ensuring everything stays stable while still letting materials move smoothly. Without it? You'd have wobbly tracks, stuck products, and a whole lot of frustration.
These connectors come in different styles to match various roller track types—like the 40 steel roller track (perfect for heavy-duty loads) or the 38 aluminum roller track (lightweight and corrosion-resistant for medical or 3C assembly lines). Some are flat, some are "drop high" (for adjusting track height), and others have built-in stops to prevent items from sliding off. But don't worry—no matter the style, the installation logic stays pretty similar. We'll break it down step by step.
Why Bother with DIY Installation?
Before we grab our tools, let's talk about why DIY makes sense here. For starters, cost savings . Professional installation can add 20-30% to your project budget—money that could go toward upgrading other equipment. Then there's flexibility . Your team knows your production line best. Maybe you need to adjust the track angle slightly for a new product, or reconfigure the flow rack layout next month. With DIY skills, you can make tweaks on the fly without waiting for external help.
And let's not forget empowerment . Teaching your team to handle basic installations builds confidence and skills that pay off long-term. Plus, when you understand how these connectors work, you'll be better at troubleshooting small issues before they become big problems. Win-win!

Gearing Up: Tools You'll Need (And a Few Pro Tips)
No DIY project is complete without the right tools. Grab these items before you start, and you'll sail through the installation:
| Tool | Why You Need It | Pro Tip |
|---|---|---|
| Phillips-head screwdriver (magnetic) | Tightening screws on the connector | Magnetic tips hold screws in place—no more dropping them into tight spaces! |
| Tape measure | Measuring track length and spacing | Measure twice, drill once! Mark spots with a pencil to avoid mistakes. |
| Level (bubble or digital) | Ensuring tracks are straight and even | A 2-foot level works best for roller tracks—smaller ones might miss subtle tilts. |
| Hex key set (Allen wrenches) | Adjusting bolts on aluminum profiles | Keep a set with both long and short arms—short for tight corners! |
| Rubber mallet | Gently tapping connectors into place (no brute force!) | Plastic or rubber—metal mallets can scratch aluminum parts. |
| Work gloves | Protecting hands from sharp edges | Go for nitrile gloves—they grip better than cotton, and keep oil from your hands off parts. |
Pro Safety Note:
Always wear gloves and safety glasses! Aluminum and steel edges can be sharp, and tiny metal shavings might fly when tightening screws. Better safe than sorry—your fingers will thank you.

Step-by-Step Installation: Let's Get This Connector Connected
Now for the fun part—actually putting it all together. We'll use a 40 steel roller track placon mount flat connector as our example (super common for flow racks and conveyors), but the steps work for most models. Just double-check your connector's instructions if it's a "drop high" or "center support" style—minor tweaks might apply.
-
Step 1: Prep Your Workspace and Parts
Clear a flat surface—your workbench or even the floor works. Lay out your roller track segments, placon mount connectors, screws (they usually come with the connectors, but grab extras just in case), and aluminum profile (we're using a 4040 EU standard aluminum profile here—super versatile for industrial setups). Give everything a quick wipe with a dry cloth to remove dust or oil—greasy parts = slippery screws = headaches later.
-
Step 2: Mark Your Mounting Spots
Measure your roller track length, then decide where to place the connectors. A good rule of thumb: one connector every 12-18 inches (30-45 cm) for stability. If you're using heavy steel tracks or moving heavy loads, go closer (12 inches max). For lighter aluminum tracks, 18 inches is fine. Use your tape measure to mark these spots on the aluminum profile. Then, line up the roller track along the profile—make sure the track's mounting holes align with your marks. Pro tip: Use a pencil to mark through the track's holes onto the profile—this guarantees perfect alignment.
-
Step 3: Attach the Placon Mount to the Aluminum Profile
Take your placon mount connector and slide it onto the aluminum profile. Most connectors have a T-slot design that fits into the profile's grooves—no drilling needed! Position it over your pencil mark. Now, grab a hex bolt (usually M5 or M6, depending on the connector size) and insert it into the T-slot from the side of the profile. Tighten it with your hex key until the connector feels snug—don't overdo it yet, though! You might need to adjust the position slightly later.
Stuck?: If the connector won't slide into the T-slot, check for burrs on the profile edges. A quick rub with sandpaper (fine grit!) will smooth it out. -
Step 4: Secure the Roller Track to the Connector
Now, place the roller track on top of the placon mount connector. Line up the track's mounting holes with the holes on the connector. Take your Phillips-head screwdriver and insert the screws (usually self-tapping, so they'll bite into the track without pre-drilling). Start with one screw loosely, then move to the opposite end—this keeps the track from shifting. Once all screws are in, tighten them gradually in a "star" pattern (like tightening lug nuts on a car)—this ensures even pressure and prevents warping the track.
Give the track a gentle wiggle—if it moves, tighten the screws a bit more. If it's rock solid, you're golden!
-
Step 5: Level and Adjust (The Most Important Step!)
Remember that level we told you to grab? Now's its time to shine. Place the level on top of the roller track. If the bubble is off-center, loosen the hex bolt on the placon mount, adjust the connector up or down, then retighten. Repeat this for every connector until the entire track is level. Why does this matter? A tilted track will make products slide too fast (risking damage) or too slow (jamming the line). Take your time here—it's worth it for smooth, consistent flow.
-
Step 6: Test It Out!
Now for the moment of truth: grab a test product (a box, a part, whatever you'll be moving on the track) and slide it along. It should glide smoothly without sticking or wobbling. If it catches, check for misaligned connectors or loose screws. If it's too fast, slightly tilt the track downward (by raising one end's connectors) or add a brake (some connectors have built-in stop tabs—flip them up if needed). If it's too slow, tilt it upward a tiny bit. Once it's moving like butter, you're done with the basic installation!

Troubleshooting: Oops, That Didn't Work—Now What?
Q: The roller track keeps sliding off the connector. What's wrong?
A: Check if you used the right screws! Some tracks need longer screws to bite into the connector. If the screws are too short, they won't hold. Also, make sure the connector's lip is fully under the track's edge—some models have a small flange that should grip the track's side.
Q: The track is wobbly even after tightening everything. Help!
A: You might need more connectors. If you spaced them too far apart, the track will sag in the middle. Add a connector between the existing ones—this will stiffen things up. Also, check if your aluminum profile is straight—bendy profiles = wobbly tracks.
Q: I can't get the track level. The bubble just won't center!
A: Your workspace might not be level! If you're mounting the profile on a workbench, use adjustable leveling feet (we love anti-slip adjustable leveling feet for this) to tweak the bench's height first. Then adjust the connectors. Small shims (thin metal or plastic strips) under the connector can also help with tiny adjustments.
Where Does This Fit into Your Lean System? Let's Talk Real-World Uses
Okay, you've installed your roller track with placon mount connectors—now what? Let's look at how this fits into bigger lean manufacturing goals. Remember, lean is all about eliminating waste and continuous improvement , and your new track system is a perfect example of that.
1. Flow Racks in Warehousing
Flow racks are a game-changer for picking and packing lines—products slide from the back (replenishment side) to the front (picking side), so workers never have to reach or bend. By using placon mount connectors, you can build flow racks that are custom-sized for your boxes. Need to adjust the track angle for smaller parts? Loosen the connectors, tilt, retighten—done. No need to buy a whole new rack. That's sustainable improvement in action!
2. Conveyor Systems for Assembly Lines
Conveyors move products between workstations, but not all lines are straight. Placon mount connectors let you build curved or angled conveyor sections by adjusting the connector positions. For example, in a 3C assembly line (think smartphones or laptops), you might need a 90-degree turn to get parts from the soldering station to the testing station. Use a 90° aluminum crossing joint with placon mount connectors, and you've got a seamless turn—no expensive custom conveyor needed.
3. ESD Workstations for Sensitive Electronics
Medical device or electronics manufacturing needs ESD (electrostatic discharge) protection to avoid damaging sensitive parts. Many roller tracks (like the 38 aluminum roller track black ESD) are ESD-safe, and placon mount connectors made of conductive materials keep the entire system grounded. By installing these tracks on an ESD workbench, you create a safe, efficient flow for PCBs or medical components—all while staying compliant with industry standards.
Beyond the Basics: Making It Leaner with Custom Solutions
DIY installation is great for small projects, but what if you need a full production line overhaul? That's where lean solutions come in. Companies like ours specialize in designing custom systems that fit your unique needs—whether you're in automotive, 3C assembly, or medical device manufacturing. We take the parts you just learned to install (roller tracks, connectors, aluminum profiles) and turn them into full workflows: from flexible (flexible production lines) to custom workstations that adapt as your products change.
The best part? These solutions are built on the same "reusable, reconfigurable" (philosophy) as your DIY track. Need to add a new conveyor section next quarter? We'll design it to fit your existing system. Want to switch from steel tracks to aluminum for lighter loads? No problem—our connectors are compatible with both. It's lean manufacturing at its core: invest once, adapt forever .
Wrapping It Up: You've Got This!
Installing a roller track placon mount connector might seem intimidating at first, but we promise—with the right tools, a little patience, and this guide, you'll be a pro in no time. Remember, DIY isn't just about saving money; it's about taking control of your production line and building something that works for your team . And when you're ready to scale up? That's where lean solutions and expert support come in—we're here to help you take those DIY skills to the next level.
So go ahead—grab your tools, round up your team, and start building. Your smoother, more efficient production line is just a few screws and connectors away. And if you hit a snag? drop us a line—we're always happy to share tips or help design a custom system that fits your needs. Happy building, and here's to leaner, better manufacturing!