- Company Articles
- Products and Technology
- Product knowledge
- DIY T Slot Aluminum Pipe with Board Holder: Is It Feasible?

DIY T Slot Aluminum Pipe with Board Holder: Is It Feasible?
Related Product
T Slot Aluminum Pipe with Board Holder
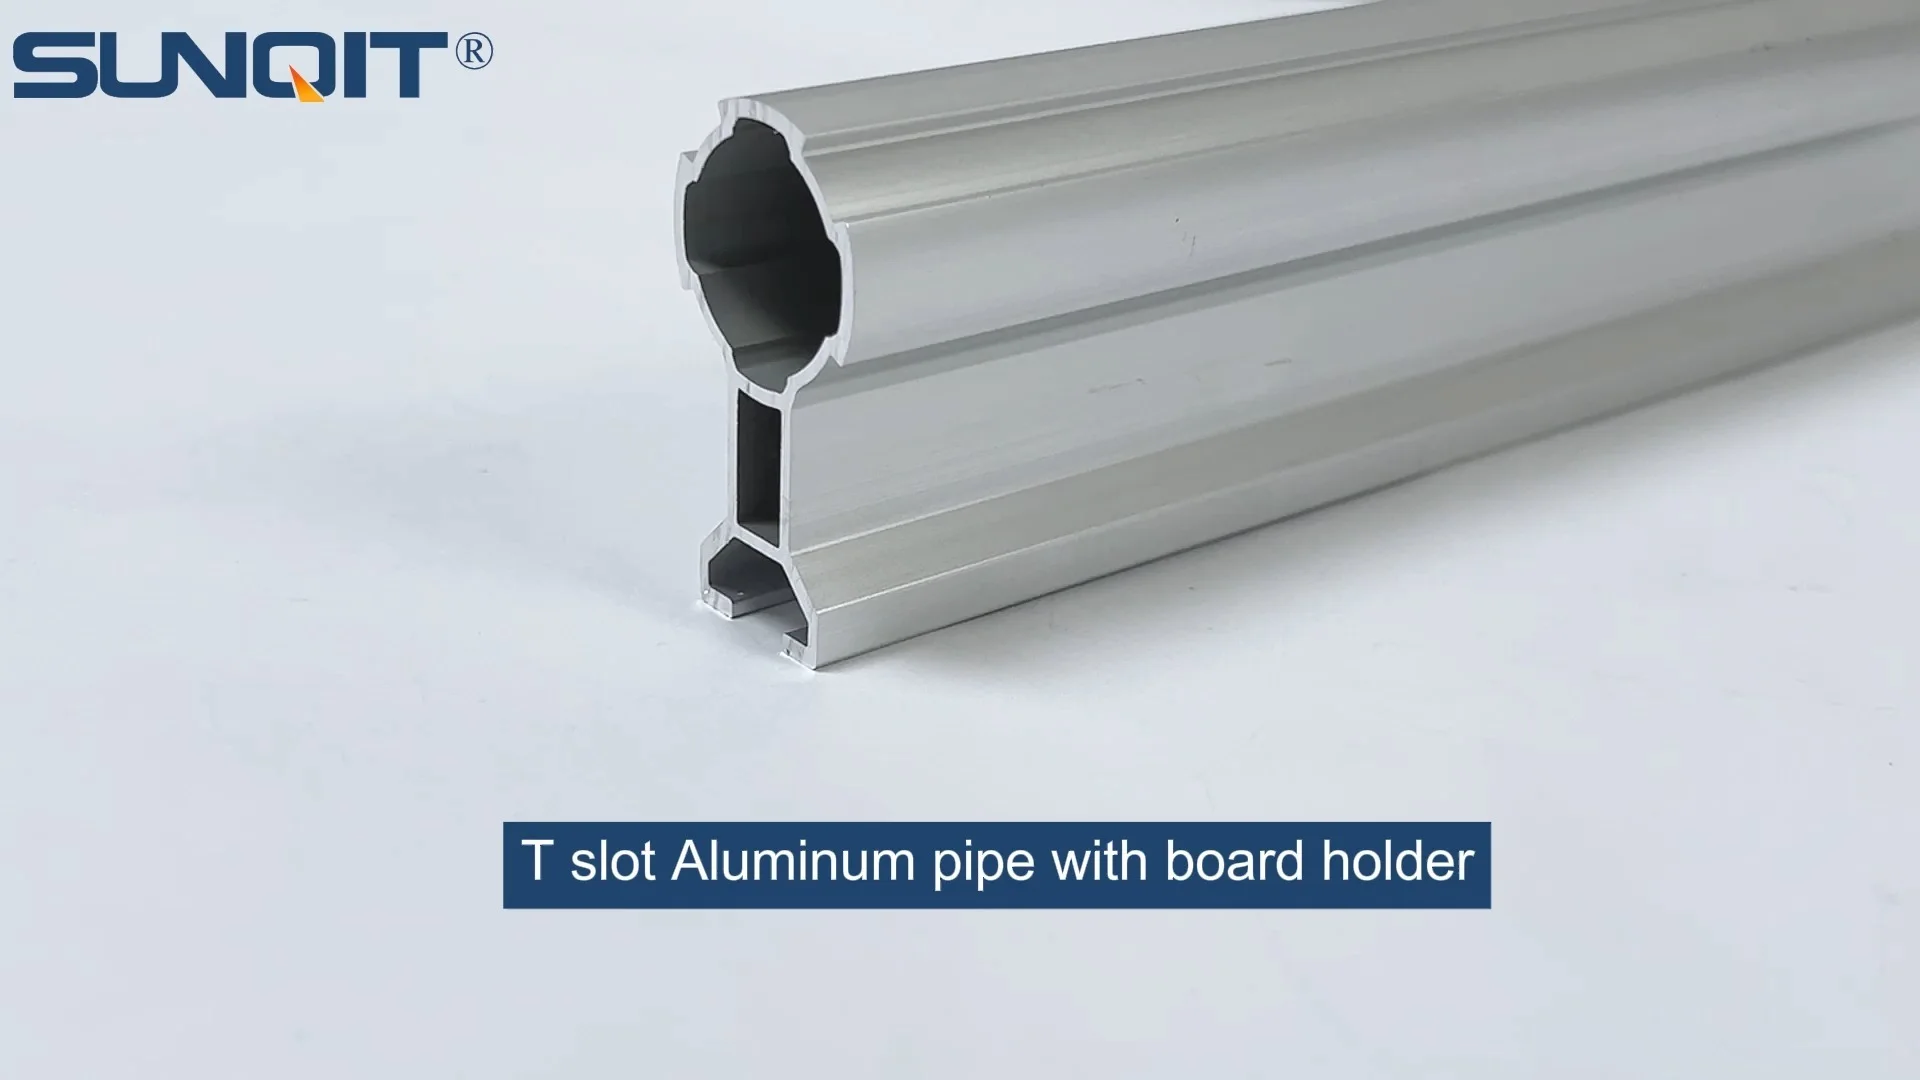
T slot Aluminum pipe with board holder,the pipe one side connected by a joint, the other side with a slot which can hold a tray or a aluminum pannel
There's a quiet pride in building something with your own hands. Whether you're setting up a home workshop, organizing a garage, or outfitting a small business space, the urge to create a solution that fits exactly your needs—instead of settling for a one-size-fits-all product—feels almost universal. And if you've spent any time researching workshop materials, you've likely stumbled upon T-slot aluminum pipe. Lightweight, strong, and endlessly adaptable, it's become a favorite for DIY enthusiasts. But today, let's tackle a specific project: building your own T-slot aluminum pipe with a board holder. Is it doable? Let's break it down, step by step.
What Even Is T-Slot Aluminum Pipe, Anyway?
Before we dive into feasibility, let's make sure we're on the same page. T-slot aluminum pipe—often called an aluminum extrusion profile in industry terms—is a type of structural framing made by pushing heated aluminum through a die to create a specific cross-section. The "T-slot" refers to the T-shaped groove running along the length of the pipe, which acts like a built-in track for attaching accessories. Think of it as a modular building system: with the right aluminum profile accessories (joints, brackets, fasteners), you can connect pipes into almost any shape—shelves, workbenches, carts, or yes, board holders—without welding, drilling random holes, or using messy adhesives.
What makes it so popular? Unlike wood, it won't warp or rot. Unlike steel, it's lightweight and resists rust. And unlike plastic, it can support serious weight (we're talking hundreds of pounds, depending on the profile size). For DIYers, though, the biggest win is flexibility: if you outgrow your creation, you can take it apart and rebuild it. No waste, no regret.
Why a Board Holder, Specifically?
A board holder might sound simple, but it's surprisingly versatile. Maybe you need a sturdy surface to hold tools above your workbench . Or a slotted rack to organize plywood sheets in your garage. Or a tilted holder for project plans that won't slip off your desk. Pre-made options exist, but they're often either too small, too flimsy, or way overpriced for what they are. A DIY version lets you pick the size, angle, and features—like adding hooks for cables or extra shelves for supplies—so it works for you .
Plus, building a board holder is a great starter project. It's small enough to tackle in a weekend, uses basic tools, and teaches you the ropes of working with T-slot aluminum—skills you can later apply to bigger builds, like a custom material rack or rolling cart.

Feasibility Check: Can You Actually Do This?
Let's cut to the chase: Yes, building a T-slot aluminum pipe board holder is feasible for most people. But "feasible" depends on three things: your budget, the tools you have (or can borrow), and your comfort with basic hand tools. Let's break each down.
1. Budget: Will It Save You Money?
Short answer: Probably. Pre-made board holders (especially metal ones) can cost $100–$300, even for simple designs. DIY materials, on the other hand, typically run $50–$150, depending on size and accessories. Here's a rough breakdown:
- T-slot aluminum pipe (2–4 pieces, 4–6ft long): $20–$60 (aluminum extrusion profiles come in standard lengths; you can cut them down).
- Aluminum profile accessories: $15–$50 (joints, end caps, brackets, and maybe a few aluminum pipe accessories like angle connectors or shelf supports).
- Board material: $10–$30 (plywood, MDF, or even a repurposed wooden board you already own).
- Fasteners (if not included with accessories): $5–$15 (hex bolts, washers, or T-slot nuts).
Total: $50–$150. Compare that to a pre-made 2ft×4ft metal board holder, which often starts at $150. And if you already have some tools or leftover materials? Even cheaper.
2. Tools: What Do You Need?
You don't need a workshop full of machinery, but you will need a few basics. Chances are, you already own most of these:
- Measuring tape and straightedge: To mark cuts and ensure your holder is square.
- Hacksaw or miter saw: To cut the aluminum pipe. A miter saw with a metal-cutting blade is faster, but a hacksaw works too (just slower).
- Deburring tool or sandpaper: Aluminum edges are sharp after cutting—this smooths them out (safety first!).
- Hex keys (Allen wrenches): Most T-slot accessories use hex bolts, so a set of metric hex keys is a must.
- Pencil or marker: To mark where to cut or attach accessories.
- Level: To make sure your holder doesn't lean (annoying!) once assembled.
Optional extras: A drill with a metal bit (if you need to add custom holes), a rubber mallet (to tap joints into place), or a vice (to hold pipes steady while cutting). But even without these, you can still pull it off.
3. Skills: Do You Need to Be a Pro?
Nope. This project is beginner-friendly. You don't need welding skills, electrical know-how, or woodworking expertise. The hardest part is cutting the pipes straight—and even that gets easier with a little practice. If you can measure twice and cut once, tighten a bolt with a hex key, and check if something is level, you've got the skills.
Worried about making mistakes? T-slot aluminum is forgiving. If you cut a pipe too short, you can buy a new one (they're cheap). If a joint is loose, just tighten the bolt. And if the whole thing looks wonky? Disassemble and start over—no permanent damage done.

Step-by-Step: Building Your Board Holder
Ready to dive in? Here's a simplified guide to building a basic wall-mounted board holder (we'll keep it simple, but feel free to customize!).
Step 1: Plan Your Design
Grab a piece of paper (or open a notes app) and sketch your board holder. Ask yourself:
- How big do you need it? Measure the space where it will go (width, height, depth).
- What angle do you want the board? Flat (for a shelf), tilted (for plans/books), or adjustable?
- Will it mount to the wall, or stand on a table? Wall-mounted saves floor space; tabletop is portable.
- Extra features? Hooks, side shelves, cable management holes?
For a basic wall-mounted holder, a simple rectangle works: two vertical pipes (legs), two horizontal pipes (top and bottom), and a slat across the front to hold the board. Add angle brackets to tilt the board, and wall-mounting brackets to attach it to studs.
Step 2: Gather Materials
Based on your design, order T-slot aluminum pipe and accessories. Most suppliers (check online for aluminum profile suppliers —many offer cut-to-length services if you don't want to cut pipes yourself) sell starter kits with common parts, but you can also buy individual pieces. For a 2ft wide × 1.5ft tall holder, you'll need:
- 4 pieces of T-slot aluminum pipe (e.g., 20mm×20mm or 30mm×30mm profile—bigger = sturdier).
- 4 corner joints (to connect the vertical and horizontal pipes).
- 2 angle brackets (to hold the board at your desired tilt).
- Wall-mounting brackets (if wall-mounted) or feet (if freestanding).
- T-slot nuts and hex bolts (usually included with joints, but grab extras just in case).
- A wooden or plywood board (cut to fit your frame).
Pro tip: Buy an extra pipe or two. Mistakes happen—better to have a spare than wait for a replacement.
Step 3: Cut the Pipes (If Needed)
If you ordered pipes longer than needed, mark your cuts with a pencil and straightedge. Clamp the pipe to a workbench (or hold it steady with a vice) to prevent wobbling. Cut slowly with a hacksaw (use long, even strokes) or miter saw. After cutting, run a deburring tool or sandpaper along the edges to remove sharp burrs—you don't want to slice your hand later!
Step 4: Assemble the Frame
Lay out your pipes and joints on a flat surface. Start with the base: connect the vertical and horizontal pipes using corner joints. Slide T-slot nuts into the grooves where the joints will attach, then thread hex bolts through the joints and into the nuts. Tighten with a hex key—snug, but not so tight you strip the bolt. Repeat until the frame is square (use a level to check!).
Next, attach the angle brackets where the board will sit. Slide the brackets into the T-slots, position them at your desired angle, and tighten the bolts. Test the fit by placing the board on top—adjust the brackets if it rocks or slips.
Step 5: Mount or Finish
If wall-mounted, attach the wall brackets to the frame, then drill into studs (use a stud finder!) to hang it. If freestanding, screw on feet or casters (if you want it to roll). Finally, secure the board to the angle brackets with screws (pre-drill small holes in the board to avoid splitting) or T-slot bolts (if you want it removable).
Step 6: Test It Out!
Load it up! Put your tools, books, or materials on the board and give it a gentle shake. Does it wobble? Tighten any loose joints. Is the board secure? Add extra brackets if needed. Stand back and admire your handiwork—you built that!
Potential Pitfalls (and How to Avoid Them)
No project is without hiccups, but these are easy to fix:
- Crooked cuts: Use a straightedge and clamp the pipe before cutting. If a cut is slightly off, sand the edge to straighten it.
- Loose joints: T-slot nuts can slip if not seated properly. Push them all the way into the slot before tightening bolts.
- Board sagging: If the board bends under weight, add a center support bracket (just another pipe and joint) or use thicker plywood.
- Wall-mounting fails: Always drill into studs—drywall alone can't hold weight. If you can't find studs, use heavy-duty drywall anchors.
DIY vs. Pre-Made: The Ultimate Showdown
Still on the fence? Let's compare:
| Factor | DIY T-Slot Aluminum Board Holder | Pre-Made Board Holder |
|---|---|---|
| Cost | $50–$150 (materials only) | $150–$400+ (retail price) |
| Customization | Unlimited (size, angle, features) | Fixed (you get what's in the box) |
| Time | 3–5 hours (weekend project) | 15–30 minutes (unboxing + assembly) |
| Durability | High (same aluminum as pre-made, built to your specs) | Variable (some are flimsy; others are solid) |
| Satisfaction | Through the roof (you built it!) | Meh (it's just… there) |
Final Verdict: Go For It
Building a T-slot aluminum pipe board holder is not just feasible—it's fun, affordable, and rewarding. You'll end up with a tool that works exactly how you need it, and you'll learn skills you can use for future projects. Plus, when friends ask, "Where'd you get that?" you can say, "I built it," and mean it.
So grab your measuring tape, order some aluminum pipe and accessories, and get started. Your future self (and your organized workspace) will thank you.