- Company Articles
- Products and Technology
- Product knowledge
- DIY Workbench Project: Using Two Way Aluminum Pipe Joints for Customizable Workspaces

DIY Workbench Project: Using Two Way Aluminum Pipe Joints for Customizable Workspaces
Related Product
Two Way Aluminum Pipe Joint
Aluminum 2 way pipe joint for 28mm aluminum pipe connection in 2 direction.
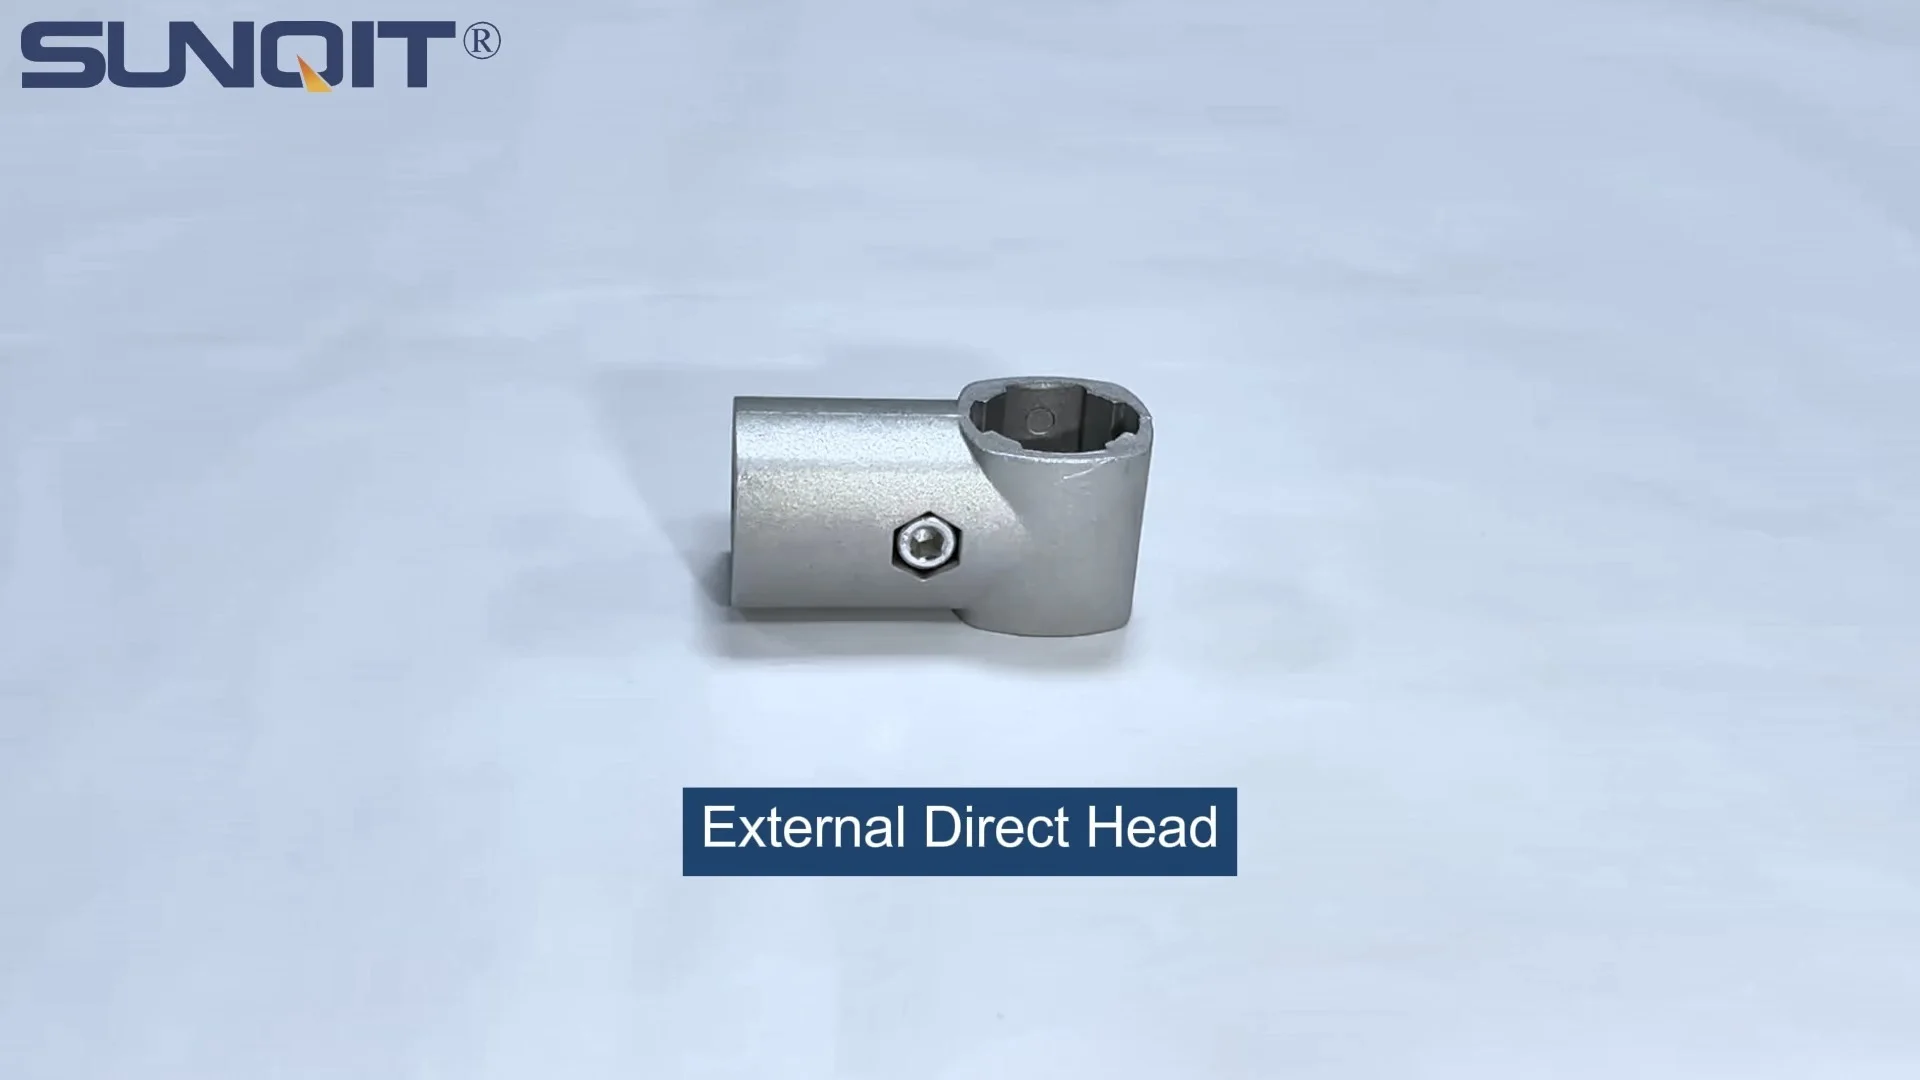
Tired of generic workbenches that never quite fit your tools, your space, or your way of working? Let's build something better—something that bends to your needs, not the other way around. Today, we're diving into how to create a fully customizable workbench using aluminum pipe and two way aluminum pipe joints. Trust me, once you build your own, you'll wonder how you ever settled for "one-size-fits-none" furniture.
Why Aluminum Pipe? The Case for Building Your Own Workbench
Here's the thing about workbenches: they're the unsung heroes of garages, workshops, and home offices. Whether you're assembling electronics, crafting, woodworking, or just need a sturdy spot to organize tools, your workbench is where the magic happens. But walk into any hardware store, and you'll find two problems with pre-made options: they're either flimsy (and cheap) or rock-solid (and way too expensive). Worse, they're rigid—no adjusting the height, adding a shelf, or reconfiguring the layout when your projects change.
That's where aluminum pipe comes in. I've been building custom workspaces for years, and aluminum has become my go-to material for a few big reasons. First, it's lightweight but surprisingly strong—strong enough to hold power tools, heavy materials, or even a weekend project that spills over. Second, it's resistant to rust and corrosion, so if you're working in a damp garage or a workshop where spills happen (we've all been there), you won't end up with a workbench that looks like it's been through a war after six months. Third, and most importantly, aluminum pipe systems are modular. Thanks to joints like the two way aluminum pipe joint, you can snap pieces together, take them apart, and rearrange them whenever you want. It's like building with adult Legos—but way more functional.
And let's talk about cost. A high-end pre-made workbench can set you back $500 or more. With aluminum pipe, two way joints, and a few basic accessories, you can build something sturdier, more customized, and often cheaper. I built my last workbench for under $200, and it's held up to everything from soldering projects to clamping down 2x4s for cutting. Plus, if you move or your needs change? Disassemble it, pack it in the back of your car, and rebuild it in the new space. No more struggling to fit a bulky workbench through a doorway.
Pro Tip: Aluminum lean pipe (sometimes called "lean tube") is even better than regular aluminum pipe for workbenches. It's designed specifically for industrial and DIY applications, with a smooth finish that's easy to clean and compatible with a huge range of accessories. Look for suppliers that offer aluminum lean pipe in standard lengths (like 4ft or 6ft) to minimize cutting.
Planning Your Workbench: Start with "Why" Before "What"
Before you run out and buy a pile of aluminum pipe, let's get clear on what you actually need. Building a workbench without a plan is like baking a cake without a recipe—you might end up with something edible, but it won't be what you imagined. So grab a notebook (or open a notes app) and answer these questions first:
1. Where will the workbench live? Measure the space. Is it a corner of your garage? A nook in your basement? A corner desk in your home office? Note the width, depth, and height constraints. You don't want to build a 6ft-long bench only to realize it blocks the garage door.
2. What will you use it for? A workbench for jewelry making needs different features than one for woodworking. If you're assembling small parts, you might want a smooth, flat surface and built-in storage for tiny tools. If you're using power tools, you'll need a thicker top (maybe plywood or a metal sheet) and enough legroom to clamp materials. If you're working with electronics, you might even want to add ESD (electrostatic discharge) features later—but we'll get to customization later.
3. Do you need mobility? Will this bench stay in one spot forever, or do you want to roll it out of the way when not in use? If mobility is key, we'll add caster wheels (and caster accessories, to keep them rolling smoothly). If it's staying put, we can skip the wheels and focus on stability.
4. What's your height? This might sound silly, but ergonomics matter. A workbench that's too low will leave you hunched over; too high, and your arms will tire mid-project. Measure the distance from the floor to your elbow when your arms are at your sides—that's your ideal workbench height. For me, that's 36 inches (I'm 5'10"), but adjust based on your own body.
Pro Tip: Draw a rough sketch. You don't need to be an artist—just a rectangle for the top, lines for the legs, and notes like "shelf here" or "caster wheels." Having a visual makes it easier to translate your ideas into parts later.
Gathering Your Materials: The Building Blocks of Your Workbench
Now that you have a plan, let's talk parts. The beauty of aluminum pipe systems is that you don't need a truckload of materials—just a few key components. Here's a breakdown of what I used for my 4ft x 2ft workbench (adjust quantities based on your dimensions):
| Item | Purpose | Tips for Choosing |
|---|---|---|
| Aluminum Pipe (1.5" diameter) | Main frame (legs, rails, shelf supports) | Go for 1.2mm or 1.5mm wall thickness—sturdy but easy to cut. I used 6ft lengths and cut them down; most suppliers sell pre-cut options too. |
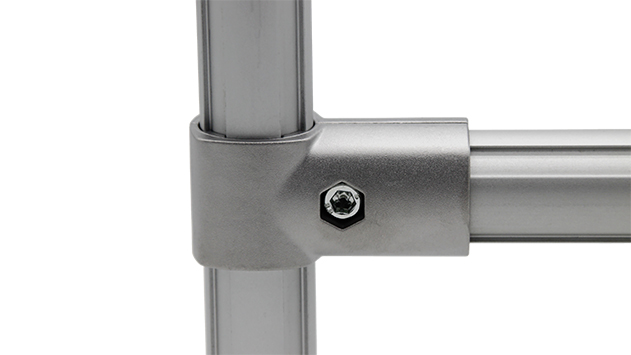
| Two Way Aluminum Pipe Joints | Connect pipes at 90-degree angles (e.g., legs to side rails) | Look for joints with set screws—they tighten securely and won't slip. I used 8 joints for the frame alone. |
| Aluminum Profile Accessories | Shelf brackets, tool hooks, cable management clips | These are optional but game-changing. I added a set of L-brackets for a lower shelf and cable clips to keep power cords from tangling. |
| Caster Wheels with Brakes | Mobility (if needed) | Get heavy-duty casters (at least 50lbs capacity each). Locking brakes are a must—you don't want the bench rolling mid-project. |
| Workbench Top | The surface you'll work on | Plywood (3/4" thick) is affordable and durable. For ESD work, use an ESD mat or a metal top with grounding. |
| End Caps for Aluminum Pipe | Cover sharp pipe ends (safety first!) | Plastic or rubber end caps—they slip right on and prevent scratches on floors or hands. |
| Basic Tools | Cutting, measuring, assembling | Hacksaw or pipe cutter, measuring tape, level, rubber mallet (to tap joints into place), Allen wrench (for set screws), drill (to attach the top). |
You might notice I didn't include a lot of fancy tools—and that's intentional. This project is doable with basic gear. If you don't have a pipe cutter, most hardware stores will cut aluminum pipe for you if you bring your measurements. And while you can splurge on specialized aluminum profile accessories, start simple—you can always add more later.

Step-by-Step: Building Your Custom Workbench
Alright, let's get building. I'll walk you through each step with tips I learned the hard way (so you don't have to). Set aside 2-3 hours—most of that is assembling, not cutting. Let's start!
1 Cut Your Aluminum Pipe to Size
First, measure and cut your pipes according to your plan. For my 4ft (48") wide, 2ft (24") deep, 36" tall workbench, I needed:
- 4 legs: 36" each (height from floor to top of the bench)
- 4 side rails: 48" each (front and back, connecting the legs)
- 4 depth rails: 24" each (left and right, connecting the legs)
- 4 shelf supports: 24" each (to hold a lower shelf, 18" from the floor)
If you're cutting the pipes yourself, use a pipe cutter (it's cleaner than a hacksaw) and mark the length with tape first. Rotate the cutter around the pipe, tightening slightly each time, until it cuts through. Sand the ends with fine-grit sandpaper to remove burrs—you don't want to scratch yourself later.
Pro Tip: Cut one pipe, then use it as a template for the others. That way, all legs (or rails) are exactly the same length, and your bench won't wobble.
2 Assemble the Frame with Two Way Joints
Now comes the fun part: putting it all together. Start with the frame—this is where the two way aluminum pipe joints shine. Here's how:
Build the front and back rectangles first. Take two leg pipes (36") and connect them with two side rails (48") using two way joints. Slide a joint onto the end of one leg, then insert the end of a side rail into the joint. Tighten the set screw with an Allen wrench—just enough to hold it, but not so tight you strip the screw. Repeat for the other end of the rail and the second leg. Do this twice: once for the front frame and once for the back frame.
Connect the front and back frames with depth rails. Now, take a depth rail (24") and use two way joints to connect the left legs of the front and back frames. Do the same for the right legs. Stand back—you should have a rectangular frame with four legs, like a giant picture frame on stilts. Grab a level and check if it's even. If one leg is shorter (we've all been there), loosen the joint and adjust the pipe until it's level. Tighten all screws once it's straight.
Add shelf supports (optional but recommended). I wanted a lower shelf for storing tools and materials, so I added 24" shelf supports between the front and back frames, 18" from the floor. Use two way joints to attach them to the legs—same process as the depth rails. Now your frame has a top rectangle (the workbench surface) and a lower rectangle (the shelf).
At this point, the frame should feel sturdy. Give it a gentle shake—if it wobbles, check the joints. Sometimes a quick tap with a rubber mallet will seat the pipe deeper into the joint, making it tighter. Trust me, I spent 10 minutes confused why my frame was wobbly, only to realize I hadn't pushed the pipes all the way into the joints. Oops.
3 Add Casters (or Leveling Feet) for Mobility or Stability
If you want your workbench to roll, now's the time to add caster wheels. Flip the frame upside down so the legs are pointing up. Attach a caster to the bottom of each leg using the caster's mounting plate—most casters come with screws, but I recommend using self-tapping screws for aluminum (they're easier to drive in). Make sure the brakes face outward so you can reach them easily when the bench is right-side up.
If you don't need mobility, swap casters for leveling feet. These are small, adjustable feet that screw into the bottom of the legs, letting you tweak the height to account for uneven floors. Either way, once they're attached, flip the frame back over. It should stand on its own now—no more balancing it against the wall!
4 Attach the Workbench Top
Now for the surface. I used a 4ft x 2ft piece of 3/4" plywood, but you can use MDF, particleboard, or even a metal sheet if you need something heavy-duty. Lay the top on the frame, centering it so there's an even overhang (or no overhang, if you prefer). Pre-drill holes through the top into the frame's side rails—this prevents the wood from splitting. Then, secure it with wood screws (or sheet metal screws, if using metal). I used 4 screws per side rail (8 total) to make sure it didn't shift.
If you want a smoother surface, sand the plywood and seal it with polyurethane or paint. I went with a clear seal to show off the wood grain, but you could also add a rubber mat (great for gripping tools) or an ESD mat if you're working with sensitive electronics. Pro tip: Leave the top slightly loose until the last step—you can slide it around to center it perfectly before tightening all screws.
5 Customize with Aluminum Profile Accessories
Here's where your workbench goes from "basic frame" to "your dream workspace." Aluminum profile accessories are the secret sauce—they let you add features without rebuilding the whole bench. Here are a few of my favorite add-ons:
Tool hooks: Slide L-shaped hooks into the aluminum profile grooves (most aluminum pipes have T-slots for accessories) to hang pliers, tape measures, or a cordless drill. I mounted mine on the side rails, within easy reach.
Shelving: If you added shelf supports earlier, cut a plywood shelf to fit and rest it on top. For extra stability, use angle brackets (another type of aluminum profile accessory) to attach the shelf to the supports.
Cable management: Use cable clips (small plastic clips that fit into T-slots) to route power cords along the back rail. No more tripping over wires or hunting for the outlet!
Lighting: Mount a LED light bar under the top shelf (if you added one) to brighten the workspace. Use magnetic strips or clips that attach to the aluminum frame—no drilling required.
The best part? If you decide later you want to move the shelf, add a pegboard, or even turn part of the bench into a standing desk, you can—just loosen the joints, reposition the pipes, and add new accessories. That's the beauty of modular design.

Testing It Out: Does It Actually Work?
I'll admit, when I finished my first aluminum pipe workbench, I was skeptical. Could this "snap-together" frame really hold up to my messy, tool-heavy projects? Spoiler: It did. I loaded it with a drill press, a stack of plywood, and a bin of hand tools—and it didn't budge. The two way joints stayed tight, the casters rolled smoothly (even over garage cracks), and the height was perfect for standing work.
A few months later, I needed more shelf space, so I added two more rails and a second shelf using extra aluminum pipe and joints. Total time? 30 minutes. No sanding, no painting, no complicated tools—just loosening a few screws and adding new parts. That's the flexibility pre-made workbenches can't touch.
I also tested it with a friend who builds custom electronics. He added an ESD mat to the top and grounded it using a clip attached to the aluminum frame (aluminum is conductive, so it worked like a charm). Now he uses it as an ESD workstation, and he's already talking about building a second one for his home office.
Maintenance: Keeping Your Workbench in Top Shape
Aluminum pipe workbenches are low-maintenance, but a little care goes a long way. Here's how to keep it looking and working like new:
Tighten joints occasionally. Over time, vibrations from tools or moving the bench can loosen set screws. Give them a quick check every few months with an Allen wrench—tighten gently to avoid stripping.
Clean the aluminum. Wipe down the frame with a damp cloth to remove dust and grime. If there's a stubborn stain, use a mild soap (like dish soap) and a soft sponge—avoid abrasive cleaners, which can scratch the finish.
replace worn parts. Casters take a beating—if they start squeaking or rolling unevenly, swap in new caster wheels or caster accessories (like replacement bearings). Most suppliers sell parts individually, so you don't have to replace the whole caster.
Protect the top. If you're using wood, re-seal it every year to prevent water damage. For metal tops, wipe up spills quickly to avoid staining (though aluminum is pretty forgiving here).
Final Thoughts: Your Workspace, Your Rules
Building a workbench with aluminum pipe and two way joints isn't just about saving money (though that's a nice bonus). It's about taking control of your workspace. No more forcing your projects into a workbench that wasn't designed for them. No more feeling limited by what the store sells. With a little planning, a few simple tools, and some aluminum pipe, you can create something that fits you —your tools, your space, your style.
I still remember the first time I used my DIY workbench. I was assembling a bookshelf, and I needed to clamp a board at an awkward angle. Instead of struggling with a clamp that didn't reach, I grabbed an extra aluminum pipe and a joint, added a temporary "arm" to the bench, and clamped away. That moment summed it up: this workbench wasn't just furniture—it was a partner in the project.
So what are you waiting for? Grab your measuring tape, order some aluminum pipe and two way joints, and start building. Your future self (and your projects) will thank you.