- Company Articles
- Products and Technology
- Installation And Maintenance
- Duplex Aluminum Pipe Joint Installation Tools: What You Need

Duplex Aluminum Pipe Joint Installation Tools: What You Need
Related Product
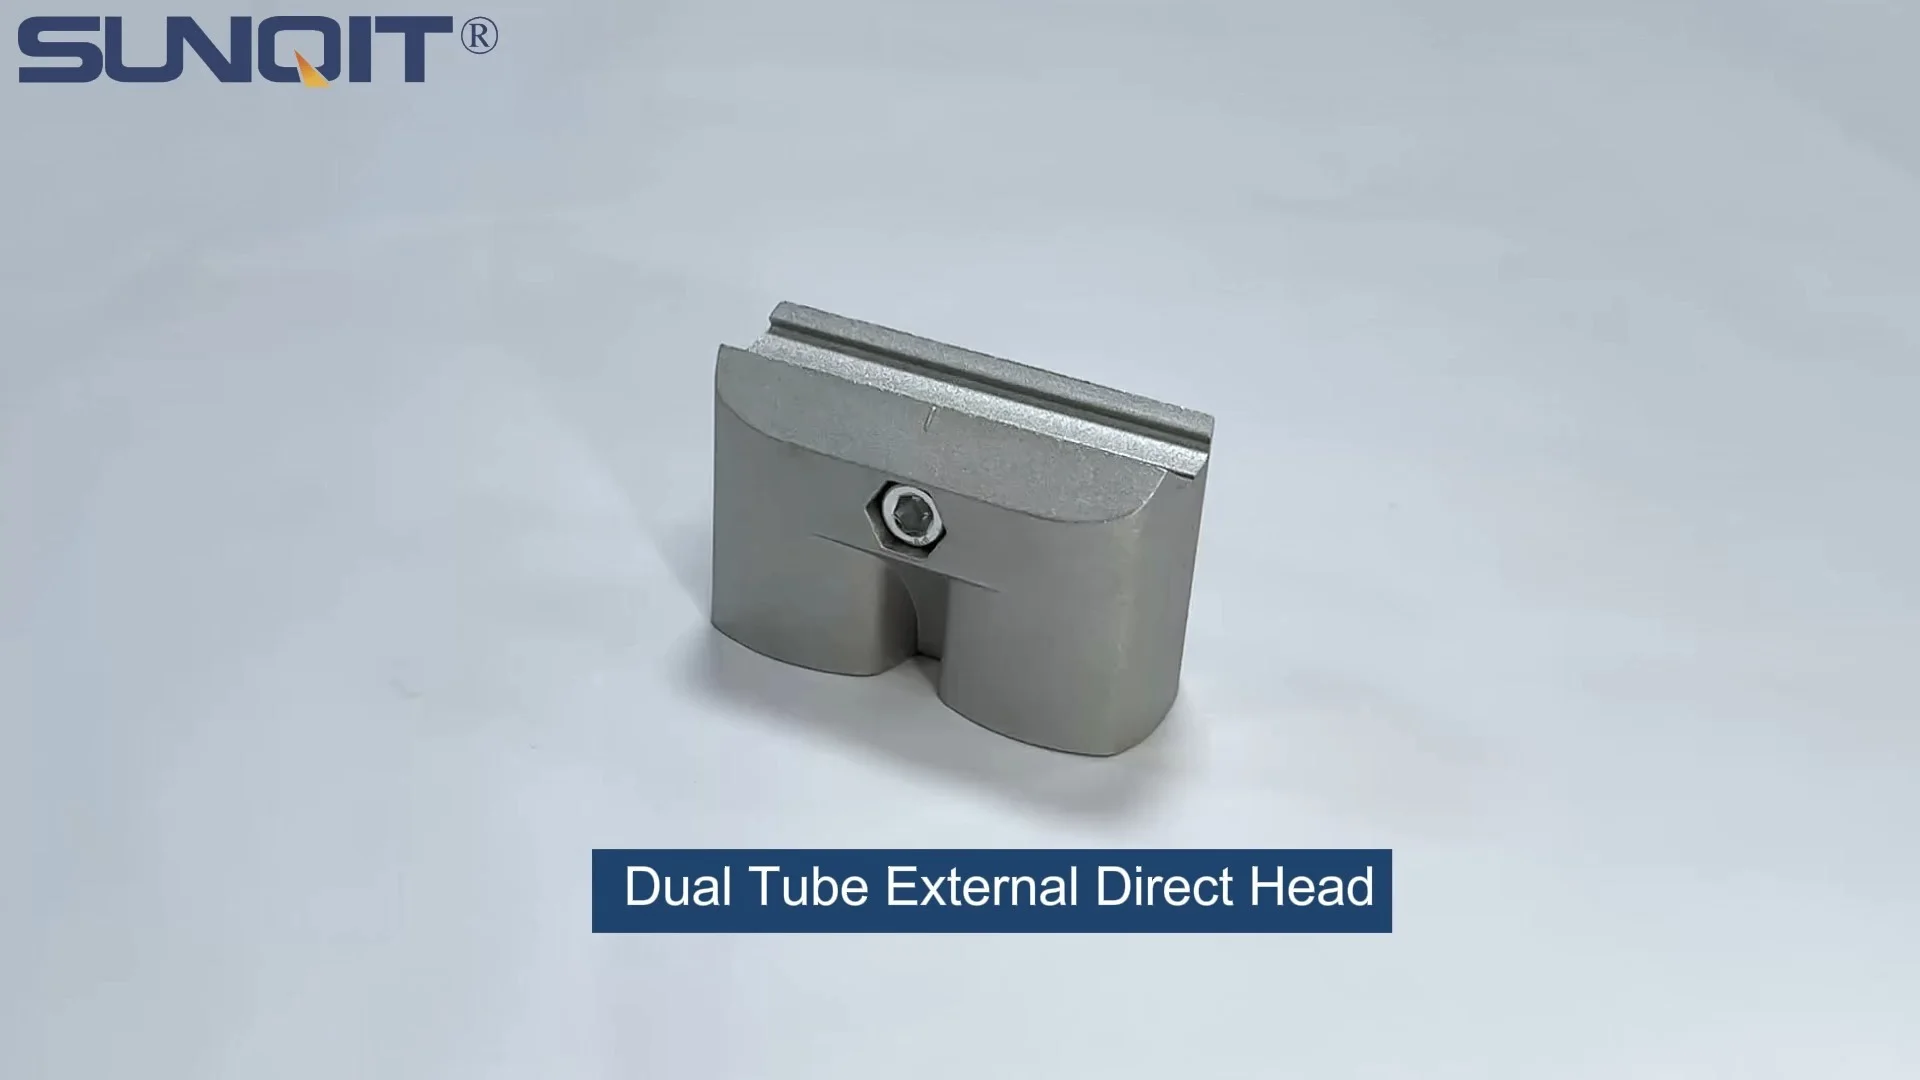
Duplex Aluminum Pipe Joint
Duplex Aluminum pipe joint used for one pcs 28pcs aluminum pipe and one pcs of 28mm duplex pipe connection in straight angle.
Walk into any modern workshop, manufacturing plant, or even a small-scale assembly garage, and you'll likely spot a common sight: sturdy, flexible workbenches, flow racks, and material trolleys built from aluminum pipes and joints. These setups are the backbone of lean systems, designed to streamline workflows, reduce waste, and keep operations running like well-oiled machines. But here's the thing—none of that efficiency happens by accident. Behind every stable workbench or smooth-rolling conveyor is a critical step that often gets overlooked: proper installation. And at the heart of that installation? The right tools, especially when working with specialized components like the duplex aluminum pipe joint.
I've spent over a decade consulting with small manufacturers and warehouse managers, and I've lost count of how many times I've seen teams struggle with wobbly racks, misaligned roller tracks, or joints that loosen after a few weeks of use. More often than not, the root cause isn't poor materials—it's using the wrong tools (or worse, no tools at all) during setup. You wouldn't build a house with a butter knife, right? The same logic applies here. Duplex aluminum pipe joints, with their dual-purpose design for straight and angled connections, demand precision. And precision? It starts with having the right toolkit.
In this guide, we're diving deep into the essential tools you need to install duplex aluminum pipe joints correctly. Whether you're setting up a single workbench or overhauling your entire production line with aluminum profile accessories, this isn't just a list of gadgets—it's a roadmap to building structures that last. We'll cover everything from basic hand tools to specialized gear, walk through a step-by-step installation, and even troubleshoot common mistakes. By the end, you'll know exactly what to grab from your toolbox (or what to add to it) to turn those loose pipes and joints into a lean, mean, productivity machine.
Why the Right Tools Matter More Than You Think
Let's start with a story. A few years back, I visited a small electronics assembly shop that had just invested in a batch of aluminum lean pipes and duplex joints to build new flow racks. The team was excited—they'd heard how these systems could speed up material handling. But when I arrived, their "new" racks were already sagging. Pipes were misaligned, joints were loose, and one corner had even started to bend under the weight of circuit boards. When I asked what tools they'd used, the foreman shrugged and held up a rusty adjustable wrench and a hammer. "We made do," he said. That "making do" cost them hours of downtime, not to mention the cost of replacing bent pipes. The lesson? Skimping on tools isn't saving time—it's costing you more in the long run.
So why do tools matter so much with duplex aluminum pipe joints? For starters, these joints are engineered for precision. They're designed to lock pipes into place at specific angles (often 90°, 45°, or straight) with minimal play, ensuring stability even under heavy loads. But to achieve that lock, you need tools that fit the joint's unique shape and size. A generic wrench might slip, stripping the joint's threads or leaving gaps. A dull cutter could leave jagged pipe edges, making it impossible to seat the joint properly. And without a level? You're guessing at alignment, which means your entire structure could wobble or lean over time.
Then there's safety. Imagine a roller track loaded with heavy components suddenly collapsing because a joint wasn't tightened correctly. Or a workbench leg giving way because the caster wheel wasn't secured with the right tool. These aren't just productivity issues—they're hazards. The right tools ensure that every connection is tight, every pipe is cut clean, and every component is aligned, turning your setup from a potential accident waiting to happen into a reliable, safe workspace.
Finally, there's efficiency. When you have the right tools, installation moves faster. No more fumbling with mismatched wrenches or stopping to file down rough pipe edges. You'll spend less time fixing mistakes and more time focusing on what matters: getting your lean system up and running. And let's not forget maintenance. A well-installed structure with properly tightened joints is easier to adjust or expand later—say, adding a new shelf to your material rack or reconfiguring a conveyor. With the right tools, those tweaks become 10-minute tasks instead of all-day projects.
Essential Tools for Duplex Aluminum Pipe Joint Installation
Now that we've covered why tools matter, let's get into the specifics. Think of this as your shopping list (or toolbox checklist) for installing duplex aluminum pipe joints. We'll break it down into categories, starting with the basics you probably already own, then moving into specialized gear that's worth the investment.
1. Basic Hand Tools: The Foundation of Any Toolkit
You don't need to splurge on industrial-grade equipment right away—many installations start with the basics. But "basic" doesn't mean "any old tool." For aluminum pipe work, precision and fit are key. Here's what you need:
- Hex Keys (Allen Wrenches): Aluminum joints, including duplex aluminum pipe joints, often use hex-head screws to lock pipes in place. A good set of hex keys (both metric and standard, though metric is more common here) is non-negotiable. Look for ones with ball ends—they allow you to reach screws at awkward angles without stripping the head. I prefer L-shaped keys over folding sets for better torque, but a folding set is great for portability.
- Adjustable Wrench: Not all joints use hex screws. Some, like the parallel aluminum joint or aluminum pipe clamp, rely on nuts or bolts that need a wrench. An adjustable wrench with a smooth jaw (to avoid scratching the aluminum) works here, but for better control, invest in a set of open-end wrenches in common sizes (10mm, 12mm, 14mm are standard for aluminum accessories).
- Screwdrivers: Phillips and flat-head screwdrivers are must-haves, especially for securing accessories like end caps or mounting brackets. Opt for magnetic tips—they'll save you from dropping tiny screws into hard-to-reach gaps. A precision screwdriver set (smaller sizes) is handy for tight spots, like attaching roller track placon mount brackets to aluminum profiles.
- Tape Measure and Pencil: "Measure twice, cut once" isn't just a cliché—it's gospel when working with pipes. A 25-foot steel tape measure with clear markings and a locking mechanism is ideal. Pair it with a mechanical pencil (no smudges!) for marking cut lines on pipes. Pro tip: Write down measurements immediately—memory is unreliable, especially in a busy workshop.
- Level: A 2-foot spirit level (bubble level) is critical for ensuring your structure is straight and square. Look for one with both horizontal and vertical vials—you'll use it to check everything from workbench surfaces to the alignment of roller tracks. For larger setups, a 4-foot level or even a laser level (we'll cover that later) can save time, but a basic spirit level works for most small projects.
2. Specialized Joint Tools: For Duplex Joints and Beyond
Basic tools get you started, but when it comes to duplex aluminum pipe joints, specialized tools make all the difference. These are designed to fit the unique shape and function of aluminum joints, ensuring a tight, secure connection every time.
- Duplex Aluminum Pipe Joint Installation Wrench: This is the star of the show. Duplex joints have a specific shape—often with two locking points for dual-angle connections—and a standard wrench just won't grip properly. A dedicated installation wrench (sometimes called a "joint spanner") has notches or jaws that fit snugly around the joint, allowing you to apply even torque without slipping. Most suppliers sell these alongside their joints, and they're worth every penny. I've seen teams try to use pliers here, and the result is almost always a scratched joint or a loose connection.
- Aluminum Pipe Clamp: When assembling a frame, you'll often need to hold pipes and joints in place while tightening screws. That's where an aluminum pipe clamp comes in. Unlike heavy steel clamps (which can dent aluminum), these are lightweight and have padded jaws to protect the pipe's finish. Look for C-clamps or toggle clamps with adjustable pressure—you want a firm hold without crushing the pipe. Pro tip: Get two clamps—one to hold the horizontal pipe, one for the vertical. It makes aligning joints a one-person job.
- Joint Thread Locker: This isn't a tool, per se, but it's essential for keeping joints tight long-term. Aluminum expands and contracts slightly with temperature changes, which can loosen screws over time. A small bottle of thread locker (medium strength, like Loctite Blue) applied to the screw threads before tightening prevents that. Just don't overdo it—too much can make future adjustments hard. A drop or two per screw is enough.
3. Cutting and Deburring Tools: For Clean, Safe Edges
Unless you're buying pre-cut pipes (which is an option, but less flexible), you'll need to cut aluminum pipes to length. Aluminum is softer than steel, so cutting it isn't hard—but doing it cleanly is. Ragged edges can scratch workers, catch on materials, or prevent joints from seating properly. Here's what you need:
- Pipe Cutter: A manual pipe cutter (the kind with a rotating wheel and adjustable jaw) is perfect for aluminum pipes up to 2 inches in diameter. It creates clean, straight cuts with minimal effort. For larger pipes or bulk cutting, an electric pipe cutter (or a miter saw with a fine-tooth blade) is faster, but a manual cutter works for most small projects. Avoid using a hacksaw unless you have no other option—it's harder to keep the cut straight, and the teeth can leave rough edges.
- Deburring Tool: After cutting, you'll notice a small burr (a raised edge of metal) inside and outside the pipe. Left unaddressed, this burr can damage O-rings (if your joints have them) or make it hard to slide the pipe into the joint. A deburring tool (a small hand tool with a rotating blade) removes this in seconds. Run it around the inside and outside edges of the cut pipe—you'll feel the burr disappear. Trust me, this step takes 10 seconds and prevents a world of headaches later.
- Sandpaper or File: For stubborn burrs or to smooth out any remaining rough spots, a piece of fine-grit sandpaper (220-grit or higher) or a small metal file works. Fold the sandpaper around a block of wood for even pressure, and sand in one direction (not back and forth) to avoid creating new burrs.
4. Measuring and Marking Tools: Precision is Everything
We touched on tape measures earlier, but for complex installations (like building a multi-shelf material rack or aligning roller tracks), you need more than just length measurements. Here's the gear that ensures your structure is square, level, and aligned:
- Combination Square: This tool has a ruler, a right-angle head, and a protractor head, making it perfect for marking 90° or 45° angles on pipes. When cutting pipes for a corner joint, a combination square ensures your cut is exactly perpendicular, so the joint fits flush. It's also great for checking if two pipes are square to each other during assembly.
- Laser Level: A basic laser level (the kind that projects a straight line) is a game-changer for larger setups. Say you're installing a roller track along a wall—instead of using a spirit level every few feet, just mount the laser level and align the track to the beam. It's faster and more accurate, especially for long runs. Battery-powered models are affordable and easy to use—look for one with a magnetic base to attach to metal surfaces.
- String Line and Plumb Bob: Old-school but effective. For vertical alignment (like ensuring your workbench legs are straight), a plumb bob (a weighted string) hangs perfectly vertical. Pair it with a string line stretched between two points for horizontal alignment—great for making sure your flow rack shelves are level with each other.
5. Specialized Accessories Tools: For Roller Tracks, Casters, and More
Duplex aluminum pipe joints rarely work alone—they're part of larger systems that include roller tracks, casters, and aluminum profile accessories. Installing these components requires a few extra tools:
- Roller Track Placon Mount Bracket Tool: Roller tracks (used in flow racks or conveyors) attach to aluminum profiles using brackets like the roller track placon mount bracket. These brackets often have small, recessed screws that need a precision driver. A Phillips-head screwdriver with a narrow shaft (or a hex key, depending on the bracket) works here. I keep a magnetic-tipped precision driver in my toolkit specifically for these tiny screws—they have a knack for falling into the track if you're not careful.
- Caster Wheel Wrench: Adding caster wheels to a trolley or workbench? Most casters attach with bolts that require a socket wrench or a spanner. Look for a deep-socket wrench (to reach bolts recessed in the caster housing) in sizes 10mm or 12mm (common for aluminum caster mounts). A ratchet wrench speeds this up—you'll be tightening four caster bolts per unit, so every second counts.
- Rubber Mallet: Sometimes, even with clamps, pipes or joints need a gentle tap to seat properly—like sliding a pipe into a tight-fitting joint or aligning a roller track bracket with a profile slot. A rubber mallet delivers the force without damaging the aluminum. Avoid using a steel hammer unless you wrap it in a cloth—aluminum dents easily!
6. Safety Gear: Protect Yourself While You Work
Last but never least: safety tools. Aluminum cutting and installation might not seem "dangerous," but there are hidden risks—sharp pipe edges, flying metal shavings, or slippery caster wheels during setup. Don't skip these:
- Work Gloves: Leather or nitrile gloves protect your hands from burrs, sharp edges, or chemical irritation (from thread locker). Nitrile gloves are better for handling small parts—they offer more dexterity than leather.
- Safety Glasses: When cutting pipes or deburring, tiny metal shavings can fly into your eyes. Even if you're using a pipe cutter (which is relatively low-risk), safety glasses are a must. I've had a burr off a pipe and hit my cheek—glasses would have saved me the scare.
- Knee Pads: If you're working on the floor (installing casters, aligning lower shelves), knee pads save your joints. Look for ones with gel padding—they're more comfortable for long sessions.
Tool Comparison Table: Making Smart Choices
Still unsure which tools to prioritize? Here's a quick comparison of common tools, their uses, and why they're worth the investment:
| Tool | Best For | Pros | Cons | Worth the Splurge? |
|---|---|---|---|---|
| Hex Key Set (Ball-End) | Tightening hex screws in joints | Reaches angles, prevents stripping | Can bend if over-tightened | Yes—$15-20 for a good set |
| Aluminum Pipe Clamp | Holding pipes during assembly | Protects aluminum, adjustable pressure | Bulky to store | Yes—$20-30 each; get two |
| Manual Pipe Cutter | Clean cuts on small pipes | Portable, no power needed | Slow for bulk cutting | Yes—$15-25; essential for custom lengths |
| Roller Track Placon Mount Bracket Tool | Installing roller track brackets | Precision for tiny screws | Only useful for specific brackets | Yes if you're using roller tracks—$10-15 |
| Laser Level | Aligning long tracks or shelves | Fast, accurate for large setups | Expensive ($50+), overkill for small projects | No—start with a spirit level; upgrade later |

Step-by-Step Installation Guide: Putting It All Together
Now that you have your tools, let's walk through installing a basic structure using duplex aluminum pipe joints. We'll build a simple workbench with a roller track shelf—something you might find in an assembly line. This will cover cutting pipes, assembling joints, attaching accessories, and final checks.
Step 1: Plan Your Design and Gather Materials
Before you pick up a tool, sketch your design. Measure the space where the workbench will go, and note the dimensions: height, width, depth, and where you want the roller track shelf. For our example, we'll build a workbench that's 4 feet wide, 2 feet deep, and 36 inches tall, with a roller track shelf 18 inches from the top. List out the materials you need: aluminum pipes (we'll use 20mm diameter, common for workbenches), duplex aluminum pipe joints (4 for the corners, 2 for the roller track supports), an aluminum workbench top (we'll use a pre-cut aluminum honeycomb panel), roller track with roller track placon mount brackets, and four caster wheels.
Lay out all materials on a flat surface—a clean floor or a temporary table. Check that your duplex joints have all their screws (sometimes they come separately), and verify pipe lengths. If you're cutting your own pipes, now's the time: use your tape measure and combination square to mark cut lines, then cut with the pipe cutter. Deburr each end with the deburring tool—run your finger along the edge to make sure it's smooth. Pro tip: Label each pipe with its purpose (e.g., "left front leg") to avoid mix-ups later.
Step 2: Assemble the Frame with Duplex Joints
Start by building the two end frames of the workbench. Each frame is a rectangle made of two vertical pipes (legs) and two horizontal pipes (top and bottom rails). Take two vertical pipes (36 inches long) and two horizontal pipes (2 feet long). Attach a duplex aluminum pipe joint to each end of the horizontal pipes—these joints will connect to the vertical legs. Apply a drop of thread locker to each joint screw before tightening (this prevents loosening later).
Use your hex key to tighten the joint screws finger-tight first—you want the joint to hold, but still be adjustable. Now, attach the vertical legs to the joints. Stand the frame upright and use your spirit level to check if it's square: the vertical legs should be plumb (straight up and down), and the horizontal rails should be level. If not, loosen the joint screws slightly and adjust the pipes until the level reads true. Once square, fully tighten the screws with your hex key—don't overdo it; aluminum threads can strip. Repeat this for the second end frame.
Next, connect the two end frames with the remaining horizontal pipes (4 feet long) to form the full workbench frame. These pipes will run along the top and bottom of the end frames. Use duplex joints at each connection point, again starting with finger-tight screws, checking for level, then fully tightening. At this point, your frame should look like a rectangular cube—sturdy but still without the top or casters.
Step 3: Attach the Roller Track Shelf
Now, add the roller track shelf. Measure 18 inches from the top of the frame and mark the vertical legs—this is where the shelf will go. Cut two short horizontal pipes (2 feet long) to act as supports for the roller track. Attach these supports to the vertical legs using duplex joints, making sure they're level (use your spirit level again). Once the supports are in place, it's time to mount the roller track.
Lay the roller track on top of the supports. Position the roller track placon mount brackets at each end of the track and in the middle for support. Use your precision screwdriver to attach the brackets to the track, then secure the brackets to the horizontal supports with hex screws. Tighten until the track is firm—you should be able to roll items along it without the track wobbling. Test it with a small box or tool—if it sticks, check that the brackets are aligned and the track is level.
Step 4: Install Caster Wheels for Mobility
Flip the frame upside down so the bottom rails are facing up. Attach the caster wheels to the bottom of each vertical leg using the caster bolts and your socket wrench. Most casters have a mounting plate that lines up with holes in the duplex joint (or a separate mounting bracket). Tighten the bolts firmly—these take the weight of the workbench, so you don't want them coming loose. If your casters have brakes, test them to make sure they engage and release smoothly.
Step 5: Add the Workbench Top and Final Checks
Flip the frame right-side up and place the aluminum honeycomb panel on top. Secure it to the top rails using aluminum profile accessories like corner brackets or screws (pre-drill small holes in the panel to avoid cracking). Give the entire structure a gentle shake—if it wobbles, check for loose joints and tighten them. Roll it around to test the casters—they should move smoothly without sticking. Finally, run your hand along all edges and joints to ensure there are no sharp burrs or protruding screws. Your workbench is now ready for action!

Common Mistakes to Avoid (and How to Fix Them)
Even with the right tools, mistakes happen. Here are the ones I see most often, and how to fix (or avoid) them:
- Over-Tightening Joints: It's tempting to crank down on screws to "make sure they're tight," but aluminum is soft. Over-tightening strips threads or cracks joints. Fix: If a screw strips, replace the joint (it's cheaper than replacing the pipe). To avoid this, tighten until the joint is firm, then stop—you should feel resistance, but not have to use all your strength.
- Skipping Deburring: A rough pipe edge can cut someone or prevent a joint from seating. Fix: Always deburr after cutting—even if it seems "good enough." A 10-second deburr now saves a band-aid later.
- Misaligned Roller Tracks: Items get stuck, or the track sags. Fix: Use a laser level or string line during installation to ensure the track is straight. If it's already installed, loosen the roller track placon mount brackets, realign, and retighten.
- Using the Wrong Caster Size: Casters that are too small for the workbench weight will wear out quickly. Fix: Check the caster's weight rating before buying—most workbenches need casters rated for at least 50 lbs each (200 lbs total for four).
- Forgetting Thread Locker: Joints loosen over time with vibration. Fix: Disassemble the joint, clean the screws with alcohol, apply fresh thread locker, and retighten. Do this during installation to avoid the hassle.

Maintenance Tips: Keeping Your Tools (and Structure) in Top Shape
Your tools are an investment—treat them well, and they'll last for years. Here's how to maintain them:
- Clean Tools After Use: Aluminum shavings and dust can corrode metal tools. Wipe down hex keys, wrenches, and clamps with a dry rag after each use. For pipe cutters, oil the wheel occasionally to keep it rolling smoothly.
- Store in a Dry Place: Moisture is the enemy of metal tools. Keep them in a toolbox with a desiccant packet, or hang them on a wall rack in a dry area. Avoid leaving tools on concrete floors—they'll rust faster.
- Inspect for Wear: Check hex keys for bending, pipe cutter wheels for dullness, and clamp jaws for cracks. replace worn tools—using a bent hex key is a recipe for stripped screws.
- Lubricate Moving Parts: Adjustable wrenches, ratchets, and caster wheels benefit from a drop of oil (like 3-in-1 oil) on their hinges or bearings. This keeps them moving smoothly and prevents rust.
And don't forget your structure! A quick monthly check—tightening loose joints, cleaning roller tracks, and lubricating casters—will keep it running smoothly for years. Think of it like maintaining a car: a little care now prevents big breakdowns later.
Conclusion: Tools That Build Success
Installing duplex aluminum pipe joints might seem like a small part of building a lean system, but it's the foundation on which everything else rests. With the right tools—a good set of hex keys, a pipe cutter, an aluminum pipe clamp, and maybe a roller track placon mount bracket tool—you're not just building a workbench or a flow rack. You're building efficiency, safety, and reliability into your operation.
Remember, you don't need to buy everything at once. Start with the basics: hex keys, a pipe cutter, a level, and a rubber mallet. As you take on bigger projects, add specialized tools like the duplex joint wrench or laser level. The key is to invest in quality where it counts—tools that fit well, last long, and make your job easier.
At the end of the day, lean systems are about working smarter, not harder. And there's no smarter way to build them than with the right tools in hand. So grab your toolkit, measure twice, cut once, and get ready to see just how much smoother your workflow can be. Your future self (and your team) will thank you.