- Company Articles
- Products and Technology
- Installation And Maintenance
- Essential Tools for Installing 40 Aluminum Roller Track Grey Systems

Essential Tools for Installing 40 Aluminum Roller Track Grey Systems
Related Product
40 Aluminum Roller Track Grey
Durable and smooth-running modular roller rails. The system is fully assembled. The roller rail profile contains plastic rollers mounted on steel axles. Aluminum frame with plastic wheel make it anti corrosion,and material convey more smooth.
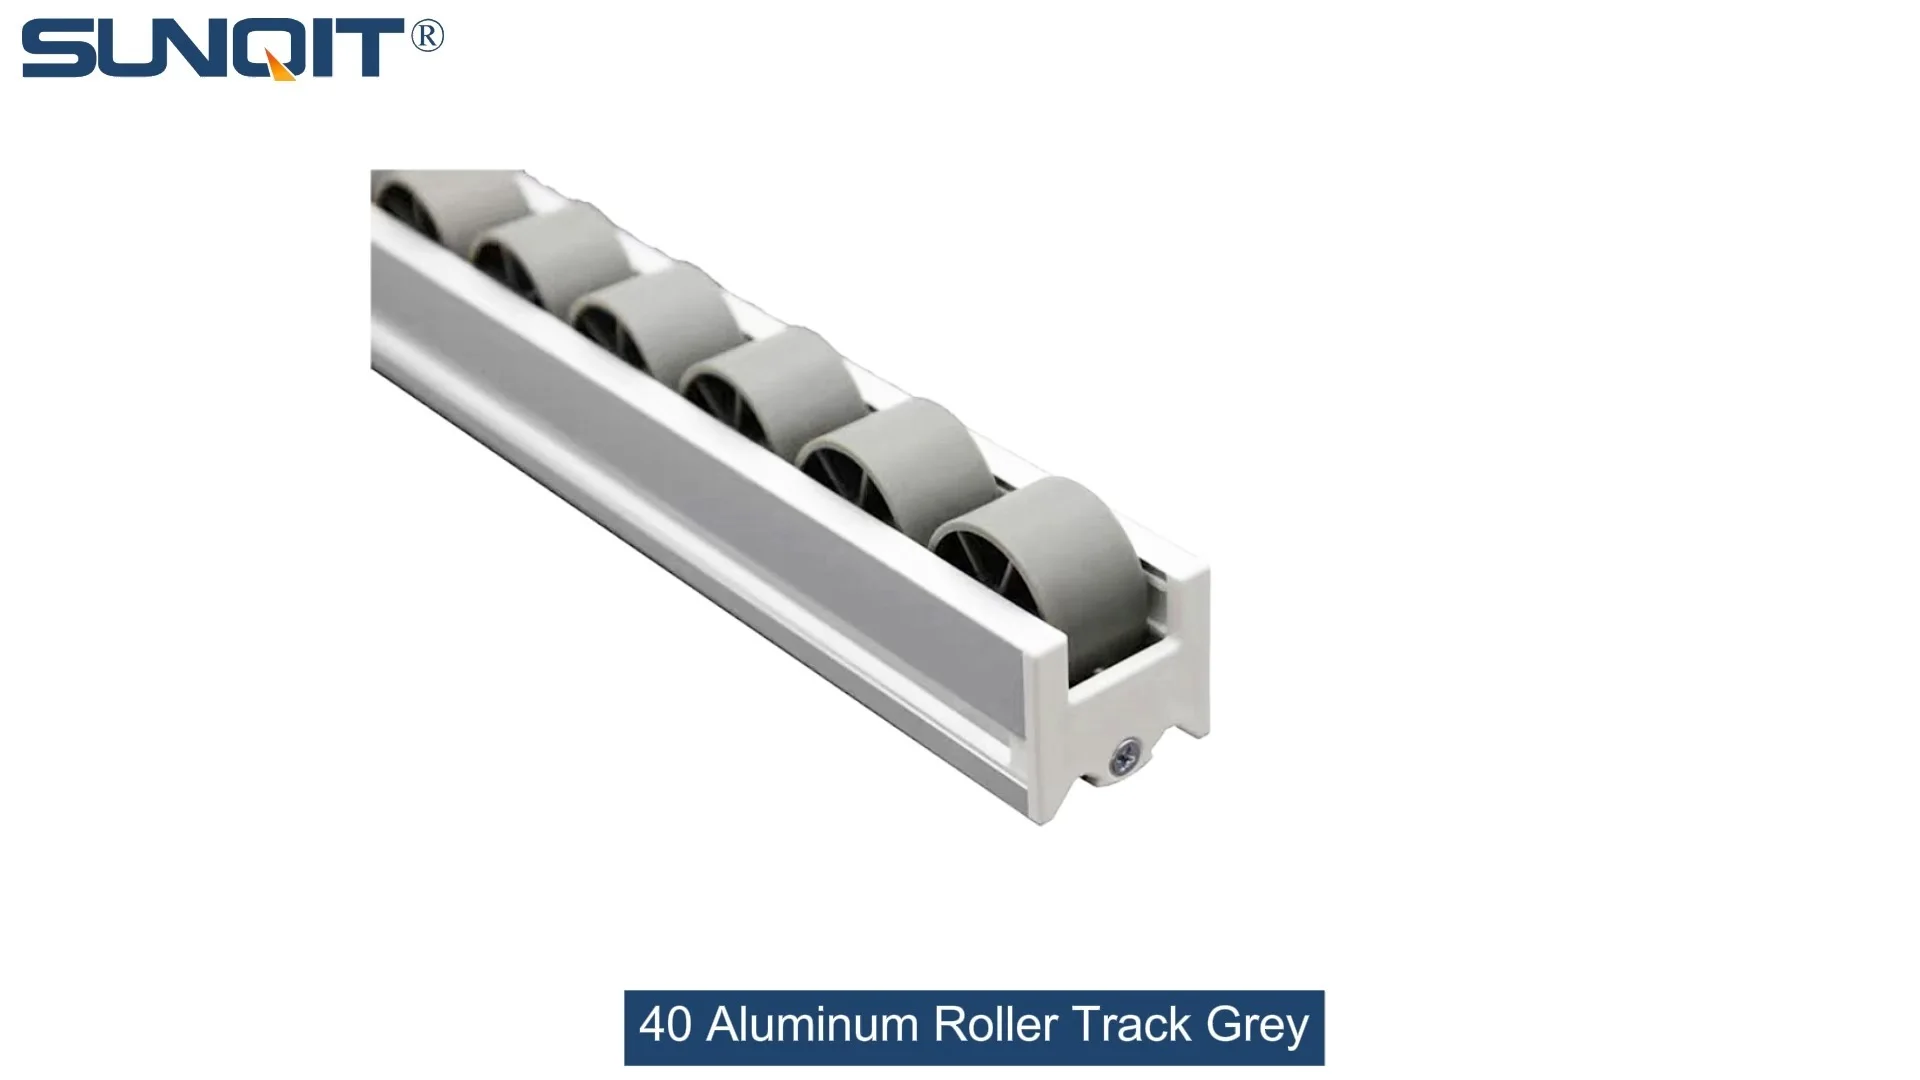
If you've ever walked through a busy warehouse, a manufacturing plant, or even a small workshop, you've probably seen them in action: sleek, metallic tracks guiding boxes, parts, and materials from one station to the next with smooth, almost effortless motion. Chances are, those systems were aluminum roller tracks—and among the most versatile and widely used options on the market is the 40 Aluminum Roller Track Grey. Designed for durability, flexibility, and seamless material flow, these tracks are the backbone of efficient production lines, assembly stations, and material handling setups. But here's the thing: even the best roller track system is only as good as its installation. A wobbly joint, a misaligned rail, or a loose connector can turn a smooth operation into a frustrating, inefficient mess. That's why having the right tools—and knowing how to use them—is critical. In this guide, we'll walk you through everything you need to know about installing 40 Aluminum Roller Track Grey systems, from the essential tools that should be in your toolkit to step-by-step tips for a flawless setup.
What Are 40 Aluminum Roller Track Grey Systems, Anyway?
Before we dive into tools, let's make sure we're all on the same page about what exactly we're installing. The 40 Aluminum Roller Track Grey is a specific type of material handling system characterized by its 40mm width, aluminum construction, and distinctive grey finish. Unlike heavier steel alternatives, aluminum offers a winning combination of strength and lightweight maneuverability, making it ideal for both fixed installations (like permanent production lines) and mobile setups (such as temporary workstations or turnover trolleys). The "roller track" part refers to the series of small, rotating wheels embedded along the track, which reduce friction and allow materials to glide forward with minimal effort—whether pushed manually or integrated into automated systems.
These systems are used across industries: in automotive plants to move parts between assembly stations, in e-commerce warehouses to sort packages, in electronics manufacturing to transport circuit boards, and even in small businesses to organize inventory. The grey finish isn't just for looks, either—it's often a powder-coated layer that resists scratches and corrosion, ensuring the track holds up to daily wear and tear. But to unlock all these benefits, installation has to be precise. Even a tiny misalignment can cause materials to jam, slow down, or even fall off the track. That's where the right tools come in.
Pre-Installation: Safety First, Setup Second
Before you even think about picking up a tool, let's talk about safety. Installing a roller track system involves handling metal components, using hand tools, and possibly lifting heavy parts (like aluminum profiles or long track sections). Skipping safety steps can lead to cuts, strains, or worse. Here's what you need to do first:
- Wear protective gear: At minimum, gloves (to protect against sharp edges on aluminum profiles) and safety glasses (to shield your eyes from metal shavings or dropped parts). If you're working with power tools (though we'll focus on hand tools here), add ear protection.
- Clear your workspace: You'll need room to lay out track sections, sort components, and move around freely. Remove clutter, secure loose cables, and make sure the floor is dry to prevent slips.
- Check your components: Unbox all parts and lay them out. You should have the 40 Aluminum Roller Track Grey sections, aluminum profiles (the frames that support the track), connectors (like roller track placon mounts for aluminum profile flat), aluminum guide rails (such as Aluminum Guide Rail A), and any accessories (casters, end stops, etc.). Refer to the supplier's checklist to ensure nothing is missing—better to find a missing part now than halfway through installation.
Pro Tip: Take a photo of the unboxed components before you start. If you run into confusion later (e.g., "Which connector goes here?"), you can refer back to the layout. It's also helpful for troubleshooting with the supplier if something is missing.

The Essential Tools: What You Need (and Why)
You don't need a fully stocked workshop to install a 40 Aluminum Roller Track Grey system, but you do need the right basics. Below is a breakdown of the must-have tools, along with why each one matters. We've organized them into categories to make it easy to check off your list.
| Tool Category | Specific Tool | Why You Need It |
|---|---|---|
| Fastening Tools | Hex Key Set (Allen Wrenches) | Most aluminum profile connectors and roller track joints use hex screws. A set with multiple sizes (including metric, since these systems often use metric hardware) ensures you can tighten every fastener. |
| Adjustable Wrench | For tightening larger nuts or bolts, especially on caster accessories or heavy-duty brackets. Look for one with a wide jaw opening to fit different sizes. | |
| Measurement & Alignment | 3-Foot Spirit Level | Critical for ensuring the track is perfectly horizontal. Even a 1-degree slope can cause materials to roll too fast or too slow. A longer level (3 feet or more) works better than a small one for spanning track sections. |
| Tape Measure (25+ Feet) | To measure distances between mounting points, ensure track sections are cut to the right length (if needed), and align aluminum profiles evenly. | |
| Carpenter's Pencil & Straightedge | For marking where to drill holes, attach brackets, or align Aluminum Guide Rail A. A straightedge (a long, flat piece of wood or metal) helps draw straight lines across aluminum profiles. | |
| Assembly Aids | Rubber Mallet | Sometimes, connectors or track sections need a gentle tap to seat properly. A rubber mallet won't damage the aluminum finish (unlike a steel hammer). |
| Clamps (2-4) | To hold track sections or aluminum profiles in place while you tighten fasteners. Locking clamps (like C-clamps) work best for keeping parts steady. | |
| Miscellaneous | Wire Brush or Sandpaper | To clean off any dirt, rust, or burrs on aluminum profile edges before assembly—this ensures a tight fit between parts. |
You might also need a few specialty tools depending on your setup. For example, if you're mounting the track to a wall or ceiling, you'll need a drill and masonry bits (for concrete) or wood bits (for studs). If your system includes casters (to make it mobile), caster accessories like mounting plates may require a socket set. But for most standard floor-mounted or tabletop 40 Aluminum Roller Track Grey systems, the tools above will cover it.

Step-by-Step Installation: Putting It All Together
Now that you're prepped and tooled up, let's walk through the installation process. We'll break it down into clear steps, with tips for avoiding common mistakes. Remember: take your time. Rushing leads to errors, and fixing mistakes later is always harder than doing it right the first time.
Step 1: Lay Out the Track and Frame
Start by laying out the 40 Aluminum Roller Track Grey sections on the floor (or workbench, if it's a small system). Arrange them in the order they'll be installed—this helps you visualize the final setup and ensures you have the right number of sections. Next, position the aluminum profiles (the support frames) parallel to the track sections. The profiles should be slightly longer than the track to allow for mounting brackets and end stops.
Use your tape measure to ensure the profiles are evenly spaced. For most systems, the distance between profiles should match the width of the track—check the supplier's specs to be sure. Mark the positions of the profiles on the floor with your pencil; this will help you keep them aligned as you secure them.
Step 2: Attach Roller Track Placon Mounts to Aluminum Profiles
Now it's time to connect the track to the frame. This is where roller track placon mounts for aluminum profile flat come into play. These small, flat brackets attach to the aluminum profiles and hold the 40 Aluminum Roller Track Grey in place. Here's how to do it:
- Place a roller track placon mount for aluminum profile flat on top of the aluminum profile, aligning the holes in the mount with the T-slots on the profile (T-slots are the grooves running along aluminum profiles that let you attach accessories).
- insert a T-bolt into the T-slot, then thread a nut onto the bolt through the mount's hole. Hand-tighten the nut to hold the mount in place.
- Repeat this every 12-18 inches along the aluminum profile—spacing the mounts evenly ensures the track is supported and won't sag.
- Once all mounts are in place, use an Allen wrench to fully tighten the nuts. Don't over-tighten—you could strip the threads or warp the aluminum profile.
Pro Tip: If the T-bolts keep spinning in the T-slot, try tilting the bolt slightly as you tighten the nut. This helps the bolt "grab" the slot and stay in place.
Step 3: Mount the 40 Aluminum Roller Track Grey
With the placon mounts secured, it's time to attach the track itself. Lift one section of 40 Aluminum Roller Track Grey and place it on top of the mounts. Align the track's pre-drilled holes with the holes in the mounts. insert bolts through the track and into the mounts, then hand-tighten nuts on the bottom (you may need to get under the frame for this, so a creeper or knee pads help).
Once the track is loosely attached, use your spirit level to check for level. Place the level across the track—if the bubble is off-center, adjust the mounts by loosening the T-bolt nuts and sliding the mounts up or down slightly. Once the track is level, fully tighten all bolts with your Allen wrench. Repeat this for each track section, making sure the ends of adjacent sections line up smoothly (there should be no gap or overlap—most tracks have tongue-and-groove ends to help with alignment).
Step 4: Install Aluminum Guide Rails
To keep materials from sliding off the track, you'll likely need guide rails. Aluminum Guide Rail A is a common choice—it's a slim, L-shaped rail that attaches to the side of the 40 Aluminum Roller Track Grey. Here's how to install it:
- Measure the length of the track and cut the Aluminum Guide Rail A to match (use a hacksaw or miter saw with a metal blade if needed; wear gloves to handle the cut ends, as they may be sharp).
- Align the guide rail along the edge of the track, ensuring it's flush with the track's top surface (this prevents materials from catching on the rail).
- Use small brackets (included with the rail) to attach the guide rail to the track or aluminum profile. Tighten the brackets with your Allen wrench—again, don't over-tighten.
Some systems use two guide rails (one on each side) for extra stability, especially for wide or heavy materials. If that's the case, repeat the process on the opposite side of the track.
Step 5: Add Casters (If Needed)
If your roller track system is mobile (e.g., a turnover trolley), you'll need to attach casters using caster accessories like mounting plates. Here's how:
- Flip the aluminum profile frame upside down so the bottom is facing up.
- Position caster mounting plates at each corner of the frame, aligning the plate holes with the T-slots in the profile.
- Secure the plates with T-bolts and nuts, then attach the casters to the plates using the included bolts (use a wrench to tighten—casters take more force than other components, as they support the system's weight).
- Once all casters are attached, flip the frame right-side up. Lock the brake casters (if included) to keep the system from rolling while you finish setup.
Step 6: Test and Adjust
You're almost done! Now it's time to test the system. Place a small box or container on the track and gently push it— it should roll smoothly, without jamming or tilting. If it sticks:
- Check alignment: Use your level to ensure the track is still horizontal. If not, adjust the roller track placon mounts.
- Tighten loose joints: Wiggle the Aluminum Guide Rail A—if it moves, tighten its brackets. Do the same for track sections and casters.
- Inspect rollers: Make sure all rollers on the 40 Aluminum Roller Track Grey spin freely. If a roller is stuck, clean it with a wire brush and apply a drop of lubricating oil (avoid heavy oils, which attract dust).
Repeat the test with heavier items (up to the system's weight limit) to ensure it holds up. If everything works, congratulations—you've installed your 40 Aluminum Roller Track Grey system!

Troubleshooting Common Installation Headaches
Even with careful work, you might run into issues. Here are solutions to the most common problems:
- Track is uneven: If the bubble in your level is off, check if the aluminum profiles are sitting on a flat surface. If the floor is uneven, use shims (small pieces of wood or metal) under the profiles to level them.
- Connectors won't tighten: Stripped threads? Try a slightly larger bolt or wrap the threads with Teflon tape. If the T-slot is damaged, use a different slot on the aluminum profile.
- Rollers are noisy: This usually means they need lubrication. Use a light machine oil or silicone spray (avoid WD-40, which is a cleaner, not a lubricant).
- Guide rails are too high/low: If materials catch on the rails, loosen the brackets and adjust the rail height until it's flush with the track.
Maintenance: Keeping Your System Rolling Smoothly
Installation is just the start—proper maintenance will keep your 40 Aluminum Roller Track Grey system working for years. Here's what to do regularly:
- Clean the track: Use a dry cloth to wipe off dust and debris from rollers and Aluminum Guide Rail A. For stubborn grime, use a mild soap and water (avoid harsh chemicals that can damage the powder coating).
- Lubricate rollers: Every 3-6 months (or more often if used heavily), apply a drop of oil to each roller axle. Wipe off excess to prevent attracting dust.
- Tighten fasteners: Over time, vibrations can loosen bolts. Check all connections (rollers, brackets, casters) monthly and tighten with your Allen wrench or wrench.
- Inspect for damage: Look for bent aluminum profiles, cracked brackets, or worn rollers. replace damaged parts promptly—small issues can turn into big problems.
Final Thoughts: The Right Tools Make All the Difference
Installing a 40 Aluminum Roller Track Grey system might seem daunting at first, but with the right tools and a little patience, it's totally doable. From measuring with a level to tightening with an Allen wrench, each tool plays a role in ensuring your system is safe, efficient, and long-lasting. And remember: this isn't just about putting parts together—it's about building a foundation for smoother workflows, faster production, and less stress in your workspace.
So, grab your hex key set, line up those aluminum profiles, and get ready to roll. Your future self (and your team) will thank you for taking the time to do it right.