- Company Articles
- Products and Technology
- Installation And Maintenance
- Essential Tools for Lean Pipe Clamp B Installation: A Complete List

Essential Tools for Lean Pipe Clamp B Installation: A Complete List
Related Product
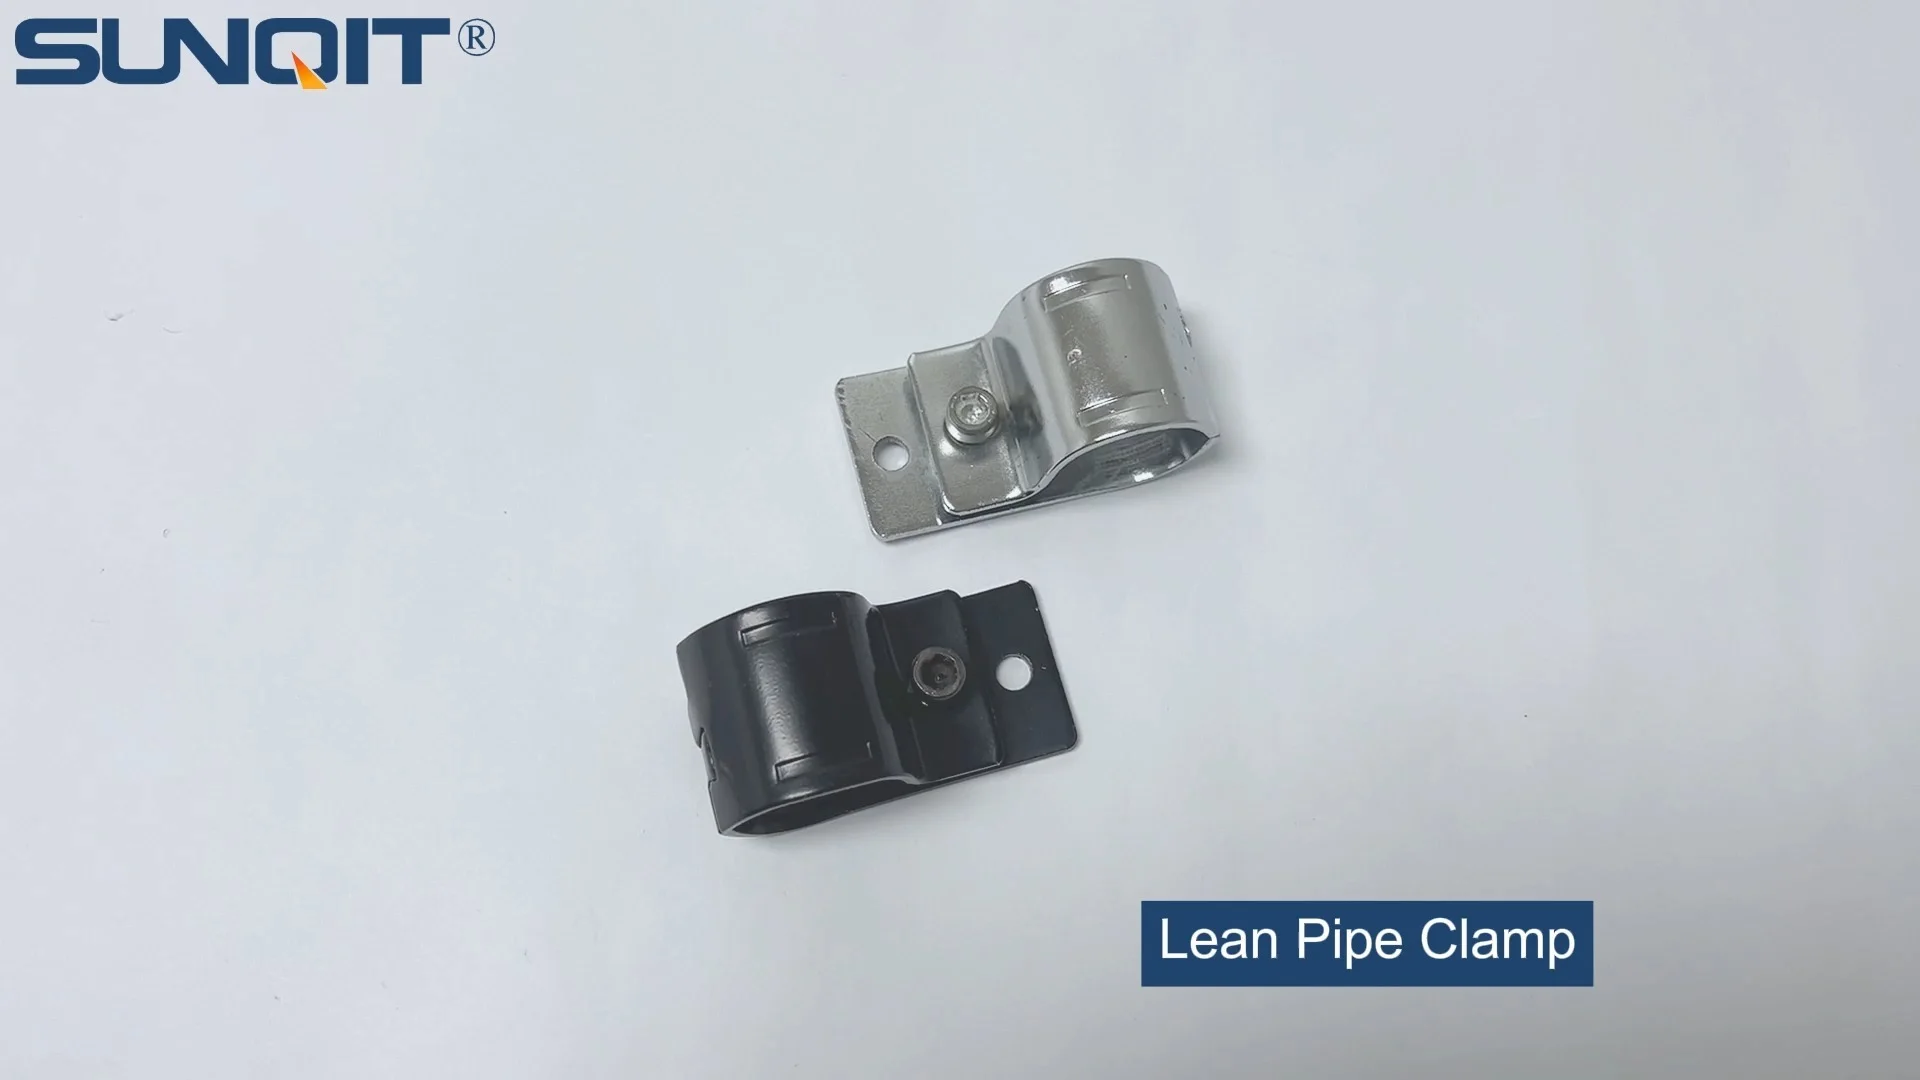
Lean Pipe Clamp
Lean pipe clamp is used for rack system hang monitor or other panel for workbenck, flowrack in production daily use.
Walk into any well-run manufacturing facility, warehouse, or workshop, and you'll likely spot the backbone of lean operations: sturdy workbenches, streamlined flow racks, and nimble turnover trolleys. These aren't just pieces of equipment—they're the silent architects of efficiency, keeping workflows moving, materials organized, and teams focused. At the heart of these systems lies a small but mighty component: the Lean Pipe Clamp B . This unassuming connector is what holds lean pipe structures together, turning basic aluminum or steel pipes into robust, customizable workspaces. But here's the truth: even the best clamp can fail if installed with the wrong tools. Loose joints, wobbly frames, and premature wear are all too common when installers skip the essentials. Today, we're diving into the tools that transform a frustrating, error-prone installation into a smooth, reliable process. Whether you're a seasoned maintenance tech or a small business owner setting up your first lean workstation, this guide will ensure you have everything you need to get the job done right—safely, efficiently, and with results that stand the test of time.
First Things First: What Is Lean Pipe Clamp B, Anyway?
Before we jump into tools, let's make sure we're all on the same page about the star of the show: Lean Pipe Clamp B . If you've worked with lean pipe systems—think workbenches, material racks, or conveyor frames—you've probably seen these clamps in action. They're the unsung heroes that fasten pipes together at angles, creating the rigid, modular structures that make lean manufacturing so adaptable. Typically made from zinc-plated steel or corrosion-resistant alloys, Lean Pipe Clamp B is designed to grip pipes tightly while allowing for quick adjustments (a must in dynamic work environments). Its U-shaped design, paired with a hex bolt or lever, cinches around two pipes, turning loose components into a solid frame. But here's the catch: its effectiveness hinges entirely on proper installation. A clamp that's too loose will wobble under weight; one overtightened might crack or strip, leaving you with a unstable structure and a costly replacement. That's why the tools you use matter just as much as the clamp itself.
Lean Pipe Clamp B is also part of a larger ecosystem: Lean Pipe and Accessories . This means it needs to play nice with other components—pipes (aluminum, steel, or PE-coated), Lean Pipe Joint s, caster wheels, and workbench surfaces. Using mismatched tools or cutting corners during installation can throw off this compatibility, leading to gaps between parts or uneven weight distribution. For example, if you skimp on deburring the pipe ends before clamping, sharp edges might damage the clamp's inner lining over time, weakening the connection. Or if you skip using a level, your workbench could slope, causing tools or materials to slide off mid-process. In short, installing Lean Pipe Clamp B isn't just about "screwing something tight"—it's about precision, care, and the right toolkit.
The Essential Toolkit: What You Need (and Why)
Building a reliable lean pipe structure starts with having the right tools at your fingertips. Below is a curated list of must-haves, organized by category, to ensure your Lean Pipe Clamp B installation is secure, efficient, and long-lasting. Each tool serves a specific purpose—skip one, and you risk compromising safety, stability, or time.
| Tool Category | Tool Name | Purpose | Key Features to Look For | Pro Tips |
|---|---|---|---|---|
| Fastening Tools | Hex Key Set (Allen Wrenches) | Tightening/loosening the clamp's hex bolt | Ball-end tips for angled access; SAE and metric sizes (most clamps use 5mm or 3/16") | Invest in a foldable set for portability—you'll reach for this tool more than any other. |
| Torque Wrench | Ensuring consistent, precise bolt tightness | Adjustable torque settings (10-50 Nm range); audible click when target is reached | Over-tightening is a common mistake! Check the clamp manufacturer's specs (usually 15-25 Nm). | |
| Rubber Mallet | Gently seating pipes into clamps without damaging them | Non-marring rubber head; wooden or fiberglass handle for grip | Avoid metal hammers—they can dent pipes or crack the clamp's coating. | |
| Thread Locker (Medium-Strength) | Preventing bolts from loosening due to vibration | Blue formula (removable with hand tools); applicator brush for precision | Apply a small drop to the bolt threads before tightening—don't overdo it (excess can seep into the clamp). | |
| Measuring & Alignment Tools | Digital Caliper | Checking pipe diameter and clamp fit | Stainless steel body; 0-6" range; LCD display for accuracy | Verify pipe diameter matches clamp specs (e.g., 28mm pipes need 28mm clamps). |
| Spirit Level (24" or longer) | Ensuring horizontal/vertical alignment of clamped structures | Magnetic edge for metal pipes; three vials (level, plumb, 45°) | Check alignment before fully tightening clamps—adjusting later is harder. | |
| Tape Measure (25'+) | Measuring pipe lengths and spacing between clamps | Locking mechanism; fractional and metric markings; reinforced end hook | Mark pipe cut lines with a pencil twice —measure once, cut once! | |
| Surface Prep Tools | Deburring Tool | Removing sharp edges/burrs from cut pipe ends | Double-sided blade (internal/external deburring); ergonomic grip | Sharp burrs can tear gloves or damage the clamp's inner lining—always deburr after cutting. |
| Wire Brush | Cleaning pipe surfaces of rust, dirt, or oil | Stainless steel bristles; compact size for tight spaces | Clean pipes before clamping—debris can create gaps, weakening the connection. | |
| Safety Gear | Cut-Resistant Gloves | Protecting hands from sharp burrs, metal edges, or tools | Level 5 cut resistance; breathable material (nitrile or HPPE) | Wear them even if you're "just tightening a bolt"—burrs are sharper than they look. |
| Safety Glasses | Shielding eyes from flying debris (e.g., metal shavings during deburring) | ANSI Z87.1 certified; anti-fog coating for all-day wear | Deburring can send tiny metal flakes flying—don't skip eye protection. | |
| Knee Pads | Protecting knees during low-to-the-ground installations | Thick foam padding; adjustable straps; breathable fabric | Essential if you're installing clamps on trolleys or low racks—knees will thank you later. | |
| Miscellaneous | Magnetic Parts Tray | Keeping small parts (bolts, washers) organized and within reach | Strong magnetic base; non-slip bottom; compact size | Prevents lost bolts—nothing derails a project faster than hunting for a missing fastener. |
You might notice this list doesn't include power tools like impact drivers—and that's intentional. While power tools can speed up some tasks, Lean Pipe Clamp B installation requires finesse. Impact drivers deliver sudden torque that can easily overtighten bolts, cracking the clamp or stripping threads. Stick to hand tools for this job; they give you better control, especially when feeling for "just right" tightness. The only exception? If you're installing hundreds of clamps (e.g., in a large-scale warehouse setup), a cordless screwdriver with adjustable torque settings can save time—but always test on a scrap piece first to dial in the correct setting.

Step-by-Step Installation: Putting the Tools to Work
Now that you have your toolkit ready, let's walk through installing Lean Pipe Clamp B like a pro. We'll use a common scenario: building a simple material rack (similar to Material Rack B (3 row and 3 floor) from the product list), where clamps connect vertical and horizontal pipes. Follow these steps to ensure a stable, long-lasting structure.
Step 1: Prep Your Workspace and Materials
Start by clearing a flat, clean area—ideally a workbench or level floor. Lay out all your materials: pipes (cut to length, deburred), Lean Pipe Clamp Bs, Lean Pipe Joint s (if using), and any accessories like caster wheels (part of Caster and Accessories if building a mobile rack). Use your magnetic parts tray to sort bolts and washers—this prevents lost pieces. Wipe down pipes with a wire brush to remove dust or oil; even a small amount of grime can weaken the clamp's grip.
Step 2: Dry-Fit the Structure
Before tightening any clamps, do a "dry fit." Assemble the pipes and clamps loosely—just enough to hold the shape. This lets you check alignment, spacing, and overall fit. For example, if you're building a 3-tier rack, place vertical pipes at the corners, then attach horizontal pipes with clamps at each tier height. Use your spirit level to ensure vertical pipes are plumb (no leaning!) and horizontal pipes are level. If something looks off—like a pipe that's too short or a clamp that sits crooked—now's the time to adjust. Dry fitting saves you from disassembling and redoing work later.
Step 3: Position the Clamp and insert Pipes
Take one Lean Pipe Clamp B and open it (if it has a hinge) or slide it over the end of a horizontal pipe. Position it where the vertical pipe will connect—use your tape measure to mark the exact spot if needed. Slide the vertical pipe into the clamp, ensuring both pipes meet at a 90° angle (use the square from your measuring tools to confirm). The clamp should sit flush against both pipes—no gaps. If the pipes are loose inside the clamp, double-check the diameter (e.g., 28mm clamps won't grip 30mm pipes). If they're too tight, check for burrs you might have missed—deburr again if needed.
Step 4: Tighten the Bolt (Gently!) with Hex Key
insert the hex bolt through the clamp's holes, then hand-tighten it with your hex key until it's snug. Don't crank it yet—you still need to adjust alignment. Hold the spirit level against the horizontal pipe: is it level? If not, nudge the pipe up or down until the bubble centers. Then check the vertical pipe with the level—plumb? Adjust as needed. Once aligned, use the hex key to tighten the bolt a little more—until you feel resistance. This is where "feel" matters: the clamp should grip the pipes firmly, but the bolt shouldn't be so tight that the clamp deforms (look for cracks or bending around the bolt hole).
Step 5: Apply Torque (If Needed) and Thread Locker
For critical applications (e.g., racks holding heavy tools), use your torque wrench to tighten the bolt to the manufacturer's spec (usually 15-25 Nm). Attach the hex key socket to the torque wrench, set the desired torque, and slowly turn until you hear the "click"—that's your cue to stop. Then, add a drop of medium-strength thread locker to the bolt head (where it meets the clamp). This prevents loosening from vibration, especially if the rack will be moved (e.g., with casters). Wipe away any excess thread locker with a rag—you don't want it gumming up moving parts.
Step 6: Repeat and Test for Stability
Repeat steps 3-5 for all remaining clamps. Once the structure is fully assembled, give it a gentle shake—does it wobble? If yes, check for loose clamps or misaligned pipes. Tighten any bolts that feel too loose, but avoid overtightening. Then, test it with weight: place a few boxes or tools on the rack (simulating its intended use). Let it sit for an hour—sometimes clamps settle slightly under load. If it still feels stable, you're good to go! If not, revisit your alignment or check for damaged clamps (replace any that are cracked or bent).

Common Mistakes to Avoid (Save Time and Headaches)
Even with the right tools, small missteps can lead to big problems. Here are the most common mistakes installers make with Lean Pipe Clamp B—and how to steer clear of them.
Mistake 1: Skipping Deburring
Sharp burrs on pipe ends are more than just a safety hazard—they can damage the clamp's inner lining over time. When you tighten the clamp, the burr presses into the clamp material, creating weak spots that crack under repeated stress. Always deburr pipe ends before clamping. Run the deburring tool around the inside and outside of the pipe until the edge feels smooth to the touch. A quick 10-second step that prevents costly repairs later.
Mistake 2: Overtightening (The #1 Culprit)
It's tempting to crank the hex key until the bolt won't turn—"tight is better, right?" Wrong. Lean Pipe Clamp B is designed to grip pipes with even pressure, not crush them. Overtightening can: (1) Crack the clamp's plastic or metal body; (2) Strip the bolt threads; (3) Dent or deform the pipe, weakening its structural integrity. If you hear a "creaking" sound while tightening, stop—you've gone too far. Err on the side of "snug but not crushing," and use a torque wrench for precision.
Mistake 3: Ignoring Alignment
A rack or workbench that's "close enough" to level might seem fine at first, but over time, uneven weight distribution will strain the clamps. Materials slide off sloped surfaces, causing spills or damage. The vertical pipes lean, putting extra stress on the bottom clamps, which can loosen or break. Always use a spirit level during dry fitting and after tightening. For large structures, check alignment at multiple points—don't assume one level reading covers the whole setup.
Mistake 4: Using Mismatched Parts
Not all lean pipe components are created equal. Mixing Lean Pipe Clamp B with incompatible pipes (e.g., 30mm clamps on 28mm pipes) or low-quality Lean Pipe and Accessories is a recipe for failure. The clamp won't grip properly, leading to wobbling or slipping. Always buy clamps and pipes from the same supplier (or verify compatibility) to ensure a tight, secure fit. Cheap knockoff clamps often have inconsistent sizing or weak materials—invest in quality, and you'll avoid rework.

Long-Term Care: Keeping Clamps (and Tools) in Top Shape
Installing Lean Pipe Clamp B is just the first step—maintaining your structure and tools ensures it lasts for years. Here's how to keep everything in working order:
For Clamps and Structures:
- Inspect monthly: Check clamps for cracks, rust, or loose bolts. Tighten any bolts that have loosened (use your hex key—no need for torque wrench unless they're very loose).
- Clean annually: Wipe down pipes and clamps with a damp cloth to remove dust and grime. For metal clamps, apply a light coat of anti-rust spray (avoiding plastic parts) if used in humid environments.
- replace worn parts: If a clamp is cracked, stripped, or bent, replace it immediately. Don't "make do" with damaged components—they compromise safety.
- Adjust for wear: Over time, pipes might settle or clamp grip might weaken. If you notice wobbling, check alignment again and retighten bolts (add thread locker if needed).
For Your Tools:
- Clean after use: Wipe hex keys and torque wrenches with a dry cloth to remove oil or debris. Store them in a toolbox or pouch to prevent rust.
- Calibrate torque wrenches: Have your torque wrench calibrated every 1-2 years (or after heavy use) to ensure accuracy—most hardware stores offer this service.
- replace worn bits: Hex keys with rounded ends slip and strip bolts—replace them at the first sign of wear.
- Organize your toolkit: Keep tools in a dedicated box with dividers (label sections for "clamp tools" to save time). A messy toolkit leads to lost tools and frustration.
Final Thoughts: Tools = Trust in Your Work
At the end of the day, installing Lean Pipe Clamp B is about more than building a rack or workbench—it's about creating a workspace you can trust. A workspace where tools don't wobble, materials don't slide, and your team can focus on what matters: doing great work. The tools in your toolkit aren't just gadgets—they're the foundation of that trust. A torque wrench ensures bolts won't loosen; a level keeps surfaces steady; a deburring tool protects hands and clamps alike. By investing in the right tools and following these steps, you're not just building a structure—you're building efficiency, safety, and peace of mind.
And remember: lean manufacturing is all about continuous improvement. Start with this toolkit, refine your process, and don't be afraid to adapt. Maybe you'll find a better way to organize your clamps, or a new pro tip for using your spirit level. Whatever you do, keep learning—and keep those clamps tight.