- Company Articles
- Products and Technology
- Product knowledge
- Five Way Straight Lean Pipe Joint Chrome Dimensions: How to Measure for Perfect Fit

Five Way Straight Lean Pipe Joint Chrome Dimensions: How to Measure for Perfect Fit
Related Product
Five Way Straight Lean Pipe Joint Chrome
Five way straight lean pipe joint, for 5 pcs 28mm lean pipe connect in straight angle,which used widely in workbench, flow rack, hand trolley frame connection.
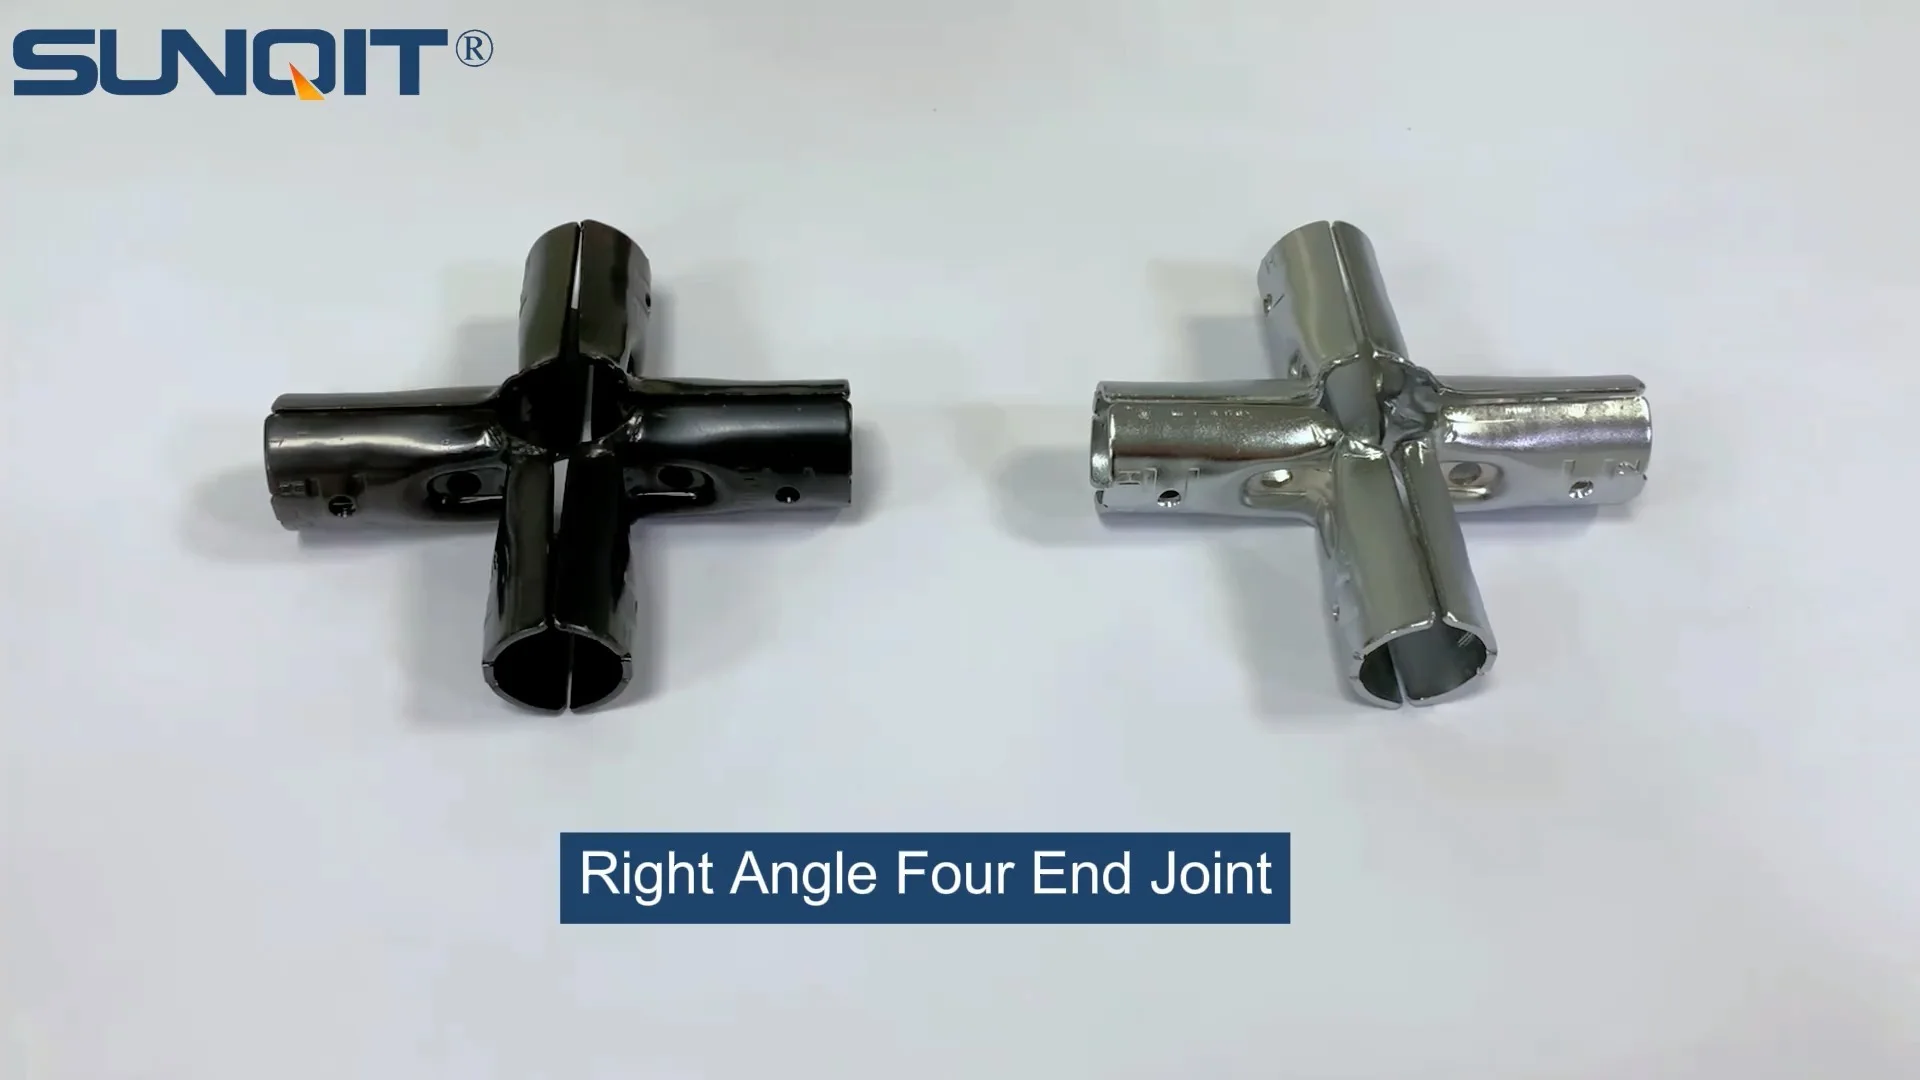
In the world of lean manufacturing and workspace optimization, every component plays a quiet but crucial role in keeping operations running smoothly. From the workbench where assembly happens to the roller track that moves materials effortlessly, each part must fit together like pieces of a well-designed puzzle. Among these components, the five way straight lean pipe joint chrome stands out as a unsung hero—connecting multiple lean pipes in different directions to build sturdy, flexible structures like material racks, workstations, and production lines. But here's the thing: even the sturdiest joint can fail if its dimensions aren't measured correctly. A fraction of a millimeter off, and you might end up with wobbly shelves, misaligned roller tracks, or worse, a safety hazard. In this guide, we'll walk through everything you need to know about measuring this critical lean pipe accessory to ensure your next project fits together seamlessly.
What Is a Five Way Straight Lean Pipe Joint Chrome?
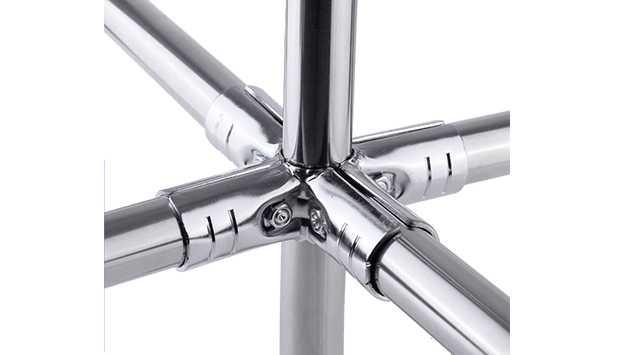
Before diving into measurements, let's get familiar with the star of the show: the five way straight lean pipe joint chrome. As the name suggests, this joint is designed to connect five lean pipes at once, typically in straight and perpendicular directions. Picture a central hub with five openings (ports) where pipes can be inserted and secured—think of it as the "crossroads" of your lean system. The "chrome" in its name refers to the protective chrome plating, which adds durability, corrosion resistance, and a sleek finish, making it ideal for both indoor and semi-outdoor environments where moisture or wear might be a concern.
Unlike simpler two-way or three-way joints, the five way variant is a workhorse for complex structures. Need to build a material rack with vertical supports, horizontal shelves, and diagonal bracing? Or a workstation with tool hooks, parts bins, and a side table? This joint handles the multi-directional load, distributing weight evenly across connected pipes. But its versatility comes with a catch: each of its five ports must align perfectly with the lean pipes they're meant to hold. If even one port is mismeasured, the entire structure could be unstable, leading to inefficiencies, wasted materials, or even accidents.
Why Precise Measurement Matters
You might be thinking, "It's just a metal joint—how precise do I really need to be?" The answer: very. Lean systems thrive on efficiency, and efficiency starts with stability. A loosely fitted joint can cause pipes to shift over time, leading to wobbly workbenches that make assembly tasks frustrating, or material racks that sag under the weight of components. In a busy production line, this isn't just a minor annoyance; it can slow down workflows, increase the risk of tools or parts falling, and even compromise product quality if workers have to compensate for an unstable surface.
Consider this scenario: A manufacturer sets up a new assembly station using a five way joint to connect the main workbench frame, a side shelf for tools, and a vertical post for hanging cables. If the joint's port for the side shelf is slightly too large, the shelf pipe might rotate or slip, causing tools to slide off. If the vertical post port is too small, forcing the pipe in could crack the joint or strip the threads, rendering it useless. In both cases, the team would have to stop production, disassemble the structure, and either replace the joint or rework the pipes—costing time and money that could have been avoided with accurate measurements.
Precision also matters for scalability. Lean systems are designed to be adaptable; maybe today you need a small workbench, but next month you want to expand it into a full production line with conveyor belts and roller tracks. If your initial joints are measured correctly, adding new components later is straightforward. Mismeasured joints, however, can create a domino effect of misalignment, making expansion a headache rather than a seamless upgrade.
Key Dimensions to Measure
Now, let's break down the critical dimensions you need to measure on a five way straight lean pipe joint chrome. While exact measurements can vary slightly by manufacturer, these are the standard metrics that will ensure compatibility with your lean pipes and overall system.
| Dimension | Description | Typical Measurement (Chrome Five Way Joint) | Why It Matters |
|---|---|---|---|
| Port Inner Diameter | The diameter of the opening where the lean pipe is inserted | 28mm (for standard 28mm lean pipe) | Ensures the pipe fits snugly without being too loose (risk of slipping) or too tight (risk of cracking the joint) |
| Port Depth | How far the pipe inserts into the joint | 30-35mm | Determines how much of the pipe is supported by the joint; insufficient depth can lead to weak connections |
| Body Length (Overall) | Distance from the frontmost to the rearmost port (longest axis) | 85-90mm | Affects spacing between connected pipes; critical for aligning components like shelves or roller tracks |
| Body Width (Across Perpendicular Ports) | Distance across ports that are perpendicular to the length axis | 65-70mm | Ensures the joint doesn't interfere with adjacent components (e.g., a workbench top or material bin) |
| Thread Size (If Applicable) | Diameter and pitch of threads for set screws (used to secure pipes) | M5 or M6 (metric) | Ensures the set screw fits and can tighten securely against the pipe |
| Chrome Plating Thickness | Thickness of the chrome layer on the joint's surface | 8-12 microns | Affects durability and corrosion resistance; thinner plating may wear faster in high-use areas |

Tools You'll Need for Accurate Measurements
Measuring a five way joint isn't complicated, but it does require the right tools. Here's what you'll need to get precise results:
- Digital Calipers: The gold standard for measuring small, precise dimensions like port inner diameter and port depth. Look for a pair with a resolution of at least 0.01mm for accuracy.
- Tape Measure or Ruler: For larger dimensions like body length and width. A steel ruler with millimeter markings is ideal for straight-line measurements.
- Thread Gauge: If the joint uses set screws (most do), a thread gauge will help you identify the thread size (e.g., M5 vs. M6) and pitch, ensuring you have the right replacement screws if needed.
- Feeler Gauge (Optional): Useful for checking gaps between the joint and a test pipe, ensuring a tight but not overly restrictive fit.
- Flat Surface: To lay the joint on while measuring, ensuring it doesn't rock or tilt, which could throw off readings.
Pro tip: Avoid using a flexible tape measure for small dimensions like port diameter—it's too easy to bend, leading to inaccurate readings. Digital calipers, while an investment, are worth it for anyone working regularly with lean pipe systems, as they eliminate guesswork and provide consistent results.
Step-by-Step Guide to Measuring the Five Way Joint
Now that you have your tools ready, let's walk through measuring each critical dimension. Take your time with each step—rushing can lead to mistakes that only become apparent later, when you're trying to assemble the joint with pipes.
Step 1: Measure the Port Inner Diameter
The port inner diameter is the most important measurement, as it determines whether your lean pipe will fit. Here's how to measure it:
- Lay the joint flat on a clean, flat surface. Choose one of the five ports to start with (they should all be the same size, but it's good to check a few to be sure).
- Open the jaws of your digital calipers and insert them into the port, making sure they're aligned straight (not at an angle). Gently close the jaws until they touch the inner walls of the port.
- Read the measurement on the calipers. For standard lean pipe, you're likely looking for around 28mm (since most lean pipes have an outer diameter of 28mm). If the port is slightly larger (e.g., 28.1-28.2mm), that's normal—manufacturers leave a small tolerance to account for pipe coatings (like PE coated lean pipe) or minor variations in pipe diameter.
- Repeat this for 2-3 other ports to ensure consistency. If you find a port that's significantly smaller or larger than the others, the joint may be defective and should be replaced.
Step 2: Measure the Port Depth
Port depth is how far the pipe will insert into the joint. A deeper port provides more support, which is important for vertical pipes or those carrying heavy loads. To measure it:
- Take a straight, rigid object (like a steel ruler or a small dowel) and insert it into the port until it hits the back (the inner wall of the joint's hub).
- Mark the point where the object exits the port with a pencil or tape.
- Remove the object and measure the distance from the mark to the end using your ruler or calipers. Typical depths range from 30-35mm. If the depth is less than 25mm, the pipe may not be supported well enough, increasing the risk of bending or slipping.
Step 3: Measure the Body Length and Width
Body length and width determine how much space the joint will take up in your structure, which is critical for fitting it into tight spaces (e.g., between a workbench and a wall) or aligning it with other components like roller tracks or shelves.
- Body Length: Identify the two ports that are directly opposite each other (the "straight" ports). Place one end of your ruler at the outer edge of one port and extend it to the outer edge of the opposite port. This is the body length. For most five way joints, this is around 85-90mm.
- Body Width: Find two ports that are perpendicular to the length axis (e.g., if length is left-to-right, width might be front-to-back). Measure from the outer edge of one to the outer edge of the other. Typical widths are 65-70mm.
Step 4: Check the Thread Size (If Using Set Screws)
Most five way joints use set screws to secure pipes in place—small screws that tighten against the pipe, preventing it from sliding out. To measure the thread size:
- Locate the set screw hole (usually on the side of the joint, near the port opening). If the screw is already in place, remove it carefully using a screwdriver.
- Use a thread gauge to determine the diameter and pitch. For metric threads, this will be labeled as "Mx" (e.g., M5 for 5mm diameter). If you don't have a thread gauge, you can measure the outer diameter of the screw with calipers (e.g., an M5 screw has an outer diameter of ~5mm).
- Note the length of the set screw as well—too short, and it won't grip the pipe; too long, and it might protrude into the port, preventing the pipe from inserting fully.
Step 5: Measure Chrome Plating Thickness (Optional)
While not critical for fit, chrome plating thickness affects durability. Thicker plating (8-12 microns) resists scratches and corrosion better than thinner layers. To check this, you'd need a specialized tool like a coating thickness gauge, which uses magnetic induction to measure the plating. If you're working in a harsh environment (e.g., a factory with high humidity or oil exposure), this is worth verifying with the supplier before purchasing.
Common Measurement Mistakes to Avoid
Even with the right tools, it's easy to make small errors that can derail your project. Here are the most common mistakes to watch for:
- Ignoring Pipe Coatings: If you're using PE coated lean pipe, remember that the coating adds ~0.5-1mm to the pipe's outer diameter. A joint with a 28mm port might fit a bare steel pipe perfectly but be too tight for a coated one. Always measure your pipes first, then ensure the joint's ports are 0.1-0.2mm larger than the pipe's OD to account for the coating.
- Measuring at an Angle: When measuring port diameter or body length, it's easy to tilt the calipers or ruler, leading to a larger-than-actual measurement. Always keep tools perpendicular to the joint's surface and double-check alignment.
- Overlooking Tolerances: No manufacturing process is perfect—joints and pipes will have minor variations (typically ±0.1-0.2mm). If your measurement is slightly outside the "typical" range, it's not necessarily a problem, but if it's more than ±0.5mm, the joint may be defective.
- Forgetting to Account for Joint Orientation: The five way joint has ports in different directions—make sure you're measuring the correct axis (length vs. width) for your project. For example, if you're building a horizontal shelf, the body width will determine how much space the joint takes up between the shelf and the vertical support.
Tips for Ensuring a Perfect Fit
Now that you know how to measure, here are some pro tips to ensure your joint and pipes fit together like they were made for each other:
- Test Fit with Sample Pipes: If possible, bring a short piece of your lean pipe to the supplier or use a spare pipe to test fit the joint before buying in bulk. A quick test can reveal issues like misaligned ports or overly tight tolerances.
- Consult Supplier Spec Sheets: Reputable lean pipe suppliers provide detailed specs for their joints, including all the dimensions we've covered. Compare your measurements to the supplier's specs to confirm consistency. If there's a discrepancy, ask for clarification—they may have updated their design.
- Consider Environmental Factors: Metal expands and contracts with temperature changes. If you're working in a facility with extreme heat or cold, factor in minor dimensional changes (e.g., a joint might fit tightly in a cold warehouse but loosen slightly in a hot assembly area). In such cases, opt for joints with set screws to adjust tension as needed.
- Document Your Measurements: Jot down all dimensions in a notebook or digital file, along with the joint's part number and supplier. This saves time if you need to reorder or expand your system later.
- Invest in Quality Tools: A cheap pair of calipers might give inconsistent readings. Spend a little extra on a reliable digital set—they'll pay for themselves in fewer mistakes and faster setup times.
Real-World Applications: How the Five Way Joint Powers Lean Systems
To see why precise measurement matters, let's look at how the five way straight lean pipe joint chrome is used in everyday lean setups. These examples show how a well-measured joint contributes to a smoother, more efficient workspace.
Example 1: Workbench Assembly
A common use for the five way joint is building a multi-functional workbench. Imagine a workbench with a main tabletop, a side shelf for tools, a vertical post for hanging cables, and a lower shelf for storage bins. The five way joint connects the main frame (two horizontal pipes), the side shelf pipe, the vertical post, and a diagonal brace for stability. If the joint's port diameter is too small, the vertical post won't insert fully, making the workbench wobbly. If the body length is miscalculated, the side shelf might sit too close to the tabletop, leaving no room for tools. Accurate measurements ensure the shelf is at a comfortable height, the post is secure, and the brace prevents swaying during use.
Example 2: Material Rack B (3 Row and 3 Floor)
Material Rack B, a popular storage solution, features three rows and three floors of shelves for components. To build this, five way joints connect the vertical support pipes, horizontal shelf pipes, and cross-bracing pipes that prevent the rack from bowing under heavy loads. If the joint's port depth is too shallow, the shelf pipes might pull out when loaded with heavy boxes. If the body width is too large, the shelves might be spaced too far apart, wasting vertical space. Precise measurements ensure each shelf is level, evenly spaced, and strong enough to hold inventory without bending.
Example 3: Roller Track Integration
Roller tracks (like Plastic Roller Track Guide Rail Yellow or Aluminum Guide Rail A) are used to slide materials between workstations. The five way joint can connect the roller track's support frame to the main production line. If the joint's body length is off, the roller track might not align with the workstation, causing materials to get stuck. By measuring the joint's dimensions, you can ensure the track is level and properly positioned, keeping materials flowing smoothly.
Choosing the Right Supplier
Even the most careful measurements won't help if you start with a low-quality joint. When sourcing five way straight lean pipe joint chrome, look for suppliers who prioritize precision and quality. Here's what to ask:
- Do you provide detailed specs? Reputable lean pipe suppliers will have spec sheets listing all critical dimensions, tolerances, and material information (e.g., chrome plating thickness, steel grade).
- What quality control processes do you use? Look for suppliers who inspect each joint for dimensional consistency, thread quality, and plating adhesion.
- Can you provide samples? A good supplier will send a sample joint so you can measure it yourself before placing a large order.
- Do you offer compatible pipes and accessories? Using pipes and joints from the same supplier reduces the risk of mismatched dimensions, as they're designed to work together.
Conclusion: Measure Twice, Assemble Once
The five way straight lean pipe joint chrome might seem like a small component, but it's the backbone of many lean systems. By taking the time to measure its port diameter, depth, body dimensions, and thread size, you ensure that your workbench, material rack, or production line is stable, efficient, and safe. Remember: lean manufacturing is about eliminating waste, and there's no bigger waste than having to disassemble and rework a structure because of a mismeasured joint.
So grab your calipers, take your time, and document your measurements. Your future self—busy assembling a perfectly aligned, rock-solid lean system—will thank you. And when you're done, step back and admire your handiwork: a workspace where every component fits together seamlessly, just as it should.