- Company Articles
- Products and Technology
- Installation And Maintenance
- Five Way Straight Lean Pipe Joint Installation Mistakes to Avoid

Five Way Straight Lean Pipe Joint Installation Mistakes to Avoid
Related Product
Five Way Straight Lean Pipe Joint
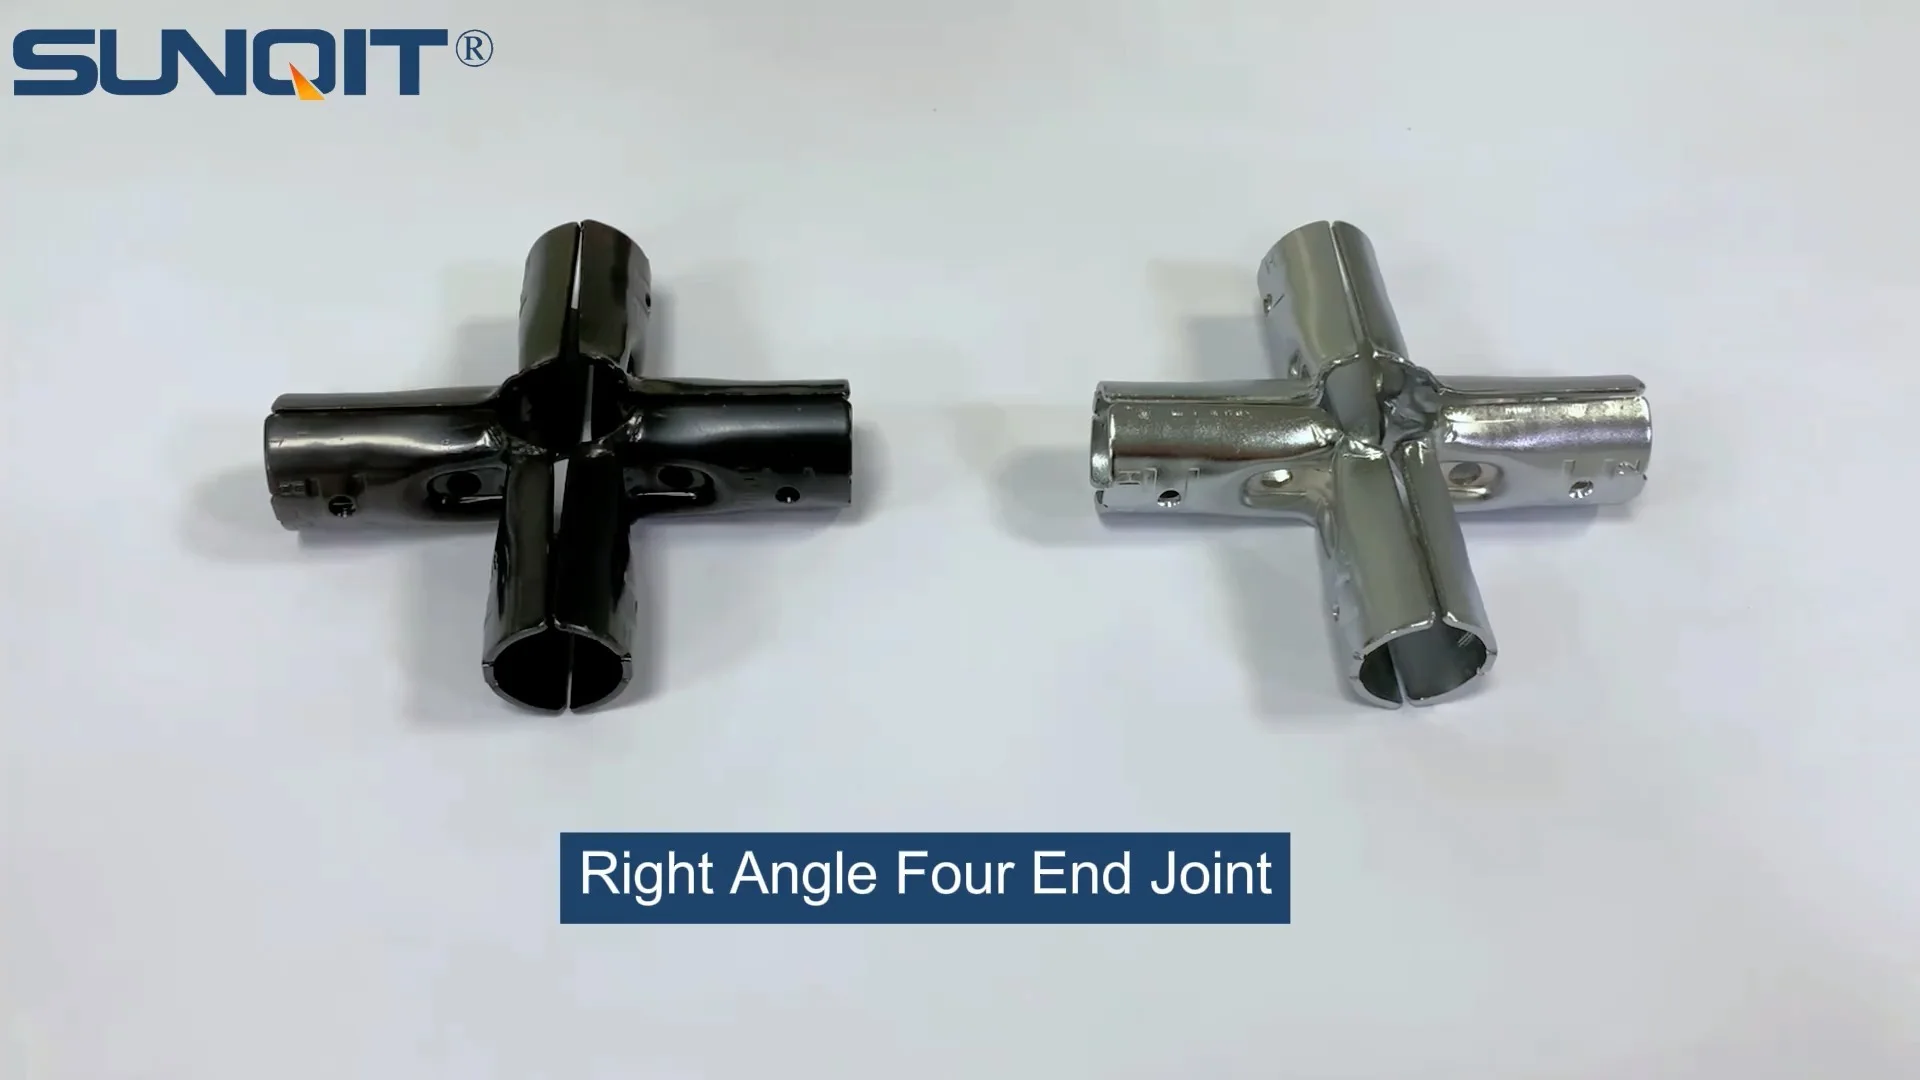
Five way straight lean pipe joint, for 5 pcs 28mm lean pipe connect in straight angle,which used widely in workbench, flow rack, hand trolley frame connection.
Walk into any well-run manufacturing facility, and you'll likely spot the clean lines of a lean system at work—material racks gliding smoothly, workbenches organized with precision, and roller tracks moving components effortlessly from station to station. At the heart of these systems lie yet critical components: lean pipe joints. And among these, the five way straight lean pipe joint stands out as a workhorse, connecting multiple pipes, aluminum profiles, and accessories to build sturdy, flexible structures. But here's the thing: even the most durable lean pipe joint can fail if installed incorrectly. A single misstep during installation can turn a reliable structure into a wobbly liability, disrupting workflows, wasting time, and even putting workers at risk. In this article, we'll dive into five common mistakes people make when installing five way straight lean pipe joints, why they happen, and how to avoid them—because in lean manufacturing, every detail counts.
Whether you're a seasoned facility manager, a maintenance technician, or a new team member tasked with assembling a lean system, understanding these pitfalls will save you from headaches down the line. Let's start by breaking down why the five way straight lean pipe joint matters so much. Unlike simpler two-way or three-way joints, this component connects five separate elements—think three aluminum profiles, a roller track, and a caster wheel, for example. Its design allows for multi-directional support, making it ideal for complex structures like material racks, workbenches, and assembly stations. But with great versatility comes great responsibility: each connection point must be precise, secure, and aligned to handle the load and stress of daily operations. Get it wrong, and you're looking at sagging shelves, jammed roller tracks, or worse.
Mistake #1: Over-Tightening or Under-Tightening the Joint
Let's start with the basics: how tightly you fasten the five way straight lean pipe joint. It's a common assumption that "tighter is better" when securing joints, but that couldn't be further from the truth. Similarly, leaving a joint too loose in the name of "flexibility" is just as risky. Both extremes can spell disaster for your lean system.
Real-Life Scenario: Jason, a maintenance technician at a automotive parts plant, was tasked with rebuilding a damaged material rack. Eager to ensure it was "extra secure," he used a pipe wrench to tighten the five way joints as hard as he could. A month later, the production team noticed the rack was leaning to one side. Upon inspection, Jason discovered the threads on two of the joint's connection points had stripped—his over-tightening had weakened the metal, causing the joint to deform under the weight of the parts. The rack had to be disassembled, and the joint replaced, costing the plant 8 hours of downtime.
So why does this happen? Over-tightening can strip threads, crack the joint's plastic or metal casing, or even bend the aluminum profiles it's connecting. Under-tightening, on the other hand, leaves gaps between the joint and the pipes, allowing for movement and vibration. Over time, this looseness can cause the joint to shift, throwing off alignment and putting stress on other components like roller track connectors or caster wheels.
Consequences: Stripped threads mean the joint can't be re-tightened, requiring a full replacement. Cracks in the joint weaken its load-bearing capacity, increasing the risk of collapse. Loose joints, meanwhile, lead to noisy, unstable structures—imagine a workbench that wobbles every time you set down a tool, or a roller track that jams because the joint holding it has shifted. In the worst cases, loose joints can cause parts to fall, damaging inventory or injuring workers.
How to Avoid It: The solution lies in precision. Most lean pipe suppliers provide torque specifications for their five way joints—typically between 15 and 25 Newton-meters (Nm) for metal joints, and slightly lower (10–20 Nm) for plastic or composite joints. Invest in a torque wrench, and use it. If you don't have a torque wrench, test the joint by hand: after tightening, give it a gentle tug. It should feel firm, with no give. If you can rotate the pipe within the joint, it's too loose. If the joint itself twists or creaks when you pull, it's too tight.
Another pro tip: clean the threads before tightening. Dust, grease, or debris can interfere with how the joint seats, leading to false "tightness." A quick wipe with a rag or a blast of compressed air ensures the threads engage properly. Finally, check the joint 24–48 hours after installation. Materials like aluminum profiles and lean pipes can settle slightly under load, so a joint that felt tight on day one might loosen up after the first use. A quick re-tighten (with the torque wrench, of course) prevents problems later.
Mistake #2: Misaligning the Joint with Aluminum Profiles
Aluminum profiles are the backbone of many lean systems—lightweight, strong, and designed with precision grooves to fit accessories like roller tracks, caster wheels, and, yes, five way lean pipe joints. But here's the catch: if the five way joint isn't perfectly aligned with these profiles, you're setting yourself up for structural stress and premature failure.
Imagine assembling a workbench where the five way joint connects a vertical aluminum profile (the leg) to a horizontal profile (the shelf support). If the joint is even 2–3 degrees off-kilter, the horizontal profile will sit at a slight angle. At first, it might not seem like a big deal—until you load the shelf with tools or parts. The uneven weight distribution puts extra pressure on one side of the joint, causing the aluminum profile to bend over time. Add a roller track to the mix, and suddenly you've got parts sliding off the track or jamming because the surface isn't level.
Real-Life Scenario: Maria, a lean coordinator at a electronics assembly plant, was excited to roll out a new line of workbenches using aluminum profiles and five way joints. The team followed the instructions, but in their rush to finish, they skipped using a level to check alignment. A week later, operators started complaining that circuit boards were sliding off the workbench's roller track. Maria investigated and found the root cause: the five way joint connecting the roller track to the aluminum profile was misaligned by 4 degrees. The track, which should have been perfectly horizontal, sloped downward slightly, causing parts to slide prematurely. Fixing it meant disassembling the joint, re-aligning, and re-securing—costing 3 hours of production time per workbench.
Why It Happens: Misalignment often stems from rushing the installation process. Maybe you're working with a helper, and one person holds the joint while the other tightens it—without checking if everything is straight. Or perhaps you're using a "eyeball test" instead of proper tools. Aluminum profiles are straight, but even a small bump or nudge during assembly can throw off alignment. Finally, using damaged profiles (bent, dented, or warped) makes alignment impossible—no joint, no matter how well-designed, can fix a profile that's already out of shape.
Consequences: Even minor misalignment creates "bending moments" in the structure. The five way joint, which is designed to handle compressive and tensile loads (straight pushes and pulls), now has to withstand twisting forces. Over time, this weakens the joint's internal components—like the locking mechanism or the threaded insert—leading to cracks or slippage. The aluminum profile itself isn't immune: constant stress on one side can cause it to fatigue, developing hairline cracks that grow with each use. And let's not forget about the accessories: a misaligned roller track will wear unevenly, with some wheels bearing more weight than others, leading to frequent jams and replacements.
How to Avoid It: Slow down and use the right tools. A 2-foot spirit level is your best friend here—place it across the aluminum profiles before tightening the joint to ensure they're horizontal or vertical, as needed. For multi-directional joints (like the five way), check alignment in two planes: left-right and front-back. A square tool (the kind with a 90-degree angle) helps verify that vertical and horizontal profiles meet at a perfect right angle. If you're working alone, use clamps to hold the joint and profiles in place before tightening—this prevents shifting during the process.
Another trick: mark the profiles before installing the joint. Use a pencil or a piece of masking tape to mark where the joint should sit, ensuring all connection points line up with the profile's grooves. Most aluminum profiles have pre-drilled holes or grooves at standard intervals, so aligning the joint with these markers takes the guesswork out of placement. Finally, inspect the profiles themselves before assembly. If a profile is bent or warped (common if it was dropped or stored improperly), replace it. A damaged profile can't be "fixed" with alignment—it will only cause problems downstream.

Mistake #3: Ignoring Load Capacity Limits
Every five way straight lean pipe joint has a breaking point—a maximum load it can safely support before deforming or failing. Yet time and again, teams ignore these limits, assuming "it's just a little extra weight." Spoiler: it's never "just a little." Exceeding the joint's load capacity is a recipe for structural collapse, damaged inventory, and even workplace injuries.
Let's clarify what "load capacity" means. A typical five way joint might be rated for 150kg of static load (weight that doesn't move, like tools on a shelf) or 100kg of dynamic load (weight that moves, like parts sliding down a roller track). These numbers aren't arbitrary—they're calculated by the lean pipe supplier through testing, considering factors like the joint's material (plastic, steel, aluminum), the thickness of its walls, and the design of its connection points. Ignore them, and you're gambling with safety.
Real-Life Scenario: A small manufacturing company ordered a batch of five way joints rated for 200kg static load to build material racks for heavy metal components. The team assumed the joints could handle "a bit more" and loaded each shelf with 250kg of parts. Three months later, during a routine inspection, the safety officer noticed the joints were starting to bow outward. Closer examination revealed cracks in the plastic housing of several joints. The racks were immediately emptied, and the joints replaced—costing $2,000 in new parts and 2 days of lost production. The kicker? The supplier's spec sheet, which the team had ignored, clearly stated the 200kg limit.
Consequences: Exceeding load capacity doesn't always lead to dramatic collapses (though it can). Often, it starts with subtle signs: the joint creaks under load, the structure sags slightly, or parts on the shelf shift unexpectedly. These are warning signs that the joint is deforming. Over time, the deformation worsens—threads strip, plastic housings crack, or metal components bend. In the best case, you're replacing joints prematurely. In the worst case, the structure fails, sending parts crashing to the floor. This isn't just about damaged inventory; falling objects can injure workers, leading to lost time, workers' compensation claims, and damaged morale.
How to Avoid It: Start by reading the spec sheet. Your lean pipe supplier should provide detailed load ratings for each joint, including static vs. dynamic loads, and whether the rating applies to individual connection points or the joint as a whole. If you can't find the spec sheet, call the supplier—they'll be happy to share it (and might even offer guidance on load distribution). Once you know the limit, calculate the total load your structure will bear. For a material rack, this includes the weight of the aluminum profiles, the roller track, the caster wheels, and the parts you'll store. Add 20% to that number as a "safety buffer"—operations are unpredictable, and it's better to be over-prepared than under.
Next, distribute the load evenly. A five way joint with three horizontal connection points and two vertical ones will fail faster if all the weight is concentrated on one horizontal arm. Spread the load across all connection points—for example, place heavier items in the center of a shelf rather than on the edges. Finally, consider reinforcing high-load areas. If you need to support more weight than a single five way joint can handle, add a second joint or use a heavier-duty model. Many suppliers offer "heavy-duty" five way joints with thicker walls or metal (instead of plastic) components for these situations.

Mistake #4: Using Incompatible Accessories
Lean systems are all about flexibility—mixing and matching components to build custom structures. But that flexibility has a catch: not all accessories play well together. Using incompatible parts—say, a roller track connector from Brand A with a five way joint from Brand B—can lead to loose connections, poor fit, and system instability.
Here's why: lean pipe and aluminum profile manufacturers often design accessories to work with their own products. A roller track connector from Brand X might have a slightly different width or groove depth than one from Brand Y, even if they're marketed as "universal." When you pair that connector with a five way joint from Brand Z, the fit might be off by a fraction of a millimeter. At first, it seems fine—you tighten the joint, and everything holds. But over time, that tiny gap allows for movement, loosening the connection and putting stress on the joint.
Real-Life Scenario: The maintenance team at a food packaging plant needed to replace a worn roller track on their assembly line. The original track was from Brand A, but the warehouse only had Brand B track in stock. The team figured "a roller track is a roller track" and installed it using the existing five way joints. The Brand B track was 0.5mm wider than the Brand A one, so when they attached it to the joint, the connector didn't seat properly. Within days, the track started wobbling, causing packages to jam. The team spent hours troubleshooting before realizing the incompatibility—by then, they'd already replaced two five way joints that had worn prematurely from the stress.
Common Incompatibility Issues: The most problematic accessories are those that connect directly to the five way joint: roller track connectors, caster wheel mounts, and aluminum profile brackets. Issues include:
- Size Mismatches: A "1-inch" roller track might actually measure 25.4mm from Brand A and 25.6mm from Brand B. That 0.2mm difference is enough to prevent the connector from locking into the five way joint.
- Thread Differences: Some joints use metric threads (M8, M10), others use imperial (1/4-inch, 3/8-inch). Mixing them leads to stripped threads or loose connections.
- Groove Fit: Aluminum profiles have standardized groove sizes (e.g., 6mm, 8mm), but accessory manufacturers sometimes deviate slightly. A bracket that fits a 6mm groove from Brand X might be too loose in a 6mm groove from Brand Y, leading to instability.
Consequences: Incompatible accessories turn the five way joint into a weak link. A loose roller track connector causes the track to wobble, leading to jams and damaged parts. A caster wheel mount that doesn't seat properly makes the structure unstable, increasing the risk of tipping. Over time, the constant movement and vibration wear down the joint's connection points, leading to premature failure. Worse, you might misdiagnose the problem: if the roller track jams, you might replace the track itself, not realizing the issue is the incompatible connector and joint. This wastes time and money on unnecessary replacements.
How to Avoid It: Stick to one brand when possible. Most lean pipe suppliers offer a full ecosystem of products—joints, aluminum profiles, roller tracks, caster accessories, and more—designed to work together. This eliminates compatibility issues. If you must mix brands (e.g., you have leftover accessories from a previous project), test the fit before full installation. Connect the accessory to the five way joint, tighten it as you would in the final structure, and give it a firm tug. It should feel solid, with no movement. If it wobbles or slips, it's incompatible.
Check dimensions carefully. Measure the accessory's connector (e.g., the width of a roller track bracket) and compare it to the joint's connection point. Use a caliper for precision—even a 0.1mm difference can matter. For threaded accessories, verify the thread size (metric vs. imperial) and pitch (the distance between threads). A quick check with a thread gauge ensures the accessory will screw into the joint properly. Finally, ask the supplier. If you're unsure whether an accessory works with their five way joint, call or email—their technical support team can confirm compatibility (and might even suggest alternatives if there's a mismatch).

Mistake #5: Skipping Post-Installation Inspection
You've tightened the joint, aligned the aluminum profiles, checked the load capacity, and used compatible accessories. You step back, admire your handiwork, and move on to the next task. Done, right? Wrong. Skipping a thorough post-installation inspection is one of the easiest ways to miss small issues that turn into big problems.
Think about it: even the most careful installation can have hidden flaws. A thread might be slightly stripped, an aluminum profile might have a tiny dent that affects alignment, or a caster wheel might not be fully seated in its mount. These issues might not show up during assembly, but they'll reveal themselves once the structure is in use. A post-installation inspection catches them before they cause downtime or damage.
Real-Life Scenario: A team at a medical device plant spent two days assembling a new workbench using five way lean pipe joints, aluminum profiles, and a roller track for moving delicate components. They were on a tight deadline, so after the final bolt was tightened, they immediately loaded the bench with tools and started production. Two weeks later, a critical component fell off the roller track and was damaged—costing the plant $10,000 and delaying a shipment. An investigation revealed the cause: a single five way joint had loosened slightly during the first week of use, causing the roller track to dip. A 5-minute inspection after installation would have caught the loose joint, but the team skipped it to save time.
What to Inspect: A post-installation inspection doesn't have to be complicated, but it should be systematic. Start by checking all connection points on the five way joint. Tug gently on each pipe, aluminum profile, or accessory (roller track, caster wheel, etc.) to ensure they're secure. If anything moves or wiggles, re-tighten the joint. Next, check alignment again. Use your spirit level to verify that horizontal surfaces are level and vertical surfaces are plumb—remember, materials can shift slightly during assembly. Then, test the structure under load. Add the items you'll normally store or process (tools, parts, etc.) and let it sit for an hour. This mimics real-world conditions and helps identify sagging or shifting. Finally, test movement if applicable. If the structure has caster wheels, roll it back and forth to ensure it moves smoothly without wobbling. If it has a roller track, send a test part down the track to check for jams or uneven sliding.
When to Inspect: Ideally, inspect the structure immediately after installation, then again 24 hours later, and once more after a week of use. The first inspection catches obvious issues (loose joints, misalignment). The 24-hour check catches settling (aluminum profiles and lean pipes can compress slightly under load, loosening joints). The one-week check ensures the structure holds up under daily use. For high-stress structures (like material racks holding heavy loads), add monthly inspections to your maintenance schedule. A quick 10-minute check each month can extend the life of your lean system significantly.
Document the Inspection: This might seem like overkill, but a simple checklist ensures nothing is missed. Jot down the date, the structure (e.g., "Workbench E, Line 3"), and notes on each inspection point ("Joint #1 tight, roller track aligned, caster wheels rolling smoothly"). If you find an issue, note how you fixed it ("Re-tightened joint #2 to 20 Nm"). Over time, this documentation helps identify patterns—maybe joints on the east side of the plant loosen faster due to temperature fluctuations, or a certain batch of accessories is prone to misalignment. This data lets you proactively address issues before they become widespread.
Summary of Key Mistakes and Prevention Tips
| Mistake | Main Consequences | Key Prevention Steps |
|---|---|---|
| Over-tightening/Under-tightening | Stripped threads, cracked joints, loose connections | Use a torque wrench, follow supplier specs, clean threads before tightening |
| Misaligning with Aluminum Profiles | Structural stress, bent profiles, jammed roller tracks | Use a spirit level and square tool, mark profiles before installation |
| Ignoring Load Capacity Limits | Joint deformation, structural collapse, worker injuries | Read spec sheets, calculate total load + 20% buffer, distribute weight evenly |
| Using Incompatible Accessories | Loose connections, wobbling structures, premature wear | Stick to one brand, test fit before installation, check dimensions/threads |
| Skipping Post-Installation Inspection | Hidden flaws, unexpected failures, damaged inventory | Inspect immediately, at 24 hours, and after 1 week; document findings |
Conclusion: The Little Joint That Powers Your Lean System
The five way straight lean pipe joint might not be the most glamorous component in your lean system, but it's undeniably critical. It's the unsung hero that holds your material racks together, keeps your roller tracks aligned, and ensures your workbenches stay sturdy under pressure. By avoiding these five mistakes—over-tightening, misalignment, ignoring load limits, using incompatible accessories, and skipping inspections—you're not just protecting your equipment; you're protecting your team's efficiency, safety, and morale.
Remember, lean manufacturing is about eliminating waste—waste of time, waste of materials, waste of effort. A poorly installed five way joint leads to all three: time wasted fixing jams or replacing parts, materials wasted on damaged inventory or premature joint replacements, and effort wasted on rework. But when installed correctly, that same joint becomes a cornerstone of efficiency, supporting smooth workflows and reliable operations.
So the next time you pick up a five way straight lean pipe joint, take a moment to do it right. Tighten it with care, align it with precision, respect its limits, pair it with compatible accessories, and inspect it thoroughly. Your lean system—and your team—will thank you.