- Company Articles
- Products and Technology
- Installation And Maintenance
- Five Way Straight Lean Pipe Joint Installation Tools: What You'll Need

Five Way Straight Lean Pipe Joint Installation Tools: What You'll Need
Related Product
Five Way Straight Lean Pipe Joint
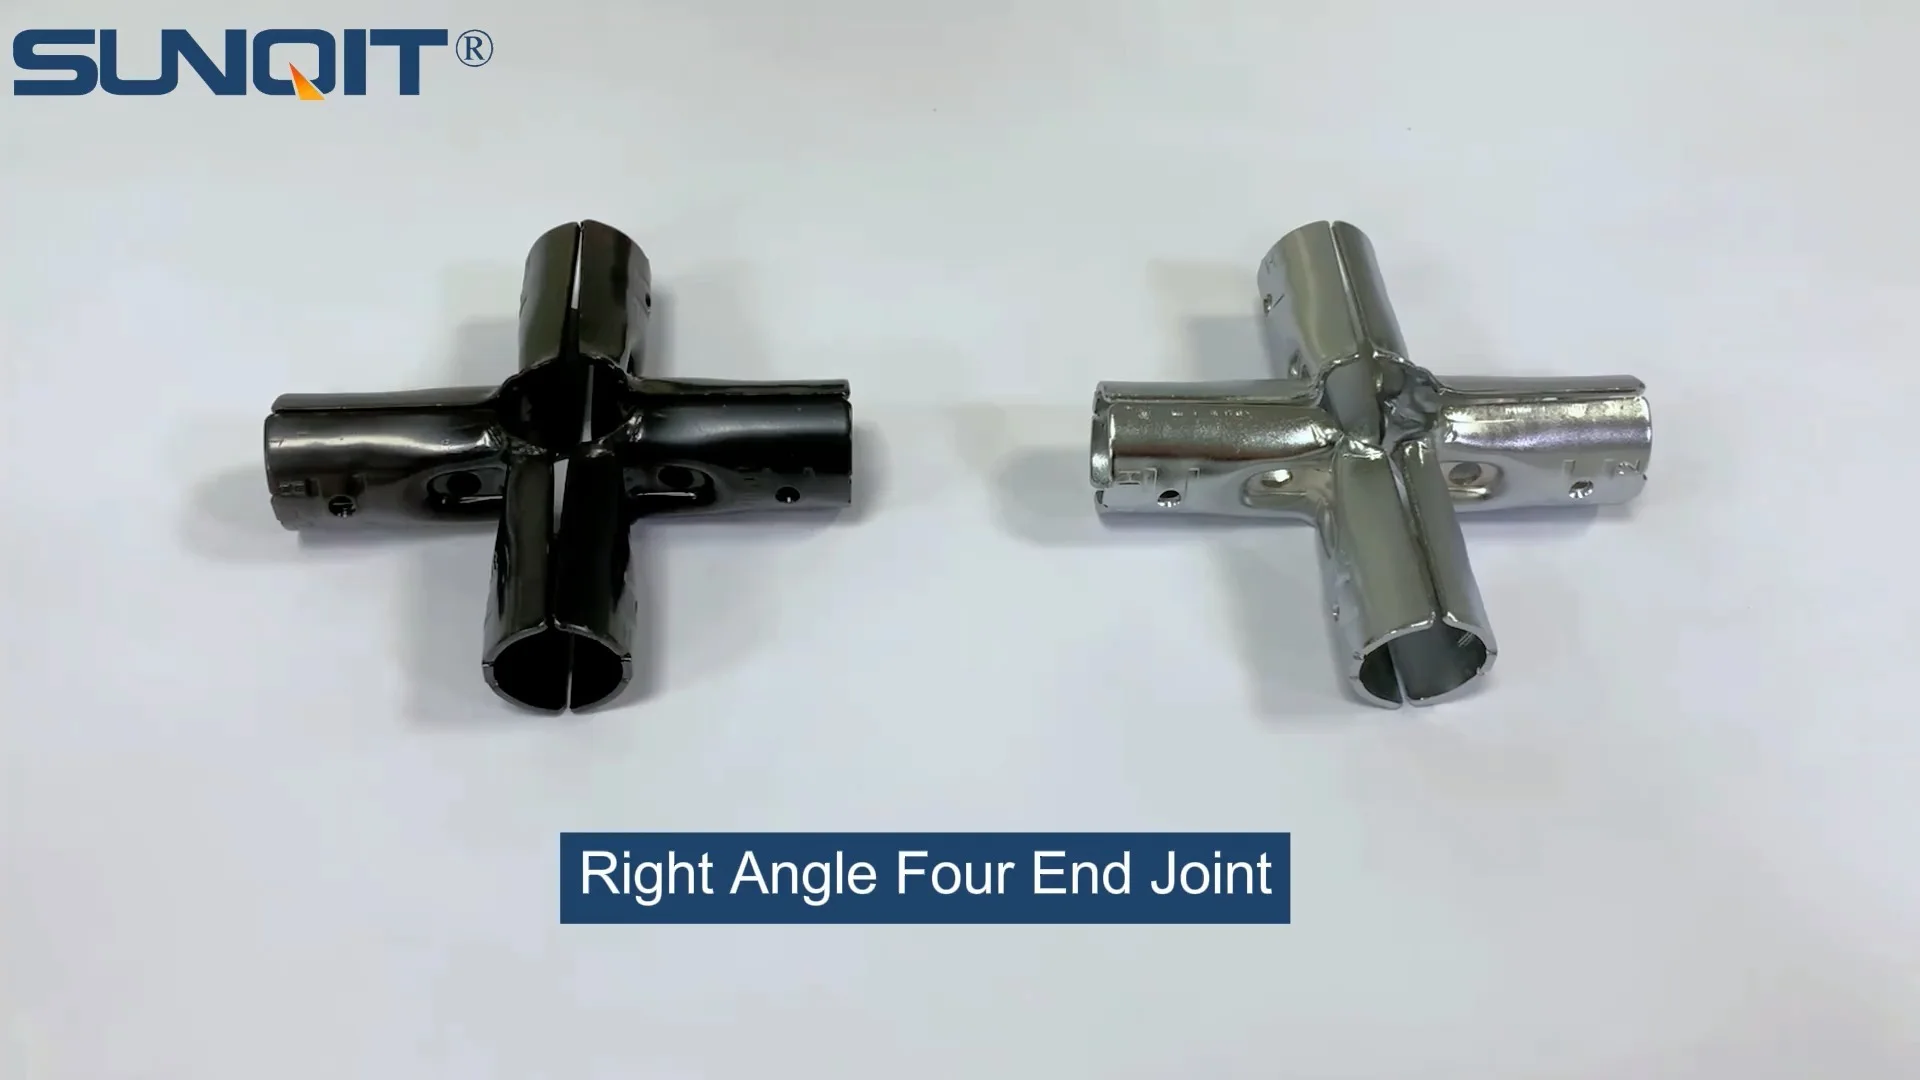
Five way straight lean pipe joint, for 5 pcs 28mm lean pipe connect in straight angle,which used widely in workbench, flow rack, hand trolley frame connection.
In the world of manufacturing and production, efficiency isn't just a buzzword—it's the backbone of a successful operation. Whether you're running a small workshop or managing a large-scale factory, the way you organize your workspace directly impacts productivity, employee morale, and bottom-line results. This is where lean systems come into play, and at the heart of these systems lies a humble yet powerful component: the lean pipe joint. Specifically, the five-way straight lean pipe joint, a versatile connector that brings structure to everything from workbenches to roller tracks, ensuring materials flow smoothly and teams work without unnecessary hurdles.
But here's the thing: even the most durable lean pipe or aluminum pipe won't live up to its potential if installed incorrectly. A wobbly joint can throw off an entire production line, causing delays, damaged materials, or even safety risks. That's why having the right tools for installing five-way straight lean pipe joints isn't just a "nice-to-have"—it's essential. In this guide, we'll walk you through every tool you need, why it matters, and how to use it effectively. Whether you're a seasoned facility manager or a small business owner setting up your first lean workspace, this article is your roadmap to a sturdier, more efficient operation.
Understanding the Five-Way Straight Lean Pipe Joint
Before we dive into tools, let's take a moment to appreciate the star of the show: the five-way straight lean pipe joint. Unlike simpler two-way or three-way joints, this connector is designed to link up to five lean pipes or aluminum pipes in a straight line, making it ideal for building complex structures like multi-tiered material racks, extended workbenches, or interconnected roller tracks. Imagine a spider's web of efficiency—this joint is the center point holding it all together.
Its design is deceptively simple: a metal or plastic core with threaded holes or slots that secure pipes in place, often with screws or bolts. But don't let its simplicity fool you. The precision of this joint directly affects how much weight the structure can bear, how smoothly materials move along roller tracks, and how long the entire setup lasts. For example, a poorly installed five-way joint on a workbench might cause the surface to sag over time, leading to misaligned tools or uneven assembly work. On a roller track, it could mean boxes get stuck mid-flow, grinding production to a halt.
So, why focus on five-way joints specifically? Because they're the unsung heroes of flexibility. Need to add a side shelf to your workbench? A five-way joint lets you attach an extra aluminum pipe without rebuilding the entire structure. Want to extend a roller track to reach a new workstation? This joint makes it possible without compromising stability. In short, it's the Swiss Army knife of lean system components—and installing it right starts with the right tools.
Essential Tools for Installation: The Basics
Let's start with the foundation: the basic hand tools you probably already have in your toolbox. While these might seem ordinary, they're the first line of defense against shoddy installation. Think of them as the "bread and butter" of your setup process—you can't build anything solid without them.
1. Measuring Tape and Straightedge
You wouldn't bake a cake without measuring ingredients, right? The same logic applies here. A 25-foot measuring tape (preferably with a locking mechanism) ensures your lean pipes are cut to the exact length needed, while a straightedge (a long, rigid ruler or a level bar) helps align pipes so they're perfectly straight before attaching the five-way joint. Even a 1/4-inch misalignment can throw off the entire structure, so take the time to measure twice, cut once. Pro tip: Use a pencil to mark measurements directly on the aluminum pipe—erasable markers work too, but pencil won't smudge if you're working with oily hands.
2. Pipe Cutter or Hacksaw
Unless you're buying pre-cut lean pipes (which is an option, but not always cost-effective), you'll need to trim pipes to fit your design. For aluminum pipe, a pipe cutter is the way to go—it's faster, cleaner, and less likely to leave jagged edges than a hacksaw. Look for a ratcheting pipe cutter with a replaceable blade; it applies even pressure, ensuring a straight cut every time. If you do use a hacksaw, opt for a fine-tooth blade (32 teeth per inch) to avoid bending the pipe or creating burrs. Remember: a clean cut means a snug fit in the five-way joint, which equals a stronger structure.
3. Deburring Tool
Ever run your finger along a freshly cut pipe and felt a sharp, rough edge? That's a burr, and it's more than just an annoyance. Burrs can scratch your hands during installation, damage pipe coatings (like the protective layer on aluminum pipe), or prevent the five-way joint from seating properly. A deburring tool (a small, handheld device with a rotating blade) smooths these edges in seconds. Simply insert the tool into the cut end of the pipe, twist gently, and voilà—no more burrs. It's a small step, but it makes a big difference in both safety and fit.
4. Adjustable Wrench or Socket Set
Most five-way lean pipe joints use bolts or screws to secure pipes, and you'll need a way to tighten them. An adjustable wrench works for basic setups, but for consistent torque (more on that later), a socket set is better. Look for a set with metric sizes (since most lean pipe joints use metric bolts) and a ratchet handle for easy turning. Pro tip: Label your sockets by size—when you're in the middle of installation, digging through a jumble of tools to find the right one wastes precious time.

Specialized Tools: Taking Installation to the Next Level
Basic tools lay the groundwork, but specialized tools turn a "good enough" installation into a "bulletproof" one. These are the tools that address the unique challenges of working with lean pipe joints, ensuring every connection is tight, aligned, and built to last.
1. Joint Torque Wrench
Here's a common mistake: overtightening. It's easy to think, "If a little tight is good, really tight must be better!" But lean pipe joints (especially those made of plastic or lightweight aluminum) can crack or strip if you crank down too hard. On the flip side, undertightening leads to loose joints that wobble. A joint torque wrench solves this problem by letting you set a specific torque (measured in Newton-meters, or Nm) and alerting you when you've reached it (usually with a "click" sound). Most five-way lean pipe joints require between 3 and 5 Nm of torque—check the manufacturer's specs to be sure. Investing in a torque wrench might seem like a splurge, but it's cheaper than replacing broken joints or rebuilding a wobbly workbench.
2. Pipe Bender (for Curved Sections)
Not all lean structures are straight—sometimes you need a gentle curve, like on a roller track that feeds into a corner. A pipe bender lets you shape aluminum pipe without kinking or weakening it. Look for a manual bender with adjustable dies (the part that holds the pipe) to match the diameter of your lean pipe (most common sizes are 28mm or 30mm). If you only need a few curves, you can rent a bender, but if you're planning multiple lean setups, owning one pays off. Pro tip: Practice on a scrap piece of pipe first—bending takes a little finesse to avoid uneven curves.
3. Magnetic Level
A regular level works for small projects, but when you're installing a five-way joint that connects multiple pipes (like a workbench with a roller track on top), a magnetic level is a game-changer. The magnet sticks to metal pipes, freeing up both hands to adjust the joint while you check for level. Opt for a 24-inch level with bubble vials for both horizontal and vertical alignment—this ensures your workbench isn't sloped (which would make tools slide off) and your roller track doesn't tilt (which would cause materials to jam). I once saw a team spend hours adjusting a roller track because they skipped this step—don't be that team.
4. Thread Locking Fluid
Even the tightest bolts can loosen over time, especially in high-vibration environments (think: near heavy machinery or busy assembly lines). Thread locking fluid (like Loctite) is a simple solution. Apply a small drop to the bolt threads before inserting them into the five-way joint; it dries to a flexible bond that prevents loosening but can be broken with a wrench if you need to disassemble later. Stick to "medium strength" fluid—"high strength" might require heat to remove, which could damage plastic joints.

Safety Tools: Protecting Yourself (and Your Team)
Efficiency and durability matter, but nothing is more important than keeping yourself and your team safe. Installing lean pipe joints involves sharp edges, heavy materials, and repetitive motions—so don't skip these safety essentials.
Safety First:
Always wear safety goggles when cutting or deburring pipes—metal shavings can fly into your eyes. Gloves (preferably cut-resistant) protect hands from burrs and sharp tools. Knee pads are a must if you're kneeling on concrete while installing, and steel-toed boots prevent crushed toes if a pipe slips.
1. Cut-Resistant Gloves
Deburring a pipe or handling a freshly cut aluminum pipe can leave tiny, sharp edges that slice through regular gloves. Cut-resistant gloves (made with materials like Kevlar) act as a barrier without sacrificing dexterity—you can still grip tools and tighten bolts easily. Look for gloves with a "Level 5" cut rating (the highest) for maximum protection, especially if you're working with stainless steel pipes (which are harder and sharper than aluminum).
2. Workbench Mat
Dropping a metal five-way joint on a concrete floor can chip the joint or scratch the floor. A rubber workbench mat cushions the fall and provides a non-slip surface for assembling parts. It also catches small tools (like screws or washers) that might roll off the bench, saving you from crawling around on the floor searching for lost hardware. Bonus: It's easy to clean—just wipe it down with a damp cloth at the end of the day.

The Ultimate Tool Checklist: A Handy Reference
To make sure you don't miss anything, here's a table summarizing all the tools we've covered, along with their purposes and pro tips:
| Tool Category | Tool Name | Purpose | Pro Tip |
|---|---|---|---|
| Basic Hand Tools | Measuring Tape (25ft) | Measure pipe lengths and alignment | Use a locking mechanism to prevent retraction mid-measure |
| Adjustable Wrench | Tighten/loosen bolts on joints | Wrap tape around the jaw to prevent scratching pipe coatings | |
| Cutting Tools | Ratcheting Pipe Cutter | Cleanly cut aluminum or lean pipe | replace blades when they start leaving burrs |
| Deburring Tool | Smooth rough edges on cut pipes | Deburr both the inside and outside of the pipe | |
| Specialized Tools | Joint Torque Wrench | Apply precise torque to bolts | Calibrate annually to ensure accuracy |
| Magnetic Level (24-inch) | Check horizontal/vertical alignment | Store it flat to prevent bending the vials | |
| Safety Tools | Cut-Resistant Gloves | Protect hands from sharp edges | Wash them regularly to maintain grip |
| Safety Goggles | Shield eyes from metal shavings | Choose goggles with anti-fog coating for humid workspaces |
Step-by-Step Installation: Putting It All Together
Now that you have your tools, let's walk through installing a five-way straight lean pipe joint in a real-world scenario: building a simple workbench with a roller track attachment. This example will show you how each tool comes into play, from start to finish.
Step 1: Plan and Measure
Start by sketching your workbench design. Let's say you want a 6-foot-long workbench with a roller track along the back edge to feed materials to the workspace. You'll need four vertical aluminum pipes for legs, two horizontal pipes for the front and back rails, and a five-way joint to connect the back rail to the roller track supports. Use your measuring tape to mark the length of each pipe on the ground (or a large table) to visualize the layout. Double-check measurements—this is where a straightedge helps ensure the legs are parallel and the rails are square.
Step 2: Cut and Deburr Pipes
Using your pipe cutter, cut the vertical legs to 36 inches (standard workbench height) and the horizontal rails to 72 inches. After cutting, deburr each end with the deburring tool—run the tool around the inside and outside edges until they're smooth to the touch. Test-fit a five-way joint on one of the cut ends to make sure there's no resistance (burrs can prevent the pipe from seating fully in the joint).
Step 3: Assemble the Frame
Lay the horizontal rails on the ground, parallel to each other. Attach the vertical legs to the ends using two-way joints (you'll add the five-way joint later). Stand the frame upright and use the magnetic level to ensure it's vertical—adjust the legs as needed. Once the frame is square, tighten the leg joints with your torque wrench set to 4 Nm (check the joint specs!).
Step 4: Install the Five-Way Joint
Now, attach the five-way joint to the back rail where the roller track will go. Slide the joint onto the rail, aligning the threaded holes with the marks you made earlier. insert the bolts, hand-tightening them first to avoid cross-threading. Then, use the torque wrench to tighten each bolt to the recommended torque (usually 3–5 Nm). Attach the roller track supports to the remaining ports on the five-way joint, again using the torque wrench to ensure even tightness.
Step 5: Test and Adjust
With the five-way joint in place, place the workbench top (plywood or an aluminum honeycomb panel) on the frame and secure it with screws. Roll a test box along the roller track to check for smooth movement—if it gets stuck, use the level to see if the track is tilted. Tighten any loose joints with the torque wrench and re-test. Finally, walk around the workbench and give it a gentle shake—if it wobbles, check the leg joints and the five-way joint for proper torque.
Pro Tip:
Take photos during installation! If you need to disassemble and reassemble later (e.g., moving the workbench), photos will help you remember how the joints and pipes fit together.
Common Mistakes to Avoid
Even with the right tools, it's easy to slip up. Here are three mistakes I've seen too many times—and how to avoid them:
1. Ignoring Pipe Alignment
It's tempting to rush through alignment, especially when you're eager to finish the project. But a pipe that's even slightly off-center will stress the five-way joint over time, leading to cracks or loosening. Always use the straightedge and level before tightening bolts—your future self (and your production line) will thank you.
2. Using the Wrong Bolt Length
Five-way joints come with specific bolt length requirements. Using a bolt that's too short won't secure the pipe properly; one that's too long might poke through the other side and scratch materials or injure someone. Check the joint's manual for bolt length specs, and keep a few extra bolts on hand in case you mix them up.
3. Skipping Maintenance Checks
Installation isn't the end—lean systems need regular love too. Every month, walk around your workbenches and roller tracks, and use the torque wrench to re-tighten any loose five-way joints. Over time, vibration and temperature changes can loosen bolts, so a quick check takes 10 minutes and prevents major issues down the line.
Conclusion: Tools That Build Success
Installing a five-way straight lean pipe joint might seem like a small part of building a lean system, but it's a critical one. The right tools turn a rickety structure into a reliable, long-lasting asset that boosts productivity and keeps your team safe. From the basic measuring tape to the specialized torque wrench, each tool plays a role in ensuring your lean pipe, aluminum pipe, and workbench work together seamlessly.
Remember, lean systems are about eliminating waste—and the biggest waste of all is rework. By investing in the tools we've covered and taking the time to install joints properly, you're not just building a workbench or a roller track—you're building a foundation for efficiency. So grab your tools, measure carefully, and tighten those joints with confidence. Your operation (and your bottom line) will thank you.