- Company Articles
- Products and Technology
- Product knowledge
- Flat Adjustable Swivel Castor Wheels: Load Rating Charts for Workbench E & Material Racks

Flat Adjustable Swivel Castor Wheels: Load Rating Charts for Workbench E & Material Racks
Related Product
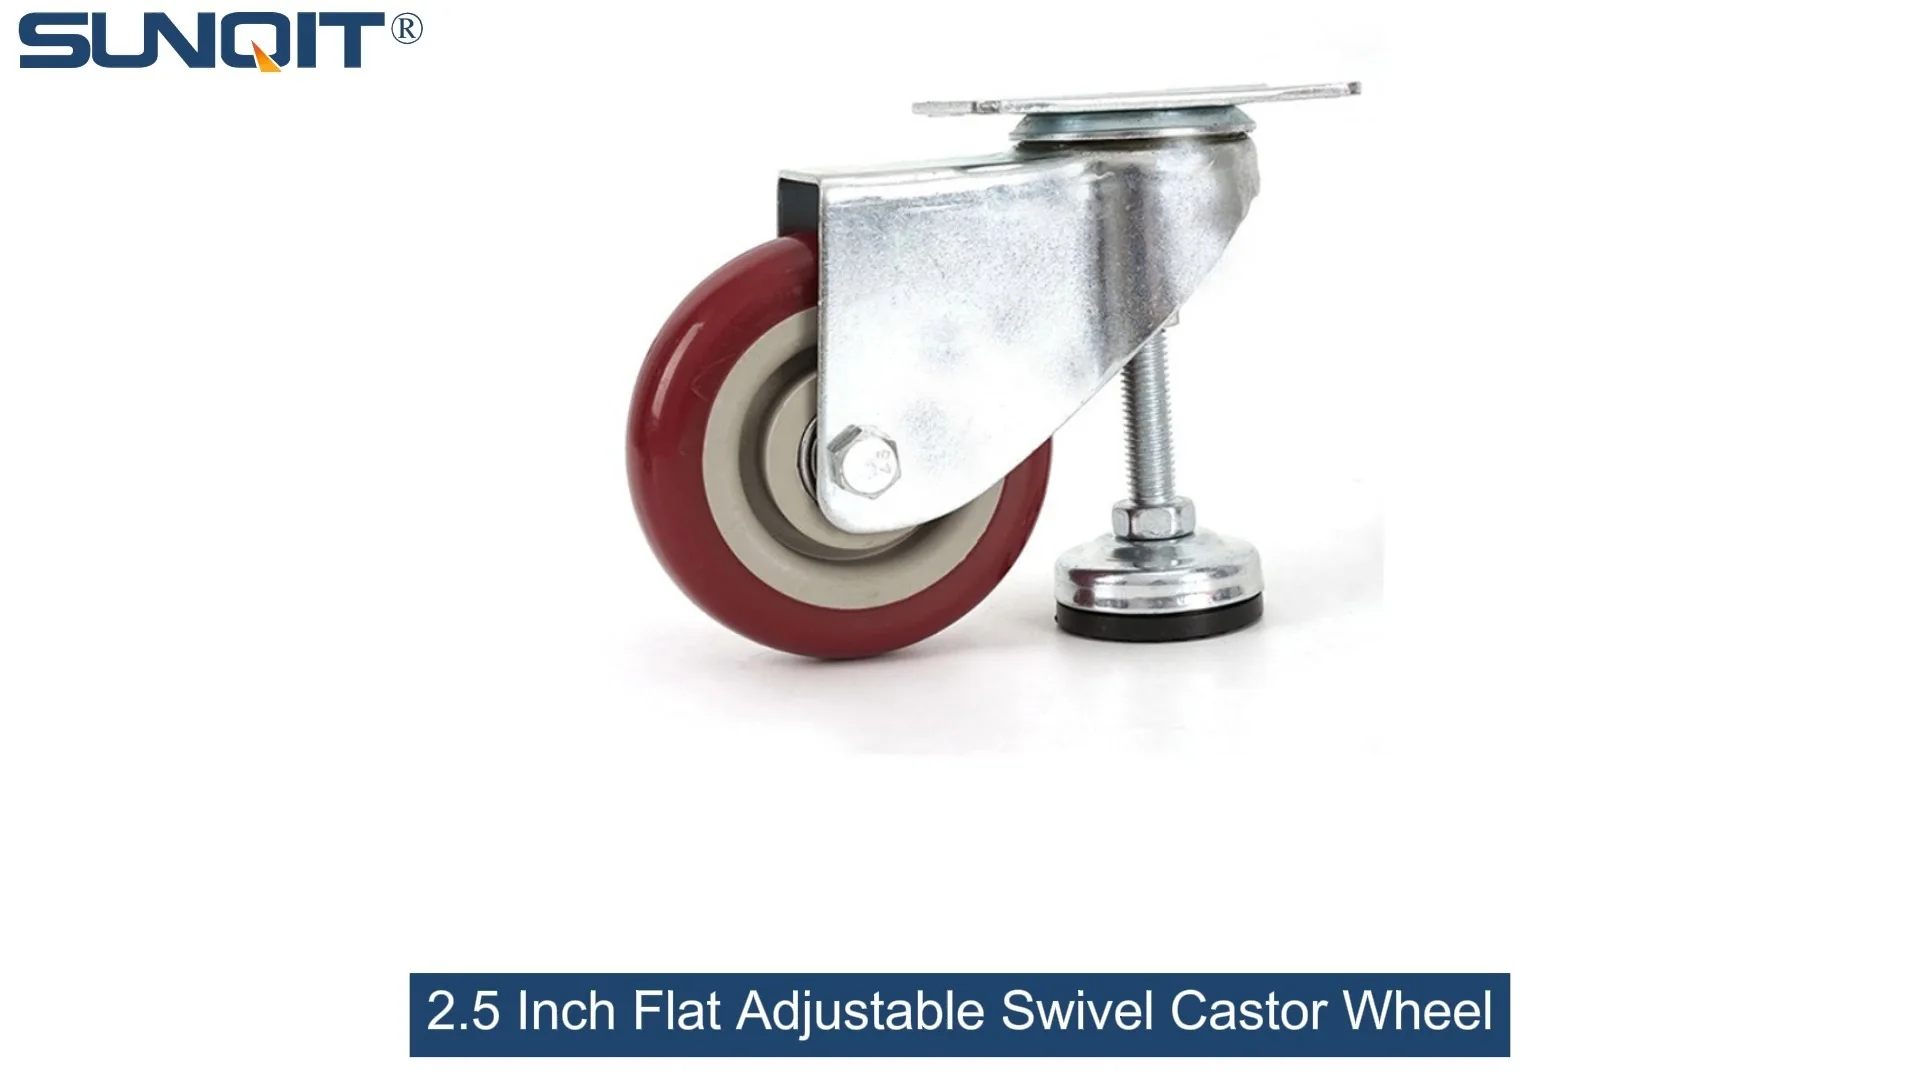
Flat Adjustable Swivel Castor Wheel
Swivel Chair Casters Ball Bearing Wheels Rubber Base with adjustable height function. Resistant to abrasion, impact and corrosion. Heavy payload can hold 80Kgs per pcs,which can make it works at a stable and smooth status.
Walk into any manufacturing plant, warehouse, or workshop, and you'll quickly realize that the backbone of daily operations isn't just the big machines or the high-tech tools—it's the smaller, often overlooked components that keep everything moving. Take, for example, the humble castor wheel. These unassuming devices are the reason your Workbench E (that single-deck workhorse without built-in casters) can glide from one assembly station to another, and why your Material Rack B (stacked with 3 rows and 3 floors of parts) doesn't become a static obstacle cluttering up valuable floor space. Among all castor types, flat adjustable swivel castor wheels stand out for their versatility, especially when paired with essential equipment like Workbench E and Material Rack B. But here's the thing: not all castors are created equal. The key to making the most of these tools lies in understanding their load ratings—and how they align with the demands of your workspace.
What Are Flat Adjustable Swivel Castor Wheels, Anyway?
Before diving into load ratings, let's get clear on what makes flat adjustable swivel castor wheels unique. Unlike fixed castors that only roll forward and backward, swivel castors can rotate 360 degrees, making them ideal for tight spaces where maneuverability is a must. The "flat adjustable" part adds another layer of utility: these castors come with a mechanism—usually a threaded stem or a cam lever—that lets you tweak their height. This adjustability is a game-changer for uneven floors, ensuring your Workbench E stays level when loaded with tools or your Material Rack B doesn't wobble when stacked with heavy components.
Most flat adjustable swivel castors feature a flat mounting plate, which attaches directly to the bottom of equipment like Workbench E or Material Rack B. This design distributes weight evenly, reducing stress on both the castor and the equipment it supports. Wheel materials vary, too—you'll find rubber for noise reduction and floor protection, polyurethane for durability and grip, and steel for heavy-duty applications. Each material impacts not just performance but also load capacity, which brings us to the heart of the matter: load ratings.
Why Load Ratings Are Non-Negotiable
Think of a load rating as a castor's promise: "I can safely support X amount of weight without failing." Ignore this promise, and you're looking at a world of trouble. Overloading a castor can lead to bent stems, cracked wheels, or seized swivel joints—all of which turn your mobile Workbench E into a stationary liability. Worse, an overloaded castor might suddenly give way, causing equipment to tip, tools to crash, or even injuries to workers. In a lean system focused on efficiency and safety, that's a risk you can't afford.
Load ratings aren't arbitrary numbers, either. They're determined through rigorous testing, considering factors like wheel material, bearing type, mounting plate strength, and swivel mechanism durability. A castor rated for 300kg per wheel, for example, has been tested to handle that weight consistently under normal operating conditions. But here's a crucial detail: load ratings are per wheel, not per set. If your Workbench E uses four castors, its total load capacity is four times the per-wheel rating (assuming even weight distribution).

Workbench E: The Unsung Hero of Assembly Lines
Let's zoom in on Workbench E (single deck-without caster), a staple in workshops everywhere. Designed as a lightweight yet sturdy surface for assembly, repairs, or quality checks, this workbench is often customized with tool holders, shelves, or bins to keep essentials within arm's reach. But without castors, it's just a static table—useful, but limited. Add flat adjustable swivel castors, and suddenly it becomes a mobile command center, able to follow workers as they move through tasks or shift between projects.
So, what's the typical load on a Workbench E? It depends on the industry, but in electronics manufacturing, for example, it might hold circuit boards, soldering irons, and testing equipment—easily 100-150kg. In automotive repair shops, it could carry heavier tools like torque wrenches and diagnostic scanners, pushing 200kg or more. That's where adjustable height comes into play: if the floor near the testing station dips slightly, you can raise one castor to keep the workbench level, preventing tools from sliding off or parts from rolling away.

Material Rack B: 3 Rows, 3 Floors, and a Whole Lot of Weight
Now, consider Material Rack B (3 row and 3 floor), the workhorse of storage. With three rows and three floors, this rack is built to maximize vertical space, holding everything from small plastic components to metal parts or even finished products. Let's break down the load: if each floor holds 50kg (a conservative estimate), that's 3 floors x 3 rows = 450kg total. But remember, weight distribution matters. The bottom floor might bear more weight than the top, and if the rack is loaded unevenly, certain castors could take on more stress than others. That's why Material Rack B needs castors with robust load ratings—and why adjustability is key to keeping it stable, even when fully loaded.
Imagine trying to move a fully loaded Material Rack B across a warehouse with fixed, non-adjustable castors. If the floor has a slight bump, the rack might jostle, causing parts to fall. With flat adjustable swivel castors, you can level the rack first, then swivel it around corners or navigate tight aisles with ease. It's not just about mobility; it's about maintaining order and safety in a busy environment.

Load Rating Charts: Matching Castors to Your Needs
To take the guesswork out of choosing castors for Workbench E and Material Rack B, let's look at a load rating chart. This table compares common flat adjustable swivel castor models, their load capacities, and which equipment they're best suited for.
| Castor Model | Wheel Material | Load Rating (Per Wheel) | Suitable for Workbench E? | Suitable for Material Rack B? | Key Features |
|---|---|---|---|---|---|
| FC-250 | Rubber | 250kg | Yes (ideal for 100-150kg total load) | No (total load too low for 450kg rack) | Quiet operation, gentle on hardwood/vinyl floors |
| FC-350 | Polyurethane | 350kg | Yes (handles up to 200kg total load) | Yes (4 wheels = 1400kg total; more than enough for 450kg) | Oil-resistant, high grip, suitable for concrete floors |
| FC-500 | Steel | 500kg | Overkill (but works for heavy-duty workbenches) | Yes (excellent for racks with variable loads) | Heavy-duty, withstands extreme temperatures, low maintenance |
| FC-200 | Nylon | 200kg | Yes (light to medium loads, e.g., electronics assembly) | No (4 wheels = 800kg, but tight margin for 450kg rack) | Economical, good for smooth floors, low rolling resistance |
A few notes on this chart: For Workbench E, the FC-250 or FC-350 is usually sufficient, depending on how much weight you typically load onto it. The FC-350, with its polyurethane wheel, is a versatile choice—it's durable enough for concrete floors but won't scratch delicate surfaces like vinyl. For Material Rack B, the FC-350 is a sweet spot: 350kg per wheel x 4 wheels = 1400kg total capacity, which leaves plenty of buffer for uneven loading or occasional overstocking. The FC-500 (steel wheel) is better for industrial settings where racks might carry metal parts or machinery components, pushing 600kg or more.
Caster and Accessories: The Extras That Make a Difference
Flat adjustable swivel castor wheels don't work alone—they rely on caster and accessories to perform at their best. Brakes, for example, are non-negotiable for Workbench E: once you've positioned it at an assembly station, a brake locks the wheel in place, preventing unwanted movement while you work. For Material Rack B, swivel locks can be useful—engaging them turns the swivel castors into fixed ones, making it easier to push the rack in a straight line down long aisles.
Other accessories include wheel guards to protect against debris, stem extensions for taller equipment, and replacement bearings for when swivel action starts to feel stiff. Even something as simple as a lubricant can extend a castor's lifespan, ensuring smooth rotation day in and day out. When selecting accessories, always check that they're compatible with your castor model—mixing and matching can compromise load capacity or safety.
Aligning with Lean System Principles
If your workspace follows lean system principles—focused on minimizing waste, maximizing efficiency, and continuous improvement—then choosing the right castors isn't just a practical decision; it's a strategic one. Lean systems thrive on adaptability: the ability to reconfigure workstations quickly, reduce unnecessary movement, and eliminate bottlenecks. Flat adjustable swivel castors support this by making Workbench E and Material Rack B highly mobile, allowing you to rearrange your floor plan on the fly.
For example, if a sudden rush of orders increases demand at the packaging station, you can wheel Material Rack B closer to the line, cutting down on the time workers spend fetching supplies. Or, if a new assembly process requires collaboration between two teams, you can position two Workbench E units side by side, creating a temporary shared workspace. In lean terms, this reduces "motion waste"—the time and energy spent moving between fixed locations—and turns your equipment into a flexible asset that adapts to your needs, not the other way around.
How to Choose the Right Castor for Your Needs
So, you're convinced that flat adjustable swivel castors are the way to go for your Workbench E and Material Rack B. Now what? Here's a step-by-step guide to selecting the perfect castor:
1. Calculate Total Load: Start by figuring out the maximum weight your equipment will carry. For Workbench E, add the weight of the bench itself (usually 30-50kg) to the weight of tools, parts, and any workers who might lean on it. For Material Rack B, sum the weight of the rack plus the heaviest possible load on all 3 rows and 3 floors. Divide this total by the number of castors (typically 4) to get the per-wheel load requirement.
2. Consider the Floor Surface: Rubber wheels are best for hardwood or vinyl floors (they prevent scratches), while polyurethane works well on concrete. Steel wheels are tough but noisy and can damage soft floors, so reserve them for industrial settings with rough surfaces.
3. Check Adjustability Range: Measure the unevenness of your floor. If there's a 10mm height difference between the highest and lowest points, choose castors that can adjust by at least 15mm to ensure stability.
4. Don't Skimp on Quality: It might be tempting to opt for the cheapest castors, but remember: a failed castor can cost far more in downtime, repairs, or injuries than the savings from a budget buy. Look for reputable brands with clear load rating certifications.
Maintenance: Keeping Your Castors Rolling Smoothly
Even the best castors need care to perform their best. Here are a few maintenance tips to extend their lifespan:
• Clean Regularly: Sweep or vacuum debris from around the wheels and swivel joints—small particles can jam the mechanism over time.
• Lubricate Swivel Joints: Apply a light machine oil or silicone spray every 3-6 months to keep rotation smooth.
• Tighten Mounting Bolts: Check bolts connecting the castor to Workbench E or Material Rack B monthly—vibration can loosen them, leading to instability.
• Inspect Wheels: Look for cracks, flat spots, or excessive wear. replace wheels at the first sign of damage—don't wait for them to fail.
Final Thoughts: Small Parts, Big Impact
Flat adjustable swivel castor wheels might not be the most glamorous part of your workshop, but they're undeniably essential. When paired with Workbench E and Material Rack B, they transform static equipment into dynamic tools that support lean system goals, boost productivity, and keep your team safe. By understanding load ratings, choosing the right castors, and maintaining them properly, you're not just investing in wheels—you're investing in a smoother, more efficient workflow.
So, the next time you see a Workbench E gliding across the floor or a Material Rack B being repositioned with ease, take a moment to appreciate the flat adjustable swivel castors making it all possible. They're proof that in manufacturing and warehousing, sometimes the smallest components are the ones that keep the whole operation rolling.