- Company Articles
- Products and Technology
- Installation And Maintenance
- Flat Rigid Castor Wheel Maintenance Tools: Essential Kits for Regular Inspections

Flat Rigid Castor Wheel Maintenance Tools: Essential Kits for Regular Inspections
Related Product
Flat Rigid Castor Wheel
Chair Casters Ball Bearing Wheels Rubber Base. Resistant to abrasion, impact and corrosion. Heavy payload can hold 70Kgs per pcs,which can make it works at a stable and smooth status.
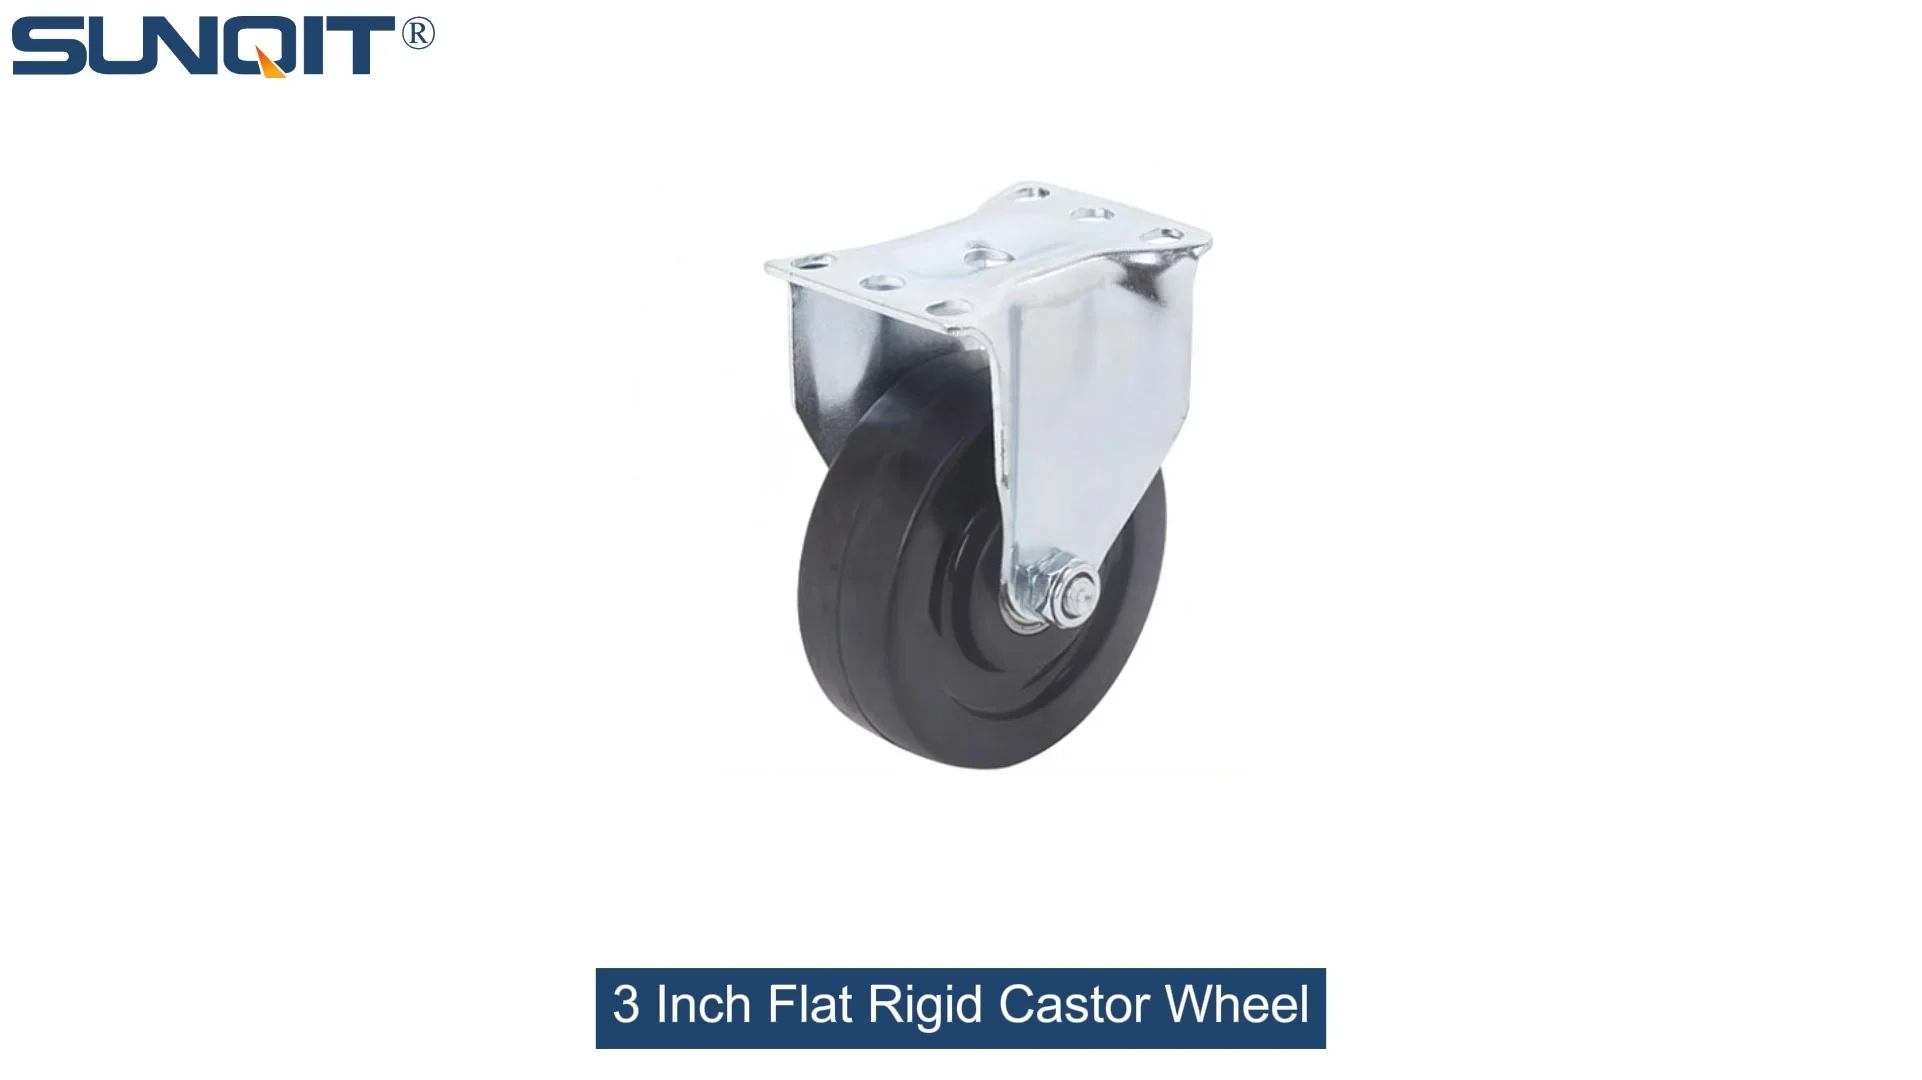
In the bustling world of manufacturing plants, warehouses, and workshops, there's an unsung hero keeping operations moving smoothly: the flat rigid castor wheel . These sturdy components quietly bear the weight of workbenches, material trolleys, and heavy racks, ensuring that tools, parts, and products glide from one station to another without a hitch. But like any hardworking equipment, they demand care. Imagine a scenario where a critical workbench grinds to a halt because its castor wheels are seized with debris, or a trolley wobbles dangerously due to loose fasteners—these aren't just minor inconveniences. They disrupt workflows, risk employee safety, and eat into your bottom line. The solution? Regular inspections powered by the right maintenance tools. In this guide, we'll dive into the essential toolkit every facility manager, maintenance technician, or workshop owner needs to keep their flat rigid castor wheels—and their operations—in top shape.
Why Maintenance Matters: Beyond "If It Ain't Broke, Don't Fix It"
It's easy to overlook castor wheel maintenance. After all, they're built to be tough, right? While it's true that flat rigid castor wheels are designed for durability—often made from high-grade rubber, polyurethane, or steel—they're not invincible. Daily exposure to dust, grease, heavy loads, and uneven floors takes a toll over time. Here's why making maintenance a priority isn't just good practice; it's an investment:
Safety First: A wobbly or seized castor wheel isn't just inefficient—it's a hazard. Imagine an employee pushing a loaded trolley when a wheel suddenly locks, causing them to strain their back or lose balance. Loose fasteners can even lead to wheels detaching mid-use, risking damage to products or injury to workers. Regular checks catch these issues before they escalate.
Efficiency Unlocked: A well-maintained castor wheel rolls smoothly, reducing the force needed to move equipment. This might seem trivial, but over a full workday, it adds up. Employees spend less energy pushing and pulling, fatigue decreases, and tasks get done faster. In a busy production line, those saved minutes translate to higher output.
Cost Savings: Replacing a damaged castor wheel or repairing a warped workbench frame costs far more than a tube of lubricant or a set of new washers. By extending the lifespan of your caster wheel components, you avoid unexpected replacement costs and minimize downtime.
Longevity for Your Gear: Castor wheels are part of a larger system—your workbench, trolley, or rack. When wheels wear unevenly or seize, they put extra stress on the frame, axles, and joints. Proper maintenance protects the entire structure, ensuring your equipment lasts for years.
The Essential Toolkit: What You Need to Get Started
Maintaining flat rigid castor wheels isn't about guesswork—it's about having the right tools for the job. Whether you're performing a quick weekly check or a deep monthly inspection, this toolkit will help you identify issues, make repairs, and keep wheels rolling smoothly. Let's break down the must-have items, from basic hand tools to specialized gear:
1. Precision Screwdriver Set: Tightening the Small Stuff
Flat rigid castor wheels are held together by a network of screws, bolts, and fasteners—think axle pins, mounting brackets, and lock nuts. Over time, vibration from movement can loosen these, leading to wobbling or misalignment. A precision screwdriver set, with both Phillips and flat-head tips in various sizes, is your first line of defense. Look for magnetic tips to avoid dropping tiny screws into hard-to-reach spaces, and ergonomic handles to reduce hand fatigue during extended use. Pro tip: Label screws as you remove them (or take a quick photo) to ensure you reassemble everything correctly.
2. Calibrated Torque Wrench: Tight, But Not Too Tight
For larger fasteners—like those securing the castor to a workbench or trolley frame—a regular screwdriver might not cut it. Over-tightening can strip threads or warp the mounting plate, while under-tightening leaves the wheel loose. A torque wrench solves this by letting you tighten fasteners to a specific torque (measured in foot-pounds or Newton-meters), as recommended by the manufacturer. Most castor wheels come with torque specifications, so keep a cheat sheet handy. A 1/4-inch or 3/8-inch drive torque wrench is ideal for most flat rigid castor applications.
3. Bearing Puller and Installer Kit: Getting to the Heart of the Wheel
The bearings inside a castor wheel are what make smooth movement possible. When they wear out or get contaminated with dirt, you'll notice grinding noises, resistance, or uneven rolling. A bearing puller (manual or hydraulic) lets you remove worn bearings without damaging the wheel or axle. Pair it with a bearing installer tool to press new bearings into place evenly—hammering bearings in can cause misalignment, leading to premature failure. Look for kits that include multiple jaw sizes to fit different bearing diameters.
4. Lubrication Kit: Keeping Things Moving Freely
Dry, unlubricated bearings and axles are a recipe for friction and wear. A good lubrication kit includes: a high-quality grease (lithium-based or PTFE-infused works well for castors), a grease gun or applicator brush for precise application, and a small bottle of penetrating oil for loosening rusted parts. Avoid using household oils—they break down quickly under heavy loads. For food-grade environments, opt for NSF H1-rated lubricants to ensure compliance. Pro tip: Clean bearings thoroughly with a solvent before reapplying lubricant—old grease mixed with new grease creates a gritty paste that accelerates wear.
5. Wire Brush and Scraper: Banishing Debris
Dust, metal shavings, and even small screws or bolts have a knack for getting trapped between the wheel and the mounting bracket, or inside the axle housing. Over time, this debris acts like sandpaper, wearing down components and causing the wheel to stick. A wire brush (stiff-bristled for metal parts, soft-bristled for rubber wheels) and a plastic scraper (to avoid scratching wheel surfaces) will help you dislodge and remove buildup. For hard-to-reach crevices—like the space between the wheel and the fork—a pipe cleaner or compressed air can work wonders.
6. Digital Caliper: Measuring Wear with Precision
How do you know when a castor wheel is beyond repair? Guesswork isn't enough. A digital caliper lets you measure critical wear indicators: the thickness of the wheel (look for uneven wear patterns), the depth of the tread (if applicable), and the clearance between the wheel and the fork. Most manufacturers specify a minimum wheel thickness—for example, if a wheel starts at 2 inches thick and is worn down to 1.5 inches, it's time for replacement. Digital calipers are easy to use: just zero them on a flat surface, then measure the wheel at multiple points to check for uneven wear.
7. Rubber Mallet: Gentle Persuasion
Sometimes, components get stuck—whether it's a seized axle or a bearing that won't budge. A rubber mallet delivers gentle, controlled force to loosen parts without damaging them. Unlike a steel hammer, which can crack or dent the wheel or mounting bracket, a rubber mallet absorbs shock, making it safe for use on delicate materials like polyurethane or rubber wheels. Use it to tap a stuck axle loose or nudge a bearing into place during installation.
8. Inspection Mirror: Seeing the Unseen
Castor wheels are often mounted close to the ground or in tight spaces, making it hard to see the top or back of the wheel, or the area where the axle meets the fork. An extendable inspection mirror (with a flexible neck) lets you peer into these blind spots, checking for cracks, rust, or debris you might otherwise miss. It's also handy for inspecting the condition of the mounting plate bolts from below, without having to tip over the entire trolley or workbench.
9. Replacement Caster Accessories : Spare Parts for Quick Fixes
Even with careful maintenance, parts wear out. Having a stock of common caster accessories on hand means you can make repairs on the spot, rather than waiting for a replacement shipment. Essentials include: washers (to reduce friction between moving parts), cotter pins (to secure axles), lock nuts (to prevent loosening), and axle sleeves (to repair worn axle holes). Check your castor wheel model numbers and keep a list of compatible accessories—most suppliers offer kits tailored to specific wheel types.
10. Safety Gear: Protecting the Person Behind the Tools
Last but never least: personal protective equipment (PPE). Maintenance involves sharp edges, moving parts, and chemicals (like lubricants or solvents). A pair of cut-resistant work gloves protects your hands from scrapes or pinches, while safety glasses shield your eyes from flying debris (especially when using a wire brush or hammer). If you're working with solvents or degreasers, add nitrile gloves and a respirator (in poorly ventilated areas) to your kit.
| Tool | Purpose | Key Features to Look For | Best For |
|---|---|---|---|
| Precision Screwdriver Set | Tightening/removing small screws and fasteners | Magnetic tips, ergonomic handles, multiple sizes | Axle pins, lock nuts, mounting bracket screws |
| Calibrated Torque Wrench | Ensuring proper fastener tightness | Adjustable torque settings, clear readout | Mounting plate bolts, large axle nuts |
| Bearing Puller/Installer Kit | Removing and replacing worn bearings | Multiple jaw sizes, hydraulic or manual operation | Wheel bearings, sealed bearing units |
| Lubrication Kit | Reducing friction in bearings and axles | Grease gun, high-quality lubricant, applicator brush | Bearings, axle shafts, moving joints |
| Digital Caliper | Measuring wear on wheels, axles, and brackets | Decimal/inch readout, accuracy to 0.001 inches | Wheel thickness, tread depth, axle diameter |
| Caster Accessories Kit | On-the-spot repairs | Washers, cotter pins, lock nuts, axle sleeves | Emergency fixes for loose or worn parts |

Step-by-Step Inspection: A Routine You Can Stick To
With your toolkit assembled, it's time to put it into action. Regular inspections don't have to be time-consuming—even a 15-minute weekly check can catch most issues early. Here's a simple, repeatable process to follow:
Step 1: Visual Inspection (Weekly Check)
Start with the basics: a walk-around visual check. Roll the equipment (workbench, trolley, etc.) slowly and watch how the wheels behave. Do they wobble? Drag? Make unusual noises? Then, lift the corner of the equipment (or tip it gently, if safe) to inspect the wheel itself: look for cracks in the wheel or mounting bracket, rust on metal parts, or chunks missing from the tread. Check the axle for signs of bending or corrosion, and the fork (the metal frame holding the wheel) for (deformation). Use your inspection mirror to look at the top and back of the wheel, where debris often hides.
Step 2: Cleaning (Monthly Deep Clean)
Once a month, give the wheels a thorough cleaning. Use the wire brush to scrub away dirt, grease, or metal shavings from the wheel surface, axle, and fork. For sticky residue (like oil or adhesive), apply a degreaser and let it sit for 5 minutes before wiping with a rag. Use the scraper to remove caked-on debris from the axle housing or between the wheel and fork. Finish by wiping the wheel with a dry cloth—this helps you spot any remaining issues, like hairline cracks, more easily.
Step 3: Fastener Check (Monthly)
Using your precision screwdriver or torque wrench, check all fasteners: axle nuts, mounting plate bolts, and any screws holding the fork to the equipment. Tighten any that are loose, but avoid over-tightening (use the torque wrench for critical bolts). If you notice a bolt that keeps loosening, it may be stripped—replace it with a new one from your caster accessories kit. Also, check cotter pins (if your wheels use them) for bending or corrosion; replace any that look worn.
Step 4: Bearing and Axle Inspection (Quarterly)
Spin each wheel by hand— it should rotate smoothly, with minimal resistance. If you feel grinding, hear a squeaking noise, or the wheel stops abruptly, the bearings are likely worn or contaminated. Use the bearing puller to remove the axle (after removing the cotter pin or lock nut), then extract the bearings. Clean them with solvent, dry thoroughly, and check for pitting, rust, or play (wobbling). If they're damaged, replace them with new ones using the bearing installer. While the axle is out, inspect it for straightness and rust—sand away light rust, but replace bent or deeply corroded axles.
Step 5: Lubrication (Quarterly, or After Cleaning Bearings)
Apply lubricant to the bearings, axle, and any moving joints (like the fork pivot, if applicable). For sealed bearings, a few drops of oil around the axle are usually enough. For open bearings, pack them with grease until it oozes out the sides (this ensures no air pockets remain). Wipe away excess lubricant to prevent attracting dirt. If the wheel has a grease fitting (a small nipple on the fork), use a grease gun to inject lubricant until old grease is pushed out—this flushes out contaminants.
Step 6: Wear Measurement (Quarterly)
Grab your digital caliper and measure the wheel thickness at three points (top, bottom, side) to check for uneven wear. Compare the measurements to the manufacturer's minimum thickness specification—if it's below, replace the wheel. Also, measure the tread depth (if the wheel has a tread) and check for flat spots (common if the wheel is left under load for long periods). A wheel with flat spots will vibrate when rolled, so replace it even if the thickness is still above minimum.
Step 7: Functional Test (After Any Repair)
After cleaning, tightening, or replacing parts, give the wheels a final test. Roll the equipment across a flat surface— it should move smoothly, with no wobbling or dragging. Apply light pressure to the side of the wheel while rolling; it shouldn't tilt or shift excessively. If everything checks out, you're good to go!

Troubleshooting Common Issues: What to Do When Wheels Go Wrong
Even with regular maintenance, problems can pop up. Here's how to diagnose and fix the most common flat rigid castor wheel issues using your toolkit:
Issue: Wheel Wobbles or Tilts
Cause: Loose fasteners, bent axle, or worn wheel bearings. Solution: Tighten fasteners with a torque wrench. If wobbling persists, check the axle for bending (use the digital caliper to measure straightness). If the axle is bent, replace it. If the axle is straight, inspect the bearings—replace if worn.
Issue: Wheel Drags or Moves Stiffly
Cause: Debris in the axle housing, dry bearings, or a flat spot on the wheel. Solution: Clean the axle and fork with a wire brush and scraper. Lubricate the bearings and axle. If dragging continues, check for flat spots using the caliper—replace the wheel if flat spots are present.
Issue: Grinding or Squeaking Noises
Cause: Worn or contaminated bearings, or metal-on-metal contact (e.g., a loose axle rubbing against the fork). Solution: Remove the bearings, clean them, and check for damage. replace if pitted or rusted. If the noise is from metal contact, tighten the axle nut or add a washer (from your caster accessories kit) to reduce play.
Issue: Wheel Keeps Loosening
Cause: Stripped threads on the axle or mounting plate, or missing lock washers. Solution: replace the stripped fastener with a new one. Add a lock washer (from your accessories kit) to prevent future loosening— the washer's teeth dig into the metal, creating friction that holds the bolt in place.

Caring for Your Tools: Keeping the Kit Itself in Shape
Your maintenance toolkit is only as reliable as the care you give it. After each use, clean tools thoroughly: wipe down screwdrivers and wrenches with a rag to remove grease, and use a wire brush to clean debris from the bearing puller jaws. Lubricate moving parts of the torque wrench or bearing puller (like the pivot points) to prevent rust. Store tools in a sturdy case or toolbox, with dividers to keep them organized—this saves time when you need a specific tool quickly. For precision tools like the digital caliper, avoid dropping them or exposing them to extreme temperatures, and calibrate them annually (most suppliers offer calibration services).
Conclusion: Maintenance as a Habit, Not a Chore
Flat rigid castor wheels might not be the most glamorous part of your facility, but they're the backbone of smooth operations. By investing in the right tools and making regular maintenance a habit, you're not just keeping wheels rolling—you're protecting your employees, boosting efficiency, and saving money in the long run. Remember: a 15-minute weekly check, a monthly deep clean, and quarterly bearing inspections are all it takes to extend the life of your castor wheels and the equipment they support. So, grab your toolkit, roll up your sleeves, and give those hardworking wheels the care they deserve. Your workflow (and your bottom line) will thank you.