- Company Articles
- Products and Technology
- Installation And Maintenance
- Flat Rigid Castor Wheel Troubleshooting: Fixing Wobbles in Production Workbenches

Flat Rigid Castor Wheel Troubleshooting: Fixing Wobbles in Production Workbenches
Related Product
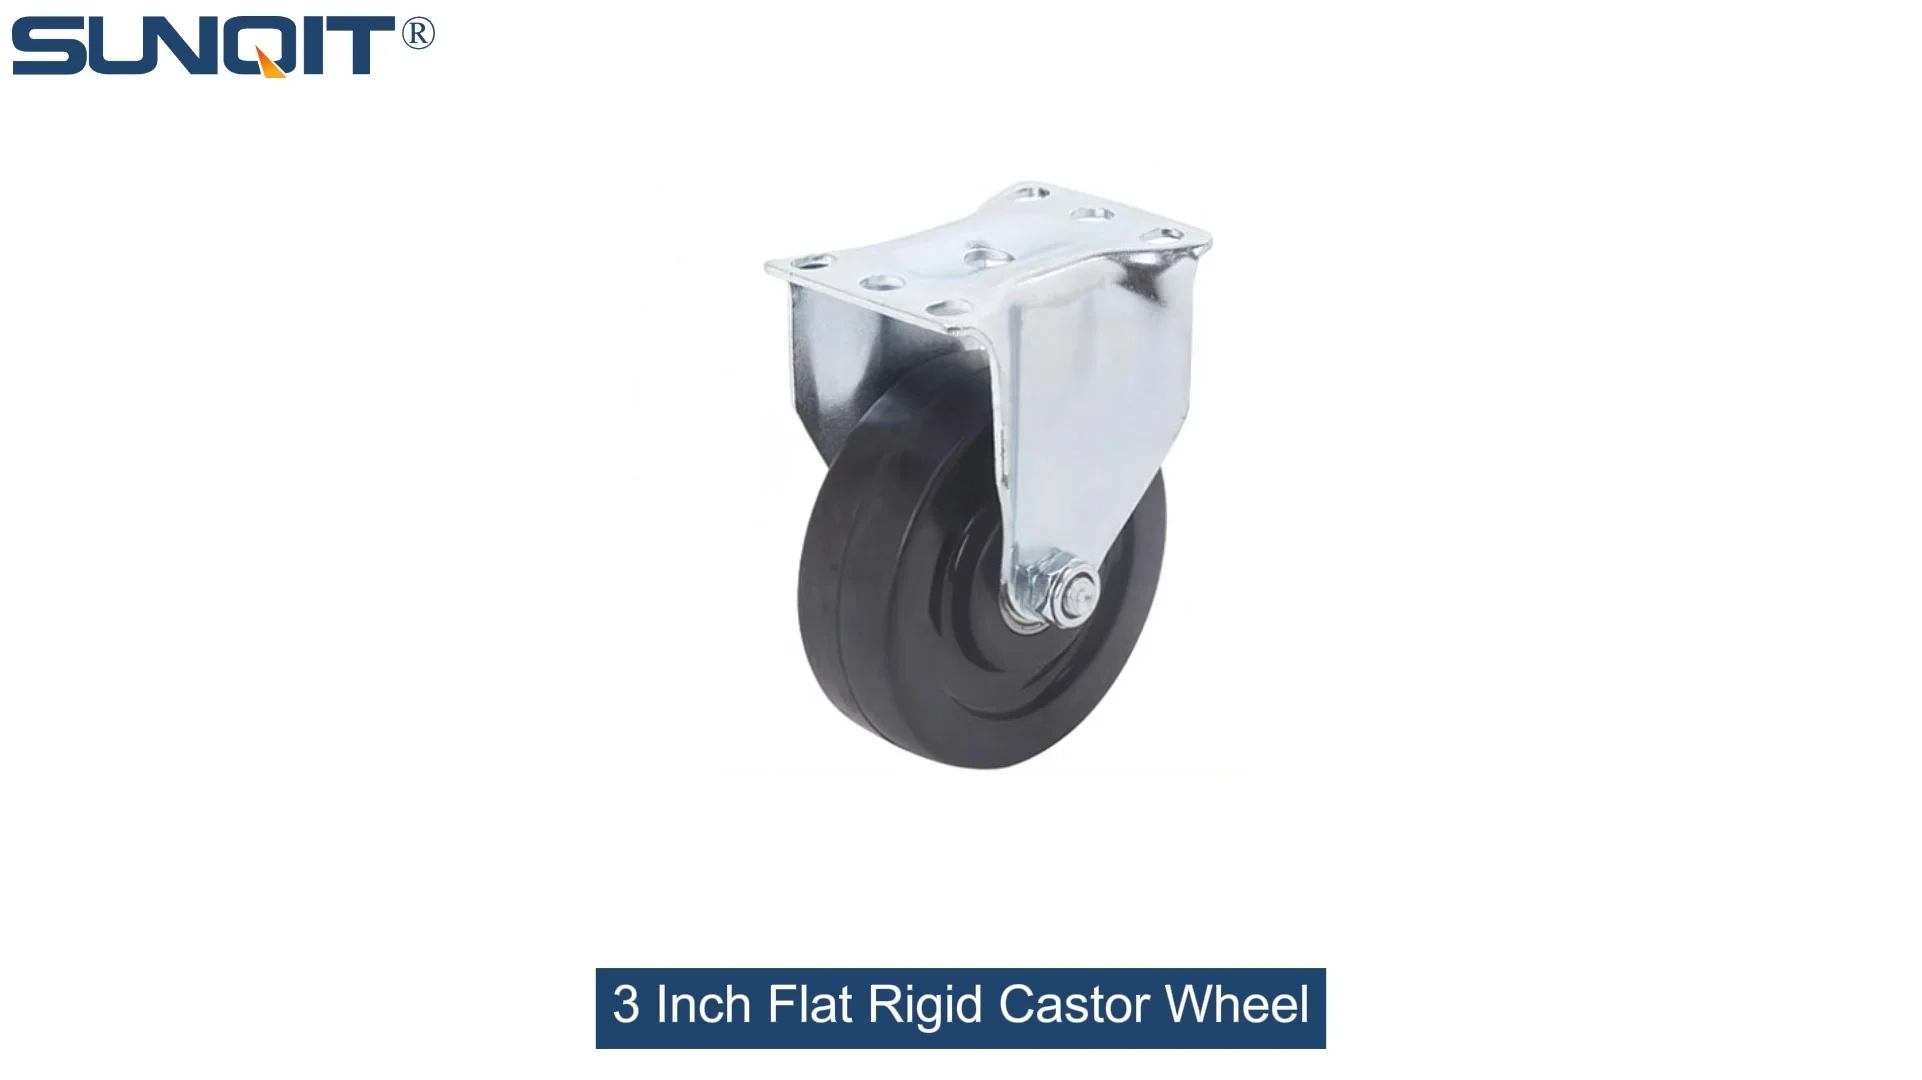
Flat Rigid Castor Wheel
Chair Casters Ball Bearing Wheels Rubber Base. Resistant to abrasion, impact and corrosion. Heavy payload can hold 70Kgs per pcs,which can make it works at a stable and smooth status.
Picture this: It's a busy Tuesday morning on the factory floor. Maria, an assembly line worker, is midway through attaching components to a circuit board when her workbench suddenly lurches. She jerks her hand back just in time to avoid a misaligned screw, but the momentum knocks a bin of small parts onto the floor. Sighing, she kneels to clean up, knowing this isn't the first time today—and it won't be the last. The culprit? A wobbly workbench, its flat rigid castor wheels refusing to stay steady.
In manufacturing and production environments, stability isn't just a convenience—it's the backbone of efficiency, safety, and quality. A (wobbly) workbench disrupts workflows, increases error rates, and even puts workers at risk of strains or accidents. And while there are many potential causes of instability, one often-overlooked suspect is the humble flat rigid castor wheel. These unassuming components, designed to keep workbenches stationary while supporting heavy loads, can become a source of frustration when they fail.
In this guide, we'll dive into the world of flat rigid castor wheels, exploring why they wobble, how to diagnose the root cause, and step-by-step solutions to restore stability to your production workbench. Whether you're a facility manager, a maintenance technician, or a frontline worker, this article will equip you with the knowledge to turn that shaky workbench into a rock-solid foundation for productivity—all while tying into the principles of a lean system that values efficiency and waste reduction.
In manufacturing and production environments, stability isn't just a convenience—it's the backbone of efficiency, safety, and quality. A (wobbly) workbench disrupts workflows, increases error rates, and even puts workers at risk of strains or accidents. And while there are many potential causes of instability, one often-overlooked suspect is the humble flat rigid castor wheel. These unassuming components, designed to keep workbenches stationary while supporting heavy loads, can become a source of frustration when they fail.
In this guide, we'll dive into the world of flat rigid castor wheels, exploring why they wobble, how to diagnose the root cause, and step-by-step solutions to restore stability to your production workbench. Whether you're a facility manager, a maintenance technician, or a frontline worker, this article will equip you with the knowledge to turn that shaky workbench into a rock-solid foundation for productivity—all while tying into the principles of a lean system that values efficiency and waste reduction.
Why Stability Matters: The Hidden Costs of a Wobbly Workbench
Before we tackle troubleshooting, let's take a moment to understand why a stable workbench is non-negotiable. In production settings, every second counts, and even minor disruptions add up. A wobbly workbench isn't just an annoyance—it's a silent drain on resources.
First, there's the hit to productivity. When a workbench (shakes), tasks that require precision—like assembling small parts, soldering, or inspecting components—take longer. Workers slow down to compensate for the movement, leading to missed deadlines and bottlenecks in the production line. Over time, these delays can snowball into significant losses: a 10-minute daily slowdown per worker, multiplied across a 50-person team, equals over 400 hours of lost productivity annually.
Then there's quality control. A (unstable) surface increases the risk of errors: a misaligned drill hole, a cracked circuit board, or a misplaced label. These mistakes mean rework, scrap, and wasted materials—all of which directly eat into profits. In industries like electronics or medical device manufacturing, where precision is critical, a single error can cost thousands of dollars.
Safety is another critical factor. A workbench that shifts unexpectedly can cause tools or materials to fall, leading to trips, slips, or even injuries. Workers may also strain their backs or shoulders by overcompensating for the movement, increasing the risk of chronic pain or workplace accidents.
Finally, there's the impact on morale. No one enjoys working with equipment that fights against them. A wobbly workbench sends a message that the company doesn't prioritize the tools workers need to succeed, leading to frustration and disengagement. In contrast, a stable, reliable workbench fosters confidence and focus—key ingredients for a motivated team.
At the heart of these issues is the role of flat rigid castor wheels. Unlike swivel casters, which rotate to allow movement, flat rigid castor wheels are fixed in place, designed to keep the workbench stationary while supporting its weight. When they fail, the entire system suffers. Let's explore why these wheels wobble in the first place.
First, there's the hit to productivity. When a workbench (shakes), tasks that require precision—like assembling small parts, soldering, or inspecting components—take longer. Workers slow down to compensate for the movement, leading to missed deadlines and bottlenecks in the production line. Over time, these delays can snowball into significant losses: a 10-minute daily slowdown per worker, multiplied across a 50-person team, equals over 400 hours of lost productivity annually.
Then there's quality control. A (unstable) surface increases the risk of errors: a misaligned drill hole, a cracked circuit board, or a misplaced label. These mistakes mean rework, scrap, and wasted materials—all of which directly eat into profits. In industries like electronics or medical device manufacturing, where precision is critical, a single error can cost thousands of dollars.
Safety is another critical factor. A workbench that shifts unexpectedly can cause tools or materials to fall, leading to trips, slips, or even injuries. Workers may also strain their backs or shoulders by overcompensating for the movement, increasing the risk of chronic pain or workplace accidents.
Finally, there's the impact on morale. No one enjoys working with equipment that fights against them. A wobbly workbench sends a message that the company doesn't prioritize the tools workers need to succeed, leading to frustration and disengagement. In contrast, a stable, reliable workbench fosters confidence and focus—key ingredients for a motivated team.
At the heart of these issues is the role of flat rigid castor wheels. Unlike swivel casters, which rotate to allow movement, flat rigid castor wheels are fixed in place, designed to keep the workbench stationary while supporting its weight. When they fail, the entire system suffers. Let's explore why these wheels wobble in the first place.
Common Causes of Wobbles: Why Flat Rigid Castor Wheels Fail
Flat rigid castor wheels are simple in design—typically consisting of a wheel, a mounting bracket, and a axle—but their simplicity belies their importance. Wobbles can stem from a range of issues, from wear and tear to poor installation. Let's break down the most common culprits:
1. Uneven or Damaged Flooring
The first place to look when troubleshooting a wobbly workbench isn't the caster itself—it's the floor beneath it. Production floors take a beating: heavy machinery rolls over them, spills are common, and over time, cracks, dips, or uneven patches can form. Even a small imperfection—a 1/8-inch dip or a raised seam—can cause a flat rigid castor wheel to lift slightly, throwing the workbench off balance.
Hard floors like concrete are prone to this, especially in older facilities. But even newer floors can develop issues: improper curing, shifting subfloors, or damage from dropped tools can create uneven surfaces. When one or more castor wheels sit on a higher or lower spot than the others, the workbench will rock back and forth, creating that familiar wobble.
Hard floors like concrete are prone to this, especially in older facilities. But even newer floors can develop issues: improper curing, shifting subfloors, or damage from dropped tools can create uneven surfaces. When one or more castor wheels sit on a higher or lower spot than the others, the workbench will rock back and forth, creating that familiar wobble.
2. Loose or Damaged Mounting Hardware
Flat rigid castor wheels are attached to the workbench frame using mounting brackets, bolts, or plates—collectively known as caster accessories. Over time, these components can loosen due to vibration from the workbench or the production environment. A loose bolt or a bent bracket can cause the caster to shift, altering its alignment and creating instability.
Even a tiny gap between the mounting bracket and the workbench leg can lead to movement. For example, if the bolts securing the caster to the aluminum profile of the workbench frame are loose, the caster may pivot slightly with each movement, causing the wheel to "walk" or tilt. In severe cases, a bracket might even crack, leaving the caster partially detached and the workbench dangerously unstable.
Even a tiny gap between the mounting bracket and the workbench leg can lead to movement. For example, if the bolts securing the caster to the aluminum profile of the workbench frame are loose, the caster may pivot slightly with each movement, causing the wheel to "walk" or tilt. In severe cases, a bracket might even crack, leaving the caster partially detached and the workbench dangerously unstable.
3. Worn or Deformed Wheels
The wheel itself is the most obvious component to inspect. Flat rigid castor wheels are typically made of rubber, plastic, or metal, and each material has its own wear patterns. Rubber wheels, for example, can develop flat spots from prolonged pressure or exposure to oils and chemicals. Plastic wheels may crack or chip if overloaded, while metal wheels can bend or warp if struck by heavy objects.
A wheel with a flat spot will cause the workbench to bounce or lurch as it rotates, even if the caster is fixed in place. Similarly, a cracked wheel may wobble as the damaged section hits the floor. Over time, this wear can become so gradual that workers adapt to the movement—until one day, the wobble becomes too severe to ignore.
A wheel with a flat spot will cause the workbench to bounce or lurch as it rotates, even if the caster is fixed in place. Similarly, a cracked wheel may wobble as the damaged section hits the floor. Over time, this wear can become so gradual that workers adapt to the movement—until one day, the wobble becomes too severe to ignore.
4. Mismatched Caster Sizes or Load Capacities
Not all flat rigid castor wheels are created equal. They come in different sizes (diameters and widths) and load capacities, and using the wrong ones for your workbench is a recipe for instability. For example, if you replace a 5-inch wheel with a 4-inch wheel on one corner of the workbench, that corner will sit lower than the others, causing the bench to tilt. Similarly, using casters with a lower load capacity than the workbench requires can lead to sagging or deformation, as the wheels struggle to support the weight.
This issue often arises during maintenance or repairs when replacement casters are chosen based on availability rather than specifications. A quick fix with the wrong part might seem convenient, but it's a temporary solution that will only lead to more problems down the line.
This issue often arises during maintenance or repairs when replacement casters are chosen based on availability rather than specifications. A quick fix with the wrong part might seem convenient, but it's a temporary solution that will only lead to more problems down the line.
5. Workbench Frame Issues
Sometimes, the problem isn't the casters at all—it's the workbench itself. If the frame is bent, twisted, or poorly constructed, even the best casters won't keep it stable. Aluminum profile workbenches, for example, rely on tight connections between profiles and joints. If a joint is loose or a profile is bent, the frame may warp, causing the casters to sit unevenly.
Overloading the workbench can also contribute to frame issues. Placing more weight on one side than the other—like a heavy tool chest on the left corner—can cause the frame to flex, lifting the casters on the opposite side. Over time, this flexing weakens the frame, leading to permanent deformation and chronic instability.
Overloading the workbench can also contribute to frame issues. Placing more weight on one side than the other—like a heavy tool chest on the left corner—can cause the frame to flex, lifting the casters on the opposite side. Over time, this flexing weakens the frame, leading to permanent deformation and chronic instability.

Step-by-Step Troubleshooting: Diagnosing the Root Cause
Now that we've covered the common causes, let's walk through a systematic troubleshooting process to identify what's causing your workbench to wobble. This step-by-step approach will help you narrow down the issue and avoid wasting time on unnecessary repairs.
Step 1: Inspect the Floor
Start by examining the area around the workbench. Clear away any debris, tools, or materials that might be underfoot—sometimes a small screw or piece of scrap can get caught under a wheel and cause a temporary wobble. Once the area is clear, visually check the floor for cracks, dips, or raised seams.
For a more precise test, place a spirit level on the workbench surface. If the bubble is off-center, the bench is uneven. Now, lift each corner of the workbench slightly (one at a time) and place a shim (a small piece of wood or metal) under the caster. If the wobble stops when a shim is added, the floor is likely the issue.
Pro tip: Use a laser level to check the floor's flatness across the entire workbench area. Shine the laser along the floor and mark where the beam deviates—this will show you exactly where the high or low spots are.
For a more precise test, place a spirit level on the workbench surface. If the bubble is off-center, the bench is uneven. Now, lift each corner of the workbench slightly (one at a time) and place a shim (a small piece of wood or metal) under the caster. If the wobble stops when a shim is added, the floor is likely the issue.
Pro tip: Use a laser level to check the floor's flatness across the entire workbench area. Shine the laser along the floor and mark where the beam deviates—this will show you exactly where the high or low spots are.
Step 2: Check Caster Mounting
Next, inspect the connection between the casters and the workbench frame. Grab each caster firmly and try to wiggle it side to side and up and down. If there's any movement, the mounting hardware is loose. Use a wrench or screwdriver to check the bolts securing the caster bracket to the frame—are they tight, or can they be turned by hand?
Look for signs of damage to the brackets or mounting plates: cracks, bends, or rust. A bent bracket may cause the caster to sit at an angle, even if the bolts are tight. Also, check the alignment of the caster: is it perpendicular to the frame, or is it tilted forward, backward, or to the side? Misalignment here can cause uneven weight distribution and wobbling.
Look for signs of damage to the brackets or mounting plates: cracks, bends, or rust. A bent bracket may cause the caster to sit at an angle, even if the bolts are tight. Also, check the alignment of the caster: is it perpendicular to the frame, or is it tilted forward, backward, or to the side? Misalignment here can cause uneven weight distribution and wobbling.
Step 3: Examine the Wheels
Now, focus on the wheels themselves. Rotate each wheel slowly by hand and look for flat spots, cracks, or chunks missing from the tread. Run your finger along the edge of the wheel—you should feel a smooth, even surface. If you notice a dip or a rough patch, that's a flat spot.
Check the axle as well: is it bent, or does it wobble when the wheel spins? A bent axle will cause the wheel to rotate unevenly, leading to a "wobble" even if the wheel itself is undamaged. Also, inspect the wheel bearings (if present)—if they're seized or worn, the wheel may not spin freely, causing jerking movements when the workbench is moved (or, in the case of rigid casters, creating instability when weight shifts).
Check the axle as well: is it bent, or does it wobble when the wheel spins? A bent axle will cause the wheel to rotate unevenly, leading to a "wobble" even if the wheel itself is undamaged. Also, inspect the wheel bearings (if present)—if they're seized or worn, the wheel may not spin freely, causing jerking movements when the workbench is moved (or, in the case of rigid casters, creating instability when weight shifts).
Step 4: Verify Caster Sizes and Load Capacities
If the wheels and mounting hardware look intact, check if the casters are the right size and capacity for your workbench. Measure the diameter and width of each wheel—they should all be the same. If one is smaller, that's a red flag.
Next, check the load capacity rating on the caster (usually printed on the bracket or wheel). Calculate the total weight of the workbench, including tools, materials, and any equipment placed on it. Divide that by the number of casters (most workbenches have 4) to get the minimum load capacity each caster should support. If the casters are rated below this number, they're overloaded and likely to sag or deform.
Next, check the load capacity rating on the caster (usually printed on the bracket or wheel). Calculate the total weight of the workbench, including tools, materials, and any equipment placed on it. Divide that by the number of casters (most workbenches have 4) to get the minimum load capacity each caster should support. If the casters are rated below this number, they're overloaded and likely to sag or deform.
Step 5: Assess the Workbench Frame
Finally, inspect the workbench frame for signs of damage or warping. Stand back and look at the bench from all angles—does it appear square, or is one side higher than the other? Check the aluminum profile joints (if your bench is made with aluminum profiles) for looseness or gaps. Tighten any loose bolts or connectors, and look for bent or twisted profiles.
If the frame is made of wood or steel, check for cracks, splits, or rust. A warped wooden top can cause the frame to twist, while rusted steel joints may weaken and fail over time. Place the spirit level on different parts of the frame (not just the top) to see if the legs or supports are uneven.
If the frame is made of wood or steel, check for cracks, splits, or rust. A warped wooden top can cause the frame to twist, while rusted steel joints may weaken and fail over time. Place the spirit level on different parts of the frame (not just the top) to see if the legs or supports are uneven.
| Issue | Signs to Look For | Quick Test |
|---|---|---|
| Uneven floor | Cracks, dips, or raised seams; spirit level bubble off-center | Add shims under casters—wobble stops if floor is the issue |
| Loose mounting hardware | Caster wiggles when pulled; bolts can be turned by hand | Wiggle caster—movement indicates loose bolts/brackets |
| Worn/damaged wheels | Flat spots, cracks, or rough tread; wheel wobbles when spun | Rotate wheel by hand—feel for bumps or uneven rotation |
| Mismatched casters | One wheel smaller than others; load rating below required weight | Measure wheel diameters; calculate load per caster |
| Frame damage | Bent profiles, loose joints, or uneven legs; frame appears twisted | Check spirit level on frame legs and supports |

Solutions: Fixing the Wobble and Restoring Stability
Once you've identified the root cause of the wobble, it's time to fix it. Below are targeted solutions for each common issue, designed to be practical and cost-effective—no need for expensive equipment or specialized training.
Solution 1: Addressing Uneven Floors
If the floor is uneven, there are a few ways to compensate:
Shimming: For minor dips, place shims under the affected caster(s). Use metal or hard plastic shims (wood can compress over time) and stack them until the workbench is level. Trim any excess shim material to avoid tripping hazards.
Floor Repair: For larger cracks or dips, consider repairing the floor itself. Epoxy fillers work well for small cracks, while self-leveling concrete can smooth out larger uneven areas. This is a more permanent solution but may require temporarily moving the workbench.
Adjustable Feet: If the floor is chronically uneven, replace one or more flat rigid castor wheels with adjustable feet (casters with built-in height adjustment). These allow you to tweak the height of each corner independently, ensuring the workbench stays level even as the floor shifts.
Shimming: For minor dips, place shims under the affected caster(s). Use metal or hard plastic shims (wood can compress over time) and stack them until the workbench is level. Trim any excess shim material to avoid tripping hazards.
Floor Repair: For larger cracks or dips, consider repairing the floor itself. Epoxy fillers work well for small cracks, while self-leveling concrete can smooth out larger uneven areas. This is a more permanent solution but may require temporarily moving the workbench.
Adjustable Feet: If the floor is chronically uneven, replace one or more flat rigid castor wheels with adjustable feet (casters with built-in height adjustment). These allow you to tweak the height of each corner independently, ensuring the workbench stays level even as the floor shifts.
Solution 2: Tightening or Replacing Mounting Hardware
Loose or damaged mounting hardware is easy to fix:
Tighten Bolts: Use a torque wrench to tighten loose bolts to the manufacturer's recommended torque (usually printed on the caster bracket). Avoid over-tightening, as this can strip the threads or crack the bracket.
replace Damaged Brackets: If a bracket is bent, cracked, or rusted, replace it with a new one. Most caster accessories (brackets, bolts, washers) are standard sizes and available at hardware stores or industrial supply shops. Make sure the new bracket matches the caster size and mounting hole pattern.
Add Reinforcement: For wobbly aluminum profile frames, add corner braces or gussets to strengthen the joints. These metal brackets attach to the inside or outside of the frame, preventing flexing and keeping the casters aligned.
Tighten Bolts: Use a torque wrench to tighten loose bolts to the manufacturer's recommended torque (usually printed on the caster bracket). Avoid over-tightening, as this can strip the threads or crack the bracket.
replace Damaged Brackets: If a bracket is bent, cracked, or rusted, replace it with a new one. Most caster accessories (brackets, bolts, washers) are standard sizes and available at hardware stores or industrial supply shops. Make sure the new bracket matches the caster size and mounting hole pattern.
Add Reinforcement: For wobbly aluminum profile frames, add corner braces or gussets to strengthen the joints. These metal brackets attach to the inside or outside of the frame, preventing flexing and keeping the casters aligned.
Solution 3: Repairing or Replacing Worn Wheels
Worn wheels need to be repaired or replaced:
Resurfacing: For rubber wheels with minor flat spots, use a sanding block to gently sand the tread until it's smooth. This works best for small, shallow flat spots—deep damage will require replacement.
Wheel Replacement: For cracked, chipped, or severely worn wheels, replace the entire caster or just the wheel (if the bracket is still good). When buying a new wheel, match the size, material, and load capacity to the original. If one wheel is replaced, consider replacing all four to ensure even wear and performance.
Lubrication: If the wheel axle is seized or stiff, apply a few drops of lubricating oil (like 3-in-1 oil) to the bearings. Spin the wheel by hand to distribute the oil—this can reduce friction and prevent future wear.
Resurfacing: For rubber wheels with minor flat spots, use a sanding block to gently sand the tread until it's smooth. This works best for small, shallow flat spots—deep damage will require replacement.
Wheel Replacement: For cracked, chipped, or severely worn wheels, replace the entire caster or just the wheel (if the bracket is still good). When buying a new wheel, match the size, material, and load capacity to the original. If one wheel is replaced, consider replacing all four to ensure even wear and performance.
Lubrication: If the wheel axle is seized or stiff, apply a few drops of lubricating oil (like 3-in-1 oil) to the bearings. Spin the wheel by hand to distribute the oil—this can reduce friction and prevent future wear.
Solution 4: Correcting Mismatched Casters
Mismatched casters are a quick fix:
replace with Matching Casters: If one caster is the wrong size or load rating, replace it with an identical model. Check the manufacturer's specs or take the old caster to a supplier to ensure a perfect match.
Upgrade to Higher Capacity: If the casters are overloaded, switch to a higher load rating. For example, if your workbench weighs 400 lbs and uses 4 casters rated for 100 lbs each, upgrade to 150-lb casters to add a safety margin.
replace with Matching Casters: If one caster is the wrong size or load rating, replace it with an identical model. Check the manufacturer's specs or take the old caster to a supplier to ensure a perfect match.
Upgrade to Higher Capacity: If the casters are overloaded, switch to a higher load rating. For example, if your workbench weighs 400 lbs and uses 4 casters rated for 100 lbs each, upgrade to 150-lb casters to add a safety margin.
Solution 5: Repairing the Workbench Frame
For frame issues:
Straighten Bent Profiles: If an aluminum profile is slightly bent, use a rubber mallet to gently tap it back into shape. For severe bends, replace the profile—aluminum is relatively inexpensive and easy to cut and assemble with standard tools.
Tighten Joints: For loose aluminum profile joints, tighten the connecting bolts or add locking washers to prevent them from loosening again. If the joint is stripped, replace the bolt with a larger diameter or use a thread repair kit.
Reinforce Weak Areas: Add cross-bracing between the legs or along the top of the frame to reduce flexing. Plywood or metal sheets can also be attached to the frame to add rigidity.
Straighten Bent Profiles: If an aluminum profile is slightly bent, use a rubber mallet to gently tap it back into shape. For severe bends, replace the profile—aluminum is relatively inexpensive and easy to cut and assemble with standard tools.
Tighten Joints: For loose aluminum profile joints, tighten the connecting bolts or add locking washers to prevent them from loosening again. If the joint is stripped, replace the bolt with a larger diameter or use a thread repair kit.
Reinforce Weak Areas: Add cross-bracing between the legs or along the top of the frame to reduce flexing. Plywood or metal sheets can also be attached to the frame to add rigidity.

Preventive Maintenance: Keeping Wobbles at Bay
The best way to deal with wobbly workbenches is to prevent them from happening in the first place. A little regular maintenance goes a long way toward keeping your flat rigid castor wheels and workbench stable. Here's a simple maintenance schedule to follow:
- Daily Checks: Quick visual inspection of the workbench—are there any obvious wobbles, loose tools, or debris under the wheels? Ask workers to report any instability immediately.
- Weekly Inspections: Tighten caster bolts with a wrench (don't over-tighten). Clean wheels with a brush or rag to remove dirt, grease, or debris that could cause uneven wear.
- Monthly Deep Dive: Rotate each wheel by hand to check for flat spots or bearing issues. Inspect brackets and frame joints for cracks or rust. Measure the workbench with a spirit level to ensure it's still level.
- Quarterly Reviews: Recalculate the total weight on the workbench—has it increased due to new equipment or materials? If so, verify that the casters are still rated for the load. replace any wheels showing signs of wear, even if they're not yet causing wobbles.
- Annual Overhaul: Consider replacing all caster wheels at once, even if only one is worn. This ensures consistent performance and avoids mismatched wear patterns. Inspect the floor for signs of damage and repair as needed.
Remember, preventive maintenance isn't just about avoiding wobbles—it's part of a lean system that minimizes downtime and maximizes efficiency. By catching issues early, you reduce the risk of costly repairs, lost productivity, and safety incidents. Plus, a well-maintained workbench sends a message to your team that their comfort and safety matter—a small investment with big returns in morale.
Case Study: How Acme Manufacturing Fixed Their Wobble Problem
Let's put this all into context with a real-world example. Acme Manufacturing, a mid-sized electronics assembler, was struggling with a production line where three workbenches had become chronically wobbly. Workers were complaining about slowdowns, and quality control reports showed a 15% increase in defective circuit boards. The maintenance team initially blamed the floors, but resurfacing didn't solve the problem.
When a new maintenance supervisor, Raj, joined the team, he decided to follow the troubleshooting steps outlined above. Here's what he found:
Step 1: Floor inspection showed minor unevenness, but shimming didn't eliminate the wobble.
Step 2: Caster mounting bolts were tight, but Raj noticed that the aluminum profile frame on each workbench had a slight twist—likely from overloading.
Step 3: Wheel inspection revealed flat spots on two casters per bench, caused by the frame twisting and putting uneven pressure on the wheels.
Solution: Raj's team straightened the aluminum profiles with a rubber mallet and added cross-bracing to prevent future twisting. They then replaced all 12 casters with new flat rigid castor wheels rated for 200 lbs each (up from the previous 150 lbs). Finally, they implemented a weekly maintenance check to tighten bolts and clean wheels.
The results? Within a month, defect rates dropped back to normal, and workers reported a 20% increase in productivity. The wobbles were gone, and the workbenches remained stable even under heavy loads. By addressing both the immediate cause (worn wheels) and the root cause (frame twisting), Acme turned a frustrating problem into an opportunity to improve their lean system.
When a new maintenance supervisor, Raj, joined the team, he decided to follow the troubleshooting steps outlined above. Here's what he found:
Step 1: Floor inspection showed minor unevenness, but shimming didn't eliminate the wobble.
Step 2: Caster mounting bolts were tight, but Raj noticed that the aluminum profile frame on each workbench had a slight twist—likely from overloading.
Step 3: Wheel inspection revealed flat spots on two casters per bench, caused by the frame twisting and putting uneven pressure on the wheels.
Solution: Raj's team straightened the aluminum profiles with a rubber mallet and added cross-bracing to prevent future twisting. They then replaced all 12 casters with new flat rigid castor wheels rated for 200 lbs each (up from the previous 150 lbs). Finally, they implemented a weekly maintenance check to tighten bolts and clean wheels.
The results? Within a month, defect rates dropped back to normal, and workers reported a 20% increase in productivity. The wobbles were gone, and the workbenches remained stable even under heavy loads. By addressing both the immediate cause (worn wheels) and the root cause (frame twisting), Acme turned a frustrating problem into an opportunity to improve their lean system.
Conclusion: Stability as the Foundation of Productivity
A wobbly workbench might seem like a minor annoyance, but as we've explored, it's a symptom of deeper issues that can impact productivity, quality, and safety. Flat rigid castor wheels, often overlooked, play a critical role in keeping workbenches stable—and when they fail, the consequences ripple through the entire production process.
By following the troubleshooting steps outlined here—inspecting the floor, checking mounting hardware, examining wheels, verifying caster specs, and assessing the frame—you can quickly identify the root cause of the wobble. And with simple, cost-effective solutions like shimming, tightening bolts, replacing wheels, or reinforcing the frame, you can restore stability in no time.
Remember, a stable workbench is more than just a tool—it's the foundation upon which your team builds quality products, meets deadlines, and stays safe. By investing a little time in maintenance and troubleshooting, you're investing in your company's success. So the next time you hear that familiar (wobble), don't just ignore it—grab a wrench, follow these steps, and turn that shaky workbench into a rock-solid asset. Your team (and your bottom line) will thank you.
By following the troubleshooting steps outlined here—inspecting the floor, checking mounting hardware, examining wheels, verifying caster specs, and assessing the frame—you can quickly identify the root cause of the wobble. And with simple, cost-effective solutions like shimming, tightening bolts, replacing wheels, or reinforcing the frame, you can restore stability in no time.
Remember, a stable workbench is more than just a tool—it's the foundation upon which your team builds quality products, meets deadlines, and stays safe. By investing a little time in maintenance and troubleshooting, you're investing in your company's success. So the next time you hear that familiar (wobble), don't just ignore it—grab a wrench, follow these steps, and turn that shaky workbench into a rock-solid asset. Your team (and your bottom line) will thank you.