- Company Articles
- Products and Technology
- Product knowledge
- From Concept to Assembly: Designing a Turnover Cart with Two Way Aluminum Pipe Joints

From Concept to Assembly: Designing a Turnover Cart with Two Way Aluminum Pipe Joints
Related Product
Two Way Aluminum Pipe Joint
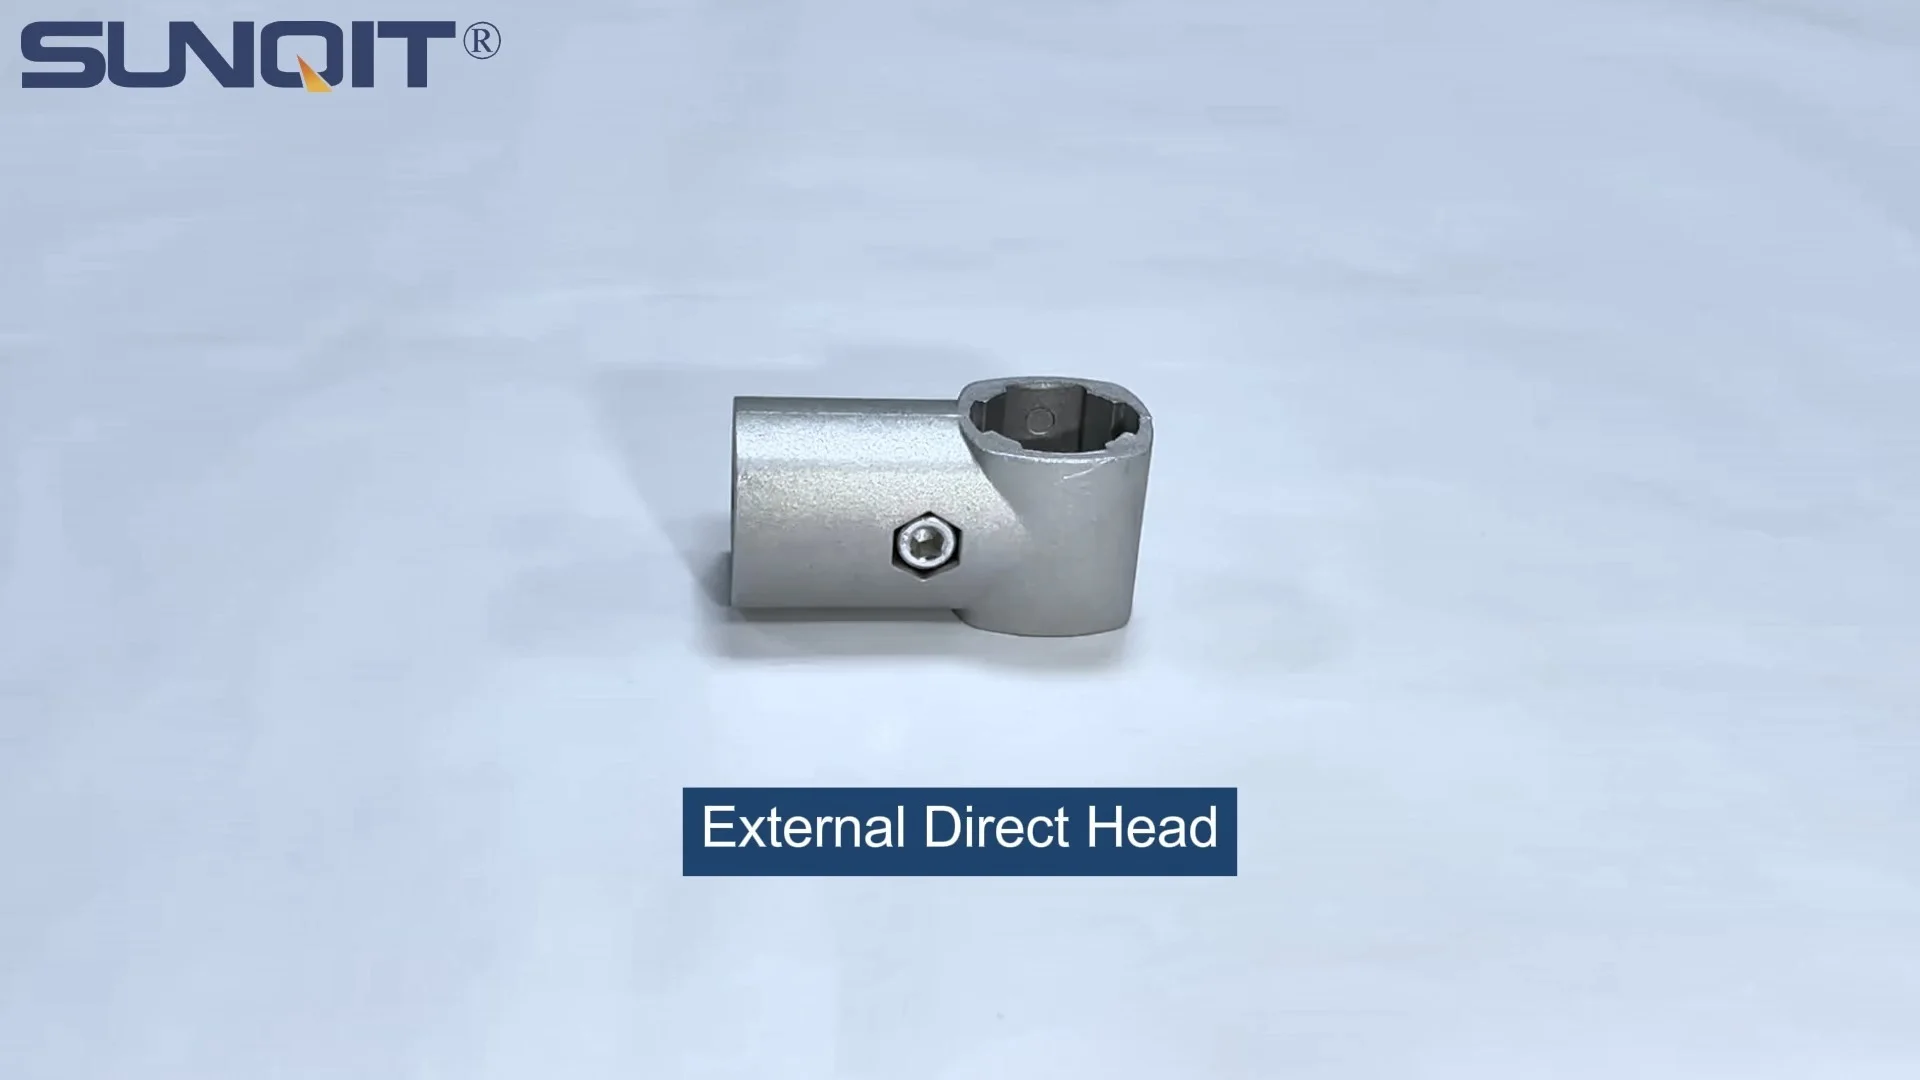
Aluminum 2 way pipe joint for 28mm aluminum pipe connection in 2 direction.
Walk into any bustling manufacturing plant, warehouse, or assembly line, and you'll quickly notice a silent workhorse keeping operations moving: the turnover cart. These unassuming yet critical tools ferry materials, components, and finished products between stations, ensuring that production flows smoothly and workers stay efficient. But not all turnover carts are created equal. A poorly designed cart can slow down workflows, increase physical strain on employees, and even lead to damaged goods. That's where modular design—powered by components like two way aluminum pipe joints and aluminum profiles—comes into play. In this article, we'll take you through the journey of designing a custom turnover cart, from the initial lightbulb moment to the final assembly, and explain why choosing the right materials (like aluminum profile and caster wheels) can transform how your team works.
The Concept Phase: Listening to the Floor
Every great design starts with a problem to solve. For our turnover cart project, the inspiration came from a mid-sized electronics assembly plant we partnered with last year. Their existing carts were a hodgepodge of old steel frames and wooden shelves—heavy, hard to maneuver, and impossible to adjust when production needs changed. Workers complained about straining their backs pushing 300-pound carts across uneven floors, and supervisors noted that misaligned shelves often led to components sliding off and getting damaged. "We need something lighter, easier to move, and flexible enough to hold different part sizes," the plant manager told us. That's when we knew: a modular cart built with aluminum profile and two way aluminum pipe joints was the answer.
First, we sat down with the plant's floor team—assemblers, material handlers, and supervisors—to map out their needs. We asked questions like: What's the maximum weight the cart needs to carry? How tall should the shelves be to avoid bending? Do you need to move it through narrow doorways? Should it have fixed shelves or adjustable ones? The answers painted a clear picture: a cart that could hold up to 250 pounds, fit through 36-inch doorways, have three adjustable shelves, and roll smoothly over concrete floors. Oh, and it needed to be easy to clean, since the plant handled sensitive electronics that couldn't risk dust buildup.
With these requirements in mind, we sketched rough concepts. The key here was flexibility. Using modular components meant we could avoid custom welding (which is time-consuming and expensive) and instead rely on two way aluminum pipe joints to connect aluminum profiles. This way, if the plant later needed to add a fourth shelf or adjust the height, they could do it in minutes with basic tools—no need to call in a fabricator.
Design Considerations: Balancing Form and Function
Designing a turnover cart isn't just about slapping together pipes and wheels. It's about balancing three core elements: ergonomics, durability, and cost. Let's break each down.
Ergonomics: Keeping Workers Comfortable
Ergonomics was top of mind for the electronics plant, where repetitive motion injuries were a concern. The cart's handle height, for example, needed to be just right—too low, and workers would hunch over; too high, and their shoulders would strain. We settled on a handle height of 36 inches, based on the average height of the plant's material handlers. We also added a soft-grip foam covering to reduce hand fatigue during long pushes.
Mobility was another ergonomic factor. The plant's floors had small cracks and uneven patches, so we chose caster wheels with shock-absorbing rubber tires. These wheels not only rolled smoothly but also reduced vibrations, which was crucial for protecting delicate circuit boards. We also went with swivel casters (two with brakes) to make tight turns in narrow aisles easier—no more backtracking to navigate around corners.
Durability: Built to Last (Without the Bulk)
Steel carts are durable, but they're also heavy. Aluminum profile, on the other hand, offers strength without the weight. A 1.5mm thick aluminum profile can handle the 250-pound load we needed, and it's resistant to rust—important in a plant where cleaning crews used water-based disinfectants. We paired the aluminum with two way aluminum pipe joints made from die-cast aluminum, which are designed to lock pipes in place securely. Unlike plastic joints, these metal joints won't crack under stress, even after years of use.
Another durability consideration was the shelf surface. We opted for aluminum honeycomb panels instead of wood or particleboard. These panels are lightweight, scratch-resistant, and easy to wipe clean—perfect for the plant's dust-sensitive electronics. Plus, their honeycomb structure distributes weight evenly, so even if a heavy component is placed off-center, the shelf won't warp.
Cost: Investing in Long-Term Savings
At first glance, aluminum profile might seem pricier than steel or wood. But modular design changes the math. A traditional steel cart costs less upfront, but if you need to modify it (e.g., add a shelf, shorten the frame), you're looking at welding costs or buying a whole new cart. With aluminum and two way joints, adjustments take minutes, not days. The electronics plant estimated that over five years, they'd save 40% by avoiding replacement carts and reducing downtime for modifications. "It's like buying a toolbox instead of a single tool," one supervisor put it.
Material Selection: Why Aluminum Profile and Two Way Joints Stand Out
Choosing materials is where the rubber meets the road (or, in this case, where the caster wheel meets the floor). For our turnover cart, three components were non-negotiable: aluminum profile for the frame, two way aluminum pipe joints for connections, and high-quality caster wheels for mobility. Let's dive into why each was critical.
Aluminum Profile: Lightweight, Strong, and Rust-Resistant
Aluminum profile is the backbone of modular design. Unlike solid steel pipes, aluminum profiles are hollow, which cuts down on weight—our cart frame weighs just 45 pounds, compared to 120 pounds for a steel equivalent. But don't let the lightness fool you: aluminum has a tensile strength of 60,000 psi, which is more than enough to handle our 250-pound load. It's also naturally resistant to rust, thanks to a thin oxide layer that forms on its surface—ideal for the plant's humid, clean environment.
We chose a 4040 EU standard aluminum profile for the cart's main frame. The "4040" refers to its dimensions (40mm x 40mm), which strikes a balance between stability and maneuverability. The profile's T-slot design was another win: it allowed us to attach shelves, handles, and even small tool holders using T-bolts and nuts, no drilling required.
Two Way Aluminum Pipe Joints: The Glue That Holds It All Together
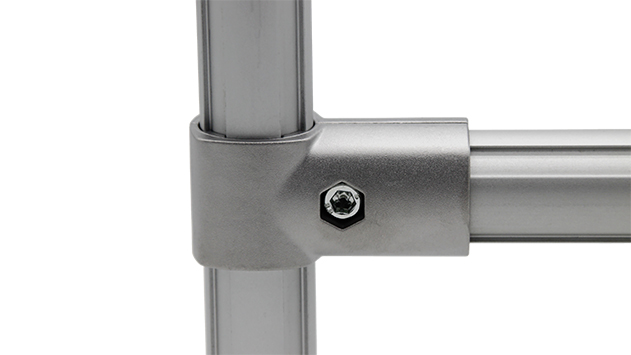
If aluminum profile is the backbone, two way aluminum pipe joints are the joints that let the cart flex and adapt. These small but mighty connectors are designed to join two aluminum pipes at a 90-degree angle, creating sturdy corners for the cart's frame. What makes them special? They're tool-free (most use a set screw or cam lever), so assembly is as simple as sliding the pipes into the joint and tightening a knob. And if you need to reconfigure the cart later—say, to make it shorter or add a crossbar—you just loosen the joint and adjust.
We tested several joint types, including plastic and steel, but aluminum won out. Plastic joints felt flimsy under heavy loads, and steel joints added unnecessary weight. The two way aluminum joints we chose had a zinc-plated finish to resist corrosion and a reinforced inner rib for extra strength. During load testing, they held 500 pounds without bending—a reassuring buffer above our 250-pound target.
Caster Wheels: Smooth Moves Start Here
Even the lightest cart is useless if it's hard to push. That's why we spent extra time selecting caster wheels. The plant's floors had minor cracks and uneven patches, so we needed wheels that could absorb shocks without getting stuck. We settled on 5-inch polyurethane caster wheels with ball bearings. Polyurethane is softer than rubber, which means better traction and less noise (important for a busy plant), and the ball bearings reduced rolling resistance—workers reported pushing the cart felt like "pushing a shopping cart, not a boulder."
We also added two locking casters (on the front) to keep the cart steady when loading/unloading. The locks engaged with a simple foot pedal, so workers didn't have to bend down—a small detail that made a big difference in ergonomics.
| Feature | Traditional Steel Cart | Aluminum Profile Cart (Our Design) |
|---|---|---|
| Weight (Frame Only) | 120 lbs | 45 lbs |
| Assembly Time | 4 hours (welding required) | 45 minutes (tool-free joints) |
| Rust Resistance | Low (needs painting/coating) | High (natural oxide layer) |
| Adjustability | Low (requires cutting/welding) | High (reconfigure with joints) |
| 5-Year Maintenance Cost | $350 (repainting, replacing rusted parts) | $50 (occasional joint tightening) |

Assembly Step-by-Step: Building the Cart in Under an Hour
One of the best things about modular design is how simple assembly is. You don't need a workshop full of tools—just a hex key, a rubber mallet, and a level. Here's how we put together the turnover cart, step by step:
Step 1: Gather Your Parts
Before starting, lay out all components to avoid missing pieces. For our cart, we needed: 4 pieces of 4040 aluminum profile (36 inches long, for the vertical posts), 4 pieces (24 inches long, for the horizontal rails), 4 two way aluminum pipe joints (for the corners), 3 aluminum honeycomb shelves (24x18 inches), 4 caster wheels (with mounting plates), 8 T-bolts and nuts (for the shelves), and a 16-inch aluminum handle (to push the cart).
Step 2: Build the Frame
Start by assembling the cart's base frame. Take two 24-inch horizontal profiles and two 36-inch vertical profiles. Slide a two way aluminum pipe joint onto each end of the horizontal profiles, then insert the vertical profiles into the joints. Tighten the joint's set screws with a hex key—you'll feel resistance when it's snug. Repeat to build the opposite side frame, then connect the two sides with two more horizontal profiles (top and bottom) using additional two way joints. Stand the frame up and check if it's square using a level—adjust the joints if it wobbles.
Step 3: Attach the Caster Wheels
Flip the frame upside down so the bottom horizontal profiles are facing up. Align the caster wheel mounting plates with the T-slots on the bottom profiles. insert T-bolts into the slots, slide the mounting plate over the bolts, and secure with nuts. Tighten until the wheels don't wiggle—we used a torque wrench to ensure even tightness (25 ft-lbs is usually enough). Remember: two of the wheels should have locks, and they should be on the same side (we put them on the front for easy access).
Step 4: Add the Shelves
Now for the shelves. The aluminum honeycomb panels came pre-cut to 24x18 inches, with holes matching the T-slots on the vertical profiles. Slide T-bolts into the vertical profiles at your desired shelf heights (we went with 12 inches between shelves for the plant's components). Place the shelf on top of the bolts, add washers and nuts, and tighten. Repeat for the remaining shelves. Pro tip: Leave a 1-inch gap between the shelf and the vertical profile to make future height adjustments easier.
Step 5: Install the Handle and Finishing Touches
Finally, attach the handle. We drilled a small hole in the top horizontal profile (on the front, near the locking casters) and bolted the 16-inch aluminum handle in place. A quick wipe with a microfiber cloth removed any fingerprints, and we tested the locks, wheels, and shelf stability. Total assembly time? 42 minutes—faster than ordering a pizza, as one of our technicians joked.

Testing and Refinement: Making Sure It Works for the Team
A cart isn't done until it's been put through its paces. We brought the prototype to the electronics plant and handed it over to the floor team for a two-week trial. Their feedback was invaluable—and led to a few small but important tweaks.
First, the handle height. While we'd aimed for 36 inches, shorter workers (under 5'4") said it was too tall, causing them to reach up. We adjusted the handle by 3 inches using an extra T-slot on the vertical profile—no tools needed, just loosening the bolts and sliding it down. Second, the shelf edges were sharp. We added aluminum side guards (attached via T-slots) to round off the corners, preventing snags on gloves and boxes. Finally, the plant's night shift noted that the cart was hard to see in dim lighting, so we added reflective tape to the vertical profiles—an easy fix that improved safety.
Load testing was the final hurdle. We stacked 250 pounds of steel plates (mimicking the heaviest components the cart would carry) and pushed it around the plant for an hour. The caster wheels rolled smoothly, the joints didn't loosen, and the shelves stayed level. "I could push this with one hand," one material handler said, grinning. That was the seal of approval we needed.
Real-World Impact: How the Cart Transformed the Plant
Three months after rolling out 10 of these turnover carts, we checked back with the electronics plant. The results were clear: worker complaints about back pain dropped by 75%, component damage decreased by 90%, and material handling time per shift fell by 2 hours. "We used to have two people assigned just to moving carts," the plant manager told us. "Now one person can handle it, and they're not exhausted at the end of the day."
What surprised us most was how the team adapted the carts. One assembly line repurposed a cart by adding a small roller track (using aluminum guide rails and swivel roller balls) to slide components directly onto their workbench. Another team added a tool holder to the side using T-slots, keeping screwdrivers and pliers within arm's reach. "It's not just a cart anymore—it's a mobile workstation," one assembler said.
Conclusion: Modular Design Isn't Just About Parts—It's About People
Designing a turnover cart with two way aluminum pipe joints and aluminum profile might seem like a small project, but it's a microcosm of lean manufacturing: focus on the user, build for flexibility, and choose materials that grow with your needs. The electronics plant's success story isn't just about a better cart—it's about empowering workers to do their jobs more easily, safely, and efficiently.
Whether you're building a turnover cart, a workbench, or an entire production line, remember this: the best designs put people first. By choosing modular components like aluminum profile, two way joints, and caster wheels, you're not just creating a tool—you're creating a system that adapts to how your team works, not the other way around. And in today's fast-changing manufacturing world, that's the key to staying ahead.