- Company Articles
- Products and Technology
- Installation And Maintenance
- Heavy Duty Split Foot Seat Installation Tools: What You'll Need

Heavy Duty Split Foot Seat Installation Tools: What You'll Need
Related Product
Heavy Duty Split Foot Seat
M10 aluminum heavy duty split foot deat with foot adjuster for workbench and flow rack.
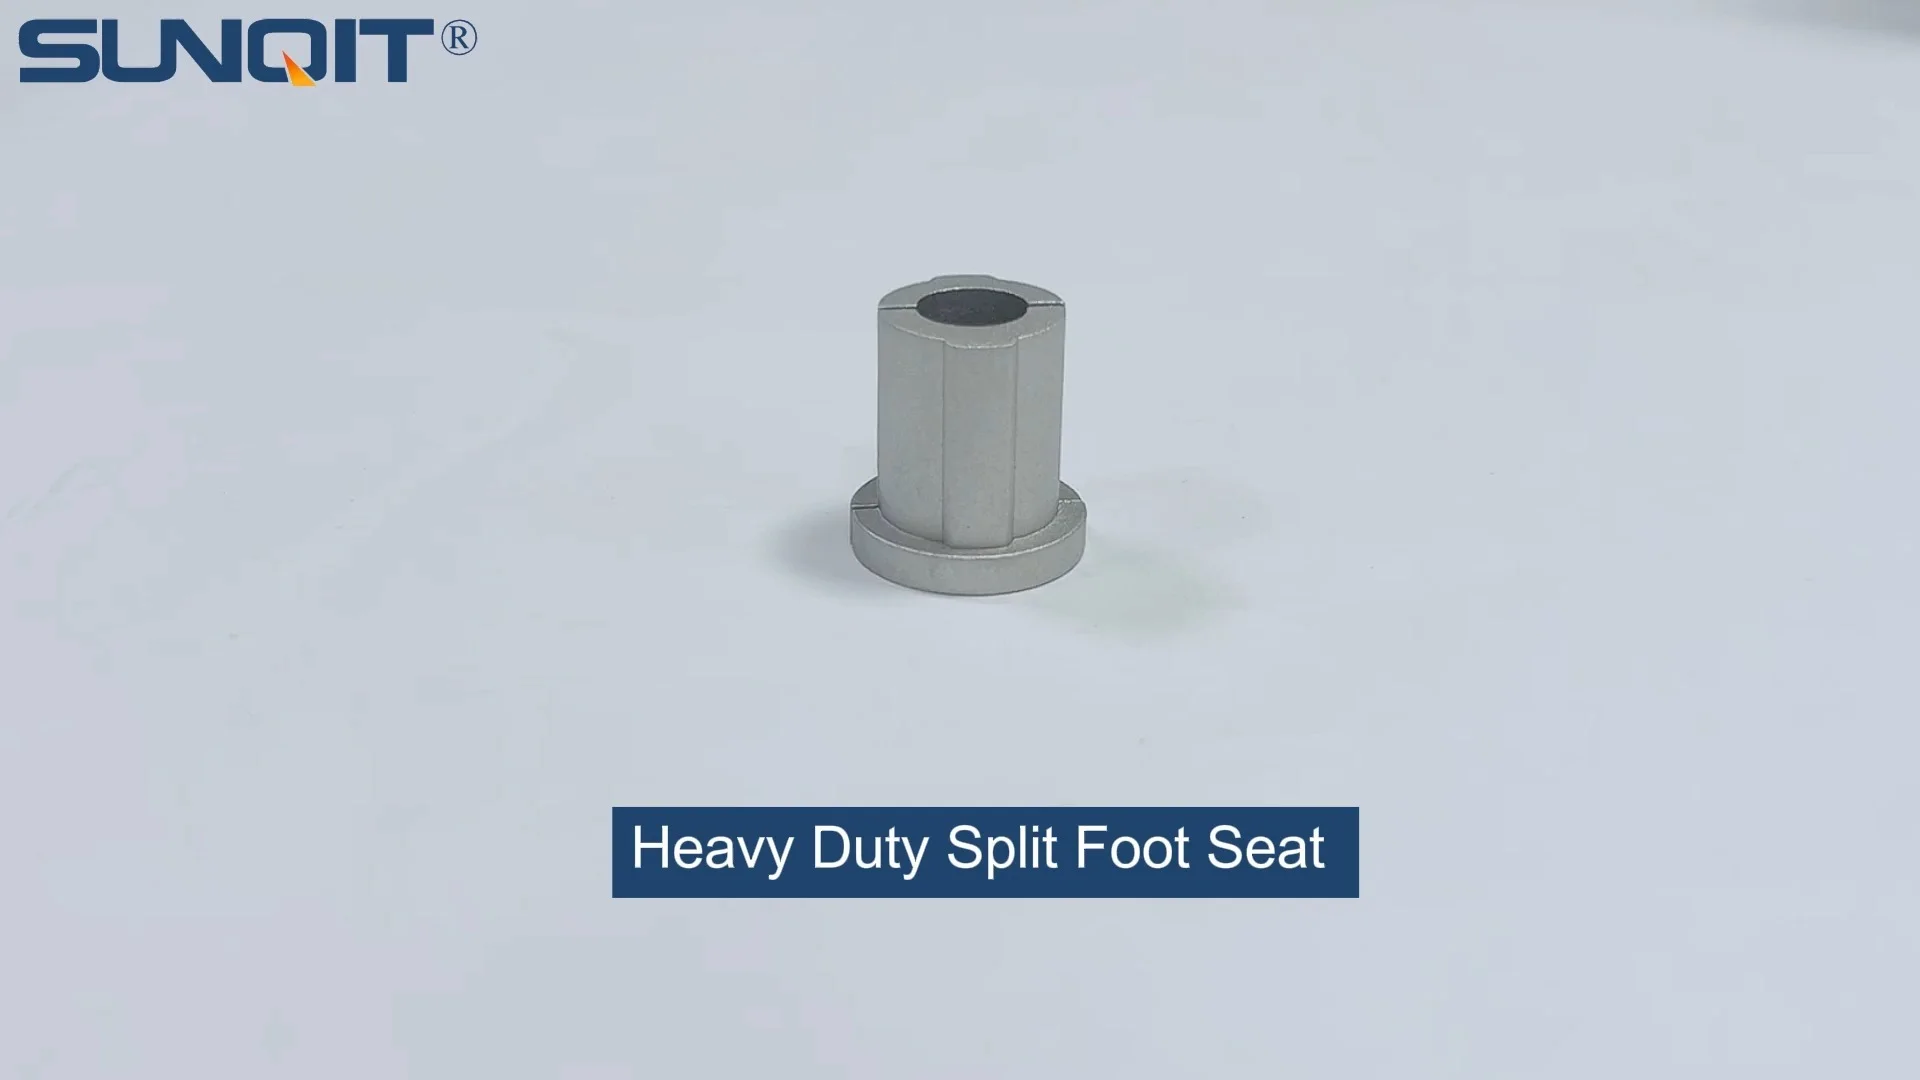
Setting up a new workbench or material rack in your production line? You've probably spent hours selecting the right aluminum profile, sourcing durable components, and ensuring every part fits together seamlessly. But there's one small yet critical step that often gets overlooked: installing the heavy duty split foot seats. These unassuming components are the backbone of stability for industrial equipment—they keep workbenches level, material racks steady, and conveyor systems aligned. But if you grab whatever tools are lying around the workshop to install them, you could end up with a wobbly setup that shakes during operation, damages your floors, or even poses safety risks to your team.
The truth is, installing heavy duty split foot seats isn't just about screwing a few bolts into place. It requires precision, the right tools, and a bit of know-how to ensure they perform as intended for years. Whether you're assembling a workbench E (single deck-without caster) for your assembly line or a material rack B (3 row and 3 floor) for storage, having the correct tools in hand will make the process smoother, faster, and far more reliable. In this guide, we'll break down the essential tools you need, explain why each one matters, and walk you through how to use them effectively. We'll also include a handy table to help you keep track of your toolkit, so you can avoid last-minute trips to the hardware store. Let's get started.
Why Heavy Duty Split Foot Seats Deserve the Right Tools
Before we dive into the tools, let's take a moment to appreciate why heavy duty split foot seats are so important. These components are designed to bear heavy loads—think of a workbench supporting hundreds of pounds of machinery or a material rack stacked with inventory. They also compensate for uneven floors, which are common in industrial spaces, by allowing you to adjust their height using integrated adjustable leveling feet. Without properly installed foot seats, your equipment could tilt, causing materials to slide off, tools to topple, or even structural stress on the aluminum profile frame.
Consider a scenario: A production line technician installs a conveyor system without properly securing the split foot seats. Over time, the constant vibration from the conveyor loosens the bolts, and the system starts to wobble. This not only slows down production as workers stop to readjust materials but also increases wear and tear on the conveyor's roller track and accessories. In the worst case, a loose foot seat could cause the entire conveyor to shift, leading to damaged products or even workplace injuries. That's why investing time in the right tools isn't just about getting the job done—it's about protecting your equipment, your team, and your bottom line.
The Essential Tools You Can't Install Without
Now that you understand why proper installation matters, let's talk about the tools that make it possible. Below is a detailed breakdown of each essential tool, along with why you need it, what features to look for, and pro tips to maximize its use. We've also included a table summarizing these tools for quick reference.
| Tool Name | Primary Purpose | Key Features to Look For | Pro Tips |
|---|---|---|---|
| Measuring Tape (25ft/7.6m) | Accurately marking foot seat placement and spacing | Locking mechanism, clear metric/imperial markings, rust-resistant blade | Measure twice, mark once! This prevents misaligned foot seats that cause wobbling. |
| Pencil/Marking Tool | Marking drill points and alignment lines on aluminum profile | Fine tip for precision, smudge-proof ink (for metal surfaces) | Use a pencil on aluminum profiles—erasable marks mean no permanent blemishes. |
| Cordless Drill (18V+) | Drilling pilot holes and driving bolts into aluminum profile | Adjustable speed settings, keyless chuck, long-lasting battery | Opt for a brushless motor drill—it's more powerful and durable for metal drilling. |
| Drill Bits (5/32" to 1/2") | Creating clean pilot holes in aluminum and foot seat brackets | High-speed steel (HSS) or cobalt construction, sharp cutting edges | Match bit size to your bolts—too small, and you'll struggle to drive bolts; too large, and they'll loosen. |
| Adjustable Wrench | Tightening nuts and bolts on foot seat mounting brackets | Wide jaw capacity (at least 1.5"), non-slip grip, corrosion-resistant finish | Wrap the wrench jaw in tape when working with painted aluminum profiles to avoid scratches. |
| Spirit Level (2ft/60cm) | Ensuring foot seats are level horizontally and vertically | Dual vials (horizontal/vertical), magnetic base, shock-resistant frame | Check level in multiple spots on your workbench or rack—floors are rarely perfectly flat! |
| Thread Locker (Medium Strength) | Preventing bolts from loosening due to vibration | Blue formula (removable with heat), brush applicator | Apply a tiny drop to bolt threads—excess can gunk up adjustable leveling feet mechanisms. |
| Safety Gloves & Goggles | Protecting hands from sharp edges and eyes from metal shavings | Cut-resistant gloves, impact-resistant goggles with adjustable straps | replace gloves if they tear—aluminum shavings are sharp and can cause cuts. |
1. Measuring Tape: The Foundation of Precision
A 25ft measuring tape might seem basic, but it's the first tool you'll reach for when installing split foot seats. Why? Because spacing the foot seats evenly is critical for balanced weight distribution. For example, on a material rack B with 3 rows and 3 floors, placing foot seats too close together on one side can cause the rack to lean, even if you use adjustable leveling feet later. A good measuring tape should have a locking mechanism to hold the blade in place, clear markings (both inches and centimeters), and a durable, rust-resistant blade—aluminum shavings and workshop moisture can quickly damage a cheap tape.
Pro tip: When measuring distances between foot seats, pull the tape tight but not so tight that it bends. For a workbench, measure from the outer edges of the aluminum profile frame to ensure the foot seats are centered. If you're installing multiple units (like several workbenches in a row), use the same reference point (e.g., the wall) to keep all setups aligned.
2. Pencil/Marking Tool: The Blueprint for Accuracy
Once you've measured, you need to mark where to drill. A pencil is ideal for aluminum profiles because it's easy to erase if you make a mistake, unlike permanent markers that leave unsightly marks. Look for a pencil with a fine tip—this allows you to mark small, precise dots for drill holes. If you're working in a dimly lit area, a white pencil or a silver marking pen can make marks more visible on dark aluminum profiles.
Pro tip: Before marking, clean the aluminum profile surface with a rag to remove oil or dust—this ensures your marks don't smudge. For extra precision, use a square to draw straight lines from your marks, especially if the foot seat has multiple mounting holes that need to align with the profile's T-slot openings.
3. Cordless Drill: Power for Clean Holes
A cordless drill is a must-have for drilling pilot holes and driving bolts into aluminum profiles. Opt for an 18V or higher model—this gives you enough power to drill through aluminum without bogging down. Look for a drill with adjustable speed settings: use low speed (300-500 RPM) for driving bolts and high speed (1500+ RPM) for drilling. A keyless chuck makes swapping drill bits quick, which is essential when switching between drilling and driving tasks.
Pro tip: Charge your drill battery fully the night before your project, and keep a spare battery handy. There's nothing worse than running out of power halfway through drilling holes for a foot seat. If you're new to drilling aluminum, practice on a scrap piece of aluminum profile first to get a feel for the pressure needed—aluminum is softer than steel, so too much pressure can cause the bit to "grab" and create uneven holes.
4. Drill Bits: The Key to Clean, Precise Holes
Using the right drill bit is critical for creating clean pilot holes in aluminum profiles. High-speed steel (HSS) bits are a good starting point, but if you're drilling multiple holes, cobalt bits are more durable and stay sharp longer. The size of the bit depends on the bolts you're using: for 1/4" bolts (common in split foot seats), a 5/32" pilot hole works best. If the hole is too small, you'll struggle to drive the bolt; too large, and the bolt will loosen over time.
Pro tip: Lubricate the drill bit with a drop of cutting oil when drilling aluminum. This reduces friction, keeps the bit cool, and prevents metal shavings from clogging the hole. After drilling, use a shop vac or a brush to clean out the shavings—leftover debris can scratch the aluminum profile or interfere with bolt threads.
5. Adjustable Wrench: Tightening with Control
Once the foot seat is positioned and bolts are started by hand, an adjustable wrench is used to tighten them securely. Look for a wrench with a wide jaw capacity (at least 1.5 inches) to fit the nuts on heavy duty split foot seats. A non-slip grip is also important—you'll be applying force, and a slippery handle can lead to accidents. Avoid using pliers or channel-lock tools, as they can round off the bolt heads, making future adjustments impossible.
Pro tip: Tighten bolts in a "star" pattern if the foot seat has multiple mounting holes (e.g., four bolts). This ensures even pressure and prevents the foot seat from tilting. Stop tightening when you feel resistance—over-tightening can strip the threads in the aluminum profile, which is a costly mistake to fix.
6. Spirit Level: Ensuring Perfect Leveling
Even the most precisely measured and drilled foot seats won't perform well if they're not level. A 2ft spirit level with dual vials (for horizontal and vertical leveling) is essential here. The magnetic base is a bonus—it sticks to the aluminum profile, leaving your hands free to adjust the foot seat's height. Make sure the vials are clear and easy to read—some levels have magnified vials or LED lights for low-light conditions.
Pro tip: Check the level in at least two directions (front-to-back and side-to-side) on your workbench or rack. If the level shows a tilt, use the adjustable leveling feet to correct it: turn the foot clockwise to lower it, counterclockwise to raise it. For large setups like material racks, check the level at the top, middle, and bottom shelves to ensure the entire structure is stable.
7. Thread Locker: Preventing Loosening Over Time
Industrial environments are full of vibration—from conveyor systems to heavy machinery. This vibration can loosen bolts over time, even if they were tightened properly. That's where thread locker comes in. A medium-strength (blue) thread locker is ideal for split foot seats: it secures bolts against vibration but can be removed with heat (a hairdryer or heat gun) if you need to adjust the foot seat later. Avoid high-strength (red) thread locker, as it's permanent and can damage aluminum threads during removal.
Pro tip: Apply thread locker sparingly—one small drop on the bolt threads, near the nut, is enough. Wipe away any excess with a rag before it dries, as it can harden and make future adjustments difficult. Let the thread locker cure for at least 24 hours before putting heavy loads on the equipment.
8. Safety Gear: Protecting Yourself
Last but never least: safety gear. Drilling aluminum creates sharp metal shavings that can fly into your eyes, and handling metal profiles can leave cuts on your hands. Always wear cut-resistant gloves to protect against sharp edges and a pair of impact-resistant safety goggles to shield your eyes from shavings. If you're working in a dusty area, a dust mask is also a good idea to avoid inhaling aluminum particles.
Pro tip: Inspect your gloves before each use—even small holes can leave you vulnerable to cuts. Goggles should fit snugly but comfortably; adjustable straps help ensure they stay in place during drilling. Keep a first aid kit nearby, just in case.

Step-by-Step Installation: Putting Your Tools to Work
Now that you have your tools ready, let's walk through the installation process step by step. We'll use a workbench E (single deck-without caster) as an example, but the same principles apply to material racks, conveyor systems, or any equipment using heavy duty split foot seats.
Step 1: Prepare the Work Area
Clear the space around your workbench to give yourself room to move. Lay down a drop cloth or cardboard to protect the floor from metal shavings. Gather your tools, split foot seats, bolts, and adjustable leveling feet, and arrange them within easy reach. Double-check that the aluminum profile frame of the workbench is square by measuring diagonally from corner to corner—equal measurements mean it's square; if not, adjust the frame before proceeding.
Step 2: Mark Foot Seat Positions
Using your measuring tape, determine where to place the split foot seats. For a standard workbench, four foot seats are typically used (one at each corner). Measure 2-3 inches from each end of the aluminum profile legs and mark the center point with your pencil. Use a square to draw a small cross at each mark—this is where you'll drill the pilot holes.
Step 3: Drill Pilot Holes
Attach a 5/32" drill bit to your cordless drill. Hold the drill perpendicular to the aluminum profile (use the square to ensure it's straight) and drill slowly into the marked cross. Apply gentle pressure—let the bit do the work. Once the hole is drilled, use a brush to sweep away shavings. Repeat for all marked positions.
Step 4: Attach the Split Foot Seats
Place a split foot seat over the pilot holes, aligning its mounting holes with the holes you drilled. insert a bolt through each hole and hand-tighten it into the aluminum profile. This ensures the threads catch properly and prevents cross-threading. Once all bolts are hand-tight, use your adjustable wrench to tighten them until snug—don't overdo it!
Step 5: Level the Workbench
Place your spirit level on the workbench top. If it's not level, adjust the adjustable leveling feet: turn the foot clockwise to lower it, counterclockwise to raise it. Check the level in both directions (front-to-back and side-to-side) and repeat until the bubble is centered in the vial. Once level, give each foot seat a gentle tug to ensure it's secure.
Step 6: Apply Thread Locker
Add a small drop of medium-strength thread locker to each bolt where it exits the aluminum profile. Wipe away excess with a rag. Let the thread locker cure for 24 hours before using the workbench.

Troubleshooting Common Installation Issues
Even with the right tools, you might run into hiccups during installation. Here are some common issues and how to fix them:
Stripped Threads in Aluminum Profile
If a bolt strips the threads in the aluminum profile, don't panic. Use a thread repair kit (helicoil) to create new threads. Alternatively, drill a slightly larger hole (e.g., 3/16" for a stripped 5/32" hole) and use a larger bolt. For temporary fixes, wrap the bolt threads in Teflon tape to add grip.
Foot Seat Wobbles After Installation
This usually means the floor is uneven or the foot seat isn't level. Recheck the spirit level and adjust the adjustable leveling feet. If the floor is extremely uneven, place a metal shim under the foot seat (wood shims compress over time, so avoid them).
Drill Bit Gets Stuck in Aluminum
Aluminum can "grab" the drill bit if you drill too slowly. Stop drilling, reverse the drill to back the bit out, and apply cutting oil to the bit. Then, drill at a higher speed with light pressure.

Final Thoughts: Invest in Tools, Invest in Reliability
Installing heavy duty split foot seats might seem like a small task, but it's one that has a big impact on the performance and safety of your industrial equipment. By equipping yourself with the right tools—measuring tape for precision, a cordless drill for power, a spirit level for accuracy, and the rest of the essentials—you're ensuring that your workbenches, material racks, and conveyor systems stand strong for years to come. Remember, the time you spend gathering the right tools and following these steps is an investment in reliability, efficiency, and peace of mind.
So, the next time you're setting up new equipment, take a moment to gather your tools, measure carefully, and install those split foot seats with care. Your team, your equipment, and your bottom line will thank you.