- Company Articles
- Products and Technology
- Installation And Maintenance
- Heavy Duty Split Foot Seat Maintenance: Tips for Longevity

Heavy Duty Split Foot Seat Maintenance: Tips for Longevity
Related Product
Heavy Duty Split Foot Seat
M10 aluminum heavy duty split foot deat with foot adjuster for workbench and flow rack.
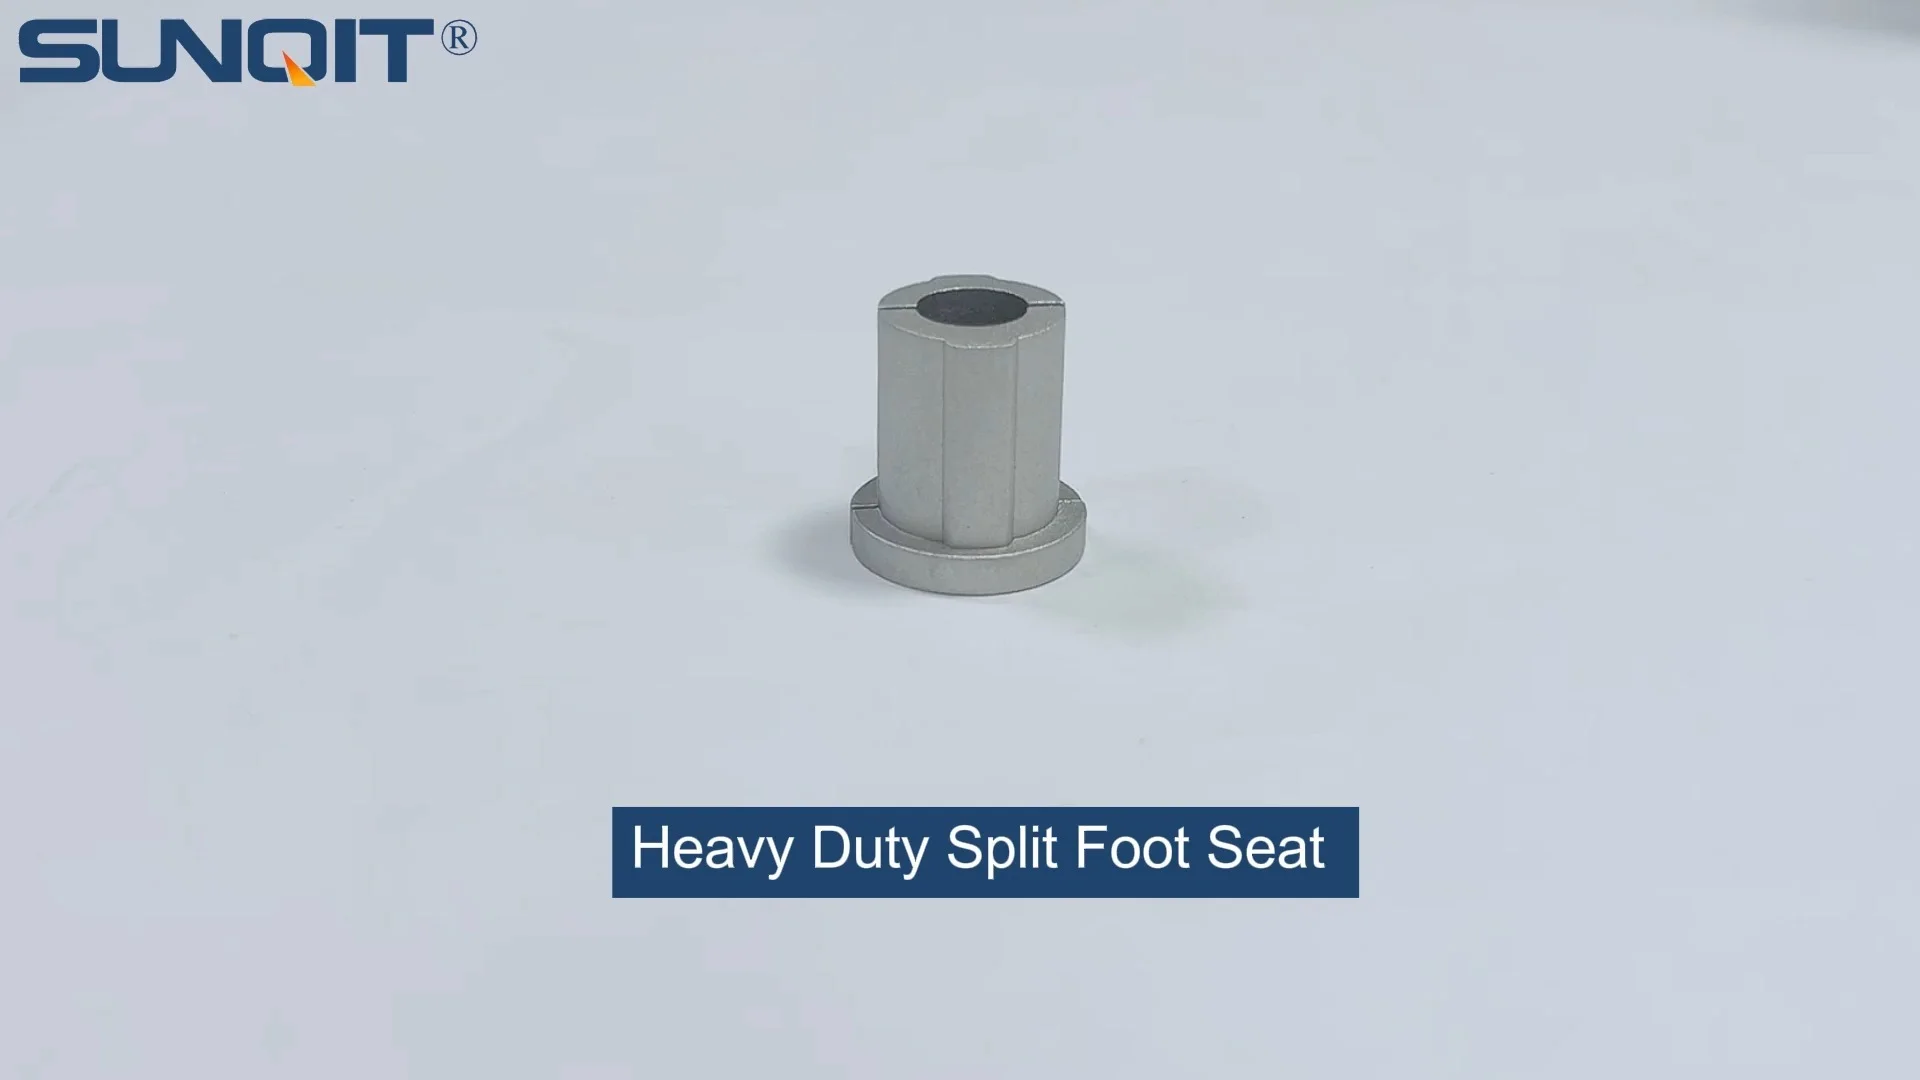
Keep your workbench stable, your operations smooth, and your equipment lasting for years with these expert care strategies
Introduction: The Unsung Hero of Your Workspace
Walk into any busy workshop, manufacturing plant, or warehouse, and you'll probably notice the big-ticket items first: the shiny conveyors moving parts, the sturdy workbenches cluttered with tools, the towering material racks holding inventory. But if you look a little closer—down at the floor, where the rubber meets the concrete—you'll find the unsung heroes keeping everything steady: heavy duty split foot seats. These small but mighty components are the silent guardians of stability, ensuring your workbench doesn't wobble mid-assembly, your conveyor doesn't tilt under a heavy load, and your lean system stays aligned even when the floor isn't perfectly level.
Here's the thing: most of us don't think about foot seats until something goes wrong. A workbench starts to rock, a shelf sags, or a caster gets stuck, and suddenly we're scrambling to fix it. But by then, the damage might already be done—worn parts, bent metal, or even safety hazards that could have been avoided with a little regular care. That's why we're diving deep into heavy duty split foot seat maintenance today. Whether you're a seasoned facility manager, a small business owner with a home workshop, or just someone who wants to get the most out of their equipment, these tips will help you extend the life of your foot seats, save money on replacements, and keep your workspace running like a well-oiled machine.
What Is a Heavy Duty Split Foot Seat, Anyway?
Before we jump into maintenance, let's make sure we're all on the same page about what a heavy duty split foot seat actually is. At its core, it's a component designed to connect and stabilize the legs of equipment like workbenches, material racks, or conveyor frames to the floor. Unlike a solid foot seat, the "split" design means it's made of two interlocking parts, which allows for adjustability—think of it like a puzzle piece that can shift slightly to adapt to uneven surfaces. This adjustability is key, especially in older facilities where floors might have dips or bumps from years of use.
You'll typically find these foot seats paired with other hardware, like adjustable leveling feet or caster accessories. For example, if your workbench uses casters to roll around, the split foot seat might attach the caster stem to the bench leg, providing a secure, wobble-free connection. Or, if you're using adjustable leveling feet to stabilize a material rack, the foot seat could act as the base that sits on the floor, distributing weight evenly to prevent sinking into soft concrete.
These components are workhorses, too. Heavy duty models are built to handle significant weight—we're talking hundreds, even thousands of pounds—so they're made from tough materials like steel or reinforced plastic. They might have rubber or plastic pads on the bottom to grip the floor and reduce noise, and their split design often includes bolts or screws that can be tightened or loosened to fine-tune the height or angle. In short, they're not just "feet"—they're precision tools for stability.

Why Maintenance Matters: It's Not Just About Saving Money (Though That Helps)
Let's get real: maintenance can feel like a chore. Who has time to inspect every little part when there's production quotas to meet, orders to ship, or projects to finish? But when it comes to heavy duty split foot seats, skipping maintenance isn't just a matter of "out of sight, out of mind"—it can have real consequences. Here's why making time for care is worth every minute:
Safety First: Wobbly Equipment = Accidents Waiting to Happen
Imagine this: You're standing at a workbench, using a power tool to drill into a metal part. The bench suddenly shifts, jolting your hand. The drill slips, and now you're dealing with a damaged part—or worse, an injury. Or picture a conveyor belt that's tilted because one foot seat has worn down, causing a box to slide off and crash to the floor, spilling its contents (or hitting someone's foot). These aren't just hypothetical scenarios—they're real risks when foot seats fail.
Heavy duty split foot seats are the foundation of safe equipment operation. When they're in good shape, they keep everything level and stable, reducing the chance of slips, trips, or falls. When they're neglected, that stability disappears. Loose bolts can cause the foot seat to detach, worn pads can lead to sliding, and rusted parts can snap under pressure. By maintaining your foot seats, you're not just protecting your equipment—you're protecting the people who use it every day.
Cost Savings: A Little Care Now = Big Bills Avoided Later
Let's talk numbers. A single heavy duty split foot seat might cost $20–$50, depending on the brand and material. replace one, and it's not a huge hit. But if you neglect maintenance, you might end up replacing more than just the foot seat. A wobbly workbench could strain the lean pipe joint connecting its legs, leading to a bent pipe that costs $100 to replace. A tilted conveyor might wear out its rollers unevenly, requiring a full roller track replacement that sets you back $500 or more. And if a foot seat failure damages the equipment it's supporting—say, a $2,000 workbench—suddenly that "small" maintenance task you skipped is costing you thousands.
On the flip side, regular maintenance is cheap. A can of lubricant costs $5. A wrench to tighten bolts is something you probably already have. Spending 10 minutes a month inspecting and cleaning your foot seats can extend their lifespan from 2–3 years to 5–7 years or more. Do the math: that's hundreds, maybe thousands, of dollars saved over time.
Performance: Stable Equipment = Smoother Operations
Ever tried to assemble a small part on a wobbly table? It's frustrating. The part slides around, your measurements are off, and you end up redoing work. Now multiply that by an entire production line. If your workbenches, conveyors, or material racks aren't stable because of worn foot seats, every task takes longer. Workers compensate for the wobble, quality suffers, and efficiency drops. Over time, those small delays add up to missed deadlines and lost revenue.
Well-maintained foot seats keep equipment level and steady, which means work gets done faster and better. Parts move smoothly along conveyors, tools stay in place on workbenches, and workers can focus on their tasks instead of fighting with unstable surfaces. In short, maintenance isn't just about keeping equipment alive—it's about keeping your operation running at peak performance.

Common Issues: What Happens When Foot Seats Are Neglected
Now that we know why maintenance is important, let's look at what actually goes wrong when we skip it. Heavy duty split foot seats might be tough, but they're not indestructible. Here are the most common issues you'll run into, and how they start:
| Issue | Cause | Signs to Watch For | Risk If Ignored |
|---|---|---|---|
| Loose Bolts/Screws | Vibration from equipment, repeated use, or initial improper installation | Foot seat wobbles when touched, visible gaps between split parts, rattling noise | Foot seat detaches, equipment tilts, potential injury |
| Worn Floor Pads | Friction from sliding, exposure to oils/chemicals, or hard floor surfaces | Thin or cracked pads, equipment slides easily, increased noise when moving | Equipment shifts during use, scratches on floors, reduced stability |
| Rust/Corrosion | Moisture (from spills, high humidity, or cleaning with water), exposure to chemicals | Orange/brown spots on metal parts, flaking paint, stiff or stuck adjustment mechanisms | Weakened metal, parts snap under load, difficulty adjusting height |
| Misalignment | Uneven floors, overloading, or accidental impact (e.g., hitting with a pallet jack) | Equipment leans to one side, gaps between foot seat and floor, uneven weight distribution | Stress on other components (e.g., lean pipe joints), premature wear on casters or rollers |
| Cracked or Bent Housing | Overloading beyond weight capacity, impact damage, or material fatigue | Visible cracks in plastic/metal, foot seat sits at an odd angle, resistance when adjusting | Complete failure, equipment collapse, safety hazard |
One issue that often flies under the radar is corrosion, especially in humid or industrial environments. Even steel foot seats can rust if they're not protected, and once rust starts, it spreads. A small spot might seem harmless, but over time, it weakens the metal, making the foot seat more likely to bend or break under pressure. Similarly, worn floor pads might not seem like a big deal—until you try to stop a loaded trolley from sliding across the floor and it keeps moving because the pads can't grip anymore.
Another problem is misalignment, which often starts subtly. Maybe the floor in your workshop has a slight dip, so one foot seat is bearing more weight than the others. Over time, that extra pressure wears down the foot seat's internal parts, causing it to sink even more. Before you know it, the entire workbench is leaning, and you're left wondering why—when the fix could have been as simple as adjusting the foot seat height early on.

Step-by-Step Maintenance: How to Care for Your Heavy Duty Split Foot Seats
Okay, enough doom and gloom—let's get to the good stuff: how to actually maintain your foot seats. The best part? It's not complicated. With a few basic tools and 15–20 minutes every month, you can keep them in top shape. Here's your step-by-step guide:
1. Inspection: Catch Problems Early
Start with a visual and physical check. Walk around each piece of equipment with foot seats (workbenches, conveyors, material racks—anything that uses them) and take your time. Here's what to do:
- Look for looseness: Gently push or wiggle the equipment. If it moves more than an inch, the foot seats might be loose. Check the split parts—are there gaps between them? Do they shift when you press on them?
- Check bolts and screws: Look at the fasteners holding the split parts together. Are they sticking out? Are the heads stripped? Can you turn them with your fingers (they should be tight enough that you need a tool)?
- Inspect the floor pad: Flip the equipment if possible (or slide a mirror under it) to look at the pad. Is it cracked, thin, or missing chunks? Is it still grippy, or does it feel smooth and slippery?
- Watch for rust or corrosion: Check metal parts for orange/brown spots, especially in crevices or where the foot seat meets the floor. If there's paint, is it chipping? For plastic foot seats, look for cracks or warping.
- Test adjustability: If your foot seat is adjustable (many heavy duty models are), try turning the adjustment bolt or screw. Does it move smoothly, or is it stuck? Can you raise or lower the foot seat easily?
Pro Tip: Keep a small notebook or phone notes app to track inspections. Jot down which foot seats need attention, so you don't forget by the time you grab your tools. For example: "Workbench A, right rear foot: loose bolt, pad 50% worn."
2. Tighten Loose Fasteners: The #1 Fix
Loose bolts and screws are the most common issue, and the easiest to fix. Here's how to do it right:
- Use the right tool: Don't guess—check the bolt head to see if you need a wrench, socket, Phillips screwdriver, or flathead. Using the wrong tool can strip the head, making it impossible to tighten later.
- Clean first: If there's dirt, grease, or rust around the bolt, wipe it away with a rag. For rust, a wire brush or a drop of penetrating oil (like WD-40) can help loosen things up.
- Tighten evenly: If the foot seat has multiple bolts (common in split designs), tighten them in a "star" pattern—like tightening lug nuts on a car. This ensures even pressure and prevents warping the split parts.
- Don't over-tighten: You want the bolt snug, but not so tight that you strip the threads or bend the metal. A good rule: tighten until you feel resistance, then give it a quarter-turn more.
If a bolt is stripped or broken, replace it immediately. Most hardware stores carry standard bolts, but check the foot seat's manual (or the manufacturer's website) for the exact size and thread count. Using a bolt that's too short or weak can lead to failure later.
3. Clean and Protect: Fight Rust and Wear
Dirt, grease, and moisture are the enemies of foot seats. A quick clean every month can prevent corrosion and keep moving parts working smoothly:
- Wipe down metal parts: Use a damp rag to remove dirt and grease. For stubborn grime, mix a little mild soap with water (avoid harsh chemicals like bleach, which can damage paint or plastic).
- Treat rust early: If you spot small rust spots, sand them off with fine-grit sandpaper (800–1000 grit), then apply a rust-inhibiting spray paint or a coat of clear sealant. For plastic foot seats, a quick wipe with a soapy rag is usually enough—just dry thoroughly to prevent mold.
- Lubricate moving parts: If your foot seat has adjustable screws or hinges, a drop of machine oil or silicone lubricant (avoid WD-40 for long-term lubrication—it's more of a cleaner) will keep them moving smoothly. Wipe off excess oil to prevent attracting dirt.
4. replace Worn Pads: Keep Grip and Protect Floors
The floor pad is what keeps the foot seat from sliding and protects your floors from scratches. When it's worn, it's time for a new one. Here's how to replace it:
- Remove the old pad: Most pads are glued or screwed on. If glued, gently pry it off with a flathead screwdriver (heat from a hair dryer can loosen stubborn glue). If screwed, remove the screws and lift the pad away.
- Clean the surface: Wipe the bottom of the foot seat with rubbing alcohol to remove any leftover glue or dirt. Let it dry completely.
- Install the new pad: If it's a peel-and-stick pad, remove the backing and press firmly, starting from the center and working outward to avoid air bubbles. If it uses screws, line up the new pad with the holes and tighten the screws (don't over-tighten—you might crack the pad).
Pro tip: Keep a few spare pads on hand. They're cheap (usually $5–$10 each), and having them ready means you can replace a worn pad immediately instead of waiting for a shipment.
5. Adjust for Level: Keep Equipment Balanced
Even if your foot seats are tight and clean, uneven floors can throw off stability. Most heavy duty split foot seats have adjustment features to fix this. Here's how to level your equipment:
- Find the high spot: Place a level on the equipment (e.g., the top of the workbench). If the bubble is off-center, that side is low. For example, if the bubble leans left, the left foot seat is too short (or the right is too tall).
- Adjust the foot seat: Use the adjustment bolt/screw to raise or lower the foot seat on the low side. Turn clockwise to raise, counterclockwise to lower (check the manual if you're unsure—some designs reverse this).
- Check again: After adjusting, place the level back on the equipment. Repeat until the bubble is centered. Tighten any locking nuts on the adjustment bolt to keep it from moving.
If your equipment has four foot seats (most do), check all four corners. Sometimes you'll need to adjust more than one to get everything level. It might take a few minutes, but the stability is worth it.
Troubleshooting: When Maintenance Isn't Enough (Yet)
Even with regular care, you might run into issues that need a little extra attention. Here's how to handle the most stubborn problems:
Problem: Stuck Adjustment Bolt
If the bolt won't turn, rust or debris is probably to blame. Try this:
- Penetrating oil: Spray the bolt with a penetrating oil (like PB Blaster or Liquid Wrench) and let it sit for 10–15 minutes. The oil will seep into the threads and loosen rust.
- Tap gently: Use a rubber mallet to tap the bolt head lightly. This can break up rust without damaging the bolt.
- Heat (for metal bolts): If the bolt is metal, use a heat gun (on low) to warm it up. Heat expands the metal, breaking rust bonds. Be careful not to overheat plastic parts!
If all else fails, you may need to replace the bolt. Drill out the old one carefully (use a drill bit slightly smaller than the bolt diameter) and install a new one.
Problem: Cracked Plastic Foot Seat
Plastic foot seats can crack from impact or overloading. Small cracks can sometimes be repaired with epoxy glue (like J-B Weld PlasticWeld). Clean the area, apply the epoxy, and clamp the crack closed for 24 hours. For large cracks or missing pieces, though, replacement is better—epoxy can't restore the original strength.
Problem: Rusted Beyond Saving
If a metal foot seat is covered in rust, with holes or thin spots, it's time to replace it. Rust weakens the metal, and even sanding and painting won't fix structural damage. Look for a replacement that matches the original size and weight capacity—don't skimp on quality here, especially if the equipment is heavy.
Long-Term Care: Making Your Foot Seats Last for Years
Monthly maintenance will keep your foot seats in good shape, but a few long-term habits can extend their life even further. Here's how to make them last for years (or decades):
Avoid Overloading: Know Your Limits
Heavy duty foot seats are built for weight, but every model has a maximum capacity (e.g., 500 lbs per foot). Check the manufacturer's specs and never exceed it. Overloading bends metal, cracks plastic, and wears out pads faster. If you need to support more weight, upgrade to a higher-capacity foot seat or add extra foot seats to distribute the load.
Clean Up Spills Fast
Oil, coolant, chemicals, and even water can damage foot seats over time. Wipe up spills immediately, and avoid letting liquids pool under equipment. For workshops with frequent spills, consider placing a mat under the equipment to catch drips and protect the foot seats.
Store Equipment Properly (If Not in Use)
If you're storing equipment for the off-season, clean the foot seats first, tighten all bolts, and cover the equipment to keep dust and moisture out. For long-term storage, place wood blocks under the equipment to take pressure off the foot seats—this prevents the pads from compressing permanently.
Upgrade When Needed
Sometimes, even with the best care, foot seats wear out. If you notice consistent issues (e.g., pads wearing out every few months, bolts loosening constantly), it might be time to upgrade. Look for models with thicker metal, reinforced plastic, or better floor pads (e.g., rubber instead of plastic). Adjustable leveling feet with larger pads, for example, can distribute weight better and last longer than basic models.
Conclusion: Small Steps, Big Results
Heavy duty split foot seats might not be the most glamorous part of your workspace, but they're essential. By taking 15–20 minutes each month to inspect, clean, tighten, and adjust them, you'll keep your equipment stable, your workers safe, and your budget intact. Remember: maintenance isn't just about fixing problems—it's about preventing them. A loose bolt today, if tightened, becomes a stable workbench tomorrow. A worn pad replaced now saves you from a wobbly conveyor next month.
So the next time you walk through your workshop, take a second to look down. Those little feet are working hard—give them a little love in return. Your equipment, your team, and your bottom line will thank you.