- Company Articles
- Products and Technology
- Product knowledge
- How Does a Vertical Lean Pipe Joint Work? Mechanism & Assembly Process Explained

How Does a Vertical Lean Pipe Joint Work? Mechanism & Assembly Process Explained
Related Product
Vertical Lean Pipe Joint
Vertical lean pipe joint is used for 28mm lean pipe fixed on ground and keep it stable.
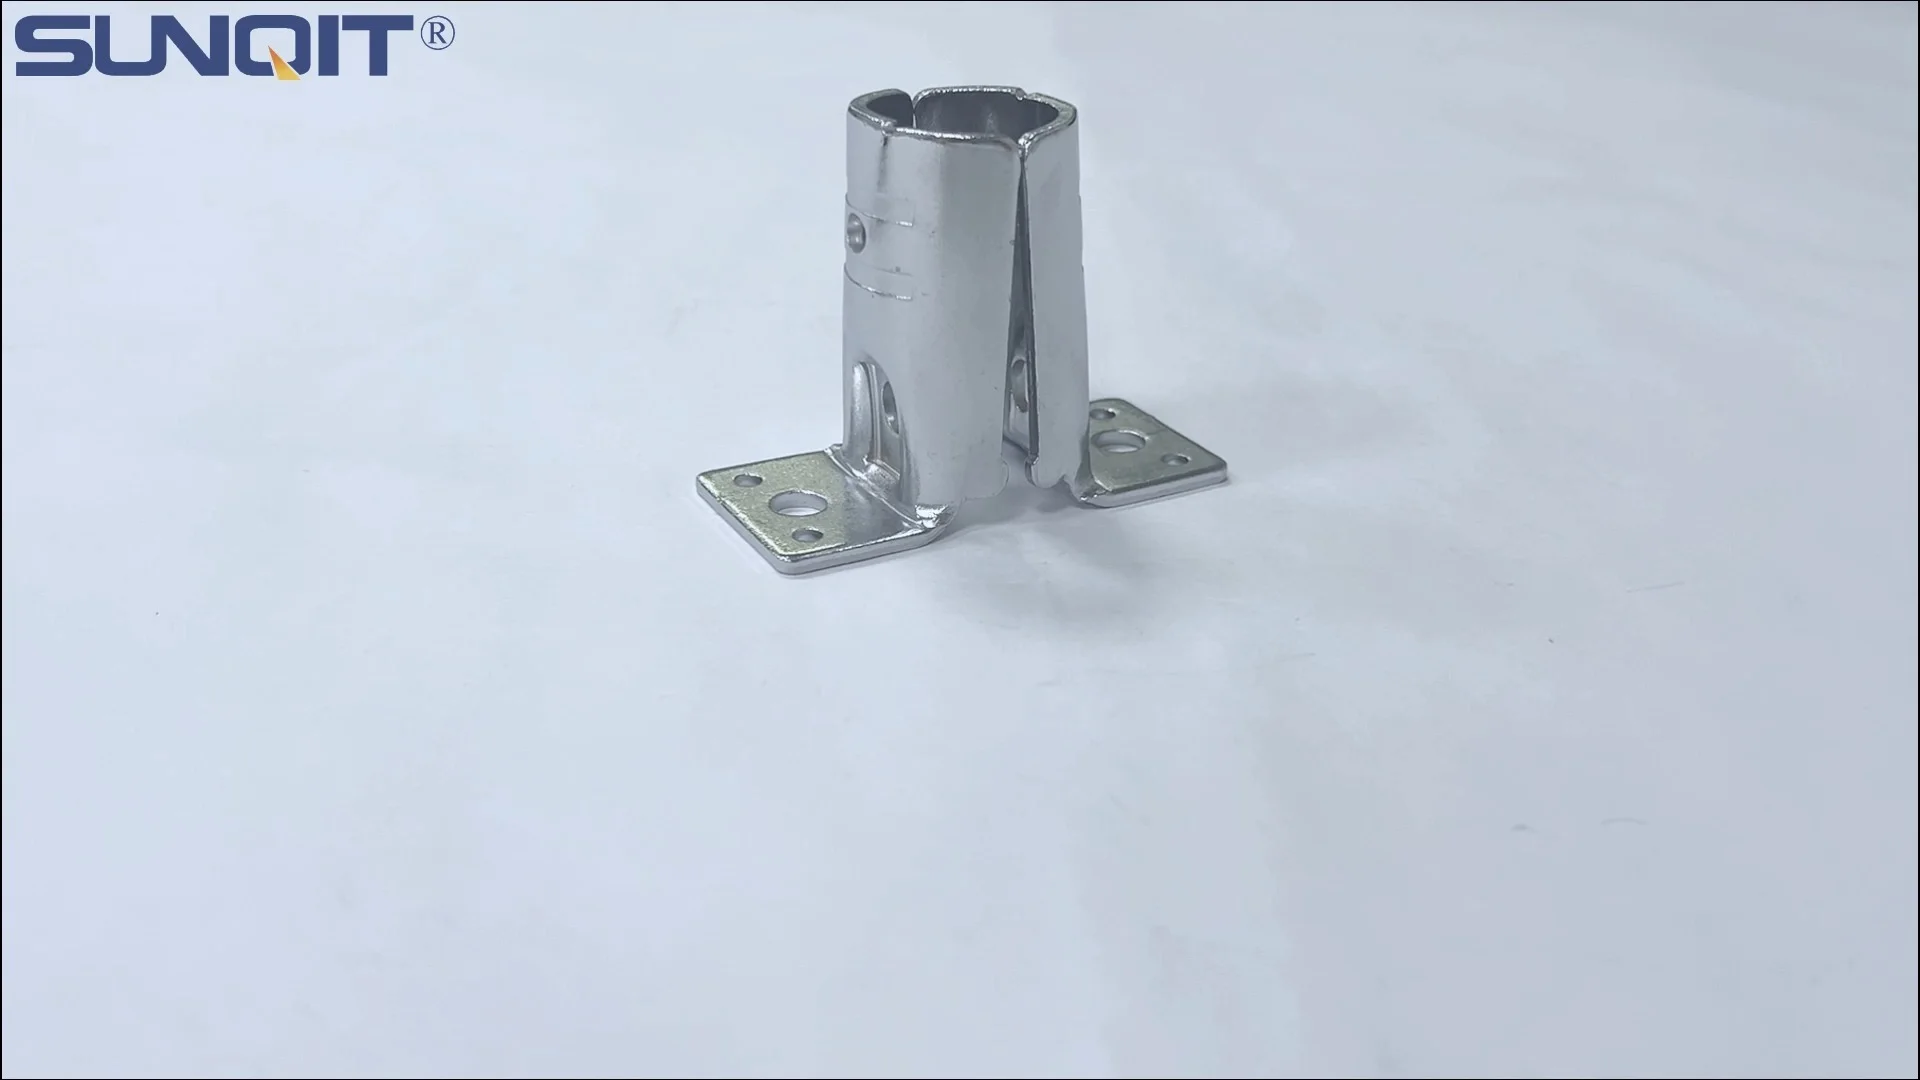
In the world of manufacturing and assembly, efficiency isn't just a buzzword—it's the backbone of daily operations. Every tool, every workstation, and every component plays a role in keeping workflows smooth, reducing waste, and ensuring teams can focus on what matters most: building quality products. At the heart of this efficiency lies the lean pipe system, a versatile framework that has revolutionized how factories, warehouses, and workshops organize their spaces. And if lean pipe systems are the skeleton of these operations, then the joints that hold them together are the vital connective tissue. Among these joints, the vertical lean pipe joint stands out as a workhorse, quietly supporting everything from simple material racks to complex assembly workbenches. But how exactly does this small but mighty component function? Let's dive in.
What Is a Vertical Lean Pipe Joint, Anyway?
Before we get into the nitty-gritty of how it works, let's clarify what a vertical lean pipe joint is. Simply put, it's a specialized connector designed to join two or more lean pipes at a 90-degree vertical angle. Think of it as the cornerstone of any vertical structure in a lean system—whether you're building a multi-tiered material rack, a standing workbench, or a shelving unit that reaches toward the ceiling. Unlike swivel joints that allow for rotation or angled joints that connect pipes at 45 degrees, the vertical lean pipe joint is all about stability and vertical alignment. It's the reason your lean pipe workbench doesn't wobble when you place heavy tools on it, or why a 3-row, 3-floor material rack can safely hold boxes of components without buckling.
But here's the thing: not all vertical joints are created equal. They come in different materials—like steel, aluminum, or even plastic-coated variants—and are engineered to handle varying weight loads. Some are fixed, meaning once tightened, they stay put; others might have slight adjustability for fine-tuning during assembly. And while they're called "vertical," they're not limited to straight-up-and-down connections. In many cases, they can also be used to reinforce horizontal structures, adding rigidity where it's needed most. For example, in a lean pipe workbench, vertical joints might connect the tabletop frame to the legs, ensuring the entire setup remains sturdy even with constant use.
Breaking Down the Components: What Makes a Vertical Lean Pipe Joint Tick?
To understand how a vertical lean pipe joint works, let's first look at its parts. Even though it might seem like a simple piece of hardware, it's actually a cleverly designed assembly of components working together to create a secure connection. Here's a closer look at the key elements:
1. The Body (or Housing)
This is the outer shell of the joint, typically made from die-cast metal like aluminum or steel. Aluminum lean pipe joints are popular for their lightweight nature and resistance to corrosion, making them ideal for clean environments or applications where weight matters—like mobile turnover trolleys. Steel joints, on the other hand, are heavier but offer superior strength, often used in heavy-duty material racks or workbenches that need to support hundreds of pounds. The body is shaped to cradle the lean pipes, with sockets (or "ports") where the pipes insert. For a vertical joint, there are usually two main ports: one for the vertical pipe (the "leg") and one for the horizontal pipe (the "crossbar"), arranged at a perfect 90-degree angle.
2. The Clamping Mechanism
This is where the magic happens. Inside the body, there's a clamping system that grips the lean pipe once it's inserted. Most vertical joints use a screw-driven clamp: a threaded bolt runs through the body, and when you tighten it (usually with a hex key or wrench), it presses a metal or rubber pad against the pipe. This creates friction, locking the pipe in place. Some joints also have serrated or grooved inner surfaces on the ports, which bite into the pipe's outer layer (especially useful for pe-coated lean pipe) to prevent slipping. The beauty of this mechanism is that it's reusable—loosen the screw, adjust the pipe length, retighten, and you're good to go. No welding, no glue, just simple mechanical force.
3. Reinforcement Ribs
Ever notice those extra ridges or bumps on the outside of the joint body? Those are reinforcement ribs, and they're not just for show. They add structural integrity to the joint, preventing it from bending or cracking under stress. In high-load applications—like a material rack holding heavy machinery parts—the ribs distribute weight evenly across the joint, reducing the risk of failure. This is especially important for aluminum joints, which are lighter but can be more prone to warping than steel. The ribs act like the beams in a bridge, ensuring the joint can handle the pressure.
4. Anti-Rotation Features
Imagine building a vertical shelf, only to have the horizontal pipes twist over time, throwing the entire structure out of alignment. That's where anti-rotation features come in. Many vertical lean pipe joints have small tabs, notches, or flat edges on the ports that mate with corresponding marks or indentations on the lean pipe. When the pipe is inserted, these features lock together, preventing the pipe from spinning inside the joint. It's a small detail, but it makes a big difference in maintaining the structure's geometry—critical for applications like roller tracks, where even a slight rotation could disrupt the flow of materials.

The Mechanism: How Does It Actually Hold Everything Together?
Now that we know the parts, let's talk about the physics of it all. When you insert a lean pipe into the vertical joint's port and tighten the clamping screw, several forces come into play to create a secure connection:
Friction: The Primary Grip
At its core, the vertical lean pipe joint relies on friction. As you tighten the clamping screw, the pad inside the joint presses against the pipe with increasing force. The more you tighten, the higher the friction between the pad and the pipe's surface. For pe-coated lean pipe, the rubbery outer layer actually enhances this friction—think of it like a tire gripping the road. For aluminum lean pipe, which has a smoother surface, the serrated ports on the joint bite into the metal, creating micro-indentations that resist sliding. This friction is what keeps the pipe from pulling out of the joint, even when you hang heavy items from it.
Compression: Squishing (in a Good Way)
Lean pipes—whether steel, aluminum, or pe-coated—have a slight amount of flexibility. When the clamping mechanism tightens, it compresses the pipe ever so slightly against the inner walls of the joint's port. This compression creates a "press fit," where the pipe is essentially squeezed into place. It's similar to how a vice holds a piece of wood: the more pressure you apply, the tighter the hold. This is why overtightening can be a problem—too much compression can damage the pipe (especially pe-coated ones, where the plastic layer might crack) or strip the threads on the clamping screw. It's all about finding that sweet spot where the pipe is secure but not deformed.
Shear Strength: Resisting Sideways Forces
Vertical joints don't just have to hold up weight from above—they also need to resist sideways (shear) forces. For example, if someone bumps into a material rack, the vertical joints at the base need to keep the structure from tipping over. This is where the joint's design shines. The 90-degree angle creates a right angle, which is inherently stable in engineering. The body of the joint is thickest at the corner where the two pipes meet, distributing shear forces across a larger surface area. Additionally, the clamping mechanism ensures the pipes can't slide sideways relative to each other, even under sudden impacts. It's why a well-built lean system with quality vertical joints can withstand the hustle and bustle of a busy factory floor.

Step-by-Step: Assembling with a Vertical Lean Pipe Joint
Okay, so we know how it works in theory—but how do you actually use one? Let's walk through the assembly process, using a simple 2-foot tall material shelf as an example. You'll need a few things: lean pipes (let's say 1.5mm pe-coated lean pipe for this project), vertical lean pipe joints, a hex key (usually 5mm or 6mm, depending on the joint), a level, and a measuring tape. Here's how it goes:
Step 1: Measure and Cut the Pipes
First, figure out how long your vertical and horizontal pipes need to be. For our shelf, let's say we want 4 vertical legs (each 24 inches tall) and 4 horizontal crossbars (each 36 inches long). Use a pipe cutter to trim the lean pipes to size—make sure the cuts are straight, as uneven ends will make assembly harder. If you're using pe-coated pipe, be careful not to nick the plastic layer; a clean cut ensures a better grip in the joint.
Step 2: Prep the Joints
Take your vertical lean pipe joints and loosen the clamping screws all the way—you want the ports to be wide open so the pipes can slide in easily. If the joints have anti-rotation tabs, make sure they're aligned with the direction you want the pipes to face. For example, if the crossbars will have roller track guide rails later, you'll want the tabs to face outward so the rails can attach cleanly.
Step 3: insert the Vertical Pipes
Start with one vertical leg. Slide the end of the pipe into the vertical port of the joint until it hits the bottom (most joints have a stop inside to prevent over-insertion). Hand-tighten the clamping screw just enough to hold the pipe in place—you'll fully tighten later. Repeat this for the other three vertical legs and their respective joints.
Step 4: Attach the Horizontal Crossbars
Now, take a horizontal crossbar and insert one end into the horizontal port of the first vertical joint. Make sure the pipe is pushed all the way in, then do the same with the other end and the second vertical joint. You should now have a rectangular frame with two vertical legs and one horizontal crossbar. Use the level to check that the crossbar is straight—if it's crooked, loosen the joints slightly and adjust. Once it's level, fully tighten the clamping screws with the hex key. Don't overdo it—you'll feel resistance when the joint is secure. Repeat this for the remaining crossbars, connecting all four vertical legs into a complete shelf frame.
Step 5: Add Reinforcements (If Needed)
For extra stability, you might want to add diagonal braces or additional vertical joints midway up the shelf. This is especially useful if you plan to load the shelf with heavy items. Simply cut shorter diagonal pipes, attach them using angled joints, and secure them to the vertical and horizontal pipes with vertical joints. Tighten all screws again to ensure everything is snug.
Step 6: Test It Out
Give the shelf a gentle shake to check for wobbles. If it moves, double-check that all joints are tight and the pipes are inserted fully. Place a few test boxes on it to simulate the actual load—if the joints hold without creaking or shifting, you're good to go. If not, you might need to tighten the screws a bit more or add extra bracing.
And just like that, you've built a sturdy shelf using vertical lean pipe joints. The best part? If you need to reconfigure it later—say, to make it taller or wider—you can simply loosen the joints, adjust the pipes, and retighten. That's the beauty of lean systems: they're adaptable, and the vertical joint is a big reason why.

Vertical Joints vs. Other Lean Pipe Joints: When to Use Which?
Now that you're a vertical joint expert, you might be wondering: when should I use this instead of other joint types? Let's compare it to a few common alternatives to help you decide.
| Joint Type | Primary Angle | Adjustability | Best For | Material Options |
|---|---|---|---|---|
| Vertical Lean Pipe Joint | 90 degrees (vertical) | Fixed (minor adjustability during assembly) | Workbenches, material racks, vertical shelving | Steel, aluminum, pe-coated steel |
| 45-Degree Reinforce Joint | 45 degrees | Fixed | Diagonal braces, angled shelves, ramps | Steel, aluminum |
| Swivel Joint | Variable (360-degree rotation) | Highly adjustable (locks at any angle) | Mobile trolleys, foldable structures, adjustable workstations | Aluminum, plastic (light-duty) |
| Crossing Joint | 90 degrees (overlapping pipes) | Fixed | Grid-style racks, overhead storage, multi-layered systems | Steel, aluminum |
As you can see, vertical joints are the go-to for straight vertical connections where stability is key. If you're building something that needs to stand tall and hold weight, they're your best bet. Swivel joints, on the other hand, are better for mobile or adjustable setups, while 45-degree joints shine in reinforcing structures with diagonal braces. The crossing joint is ideal when you need pipes to overlap (like in a grid), but it's bulkier than a vertical joint and not as efficient for simple vertical connections.
Troubleshooting Common Issues with Vertical Lean Pipe Joints
Even the best joints can run into problems. Here are a few common issues you might encounter and how to fix them:
Loose Joints Over Time
If a joint starts to wobble after weeks or months of use, it's likely because the clamping screw has loosened from vibration. Simply retighten it with the hex key—this should solve the problem. For joints in high-vibration areas (like near machinery), you might want to use thread-locking compound on the screw threads to prevent loosening.
Pipes Slipping Out
If a pipe pulls out of the joint, check two things: first, is the clamping screw tight enough? If it is, the pipe might not be inserted all the way. Push it in until it hits the stop inside the joint, then retighten. If the pipe still slips, the clamping pad inside the joint might be worn—replace the joint, as worn pads can't generate enough friction.
Corrosion (for Steel Joints)
Steel vertical joints can rust in humid or wet environments. To prevent this, opt for galvanized or stainless steel joints, or coat regular steel joints with anti-rust spray. If you notice rust already, sand it off with fine-grit sandpaper and apply a fresh coat of paint or sealant.
Damaged Pe-Coated Pipes
If you're using pe-coated lean pipe and the plastic layer cracks or peels, the joint might not grip as well. To fix this, wrap the damaged area with electrical tape (for a temporary solution) or replace the pipe (for a permanent fix). Avoid using damaged pipes in load-bearing areas, as the joint's friction grip will be compromised.
Choosing the Right Vertical Lean Pipe Joint for Your Project
With so many options on the market, how do you pick the right vertical joint? Here are a few key factors to consider:
Material Matters
Steel joints are strong and durable, making them great for heavy-duty applications (like 3-row, 3-floor material racks). Aluminum lean pipe joints are lighter and corrosion-resistant, ideal for cleanrooms, food processing facilities, or environments where weight is a concern (like mobile trolleys). Plastic-coated steel joints offer a middle ground—they're strong like steel but have a protective layer to resist scratches.
Weight Capacity
Check the manufacturer's specs for weight limits. A small vertical joint might handle 50 pounds per connection, while a heavy-duty steel version could manage 200 pounds or more. If you're unsure, err on the side of caution—overloading a joint is a recipe for failure.
Environment
In ESD (electrostatic discharge) sensitive areas—like electronics assembly lines—look for ESD-safe vertical joints (often made with conductive materials). In wet environments, stainless steel or aluminum is a must to prevent rust. For cleanrooms, smooth, easy-to-clean surfaces are key—avoid joints with crevices where dust can collect.
Compatibility
Make sure the joint fits your lean pipe size. Most lean pipes are 28mm in diameter, but some aluminum or stainless steel pipes might be smaller (like 20mm). The joint's ports should match your pipe diameter exactly—too loose, and the connection will be weak; too tight, and you'll damage the pipe.
Wrapping Up: The Unsung Hero of Lean Systems
At the end of the day, the vertical lean pipe joint might not be the flashiest component in your factory or workshop, but it's undoubtedly one of the most important. It's the reason lean systems are so versatile—able to be built, modified, and rebuilt again and again without losing stability. From the friction that grips the pipe to the reinforcement ribs that add strength, every part of its design is focused on one goal: making your workflow smoother, safer, and more efficient.
So the next time you walk past a lean pipe workbench, a material rack, or a conveyor system, take a second to appreciate the vertical joints holding it all together. They're small, but they're mighty—and they're the quiet champions of lean manufacturing.