- Company Articles
- Products and Technology
- Installation And Maintenance
- How to replace a Damaged Lean Pipe Fixed Clamp: Quick Fix Guide

How to replace a Damaged Lean Pipe Fixed Clamp: Quick Fix Guide
Related Product
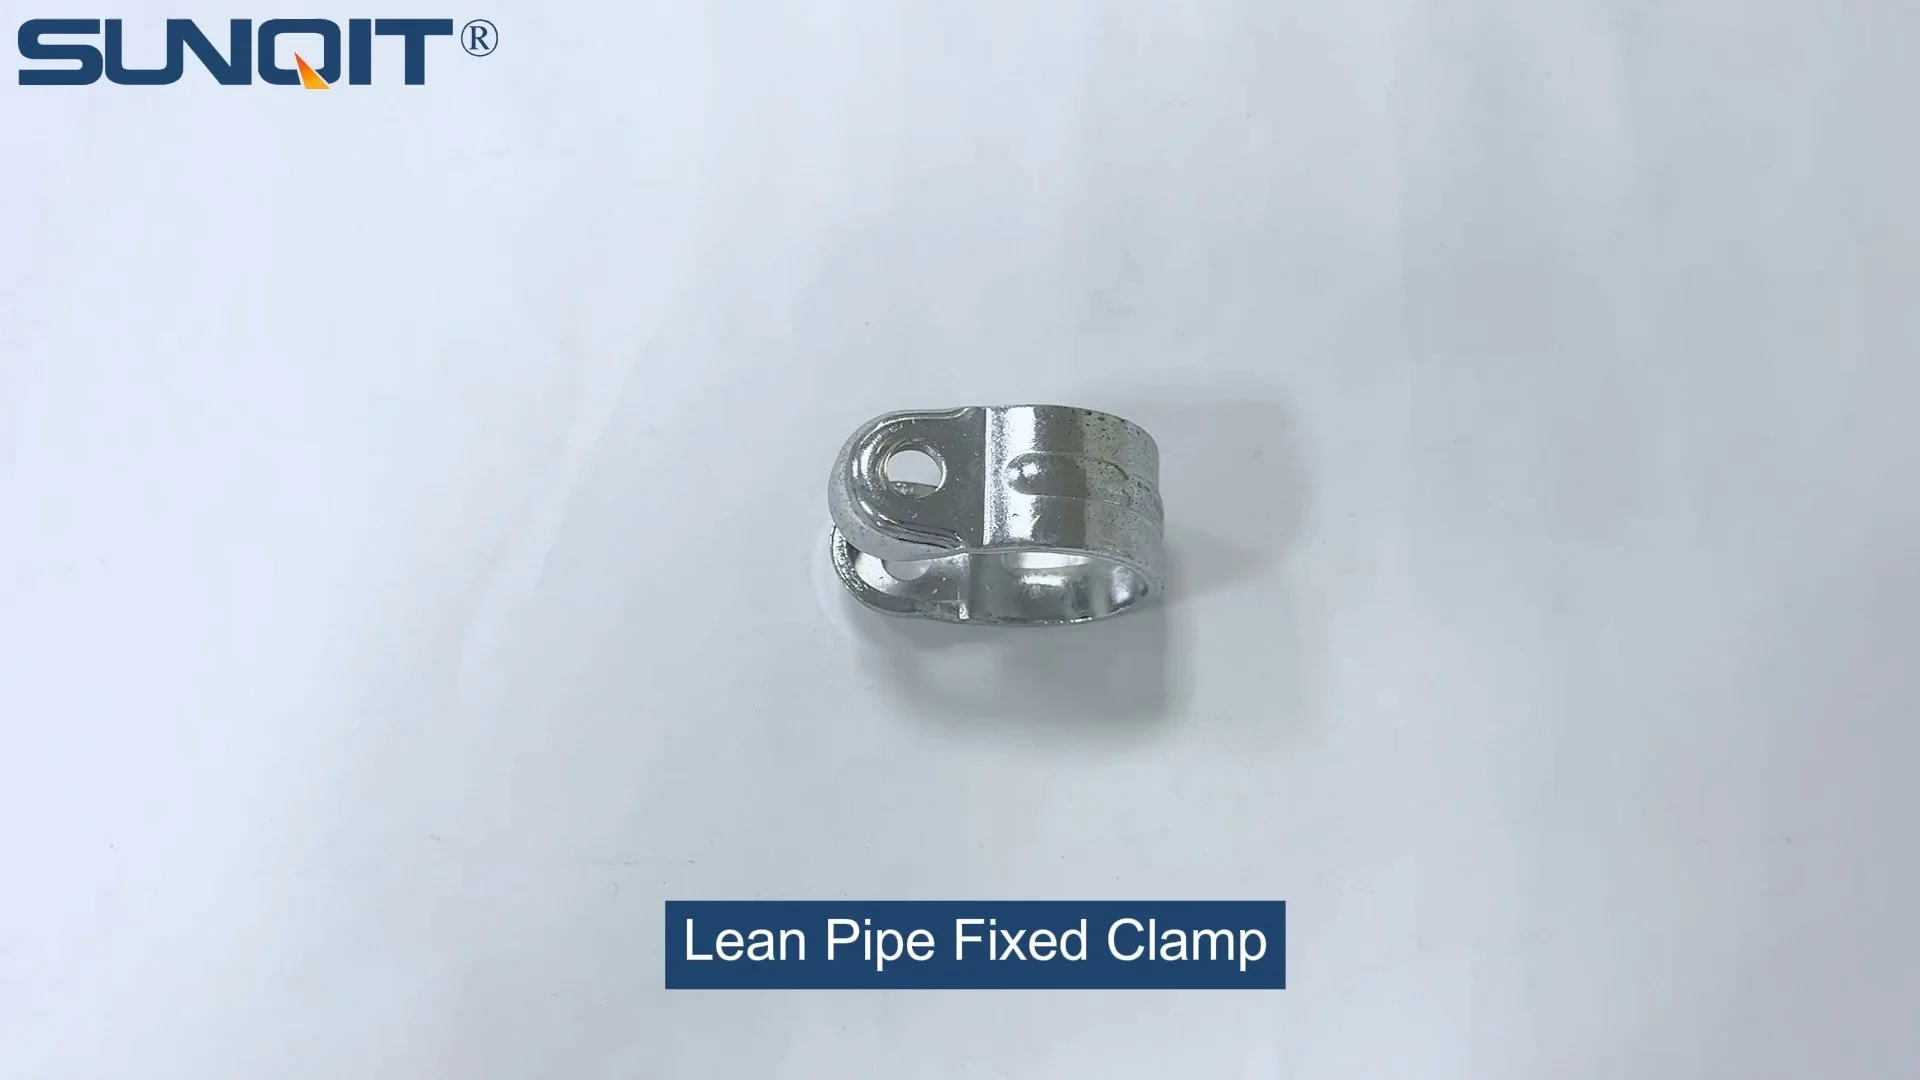
Lean Pipe Fixed Clamp
Lean pipe fixed clamp is used for pipe connector fixing the correct position during workbench flow rack hand trolley assemble work.
Introduction: The Backbone of Your Lean System
If you've spent any time in a production facility, warehouse, or workshop, you've probably seen them: those sleek, modular structures holding up workbenches, guiding roller tracks, or supporting material racks. They're part of a lean system, and at the heart of that system is the humble lean pipe. But even the sturdiest lean pipe setup relies on small, often overlooked components to stay strong—like the lean pipe fixed clamp. These clamps are the silent workhorses, keeping pipes connected, structures stable, and your workflow running smoothly.
But what happens when a fixed clamp gives out? Maybe you've noticed a wobbly workbench that used to be rock-solid, or a roller track that's starting to sag. Ignoring a damaged clamp might seem like a minor issue, but over time, it can throw off your entire setup. Loose pipes can lead to misaligned materials, slow down production, or even create safety hazards. The good news? Replacing a lean pipe fixed clamp is a straightforward DIY job—no need to call in a professional. In this guide, we'll walk you through everything you need to know, from spotting the signs of a failing clamp to installing a new one like a pro.
Signs Your Lean Pipe Fixed Clamp Needs Replacement
Before you grab your tools, you need to (confirm) that the clamp is actually the problem. Lean pipe systems are designed to be durable, but clamps take a lot of wear and tear—especially in busy environments. Here are the key symptoms to watch for:
| Symptom | What It Means | Urgency |
|---|---|---|
| Visible cracks or breaks | The clamp's metal or plastic body has splits, chips, or fractures. This weakens its grip on the lean pipe. | High—replace immediately to avoid collapse. |
| Loose pipes or wobbly structure | Even if the clamp looks intact, if the connected pipes shift or the structure (shakes) when touched, the clamp's grip is failing. | Medium—replace soon to prevent further damage. |
| Rust or corrosion | Metal clamps exposed to moisture or chemicals may develop rust, which eats away at the material and weakens the clamp over time. | Medium—rust spreads quickly; don't delay. |
| Misalignment | The clamp is supposed to hold pipes at a precise angle (like 90° or 45°). If the pipes are now crooked or off-kilter, the clamp may be bent or worn. | Medium—misalignment can throw off workflows. |
| Stripped threads | When you try to tighten the clamp's bolt, it spins freely without gripping. This means the threads inside the clamp are worn out. | High—stripped threads make the clamp useless. |
Pro tip: Check adjacent lean pipe joints, too. A damaged clamp might be a sign that other components are under stress. For example, if one clamp fails, the load could shift to nearby clamps, causing them to wear faster. It's better to catch these issues early!
Tools You'll Need: Gather These Before You Start
Replacing a fixed clamp doesn't require a fully stocked workshop, but having the right tools on hand will make the job faster and easier. Here's what you'll need:
| Tool | Why You Need It | Pro Tip |
|---|---|---|
| Adjustable wrench or socket set | To loosen and remove the old clamp's bolt. Most clamps use standard metric sizes (like M6 or M8), so a socket set with these sizes works best. | Use a socket with a ratchet for extra leverage—rusted bolts can be tough to turn. |
| New lean pipe fixed clamp | Obviously, you'll need a replacement! Make sure it matches the size of your lean pipe (most common sizes are 28mm or 30mm) and the type of joint (e.g., 90° fixed, straight, or parallel). | Buy a few extra clamps—you never know when another one might fail! |
| Wire brush or sandpaper | To clean rust or debris from the lean pipe and adjacent joints before installing the new clamp. A clean surface ensures a tight grip. | Use fine-grit sandpaper (120-220 grit) to avoid scratching the pipe's coating. |
| Level (optional but helpful) | To ensure the pipes are straight and aligned after installing the new clamp. This is especially important for workbenches or roller tracks where precision matters. | A small spirit level works best for tight spaces. |
| Gloves | To protect your hands from sharp edges on the clamp or pipe, especially if there's rust or burrs. | Go for nitrile gloves—they're durable and won't slip on metal surfaces. |
Bonus tools: If the old clamp is really stuck (thanks to rust or over-tightening), a penetrating oil like WD-40 can help loosen it. Just spray a little on the bolt and let it sit for 10-15 minutes before trying to turn it. A rubber mallet can also come in handy—gently tapping the clamp can break loose any corrosion holding it in place.

Step-by-Step Guide: Replacing the Lean Pipe Fixed Clamp
Now that you've identified the problem and gathered your tools, let's get to work. Follow these steps for a smooth replacement:
Step 1: Safety First—Secure the Area
Before you start taking things apart, make sure the lean pipe structure is safe to work on. If the clamp is part of a loaded material rack or a workbench with tools on it, empty the contents first. You don't want items falling while you're working! If the structure is tall (like a high material rack), use a step stool or ladder to reach the clamp safely—never stand on unstable surfaces.
Step 2: Loosen and Remove the Old Clamp
Locate the damaged clamp. It will be holding two lean pipes together at a joint (e.g., where a vertical pipe meets a horizontal one). Use your adjustable wrench or socket to loosen the bolt on top of the clamp. Turn it counterclockwise—you may need to apply some force if the bolt is rusted. If it's really stuck, spray on a bit of penetrating oil and wait a few minutes, then try again.
Once the bolt is loose, remove it completely, then slide the old clamp off the pipes. Be careful—if the pipes were already loose, they might shift once the clamp is removed. Hold the pipes steady with one hand while you take off the clamp with the other.
Step 3: Clean the Pipes and Joint Area
Take your wire brush or sandpaper and scrub the ends of the lean pipes where the clamp was attached. Remove any rust, dirt, or old adhesive (some clamps use a thin layer of glue for extra grip). This step is crucial—debris can prevent the new clamp from seating properly, leading to a loose fit later. Wipe the pipes with a clean cloth to remove dust, and check for any dents or bends in the pipe itself. If the pipe is bent, you may need to straighten it before installing the new clamp (a rubber mallet can help gently tap it back into shape).
Step 4: Position the New Clamp
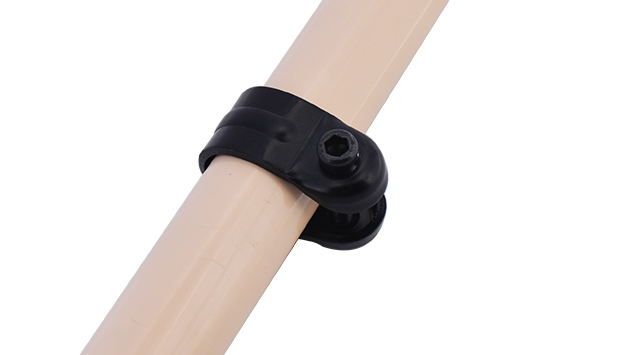
Take your new lean pipe fixed clamp and slide it onto the pipes. Make sure it's oriented correctly—most clamps have a specific shape for the joint type (e.g., a 90° clamp will have two perpendicular openings). Align the clamp so that the pipes are straight and the structure is level (use your level here if you have one). For example, if you're replacing a clamp on a workbench leg, ensure the leg is vertical and the top frame is horizontal before tightening.
Step 5: Tighten the Bolt—But Don't Overdo It
insert the new bolt into the clamp and hand-tighten it clockwise until it's snug. Then, use your wrench or socket to tighten it further—you want it tight enough that the clamp grips the pipes firmly, but not so tight that you strip the threads or warp the clamp. A good rule of thumb: tighten until you feel resistance, then give it a quarter-turn more. If the clamp has a plastic or rubber coating, be extra gentle—over-tightening can crack the coating.
Step 6: Test the Structure
Once the new clamp is in place, give the structure a gentle shake. It should feel solid—no wobbling or shifting. If it still moves, check if the clamp is aligned correctly or if the bolt needs a little more tightening. If the pipes are straight and the clamp is tight but the structure still feels loose, inspect nearby clamps—maybe another one is damaged, too. Better to fix it now than later!

Pro Tips for a Smoother Replacement
Even if you've followed the steps, a few extra tricks can make your clamp replacement last longer and look more professional. Here are our top pro tips:
Tip 1: Match the Clamp to Your Lean Pipe Type
Not all lean pipes are the same! If you're using aluminum lean pipe (lighter, corrosion-resistant) instead of traditional steel, make sure your new clamp is designed for aluminum. Aluminum pipes have a different coating (often anodized), and using a steel clamp with sharp edges can scratch or damage that coating over time. Look for clamps labeled "aluminum compatible" or with plastic inserts to protect the pipe.
Tip 2: Don't Over-Tighten—You Can Damage the Pipe
It's tempting to crank the bolt as tight as possible, but lean pipes (especially those with a PE coating) can be dented or crushed by over-tightened clamps. Most manufacturers recommend a torque of 3-5 Nm for standard clamps—if you have a torque wrench, use it! If not, tighten until the clamp feels secure, then stop. The goal is a snug fit, not a vice-like grip.
Tip 3: Check for Wear on Adjacent Joints
As we mentioned earlier, a failing clamp rarely happens in isolation. When you're replacing one clamp, take a minute to inspect the lean pipe joints around it. Are other clamps loose? Do any have rust or cracks? Tighten loose bolts and replace any damaged clamps while you're at it. It might take a little extra time now, but it'll save you from repeat repairs down the line.
Tip 4: Use Thread Locking Compound (For Heavy-Duty Setups)
If your lean pipe system is in a high-vibration area (like near a conveyor or heavy machinery), the clamp's bolt might loosen over time. To prevent this, apply a small drop of thread locking compound (like Loctite) to the bolt threads before installing the new clamp. It's not necessary for every setup, but it's a smart add-on for workbenches or material racks that see constant use.
Troubleshooting Common Issues After Replacement
Even with careful work, you might run into a few hiccups. Here's how to fix the most common post-replacement problems:
Problem: The New Clamp Still Feels Loose
Possible causes: The clamp is the wrong size for your pipe, or the pipe is bent. Double-check that the clamp's inner diameter matches your lean pipe (e.g., 28mm clamps for 28mm pipes). If the pipe is bent, use a rubber mallet to gently straighten it. If the clamp is the right size and the pipe is straight, try adding a thin layer of rubber tape around the pipe before installing the clamp—it adds friction for a tighter grip.
Problem: The Bolt Won't Tighten (Stripped Threads)
Uh-oh—this usually happens if you cross-threaded the bolt (started it at an angle) or over-tightened it. If the threads in the clamp are stripped, you'll need to replace the clamp (fortunately, they're inexpensive). To avoid this next time, start the bolt by hand—turn it clockwise gently until it feels like it's "catching" smoothly. If it resists, back it out and try again—don't force it!
Problem: The Clamp Slips on the Pipe
This is common with smooth, coated pipes (like PE-coated lean pipe). Try cleaning the pipe with rubbing alcohol to remove any oil or grease, then let it dry before reinstalling the clamp. If that doesn't work, look for clamps with serrated inner edges—they grip better on smooth surfaces.
Maintaining Your Lean Pipe System to Prevent Future Clamp Damage
Now that your new clamp is installed, you want it to last. With a little regular maintenance, you can extend the life of all your lean pipe components—including clamps. Here's how:
1. Inspect Regularly
Set a schedule to check your lean pipe system—once a month is a good start. Look for loose bolts, rust, or cracks in clamps and joints. Pay extra attention to areas that get heavy use, like workbench corners or roller track supports. Catching issues early means smaller repairs (and fewer headaches).
2. Clean and Lubricate Bolts
Every few months, wipe down clamps and bolts with a dry cloth to remove dust and debris. If you live in a humid area, spray a light coat of anti-rust spray (like WD-40) on metal clamps to prevent corrosion. For bolts that are hard to turn, a drop of lubricating oil (like 3-in-1 oil) can make future adjustments easier.
3. Avoid Overloading
Lean pipe systems are strong, but they have limits. Check the weight capacity of your workbench, material rack, or roller track, and don't exceed it. Overloading puts extra stress on clamps and joints, causing them to wear out faster. If you need to hold heavier items, upgrade to a heavier-duty clamp or switch to aluminum profile (sturdier than standard lean pipe).
4. Protect Against the Elements
If your lean pipe system is outdoors or in a damp area (like a warehouse with high humidity), use stainless steel clamps instead of standard steel. Stainless steel resists rust and corrosion, making it ideal for wet environments. For aluminum lean pipe, keep it away from harsh chemicals—acids or alkalis can eat away at the anodized coating.
Conclusion: A Small Fix for Big Results
Replacing a lean pipe fixed clamp might seem like a tiny task, but it's one that has a big impact on your lean system's performance. A sturdy clamp keeps your workbench stable, your roller track flowing, and your production on track. And the best part? You don't need to be a mechanic or have fancy tools to do it. With a little patience, the right supplies, and this guide, you can have your lean pipe system back in shape in no time.
Remember: lean systems are all about efficiency, and that starts with keeping the small things in check. So the next time you spot a wobbly pipe or a loose clamp, don't put it off—grab your tools and fix it. Your workflow (and your team) will thank you.
Now go out there and make that lean pipe system stronger than ever!