- Company Articles
- Products and Technology
- Installation And Maintenance
- How to replace a Damaged One Way Rotatory Straight Lean Pipe Joint Chrome: DIY Guide

How to replace a Damaged One Way Rotatory Straight Lean Pipe Joint Chrome: DIY Guide
Related Product
One Way Rotatory Straight Lean Pipe Joint Chrome
Two way lean pipe joint for 2 pcs 28MM lean pipe connection in straight angle with rotatory fucntion, which used widely in workbench, flow rack, hand trolley frame connection.
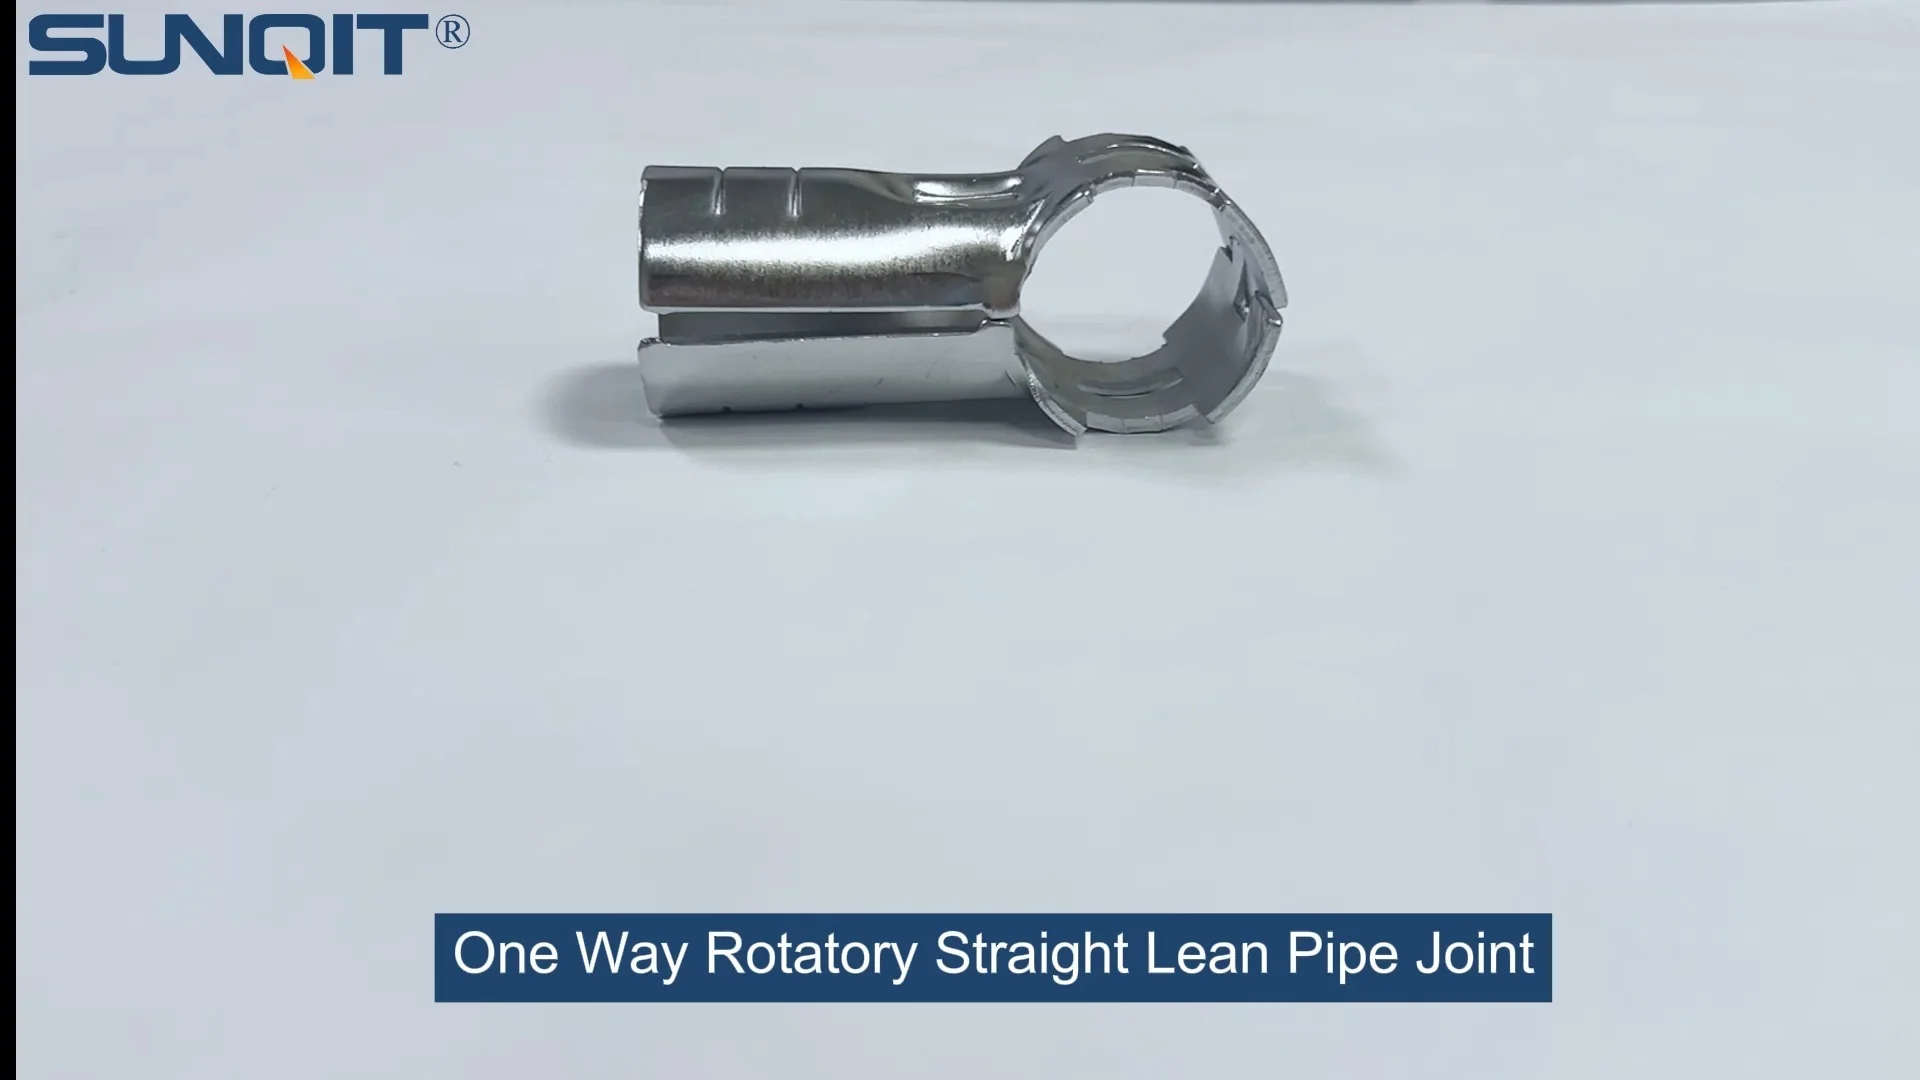
If you've ever stood in front of your lean pipe workbench and noticed a stubborn kink in your workflow—a part that won't slide smoothly, a section that wobbles when you touch it, or a joint that just refuses to rotate like it used to—chances are, you're dealing with a damaged one way rotatory straight lean pipe joint chrome. These small but mighty components are the unsung heroes of any efficient workspace, keeping your lean pipe structures sturdy, your materials flowing, and your team moving without unnecessary delays. But when they wear out or break, they can throw a wrench into even the most well-oiled operations.
The good news? You don't need to call in a professional or replace the entire system. With a little patience, the right tools, and this step-by-step guide, you can swap out that faulty joint yourself and get your workspace back to peak performance. Whether you're a seasoned facility manager, a hands-on small business owner, or someone who just likes to tackle DIY projects, this article will walk you through the process in simple, conversational terms—no engineering degree required.
Understanding the One Way Rotatory Straight Lean Pipe Joint Chrome
Before we dive into the "how," let's take a quick second to appreciate what this joint actually does. The one way rotatory straight lean pipe joint chrome is a specialized lean pipe joint designed to connect sections of lean pipe while allowing controlled, one-directional rotation. Think of it as the hinge that lets a conveyor section tilt, a material rack swing, or a workbench extension fold—all without coming loose or locking up unexpectedly.
Made from durable chrome-plated steel, it's built to withstand the daily wear and tear of busy production floors, warehouses, and assembly lines. But even the toughest parts have their limits. Over time, constant movement, heavy loads, or accidental bumps can cause the internal bearings to wear down, the chrome plating to chip (leading to rust), or the locking mechanism to fail. When that happens, you might notice:
- Stiff or jerky rotation (instead of smooth, fluid movement)
- Wobbling or looseness in the connected lean pipe sections
- Grinding or squeaking noises when the joint moves
- Visible damage, like cracks in the joint body or bent prongs
Ignoring these signs can lead to bigger problems: misaligned materials, slower workflows, or even safety hazards if a section of the lean pipe workbench or rack becomes unstable. So, let's get that joint replaced—starting with gathering what you'll need.
Gathering Your Tools and Materials
You wouldn't bake a cake without prepping the ingredients first, and the same goes for this project. Here's a list of tools and lean pipe and accessories you'll need to have on hand before you start. I've tried to keep this list practical—most of these items are probably already in your toolbox, and the rest can be picked up from your local hardware store or lean pipe supplier .
| Tool/Material | Why You Need It |
|---|---|
| New one way rotatory straight lean pipe joint chrome | The star of the show! Make sure it's the exact replacement—check the size (most are 28mm or 30mm) and rotation direction to match your original. |
| Adjustable wrench | To loosen and tighten the lock nuts on the old and new joint. |
| Rubber mallet | For gently tapping parts into place without scratching or denting the lean pipe or joint. |
| Screwdriver (flathead or Phillips, depending on your joint) | Some joints have small set screws that need to be loosened before removal. |
| Work gloves | To protect your hands from sharp edges, chrome plating, or pinch points. |
| Clean rag or paper towels | To wipe down the lean pipe ends and new joint—grease or dust can interfere with a tight fit. |
| Penetrating oil (like WD-40) | For stuck or rusted lock nuts—spray a little and let it sit for 5-10 minutes to loosen things up. |
| Level (optional but helpful) | To double-check that the joint is aligned straight after installation. |
| Zip ties or bungee cords | To temporarily support the lean pipe sections while you remove the old joint (prevents them from falling). |
Pro Tip:
Before you start, take a quick photo of the old joint with your phone. This will help you remember how it was oriented (which direction the rotation goes, how tight the nuts were, etc.) when it's time to install the new one. Trust me—memory can play tricks, and a photo is worth a thousand "Wait, how did that go again?" moments.
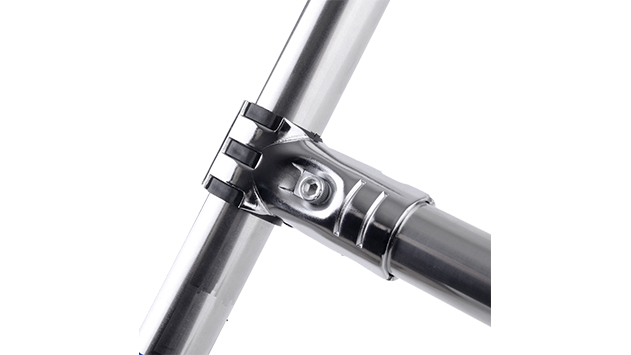
Step 1: Prepare the Workspace
First things first: safety. Before you touch anything, make sure the area around the damaged joint is clear of people, tools, and materials. If the joint is part of a lean pipe workbench or material rack that's holding items, empty those shelves or move the materials to a temporary spot—you don't want anything to fall when you start loosening parts.
Next, if the lean pipe sections connected to the joint are heavy or long, use zip ties or bungee cords to support them. For example, if the joint is in the middle of a conveyor, prop up the pipe on a sturdy box or sawhorse so it doesn't sag when you remove the joint. This not only prevents damage to the pipe but also keeps you from straining your back trying to hold it up.

Step 2: Identify and Access the Damaged Joint
Now, take a close look at the joint. Is it fully exposed, or is it tucked between other pipes, brackets, or accessories? You might need to temporarily remove nearby lean pipe and accessories —like a side bracket or a small section of roller track—to get a clear view and enough room to work. For example, if the joint is behind a material rack, loosen the adjacent joints with your wrench to swing the rack out of the way (just remember to tighten them back later!)
Once you can see the joint clearly, take a moment to note how it's installed. Which direction does the rotation handle face? Are there washers or spacers between the joint and the pipe? Take another photo if you need to—this will be your "before" reference for putting it all back together.
Step 3: Remove the Old Joint
Okay, time to say goodbye to the faulty joint. Here's how to remove it safely:
3.1 Loosen the Lock Nuts
Most one way rotatory joints have two lock nuts: one on each end, where the joint connects to the lean pipe. Grab your adjustable wrench and turn these nuts counterclockwise to loosen them. If they're stuck (thanks to rust or tightness), spray a little penetrating oil on the threads, wait 5 minutes, and try again. Avoid using excessive force—you don't want to strip the threads or round off the nut.
If the joint has set screws (small screws on the side of the joint body), use your screwdriver to loosen those first. These screws are there to keep the joint from spinning on the pipe, so they'll need to be fully unscrewed before you can slide the joint off.
3.2 Slide the Joint Off the Pipe
Once the lock nuts and set screws are loose, gently pull the joint away from the lean pipe. If it's still stuck (maybe due to corrosion or old glue), tap the end of the pipe lightly with a rubber mallet to nudge it free. Be careful not to hit the joint itself—you don't want to damage the surrounding components.
If the joint is connected to two pipes (which it usually is), you'll need to slide it off both ends. Sometimes one end will come off easily, and the other will be tighter—just take your time and work each side separately.
3.3 Inspect the Pipe Ends
With the old joint removed, take a look at the ends of the lean pipe. Are they bent, dented, or covered in rust? If there's minor rust, wipe it off with a clean rag. If the pipe is bent, gently straighten it with your hands (or a pipe bender, if it's severe)—a crooked pipe will make it hard to install the new joint properly. If the damage is too bad, you may need to cut off the damaged section and replace it with a new piece of lean pipe (but that's a project for another day—for now, we're focusing on the joint!)
Step 4: Prep the New One Way Rotatory Straight Lean Pipe Joint Chrome
Now that the old joint is out, let's get the new one ready. Start by unpacking it and checking for any defects—scratches, dents, or missing parts. Most reputable lean pipe suppliers will send joints with all the necessary hardware (lock nuts, washers, set screws), but it never hurts to double-check.
Next, wipe down the new joint with a clean rag to remove any dust or oil from the manufacturing process. Then, take a look at the rotation direction: one way joints have a "stop" that prevents rotation in one direction, so make sure it matches the old joint. If you install it backward, the rotation will be locked the wrong way—and you'll have to start over (we've all been there).
Pro Tip:
If you're unsure about the rotation direction, hold the new joint next to the old one and compare the position of the stop mechanism. They should look identical in terms of which way they allow movement.
Step 5: Install the New Joint
This is where the magic happens—time to put that new joint in place. Follow these steps carefully, and you'll have a snug, functional connection in no time.
5.1 Slide the Lock Nuts and Washers Onto the Pipe
Before sliding the joint onto the pipe, thread the lock nuts and any washers (if included) onto the lean pipe ends. The order matters here: usually, it's washer first, then lock nut, with the threaded side of the nut facing the joint. Check the old joint if you're unsure—this is where that "before" photo comes in handy!
5.2 Align and Slide the Joint Onto the Pipes
Hold the new joint so that the rotation direction matches the old one (remember that photo?). Then, slide one end of the joint onto the prepared lean pipe end. Push it on until it's about halfway, then do the same with the other pipe end. The joint should sit evenly between the two pipes, with both ends inserted to roughly the same depth (usually 1-2 inches, depending on the joint size).
If the pipes are hard to slide in, apply a tiny bit of dish soap to the pipe ends (it acts as a lubricant and will wash away later). Avoid using oil or grease here—they can attract dust and cause the joint to slip over time.
5.3 Tighten the Set Screws (If Applicable)
If your new joint has set screws, now's the time to tighten them. Use your screwdriver to turn them clockwise until they're snug against the pipe—don't overtighten, or you could strip the screws or damage the pipe.
5.4 Tighten the Lock Nuts
Finally, use your adjustable wrench to tighten the lock nuts. Turn them clockwise until they're firm, but not so tight that you can't move the joint. You want the joint to be secure enough to hold the pipes in place but still able to rotate smoothly. A good rule of thumb: tighten until you feel resistance, then give it a quarter-turn more.
If the joint starts to rotate while you're tightening the nuts, hold it steady with one hand to keep it aligned. Once both nuts are tight, give the joint a gentle wiggle—there should be no wobble or looseness in the connection.
Step 6: Test the Joint and Make Adjustments
You're almost done! Now it's time to test the new joint to make sure it works like it should. Here's how:
- Check rotation: Try rotating the joint in the intended direction (the "one way" part). It should move smoothly, with no sticking or grinding. If it's stiff, loosen the lock nuts slightly—overtightening can restrict movement.
- Check the stop mechanism: Now try rotating it the opposite way. It should lock firmly, with no give. If it moves backward, the joint may be installed upside down—double-check the rotation direction and flip it if needed.
- Check stability: Grab the connected lean pipe sections and gently shake them. There should be no wobble or play in the joint. If it moves, tighten the lock nuts a little more (but again, don't overdo it).
- Test under load: If the joint is part of a lean pipe workbench or rack, place a light load on it (like a box of parts) and see how it holds. The joint should support the weight without bending or slipping.
If something feels off, don't panic! Most issues are easy to fix: a loose nut, a misaligned pipe, or a set screw that needs tweaking. Just go back through the steps and adjust as needed—patience is key here.
Step 7: Clean Up and Final Checks
Once the joint is working perfectly, take a minute to clean up your workspace. Put away your tools, throw away any trash (like old rags or packaging), and move the materials back onto the lean pipe workbench or rack. Then, do a final walk-around to make sure everything is secure and nothing was missed—did you remember to retighten any brackets or accessories you moved earlier? Are all the lock nuts tight? Is the area safe for others to work in?
And that's it! You've successfully replaced the one way rotatory straight lean pipe joint chrome. Take a step back and admire your handiwork—you've saved time, money, and the hassle of waiting for a repair service. Plus, you've gained a new skill that will come in handy the next time a lean pipe component needs fixing.
Pro Tips for Maintaining Your Lean Pipe Joints
Now that your new joint is installed, let's talk about how to keep it (and all your lean pipe and accessories ) in great shape for years to come. A little maintenance goes a long way in preventing future breakdowns:
- Clean regularly: Wipe down your lean pipe joints with a damp rag every few weeks to remove dust, grease, and debris. This prevents buildup that can cause sticking or corrosion.
- Lubricate moving parts: Every 3-6 months, apply a small amount of silicone lubricant (or machine oil) to the joint's rotation points. This keeps the movement smooth and prevents wear on the bearings.
- Check for tightness: Periodically inspect the lock nuts and set screws—vibration from daily use can loosen them over time. A quick tighten with a wrench is all it takes to keep things secure.
- replace worn parts early: If you notice a joint starting to feel stiff or wobbly, don't wait for it to break. replace it proactively to avoid downtime and more extensive damage.
By staying on top of maintenance, you'll extend the life of your lean pipe system and keep your workspace running efficiently—something every team can appreciate.
Troubleshooting Common Issues
Even with the best instructions, things can sometimes go sideways. Here are a few common problems you might run into, and how to fix them:
Problem: The new joint won't slide onto the pipe.
Solution: Check if the pipe end is bent or too large. If it's bent, straighten it. If it's too large (maybe due to paint or rust), sand the end lightly with fine-grit sandpaper to reduce the diameter slightly.
Problem: The joint rotates both ways, not just one.
Solution: The joint is installed backward. Remove it, flip it 180 degrees, and reinstall it. The stop mechanism should now block rotation in the wrong direction.
Problem: The joint is tight and won't rotate at all.
Solution: Loosen the lock nuts slightly—they're probably overtightened. If that doesn't work, check if the set screws are digging into the pipe too hard; back them off a quarter-turn.
Problem: There's a gap between the joint and the pipe.
Solution: The pipe may be too short. If the gap is small (less than 1/2 inch), add a washer between the lock nut and the joint. If it's larger, you may need to replace the pipe with a longer section.
Wrapping Up
Replacing a one way rotatory straight lean pipe joint chrome might seem intimidating at first, but as you've seen, it's a straightforward project that anyone can tackle with the right tools and a little know-how. By taking the time to do it yourself, you're not just fixing a part—you're investing in the efficiency and safety of your workspace, and that's something to be proud of.
Remember, your lean pipe workbench , racks, and conveyors are the backbone of your operation. Keeping them in top shape isn't just about maintenance—it's about strengthen lean management and ensuring your team has the tools they need to succeed. And if you ever need more parts, your local lean pipe supplier is there to help with everything from joints and pipes to lean pipe and accessories .
So, the next time you notice a wonky joint, don't stress—grab your tools, follow this guide, and get back to work. You've got this!