- Company Articles
- Products and Technology
- Installation And Maintenance
- How to replace a Damaged Plastic Pipe End Cap: Step-by-Step Repair Guide

How to replace a Damaged Plastic Pipe End Cap: Step-by-Step Repair Guide
Related Product
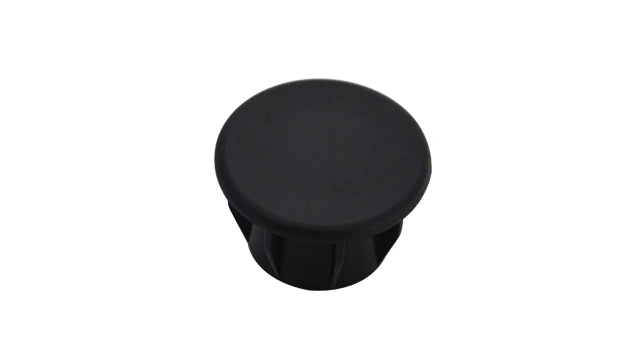
Plastic pipe end cap
Plastic pipe cover, used for 28mm two end cover and protection, to avoid any scratch from sharp metal surface.
In the world of workshops, warehouses, and manufacturing floors, it's often the smallest parts that keep everything running smoothly. Take the plastic pipe end cap, for example. At first glance, it might seem like an afterthought—just a tiny piece of plastic covering the end of a pipe. But anyone who's dealt with a cracked, loose, or missing cap knows better. These unassuming caps seal off open pipe ends, blocking dust, debris, and moisture from creeping in. They prevent sharp metal edges from scratching hands or catching on clothing. And in lean systems—where efficiency and safety are everything—they're the unsung heroes that keep workbenches, flow racks, and turnover trolleys in top shape.
Maybe you've already noticed the signs: a rattle from your lean pipe workbench when you set down a tool, dust bunnies collecting inside the aluminum pipe frame of your material rack, or a stubborn scratch on your arm from a jagged pipe end. Whatever the case, replacing a damaged plastic pipe end cap is a simple fix that saves you from bigger headaches down the line. In this guide, we'll walk through the process step by step, from identifying the problem to installing a brand-new cap. Whether you're a seasoned facility manager or a DIY enthusiast tinkering with a home workshop, you'll have all the know-how to get the job done right.
Why Plastic Pipe End Caps Matter (More Than You Think)
Before we dive into the repair, let's talk about why these caps are worth your attention. Plastic pipe end caps are designed to fit snugly over the open ends of pipes—think lean pipes, aluminum pipes, or even stainless steel pipes used in everything from workbenches to conveyor systems. Here's what they do:
- Seal out debris: Without a cap, dust, dirt, and even small tools can fall into the pipe, gumming up the works or adding unnecessary weight.
- Prevent moisture damage: If your pipes are metal (like stainless steel or aluminum), moisture inside can lead to rust or corrosion over time. A cap keeps rain, spills, or humidity out.
- Boost safety: Exposed pipe ends are sharp—especially if the pipe has been cut or damaged. Caps smooth those edges, reducing the risk of cuts or snags.
- Maintain structure: In modular systems (like those built with lean pipe and lean pipe joints), caps add stability by preventing the pipe from deforming at the ends.
The bottom line? A missing or damaged cap isn't just an eyesore—it's a ticking time bomb for wear and tear. Let's get to fixing it.
Signs Your Plastic Pipe End Cap Needs Replacement
Not sure if your cap is beyond repair? Here are the red flags to watch for:
1. Cracks or Splits
Cracks are the most obvious sign. They can form from impact (like dropping a heavy tool on the cap), prolonged sun exposure (which makes plastic brittle), or simply old age. Even a small hairline crack can let moisture and dust inside, so don't ignore it.
2. Looseness or Wobbling
A cap that spins, slides, or falls off with a light tug is no longer doing its job. This usually happens when the cap's inner diameter has stretched over time, or when dirt and grime have worn away the friction that keeps it in place.
3. Discoloration or Brittleness
If your cap is faded, yellowed, or feels hard and crumbly to the touch, it's probably degraded. UV rays, chemicals, or extreme temperatures can break down plastic over time, making it prone to cracking.
4. Sharp Edges or Missing Chunks
Even if the cap is still partially intact, a chipped or cracked edge can turn it into a safety hazard. Run your finger gently around the cap—if it catches or feels sharp, it's time for a replacement.
5. Debris Inside the Pipe
If you notice dust, dirt, or even small insects inside the pipe, chances are the cap isn't sealing properly. This is especially common with loose caps, which let contaminants sneak in every time the pipe vibrates (like when a caster wheel rolls over a bump).
Pro Tip:
Make a habit of inspecting end caps during routine maintenance checks. A quick once-over of your workbenches, material racks, and trolleys every month can catch issues early—before a small crack turns into a big problem.

Tools and Materials You'll Need
Replacing a plastic pipe end cap doesn't require a fancy toolbox. In fact, you probably already have most of these items on hand. Here's what you'll need to get started:
| Tool/Material | Purpose |
|---|---|
| Work gloves (latex or nitrile) | Protect your hands from sharp pipe edges, debris, or old adhesive. |
| Utility knife or box cutter | Loosen stuck caps by cutting through dirt, grime, or dried adhesive. |
| Microfiber cloth or lint-free rag | Clean the pipe end before installing the new cap (dirt = poor fit!) |
| New plastic pipe end cap (matching size) | The star of the show! Make sure it's the right diameter for your pipe (e.g., 0.5 inch, 1 inch). |
| Rubber mallet (optional) | Gently tap the new cap into place without damaging the plastic. |
| Mild soap and water (or rubbing alcohol) | Clean greasy or sticky pipe ends—adhesive residue or oil can prevent the cap from sealing. |
| Tape measure or ruler | Double-check the pipe diameter to ensure you buy the correct cap size. |
| Hair dryer (optional) | Warm up a stubborn old cap to soften the plastic, making it easier to remove. |
Caution:
If your pipe is part of a larger system (like a conveyor or heavy-duty material rack), stabilize it before starting. For example, if the pipe is attached to a lean pipe joint, make sure the joint is tight so the pipe doesn't wiggle while you work. Safety first!

Step-by-Step: Replacing the Plastic Pipe End Cap
Now that you've got your tools ready, let's walk through the repair process. We'll break it down into simple steps, so even if you've never done this before, you'll feel confident.
Step 1: Safety First—Prepare the Area
Before you start, take a moment to make the workspace safe. If the pipe is part of a workbench, clear off any tools or materials from the surface to avoid knocking them over. If it's a mobile unit (like a turnover trolley with caster wheels), lock the casters or block the wheels to prevent it from rolling. If the pipe is near electrical equipment, turn off the power to avoid accidents. And don't forget your gloves—even a small nick from a sharp pipe edge can ruin your day.
Step 2: Identify the Damaged Cap and Measure the Pipe
Locate the cap that needs replacing. If you're dealing with a large system (like a flow rack with multiple aluminum pipes), double-check that you're targeting the right one—mark it with a piece of tape if needed. Next, measure the pipe's outer diameter. This is crucial because caps come in standard sizes (e.g., 0.5 inch, 1 inch), and a poor fit will just lead to more problems later.
To measure, wrap a tape measure around the pipe and note the circumference, then divide by 3.14 (pi) to get the diameter. For example, a pipe with a 3.14-inch circumference has a 1-inch diameter. Alternatively, use a ruler to measure straight across the pipe's end (from one edge to the other, through the center). Write down the measurement—you'll need it to buy the right cap.
Step 3: Remove the Old Cap
Now comes the fun part: getting rid of the old cap. How you do this depends on how it's attached and how damaged it is.
If the cap is loose or cracked: Start by gently twisting it back and forth while pulling outward. Think of it like removing a bottle cap—slow and steady wins the race. If it's only partially cracked, you might need to peel off broken pieces first. Be careful not to let sharp plastic shards fall into the pipe (you can cover the end with a cloth temporarily to catch debris).
If the cap is stuck (tight or glued): Stuck caps are usually held in place by a combination of dirt, grime, and friction. Grab your utility knife and carefully run the blade around the gap between the cap and the pipe. This will break up any debris or dried adhesive. If it's still stuck, try warming the cap with a hair dryer (on low heat!) for 10-15 seconds. The plastic will soften slightly, making it easier to twist off. Just be sure to wear gloves—warm plastic can get hot!
If the cap is broken off inside the pipe: This is trickier, but not impossible. Use a pair of needle-nose pliers to grip the remaining plastic and pull it out. If pieces are too small to grab, try using a bent paperclip or a magnet (if the pipe is metal) to fish them out. You want the pipe end completely clear before installing the new cap.
Pro Tip:
If the pipe is part of a lean system with lean pipe joints, gently tighten the joint with a wrench before removing the cap. This stabilizes the pipe, so it doesn't wiggle while you work. Loose joints = wobbly pipes = harder cap removal!
Step 4: Clean the Pipe End
With the old cap gone, take a close look at the pipe end. Chances are, there's dirt, grease, or leftover adhesive stuck to it. This gunk will prevent the new cap from fitting snugly, so it's time to clean.
Dampen your microfiber cloth with soap and water (or rubbing alcohol for tough grease) and wipe the pipe end thoroughly. Scrub gently to remove any stubborn residue, but be careful not to scratch the pipe (especially if it's aluminum or stainless steel). Dry the pipe completely with a clean cloth—moisture trapped between the pipe and cap can cause mold or corrosion over time.
If the pipe end has burrs (sharp metal edges from cutting or damage), use fine-grit sandpaper (220-grit) to smooth them out. Run your finger along the edge after sanding—if it feels smooth, you're good to go. Sharp edges can tear the new cap or hurt someone, so don't skip this step!
Step 5: Prepare the New Cap
Unpackage your new plastic pipe end cap and inspect it for defects—cracks, warping, or rough edges. If it looks damaged, return it and get a replacement (most suppliers, like lean pipe suppliers or hardware stores, will swap it out no questions asked).
If the cap feels tight (common with new, stiff plastic), you can soften it slightly to make installation easier. Fill a bowl with warm (not boiling) water and submerge the cap for 30 seconds. The plastic will become more flexible, so it stretches to fit the pipe. Dry it off with a cloth before installing—wet plastic is slippery, and you don't want it slipping off mid-installation.
Step 6: Install the New Cap
Now it's time to put the new cap on. Align it with the pipe end, making sure it's straight (crooked caps won't seal properly). Push firmly with your palms, applying even pressure. You should feel it "pop" into place—this is the cap's inner lip gripping the pipe.
If it's still tight, gently tap the cap with a rubber mallet (or the palm of your hand) to seat it fully. Start at the top, then the bottom, then the sides—this ensures it goes on evenly. Stop when the cap sits flush against the pipe end (no gaps!) and doesn't wiggle when you tug on it.
Caution:
Don't use a metal hammer or excessive force! Plastic caps can crack if hit too hard. A rubber mallet is soft enough to tap the cap into place without damage.
Step 7: Test the Repair
You're almost done! Now it's time to make sure the new cap is secure. Give it a gentle tug—if it stays put, great. If it slides off, check the pipe end for debris (you might have missed a spot) or try warming the cap again (flexible plastic grips better). If it's still loose, the cap might be the wrong size—double-check your measurements and swap it for the correct one.
Next, shake the pipe gently (or roll the trolley, if it has caster wheels) to simulate normal use. The cap shouldn't rattle or shift. Finally, run your hand around the cap's edge—no sharpness, no gaps, just a smooth, snug fit. If everything checks out, you're done!
Pro Tips for a Long-Lasting Repair
Now that your new cap is installed, here's how to keep it in great shape for years to come:
1. Choose the Right Cap for the Job
Not all plastic caps are created equal. If the pipe is outdoors or exposed to sunlight, look for UV-resistant caps—they won't fade or crack as quickly. For industrial settings (like factories with chemicals), opt for chemical-resistant plastic (e.g., polyethylene). And if the pipe is part of a heavy-duty system (like a material rack holding heavy loads), go for thicker, reinforced caps—they'll stand up to more wear and tear.
2. Clean Caps During Routine Maintenance
Dirt and grime can wear down caps over time, so wipe them off with a damp cloth during monthly checks. This is especially important for caps on mobile units (like trolleys with caster wheels), which pick up more debris from floors.
3. Inspect Adjacent Parts
While you're at it, take a look at nearby components. If the pipe is connected to a lean pipe joint, make sure the joint is tight—loose joints put extra stress on caps. If the pipe is part of a workbench, check the caster wheels (if it's mobile) to ensure they're rolling smoothly—wobbly wheels can vibrate caps loose.
4. Stock Spare Caps
Keep a few extra caps in your toolbox or maintenance closet. That way, if one cracks or goes missing, you can replace it immediately—no waiting for a trip to the supplier. Label them by size (e.g., "1 inch plastic cap") to save time later.
Troubleshooting Common Issues
Even with the best prep work, things can go wrong. Here's how to fix common problems:
Problem: The new cap is too loose and falls off.
Solution: Check if the pipe end is worn or dented (use sandpaper to smooth it). If that doesn't work, wrap a thin layer of Teflon tape around the pipe end (overlapping slightly) to add thickness, then reinstall the cap. The tape will create friction, holding the cap in place.
Problem: The cap is too tight and won't fit.
Solution: Warm the cap in hot (not boiling) water for 30 seconds to soften the plastic, then try again. If it's still stuck, check the pipe for burrs—sand them down. As a last resort, use a small amount of dish soap as a lubricant (wipe off excess after installation).
Problem: The cap cracks immediately after installation.
Solution: You probably used too much force. Plastic is strong, but it's not indestructible. Try a rubber mallet instead of a metal one, or tap more gently. If the cap is brittle, it might be old—swap it for a fresh one.
When to Call a Professional
Replacing a plastic pipe end cap is usually a DIY job, but there are times to call in a pro:
- Severe pipe damage: If the pipe itself is bent, cracked, or rusted through, replacing the cap won't fix the problem. A professional can assess whether the pipe needs repair or replacement.
- Complex systems: If the pipe is part of a critical system (like a conveyor belt or automated material handler), tampering with it could disrupt operations. Let a qualified technician handle it.
- Multiple damaged components: If the cap is missing and the lean pipe joint is loose, the caster wheels are broken, and the workbench is wobbly—you're looking at a bigger repair. A pro can fix everything at once, saving you time.
Conclusion: Small Fix, Big Impact
There you have it—everything you need to replace a damaged plastic pipe end cap. It's a simple task, but it's one that makes a world of difference. With a new cap in place, your lean pipe system will stay cleaner, safer, and more efficient. No more rattles, no more dust, no more scratched arms—just smooth, worry-free operation.
And remember: maintenance isn't just about fixing what's broken. It's about caring for the tools and systems that care for you. So the next time you walk past that workbench or material rack, take a second to appreciate the little things—like the plastic cap that's quietly doing its job. You'll be glad you did.