- Company Articles
- Products and Technology
- Installation And Maintenance
- How to replace a Worn 4040 Aluminum Profile End Cap: DIY Repair Steps

How to replace a Worn 4040 Aluminum Profile End Cap: DIY Repair Steps
Related Product
4040 Aluminum Profile End Cap
The aluminum profile end cap adds a finishing touch to your project and closes off profile ends to limit dust and debris buildup, also it can avaid some scratch for material and labor during the assemble work.
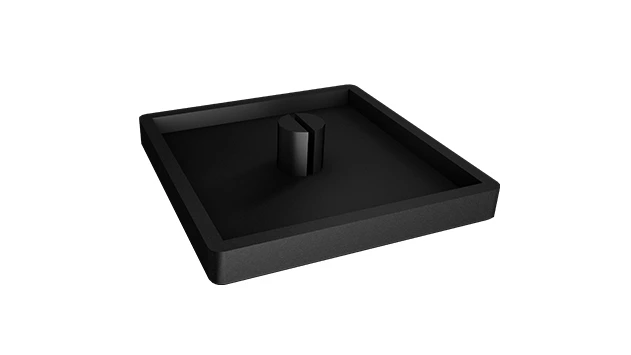
Let's start with a scenario we've all been through: You're in your workshop, leaning over your trusty aluminum workbench to tighten a loose screw on a project. As you reach across the table, your arm brushes against the edge of the bench—and suddenly, you wince. Instead of the smooth, rounded finish you expect, there's a sharp, jagged edge where the end of the aluminum profile peeks through. You look closer and realize: the end cap is gone. Maybe it fell off months ago and you didn't notice, or perhaps it cracked from wear and tear. Either way, that tiny piece of plastic or rubber (yes, even the small stuff matters!) is now a safety hazard, not to mention an eyesore.
If you've ever worked with aluminum profiles—whether building a workbench, a shelving unit, or a custom storage rack—you know they're the unsung heroes of any DIY space. Lightweight, strong, and endlessly customizable, aluminum profiles (especially the popular 4040 size) are the backbone of countless projects. But like any hero, they need a little protection, and that's where end caps come in. These small aluminum profile accessories might seem insignificant, but they do big work: shielding the raw edges of the profile from dents, preventing dust and debris from clogging the T-slots, and keeping you (and your projects) safe from scrapes.
The good news? Replacing a worn 4040 aluminum profile end cap is one of the easiest DIY repairs you can tackle—no special skills, no fancy tools, just a few minutes of your time. In this guide, I'll walk you through everything you need to know: how to spot a worn end cap, what tools to grab, step-by-step instructions to get the job done, and even some pro tips to make sure your new end cap lasts. Let's dive in.
Signs Your 4040 Aluminum Profile End Cap Needs Replacing
Before we grab our tools, let's make sure we're actually dealing with a worn end cap. Sometimes, these little guys can be tricky—they might look fine at first glance, but a closer inspection reveals hidden damage. Here are the top signs it's time for a replacement:
Cracks or splits:
Run your finger along the end cap. If you feel any cracks, even tiny ones, it's only a matter of time before it breaks completely. Cracks often start near the edges or where the end cap fits into the profile, so check those spots carefully. I once ignored a hairline crack on my garage shelving unit, and three weeks later, the whole end cap snapped off when I accidentally bumped a box against it. Oops.
Looseness or wobbling:
A properly installed end cap should fit snugly—no movement, no rattling. If you can twist or pull the end cap with minimal effort, it's either worn out or wasn't installed correctly in the first place. A loose end cap won't protect the profile, and it might even fall off during use.
Missing pieces:
This one's obvious, but worth mentioning. If part of the end cap is chipped off—maybe the corner is gone, or there's a gap where plastic used to be—it's time to replace it. Even a small missing chunk can expose the aluminum profile's sharp edges.
Discoloration or brittleness:
Over time, exposure to sunlight, heat, or chemicals (like cleaning sprays) can cause end caps to fade or become brittle. If your end cap feels hard and crumbly to the touch, or if it's turned a dull gray instead of its original color, it's lost its flexibility and won't grip the profile as well.
Sharp edges on the profile:
If you feel a rough, unprotected edge on the aluminum profile itself, that's a dead giveaway the end cap is either missing or so worn down that it's no longer covering the metal. Don't skip this check—those sharp edges can tear clothing, scratch tools, or even draw blood.
Tools You'll Need (Spoiler: It's a Short List)
The best part about this repair? You don't need a workshop full of gear. Chances are, you already have everything you need lying around your garage or toolbox. Here's what to grab:
| Tool | Why You Need It | Pro Tip |
|---|---|---|
| Flathead screwdriver (small to medium size) | To gently pry off the old end cap without scratching the aluminum profile. | A plastic or rubber-handled screwdriver is best—metal handles can slip and damage the profile. |
| Pliers (needle-nose or regular) | For gripping and pulling off stubborn end caps that won't budge by hand. | Wrap the pliers' jaws in electrical tape to avoid leaving marks on the end cap or profile. |
| New 4040 aluminum profile end cap | Obviously, the star of the show! Make sure it's the right size—4040 profiles measure 40mm x 40mm, so the end cap should match. | Buy a few extras while you're at it—end caps are cheap, and you'll thank yourself later when another one wears out. |
| Cleaning cloth (microfiber or lint-free) | To wipe down the end of the aluminum profile before installing the new cap—dust and grime can prevent a tight fit. | Dampen the cloth with a little rubbing alcohol for extra cleaning power, especially if there's grease or oil buildup. |
| Rubber mallet (optional) | For tapping the new end cap into place if it's a snug fit—gentle taps only! | If you don't have a rubber mallet, a regular hammer wrapped in a towel works too. |
That's it! No power tools, no complicated gadgets. Just the basics. Now, let's get to the repair.

Step-by-Step: Replacing Your 4040 Aluminum Profile End Cap
I'm going to break this down into simple, actionable steps. Take your time with each one—rushing only increases the risk of damaging the profile or the new end cap. And remember: this is supposed to be easy. If you get stuck, take a breath, and refer back to these instructions. You've got this.
- 1. Prepare the work area. First, clear off any tools, projects, or clutter from around the aluminum profile. You need a clean, flat surface to work on, and you don't want anything getting in the way when you're prying or tapping. If the profile is part of a larger structure (like your aluminum workbench), make sure the bench is stable—no wobbly legs! If it is wobbly, now's a good time to check the adjustable leveling feet and tighten them up. A stable workspace makes every step easier.
-
2.
Remove the old end cap.
This is where the flathead screwdriver comes in. Start by examining the old end cap: is it loose enough to pull off with your fingers? If yes, great—just grip it firmly and wiggle it back and forth until it pops off. If it's stuck (and trust me, they can get really stuck after years of use), gently wedge the screwdriver between the end cap and the aluminum profile. Aim for the edge of the end cap, not the center—you want to create a small gap without bending the cap or scratching the profile.
Once you have a gap, use your fingers to pull the end cap away from the profile. If it's still resisting, slide the screwdriver a little deeper (but not too far!) and try again. For really stubborn caps, grab the pliers: grip the edge of the end cap (gently!) and rock it back and forth while pulling outward. It should come free with a little persuasion. Pro tip: If the end cap is cracked, it might break into pieces as you remove it—don't panic! Just pick up all the and set them aside to throw away later. - 3. Clean the end of the aluminum profile. Now that the old end cap is off, take a look at the end of the aluminum profile. Chances are, there's a layer of dust, dirt, or even a little rust (if the profile is older) where the cap used to be. Grab your cleaning cloth and wipe it down thoroughly. If there's sticky residue or grease, dampen the cloth with rubbing alcohol and scrub gently. Why does this matter? A clean surface ensures the new end cap fits tightly and stays in place. Think of it like putting a lid on a jar—if there's crud on the rim, the lid won't seal properly. Same idea here.
- 4. Inspect the profile for damage. While the end is clean, take a minute to check the aluminum profile itself. Are there any dents, bends, or sharp edges? If the profile is slightly bent (maybe from that time you dropped a tool on it), use your hands to gently straighten it out. If there's a sharp burr (a tiny metal splinter), file it down with a metal file or sandpaper (fine-grit, like 220-grit, works best). You want the end of the profile to be as smooth and flat as possible—this helps the end cap sit evenly and prevents it from cracking under pressure.
-
5.
Install the new end cap.
Now for the fun part: putting on the new cap! Take your fresh 4040 end cap and line it up with the end of the aluminum profile. Make sure the edges of the cap align with the edges of the profile—most end caps have a lip that fits into the T-slot or around the profile's corners, so it should only go on one way. If it feels like it's forcing, stop and check the orientation—you don't want to crack the new cap before it's even installed.
Once it's lined up, press firmly with your thumbs around the edges of the cap. You should feel it "snap" into place—that's the sound of the cap's tabs (or friction fit) gripping the profile. If it's a tight fit and won't snap by hand, grab your rubber mallet (or hammer wrapped in a towel) and tap the cap gently, working your way around all four sides. Be careful not to hit too hard—you're aiming for a snug fit, not smashing the cap into place. A few light taps should do the trick. - 6. Test the fit and security. Last step: Give the new end cap a little test. Try to wiggle it with your fingers—if it moves, it's not seated properly. Press down harder on the loose side, or tap it gently with the mallet. Run your hand along the edge of the cap—does it feel smooth, with no gaps between the cap and the profile? If yes, you're done! If there's a gap, double-check that the profile is straight and clean, then try reinstalling the cap. Remember: a tight fit now means fewer repairs later.
Quick Note on End Cap Materials:
End caps come in plastic, rubber, and even metal. Plastic is the most common (and affordable), rubber is great for extra grip (perfect if your profile is on a movable cart), and metal adds a sleek, industrial look. The installation process is the same for all—just choose the material that fits your project's needs!

Troubleshooting: When Things Don't Go Smoothly (And How to Fix Them)
Even the simplest DIY projects can hit a snag. Here are a few common issues you might run into, and how to solve them:
Problem: The old end cap is stuck and won't budge, even with pliers.
Solution: Heat it up! A little warmth can loosen the grip of a stuck end cap. Use a hair dryer on low heat to blow warm air on the end cap for 10-15 seconds (don't use a heat gun—it's too hot and can melt plastic caps). The heat will expand the plastic slightly, making it easier to pry off. If that doesn't work, try spraying a tiny amount of WD-40 around the edges (let it sit for a minute to penetrate), then try prying again.
Solution: Heat it up! A little warmth can loosen the grip of a stuck end cap. Use a hair dryer on low heat to blow warm air on the end cap for 10-15 seconds (don't use a heat gun—it's too hot and can melt plastic caps). The heat will expand the plastic slightly, making it easier to pry off. If that doesn't work, try spraying a tiny amount of WD-40 around the edges (let it sit for a minute to penetrate), then try prying again.
Problem: The new end cap is too loose and falls off immediately.
Solution: First, check if you bought the right size. 4040 profiles are 40mm x 40mm, but some manufacturers make "universal" end caps that might be slightly smaller. If it's the right size, the issue might be dirt or debris you missed—clean the profile again with rubbing alcohol. If the cap still won't stay, try adding a tiny dot of super glue to the inside of the cap (but only a tiny dot! You don't want to glue it permanently, in case you need to replace it again later). Press the cap on firmly and hold it for 30 seconds—this should give the glue enough time to set.
Solution: First, check if you bought the right size. 4040 profiles are 40mm x 40mm, but some manufacturers make "universal" end caps that might be slightly smaller. If it's the right size, the issue might be dirt or debris you missed—clean the profile again with rubbing alcohol. If the cap still won't stay, try adding a tiny dot of super glue to the inside of the cap (but only a tiny dot! You don't want to glue it permanently, in case you need to replace it again later). Press the cap on firmly and hold it for 30 seconds—this should give the glue enough time to set.
Problem: The end of the aluminum profile is bent or dented, so the cap won't sit flat.
Solution: Grab a pair of pliers (with tape on the jaws to avoid scratches) and gently bend the dented area back into shape. For deeper dents, use a rubber mallet to tap the end of the profile on a flat surface (like a workbench) to straighten it out. If the bend is too severe to fix by hand, you might need to cut off the damaged end with a hacksaw (but that's a last resort—only try this if you're comfortable using a saw and have a replacement section of profile on hand).
Solution: Grab a pair of pliers (with tape on the jaws to avoid scratches) and gently bend the dented area back into shape. For deeper dents, use a rubber mallet to tap the end of the profile on a flat surface (like a workbench) to straighten it out. If the bend is too severe to fix by hand, you might need to cut off the damaged end with a hacksaw (but that's a last resort—only try this if you're comfortable using a saw and have a replacement section of profile on hand).
Problem: The new end cap cracks when you try to install it.
Solution: This usually happens because you're forcing the cap into place or it's misaligned. Take a deep breath and start over: remove the cracked cap (carefully—sharp plastic edges!), check the profile for burrs, and line up the new cap (grab a fresh one from your extra stash!) more carefully. Press slowly and evenly, and use the rubber mallet only if needed. Remember: plastic end caps are tough, but they're not indestructible—gentle pressure is key.
Solution: This usually happens because you're forcing the cap into place or it's misaligned. Take a deep breath and start over: remove the cracked cap (carefully—sharp plastic edges!), check the profile for burrs, and line up the new cap (grab a fresh one from your extra stash!) more carefully. Press slowly and evenly, and use the rubber mallet only if needed. Remember: plastic end caps are tough, but they're not indestructible—gentle pressure is key.
Maintenance Tips to Keep Your End Caps (and Aluminum Profiles) Happy
Now that your new end cap is installed, let's talk about how to make sure it lasts. With a little regular care, you can extend the life of your end caps and keep your aluminum profiles in top shape for years to come.
Check end caps during your regular workspace cleanup.
Every time you wipe down your aluminum workbench or shelving unit, take 30 seconds to run your hand along the edges of the profiles. Are all the end caps still in place? Any cracks or looseness? Catching issues early means easier repairs (and no unexpected scrapes!).
Clean end caps with mild soap and water.
Over time, end caps can get grimy—especially if you work with oil, paint, or other messy materials. Use a soft cloth and a little dish soap to wipe them down every few months. Avoid harsh chemicals like bleach or abrasive cleaners—they can weaken the plastic or rubber over time.
replace end caps before they fail completely.
If you notice a small crack or the cap starts to feel loose, don't wait for it to fall off. replace it right away! Remember those extra end caps you bought earlier? This is why you have them. A quick swap now beats dealing with a sharp, exposed profile later.
Protect profiles from heavy impacts.
Aluminum is strong, but dropping a heavy tool or slamming a project into the end of a profile can crack the end cap or bend the profile itself. Keep a soft mat or foam pad near work areas where impacts are likely, or add corner guards to high-traffic profiles (you can find these at most hardware stores—they're like mini bumpers for your profiles!).
Lubricate T-slots (but not the end caps!).
If your aluminum profile has T-slots (and most do), a little lubrication (like dry silicone spray) can keep accessories sliding smoothly. But keep the lube away from the end caps—oil or grease can weaken the cap's grip and cause it to slip off.
Wrapping Up: Small Fix, Big Difference
Let's be real: replacing an end cap isn't the most glamorous DIY project. It won't make your friends ooh and aah like building a custom workbench or installing a fancy tool organizer. But here's the thing: it's the small fixes that keep your workspace functional, safe, and looking its best. A missing or cracked end cap might seem trivial, but it's a sign that you care about the tools and projects that matter to you.
And let's not forget the safety factor. A sharp, exposed aluminum profile edge can ruin a project (ever had a piece of wood snag on a rough edge and get ruined?) or worse, cut your hand when you're focused on something else. Taking 10 minutes to replace an end cap is a small investment in keeping yourself—and everyone who uses your workspace—out of harm's way.
So, the next time you spot a worn end cap on your aluminum profile, don't ignore it. Grab your screwdriver, a new cap, and get to work. You'll be surprised how satisfying it is to fix something so small and see such immediate results. And who knows? Maybe this quick win will inspire you to tackle that bigger project you've been putting off—after all, if you can replace an end cap like a pro, you can do just about anything.
Now go forth, and keep those aluminum profiles (and their end caps) happy!