- Company Articles
- Products and Technology
- Installation And Maintenance
- How to replace a Worn Flat Swivel Castor Wheel: DIY Step-by-Step

How to replace a Worn Flat Swivel Castor Wheel: DIY Step-by-Step
Related Product
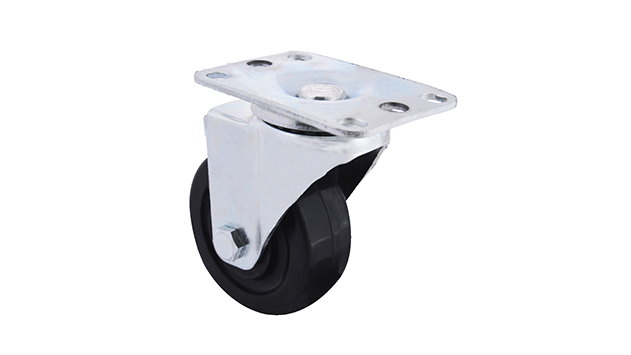
Flat Swivel Castor Wheel
Chair Casters Ball Bearing Wheels Rubber Base. Resistant to abrasion, impact and corrosion. Heavy payload can hold 70-90Kgs per pcs,which can make it works at a stable and smooth status.
Let's talk about something that's probably been bugging you for weeks: that one wobbly, squeaky, or half-broken wheel on your favorite cart, workbench, or storage rack. You know the one—I'm talking about the flat swivel castor wheel that used to glide smoothly but now sounds like a rusty gate every time you move it. Maybe it's leaving scratches on your kitchen floor, or worse, making your tool cart tip so precariously you're scared to load it up. Trust me, I've been there. Last month, my garage utility cart started veering to the left like a drunk shopping cart, and after a quick check, I realized the culprit was a worn-out caster wheel. The plastic had cracked, the bearings were shot, and honestly, it was a wonder it hadn't fallen off completely. The good news? Replacing a flat swivel castor wheel is way easier than you think. No need to call a handyman or buy a whole new cart. With a few basic tools, a little patience, and this step-by-step guide, you'll have that wheel rolling like new in under an hour. Let's dive in.
Why Bother Replacing a Worn Caster Wheel?
First, let's get real: Why not just ignore it? Well, a worn caster wheel isn't just an annoyance—it's a safety hazard. A wobbly wheel can make your cart or workbench unstable, increasing the risk of spills, falls, or damaged items. If the wheel is stuck or dragging, you're putting extra strain on your back when you push or pull, which could lead to aches or injuries. And let's not forget your floors: A rough, damaged caster wheel can scratch hardwood, tile, or even concrete over time. Replacing it isn't just about convenience; it's about protecting your stuff, your space, and yourself.
Plus, caster wheels are designed to be replaceable! Most manufacturers make them easy to swap out, so you don't have to shell out for a brand-new piece of equipment. Whether it's a caster wheel on a office chair, a workshop cart, or a kitchen island, the process is surprisingly similar. And once you learn how, you'll be ready for the next time (because let's face it, wheels wear out—especially if you use your gear as much as I do).
Tools You'll Need (And Why You Need Them)
Before we start, let's gather your tools. You won't need anything fancy—chances are, you already have most of these in your toolbox. If not, a quick trip to the hardware store will set you back less than $20. Here's what you'll need:
| Tool Name | Purpose | Pro Tip |
|---|---|---|
| Adjustable Wrench | Loosening and tightening nuts/bolts on the caster mount | Wrap the jaws in electrical tape to avoid scratching metal parts |
| Phillips or Flathead Screwdriver | Removing screws if your caster is screw-mounted | Use a magnetic screwdriver to keep tiny screws from rolling away |
| Pliers (Needle-Nose or Regular) | Gripping stuck bolts or bending cotter pins (if present) | Needle-nose pliers are lifesavers for tight spaces |
| Hammer (Rubber Mallet Preferred) | Gently tapping the old caster loose if it's rusted or stuck | A rubber mallet won't damage the mounting plate or cart frame |
| Wire Brush or Sandpaper | Cleaning rust or debris from the mounting area | Use fine-grit sandpaper (220-grit) to avoid scratching metal surfaces |
| Penetrating Oil (e.g., WD-40) | Loosening rusted bolts or stuck axles | Spray and let sit for 10 minutes before trying to loosen—patience pays off! |
| Replacement Flat Swivel Castor Wheel | The star of the show! Make sure it matches the old wheel's size and type | Bring the old wheel to the store to compare—sizes can be tricky! |
| Caster Accessories (e.g., New Bolts, Washers, Cotter Pins) | Replacing worn hardware that came with the old wheel | Most replacement wheels come with these, but it never hurts to have extras |
Pro move: Lay out a towel or old newspaper on your workbench to keep track of small parts like screws or washers. There's nothing worse than dropping a tiny bolt and spending 20 minutes hunting for it under the fridge.
Step 1: Prep Your Workspace (And the Object!)
First things first: You need to get the object with the worn wheel off the ground so you can access the caster. Let's say it's a utility cart—empty it first! Trying to work on a loaded cart is a recipe for disaster (I once spilled a bag of nails doing this… don't be me). Once it's empty, find a flat, stable surface to work on. A workbench is ideal, but even a sturdy table or the floor will do.
Next, you need to elevate the side with the bad wheel. Grab a couple of sturdy blocks of wood, a jack (if it's a heavy object like a tool chest), or even a stack of thick books. Place them under the frame of the cart, not the wheel itself—you want to lift the wheel completely off the ground so it's free to spin (or not spin, in this case). Important: Make sure the object is stable before you start! Give it a gentle shake—if it wobbles, add more support. Safety first, folks.

Step 2: Remove the Old Flat Swivel Castor Wheel
Now, let's get that old wheel off. Caster wheels are usually attached in one of two ways: with bolts/screws or with a stem (a metal rod that fits into a socket). Let's break down both scenarios.
Scenario 1: Bolted or Screwed-On Caster Wheels
Most heavy-duty casters (like those on workbenches or tool carts) are bolted to the frame with 2-4 bolts. Grab your adjustable wrench or screwdriver and look for the fasteners holding the caster's mounting plate to the frame. If they're screws, use the appropriate screwdriver (Phillips or flathead) and turn counterclockwise. If they're bolts with nuts, hold the nut with pliers and turn the bolt head with the wrench.
Pro tip: If the bolts are rusted, spray them with penetrating oil and let sit for 10-15 minutes. I once spent 10 minutes sweating over a stuck bolt before remembering to use WD-40—after that, it came loose with one twist. If the screw heads are stripped, try pressing down hard with the screwdriver while turning, or use a rubber band over the head for extra grip. Stubborn? A gentle tap with a hammer on the screwdriver handle can help loosen it (just don't go full Hulk—you don't want to strip the head further).
Scenario 2: Stem-Mounted Caster Wheels
Some lighter casters (like those on office chairs or small carts) have a stem instead of a mounting plate. The stem is a metal rod that slides into a socket on the frame, often held in place with a setscrew or a cotter pin. To remove it, first check for a small setscrew on the side of the socket—this is usually a tiny hex screw that you'll need an Allen wrench to loosen. Once the setscrew is loose, the stem should pull out easily. If there's no setscrew, look for a cotter pin through the stem—straighten the pin with pliers, pull it out, and the stem will slide free.
Once the fasteners are removed, the old caster wheel should come off. If it's stuck (thanks, rust!), gently tap the mounting plate or stem with a rubber mallet to loosen it. Be careful not to hit too hard—you don't want to bend the frame.

Step 3: Inspect the Mounting Area (And Clean It Up!)
Now that the old wheel is off, take a good look at the mounting area. Is the frame bent? Are there cracks or rust? If the frame is damaged, you might need to reinforce it before installing the new wheel (a metal bracket from the hardware store can work wonders). If it's just rusty, grab your wire brush or sandpaper and scrub away the corrosion—this will help the new caster attach securely. Wipe away any dust or debris with a damp cloth.
While you're at it, inspect the old caster wheel itself. Note the size (diameter and width), the type (swivel or fixed), and the mounting style (bolt-on or stem). You'll need this info to buy the right replacement. Measure the diameter with a ruler (from one end of the wheel to the other) and the width (across the tread). If the wheel has a brake, make a note of that too—you'll want the new one to match (unless you never use the brake, in which case, skip it!).
Pro Tip:
Take the old wheel with you to the store! Caster wheel sizes can be tricky (is it 2 inches or 2.5 inches?), and seeing it side-by-side with the new one will ensure a perfect match. Most hardware stores have a caster section, and the staff can help you find the right
caster and accessories
if you're unsure.
Step 4: Choose the Right Replacement Caster Wheel
Not all caster wheels are created equal. Picking the right replacement is key to making sure it lasts and works well. Here's what to look for:
Size Matters
This is non-negotiable. A wheel that's too small will make the object sit lower, which can cause dragging. Too big, and it might rub against the frame or make the object unstable. Match the diameter and width of the old wheel exactly. If you can't find the exact size, go up by 1/4 inch at most—but measure twice to be sure.
Load Capacity
Every caster wheel has a load capacity (how much weight it can support). Check the old wheel for a label, or look up the manufacturer's specs for your cart/workbench. If you can't find it, estimate: A typical utility cart with 4 wheels can usually handle 200-300 lbs total, so each wheel should support at least 50-75 lbs. If you overload a wheel, it'll wear out fast. When in doubt, go for a higher capacity—it's better to be safe than sorry.
Wheel Material
The material of the wheel depends on your floor type:
- Rubber or polyurethane: Great for hardwood, tile, or laminate floors—they're soft and won't scratch. They also absorb shock, so they're quieter.
- Plastic: Budget-friendly, but not as durable. Good for concrete floors (like garages) but avoid on soft floors—they can leave marks.
- Metal (steel or iron): Super durable for heavy loads, but noisy and will scratch floors. Best for rough surfaces like workshops or warehouses.
Since we're replacing a flat swivel castor wheel , make sure the new one swivels! Some casters are fixed (they only roll forward/backward), but swivel ones can turn 360 degrees, making the object easier to maneuver.
Step 5: Install the New Caster Wheel
You're in the home stretch! Installing the new wheel is basically the reverse of removing the old one. Let's break it down by mounting type again.
Bolted/Screwed-On Casters
Align the new caster's mounting plate with the holes on the frame. If the holes don't line up perfectly, don't force it—you might need to drill new ones (use a drill bit slightly smaller than the bolt diameter). Once aligned, insert the bolts/screws and tighten them by hand first to avoid cross-threading. Then, use your wrench or screwdriver to snug them up—don't over-tighten, though! You could strip the threads or bend the mounting plate. A good rule: Tighten until it's secure, then give it a quarter-turn more.
Stem-Mounted Casters
For stem-mounted casters, apply a little lubricant (like WD-40) to the stem to make insertion easier. Slide the stem into the socket until it's fully seated. If there's a setscrew, tighten it with an Allen wrench until it's snug against the stem (but not so tight you damage the stem). If there's a cotter pin, insert it through the hole in the stem and bend the ends to lock it in place.
If your replacement caster came with caster accessories like washers or lock washers, use them! Washers help distribute weight and prevent the bolt from digging into the frame. Lock washers (the ones with a split in them) keep the bolt from loosening over time—definitely worth using, especially if the object moves around a lot.
Step 6: Test It Out (And Celebrate!)
Now, the moment of truth: Lower the object back down and give the new wheel a spin. Push the cart/bench back and forth—does it glide smoothly? No squeaks? No wobbles? Great! Try swiveling it—does it turn easily without getting stuck? If it's still squeaky, a drop of lubricant on the wheel's axle or swivel joint should fix it. If it wobbles, check if the bolts are tight or if the mounting plate is bent. If the wheel doesn't roll straight, make sure it's centered on the mounting plate.
Once it's rolling smoothly, take a step back and admire your handiwork. You just saved yourself time and money, and you learned a new skill! Pat yourself on the back—you deserve it.
Pro Tips to Make Your New Caster Wheel Last Longer
Now that your wheel is new, let's keep it that way. A little maintenance goes a long way:
- Clean them regularly: Wipe off dirt, hair, and debris from the wheels and swivel joints with a damp cloth. Built-up gunk can make them stick.
- Lubricate annually: A drop of oil (like 3-in-1 oil) on the axle and swivel joint will keep them rolling smoothly. Avoid WD-40 for long-term lubrication—it's more of a cleaner than a lubricant.
- Don't overload: Stick to the weight capacity—overloading is the #1 cause of premature wear.
- Check for loose bolts: Tighten them every few months—vibration can loosen them over time.
Troubleshooting Common Issues
Even with the best prep, things can go wrong. Here's how to fix common hiccups:
New Wheel Still Squeaks
Squeaks usually mean dry joints. Apply a small amount of lubricant to the swivel joint and axle. If it's a plastic wheel, avoid oil—use a silicone-based lubricant instead (oil can degrade plastic over time).
Wheel Wobbles After Installation
Check if the mounting plate is bent or if the bolts are loose. If the plate is bent, gently straighten it with pliers (if it's metal). If the wheel itself is wobbly, it might be defective—return it and get a new one.
Wheel Won't Swivel
Debris might be stuck in the swivel joint. Clean it out with a toothbrush or compressed air. If that doesn't work, the swivel bearings might be seized—you might need to replace the wheel (defective bearings happen, even with new wheels).
Final Thoughts
Replacing a worn flat swivel castor wheel is one of those DIY tasks that feels way harder than it is. With a little know-how and the right tools, you can save money, avoid frustration, and keep your gear rolling smoothly for years. Remember, the key is to take your time, use the right replacement parts (don't skimp on quality!), and stay patient—especially if those old bolts are being stubborn. And hey, once you've done one, you'll be a pro. Next time, you can help your neighbor fix their squeaky office chair or your friend's wobbly grill cart. You've got this!